Looking for ways to keep track of your transactions in a checkbook ledger? Then you’ve come to the right place. In this article, we’ll show you 2 handy examples of how to create a checkbook ledger in Excel.
What Is a Checkbook Ledger?
In short, a checkbook ledger stores the information of every transaction like purchases, payments, bills, deposits, etc. for a given period. Generally speaking, it is a common practice in Accounting to record transactions in a ledger.
Create a Checkbook Ledger in Excel: 2 Practical Examples
Now, in our first example, we’ll construct a simple checkbook ledger while in the second example, we’ll build a more dynamic ledger using Excel’s Table feature. Therefore, without further delay, let’s see the examples one by one.
Considering the dataset shown in the B4:D13 cells. Here, the dataset shows the transaction Date, Number, and Description. Then, the last two columns show the types of transaction Debit, and Credit respectively.
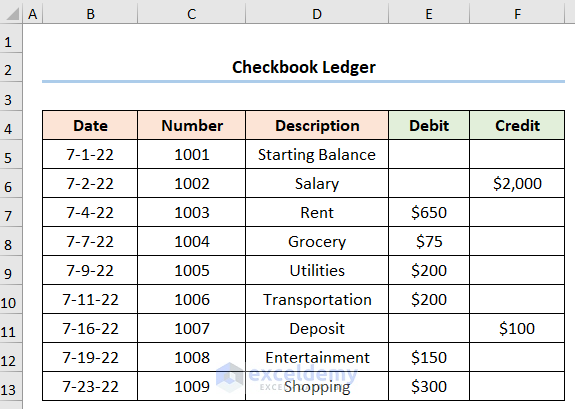
Here, we have used Microsoft Excel 365 version, you may use any other version according to your convenience.
Example-1: Create a Simple Checkbook Ledger in Excel
Microsoft Excel makes it very easy to make a simple checkbook ledger. So, let’s just follow these steps.
Steps:
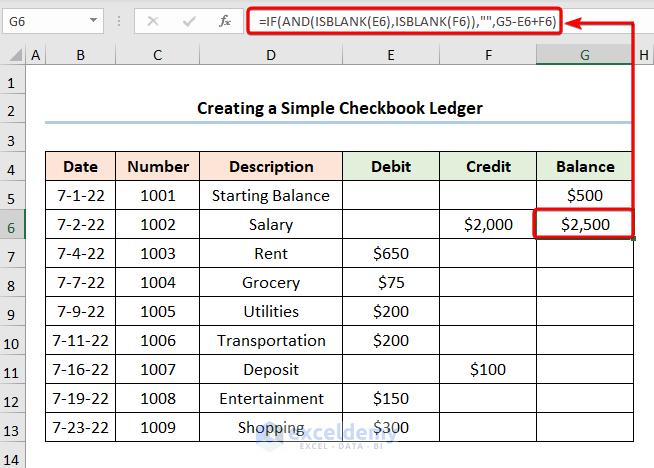
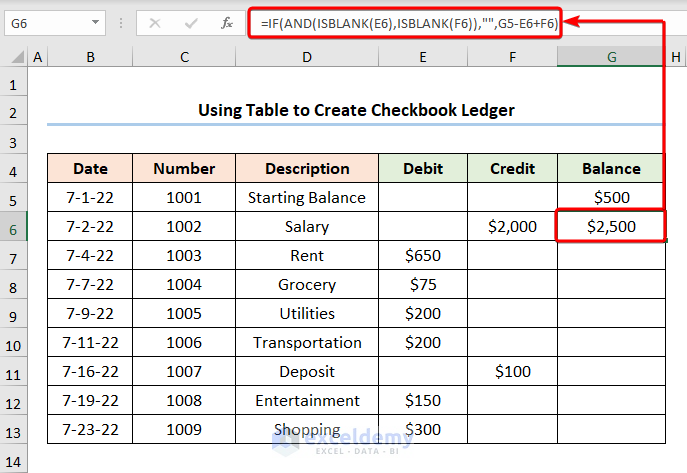
- Firstly, our Starting Balance for July was $500 and we want a running total to appear in the Balance column. Hence, we insert the expression below in the G6 cell.
=IF(AND(ISBLANK(E6),ISBLANK(F6)),"",G5-E6+F6)
Here, the E6 and the F6 cells refer to the Debit and Credit columns respectively while the G6 cell indicates the Balance of $500.
Formula Breakdown:
- ISBLANK(E6),ISBLANK(F6) → the ISBLANK function checks whether a reference is to an empty cell, and returns TRUE or FALSE. Here, E6 is the value argument that refers to the Debit value for Salary. Next, the F6 is the value argument that represents the Credit value for Salary. Now, the ISBLANK function checks whether the Debit and Credit cells are blank. It returns TRUE if blank and FALSE if not blank.
- Output → TRUE, FALSE
- AND(ISBLANK(E6),ISBLANK(F6)) → becomes
- AND(TRUE,FALSE) → the AND function checks whether all the arguments are TRUE, and returns TRUE if all the arguments are TRUE. Here, TRUE is the logical1 argument and FALSE is the logical2 argument since one argument is FALSE so the AND function returns the output FALSE.
- Output → FALSE
- =IF(AND(ISBLANK(E6),ISBLANK(F6)),””,G5-E6+F6) → becomes
- =IF(FALSE,””,G5-E6+F6) → the IF function checks whether a condition is met and returns one value if TRUE and another value if FALSE. Here, FALSE is the logical_test argument because of which the IF function returns the value of G5-E6+F6 which is the value_if_false argument. Otherwise, it would return “” (BLANK) which is the value_if_true argument.
- 500 – 0 + 2000 → 2500
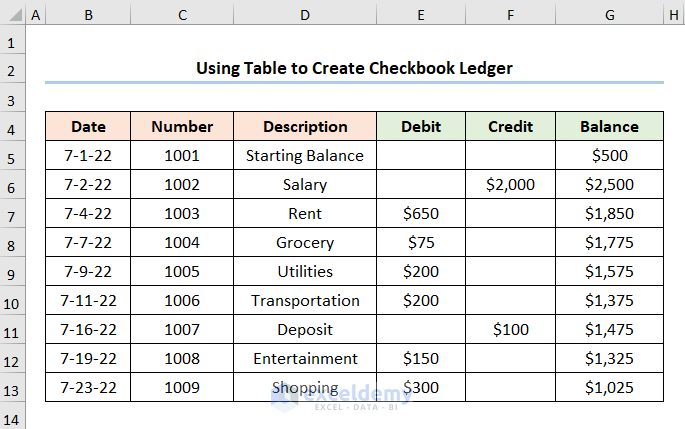
- Next, use the Fill Handle Tool to copy the formula into the cells below.
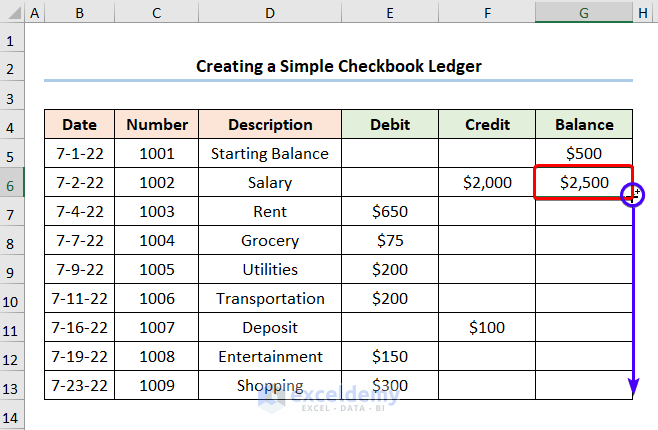
Lastly, the results should look like the image given below.
Read More: How to Make General Ledger in Excel
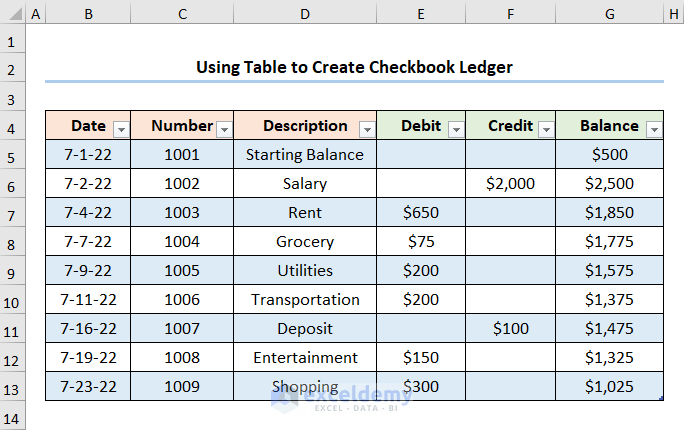
Example-2: Using Excel Table to Create a Checkbook Ledger
Our second example takes the simple checkbook ledger a step further. Simply put, we’ll utilize Excel Table so that the Balance column is updated automatically whenever a new entry is added. It’s simple and easy, just follow along.
Steps:
- To start, insert the following expression in the G6 cell below.
=IF(AND(ISBLANK(E6),ISBLANK(F6)),"",G5-E6+F6)
In this formula, the E6 and the F6 cells refer to the Debit and Credit columns respectively while the G6 cell indicates the Balance of $500.
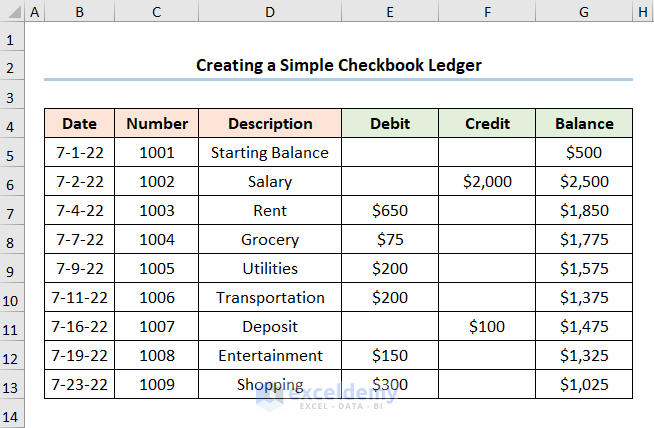
- Then, copy the formula into the cells below and the results should look like the picture shown below.
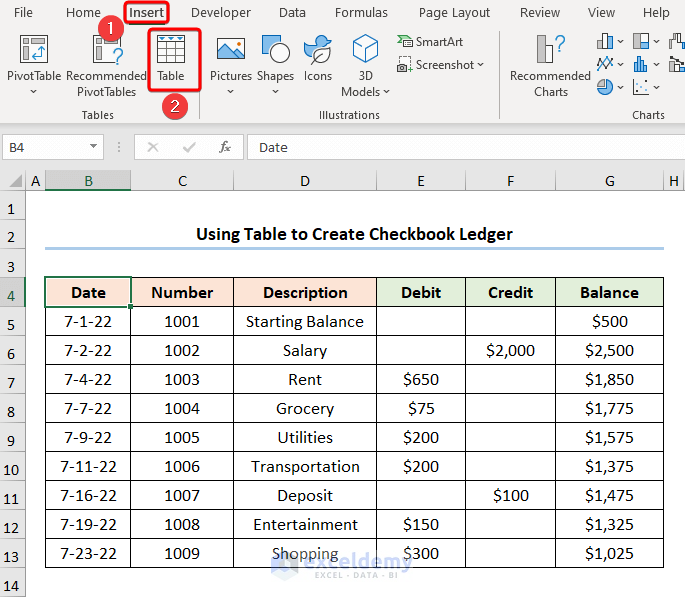
- Next, move to the Insert tab >> click the Table option.
- Now, Excel automatically selects the B4:G14 range of cells for the Table. Also, make sure to check My table has headers option.
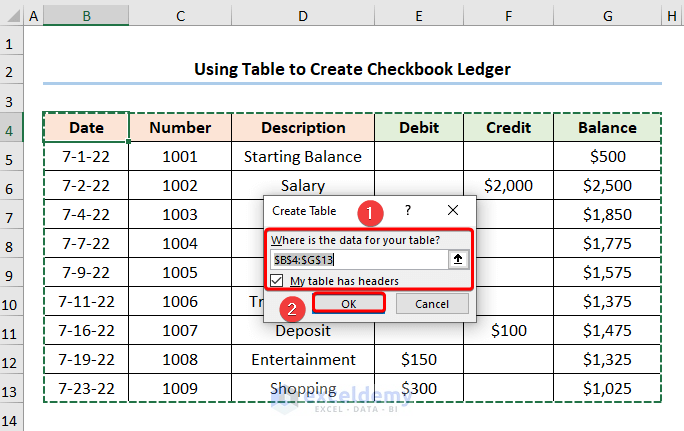
Next, the Table should look like the screenshot below.
- Navigate to the G13 cell and press the TAB key on your keyboard.
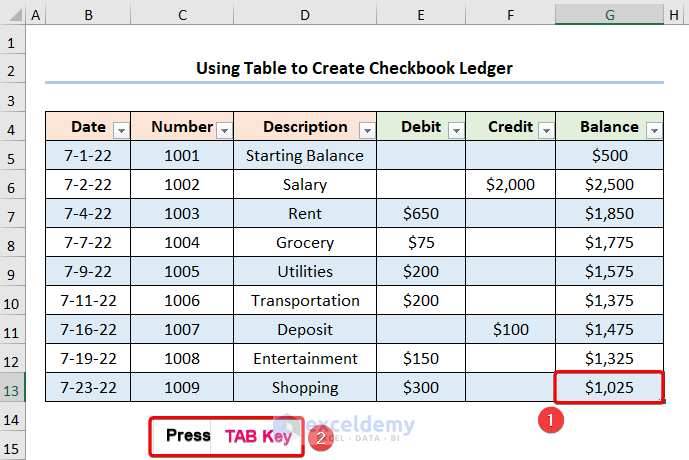
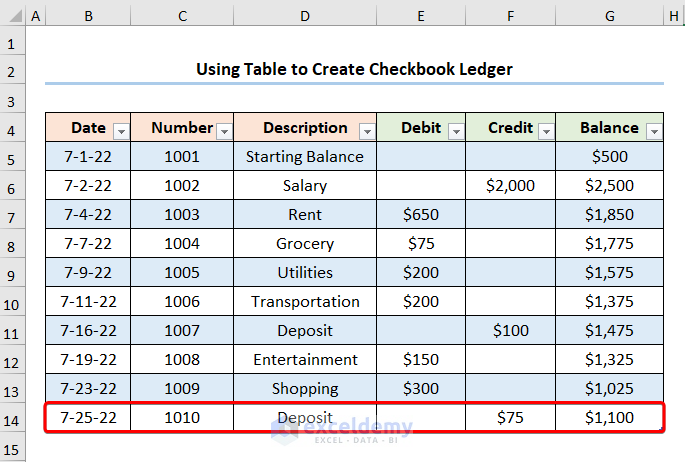
- The Table expands automatically to the next row. Finally, you can add a new entry to your checkbook ledger and the Balance is also updated.
Read More: How to Make a Ledger in Excel
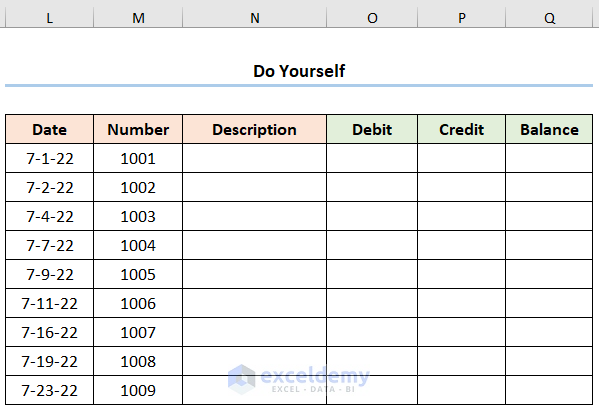
Practice Section
We have provided a Practice section on the right side of each sheet so you can practice yourself. Please make sure to do it by yourself.
You can download the practice workbook from the link below.
Conclusion
I hope this article helps you understand how to create a checkbook ledger in Excel. If you have any queries, please leave a comment below.
Related Articles
- Create General Ledger in Excel from General Journal Data
- How to Make a Bank Ledger in Excel
- Maintain Ledger Book in Excel
- Make Subsidiary Ledger in Excel
- How to Export All Ledgers from Tally in Excel
<< Go Back to Ledger in Excel | Excel for Accounting | Learn Excel
Get FREE Advanced Excel Exercises with Solutions!
