Excel has no such features that can allow you to copy multiple row heights only. However, you can copy entire row formats. That is how you can manage to copy multiple row heights in Excel. In this article, you will learn 3 quick tricks to copy multiple row height in Excel.
How to Copy Multiple Row Height in Excel: 3 Quick Tricks
1. Use Format Painter to Copy Multiple Row Height in Excel
The easiest way to copy multiple row heights in Excel is to use the Format Painter feature.
But this Format Painter not only copies multiple row heights but also copies the entire cell format.
Anyways, here’s how to use this tool to copy multiple row heights in Excel with ease.
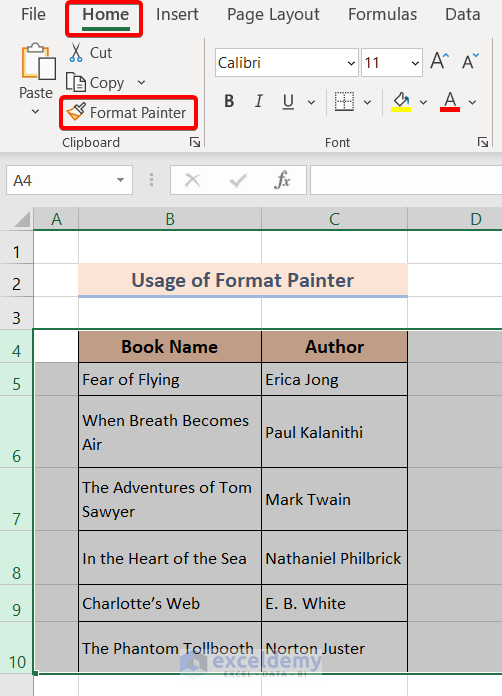
❶ First of all, copy all the rows from where you want to copy the row heights.
I’m selecting rows number 4 to 10 which is 7 rows in total.
❷ After that, go to the Home tab.
❸ Then click on the Format Painter from the Clipboard group.
❹ Now left-click on your mouse and drag it to select a range.
❺ You must select the same amount of rows where you want to Paste the copied row heights.
As selected 7 rows from the source, in destination there should also be selected total 7 rows.

❻ When the selection is done, just release the mouse button.
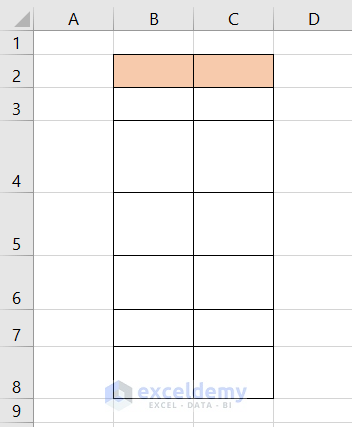
After that, you will see that your copied row heights are pasted in the destination range.
Read More: Row Height Units in Excel: How to Change?
2. Copy Multiple Row Height in Excel Using Paste Special Feature
Another way to copy multiple row height is to use the Paste Special command.
This command also copies the row heights as well as other cell formats.
Anyways, here’s how to use it.
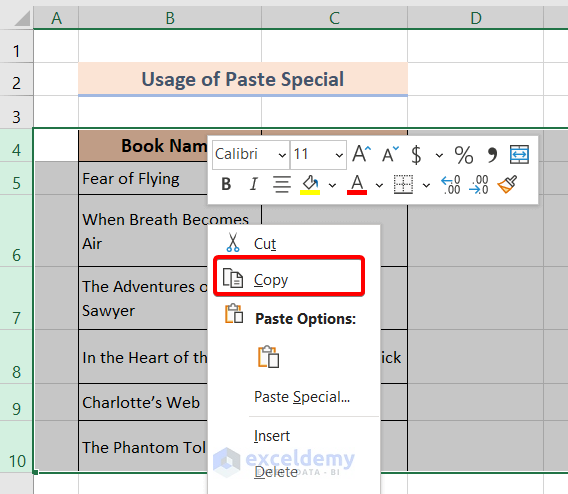
❶ At first, select a range of rows from where you want to copy the row heights.
❷ Then right-click on the selection area and choose Copy.
❸ Now select your destination rows.
The number of destination rows should as the same as that of the source rows.
❹ Right-click on your selection and choose Paste Special.
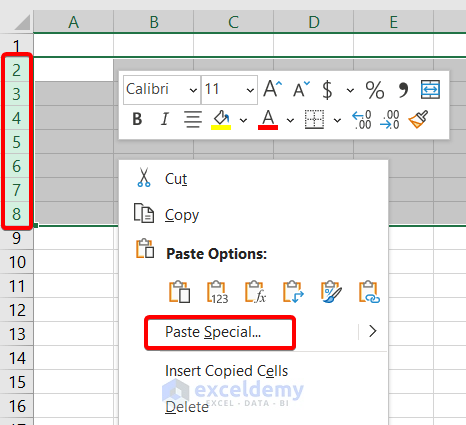
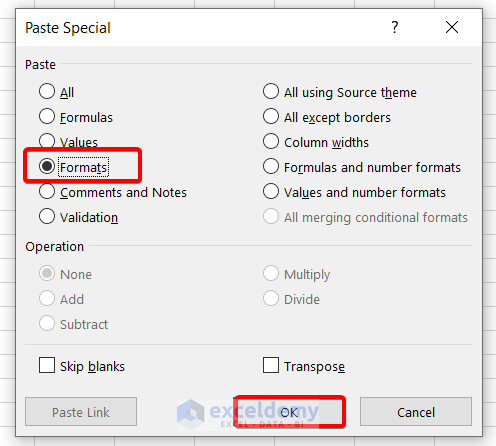
The Paste Special dialog box will appear.
❺ Select Formats under the Paste section.
❻ And hit OK.
Now you will see all the row heights have been copied from the source to the destination.

3. Use Insert Copied Cells Command to Copy Multiple Row Height in Excel
Another way to copy multiple row height in Excel is to use the Insert Copied Cells command.
But one drawback of using this method is it copies not only the row heights but also data.
Let’s see how it works.
❶ Select all the rows from where you want to copy multiple row heights.
❷ Right-click on your selection area and hit Copy.

❸ Select a cell where you want to paste the copied data.
❹ Right-click on it and choose Insert Copied Cells.

Thus, all the row heights will be pasted along with the data in the destination.

Read More: How to Change Row Height in Excel
Practice Section
You will get an Excel sheet like the following screenshot, at the end of the provided Excel file. Where you can practice all the methods discussed in this article.

Download Practice Workbook
You can download the Excel file from the following link and practice along with it.
Conclusion
To sum up, we have discussed 3 quick tricks to copy multiple row height in Excel. You are recommended to download the practice workbook attached along with this article and practice all the methods with that. And don’t hesitate to ask any questions in the comment section below. We will try to respond to all the relevant queries asap.
Related Articles
- How to Auto Adjust Row Height in Excel
- Auto Row Height Not Working in Excel
- How to Adjust Row Height to Fit Text in Excel
- How to Increase Row Height in Excel
- How to Change & Restore Default Row Height in Excel
<< Go Back to Row Height | Rows in Excel | Learn Excel
Get FREE Advanced Excel Exercises with Solutions!
