Method 1 – Changing Default Row Height
There are two methods to change the default row height.
1.1. Changing Default Row Height by Altering the Font Size
We can assign a particular row height for the whole workbook. The following table will be used for illustration.
| Font | Font Size | Default Row Height | Pixels |
|---|---|---|---|
| Calibri | 10 | 12.75 | 17 |
| Calibri | 11 | 15.00 | 20 |
| Calibri | 15 | 19.50 | 26 |
We will change the default row height. The row height starts at 0 and ends at 409. The value of the row height is not an integer value because every pixel increases 0.75 to the row height.
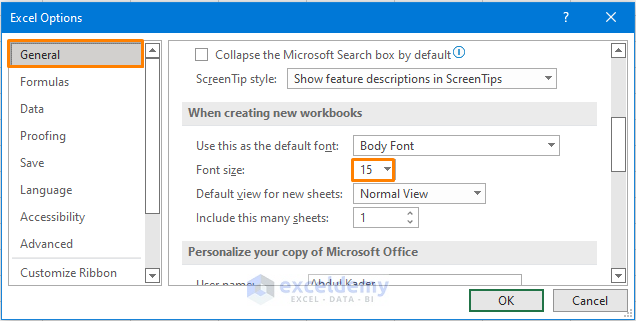
⇰ Go to File > Options.
⇰ Change the font size based on your required row height. As we want the row height to be 20 (actually 19.50), we will set the font size 15 as shown in the following image.
⇰ You will see the following command from Excel. Click OK.
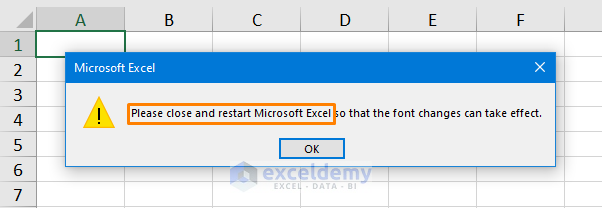
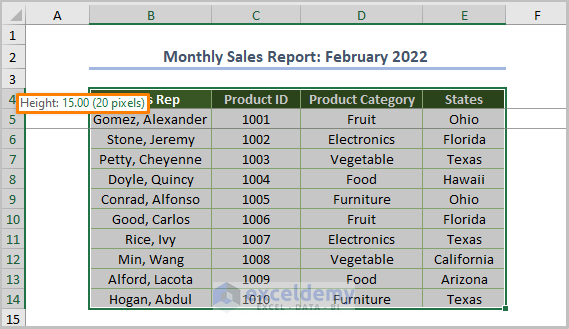
⇰ When you open a new worksheet, you’ll find that the row height is 19.50.
This new default row height will work on any number of worksheets or workbooks.
1.2. Changing Default Row Height Using the Row Height Option
⇰ Select the entire worksheet or dataset (the keyboard shortcut is CTRL + A).
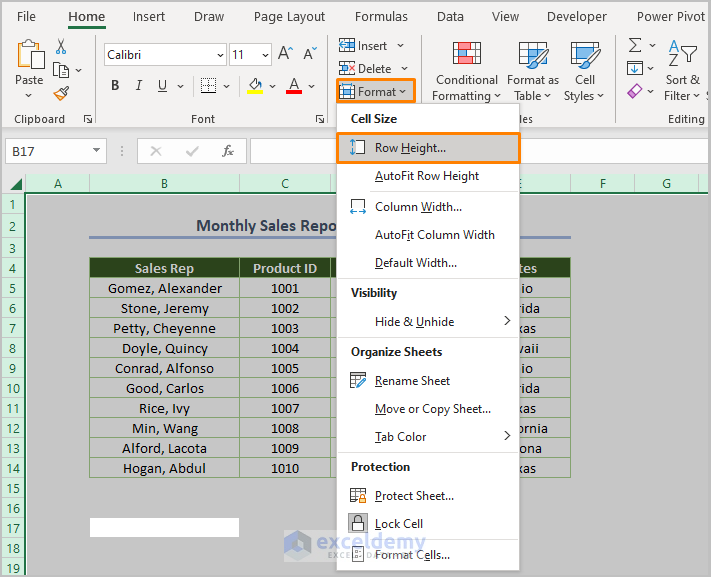
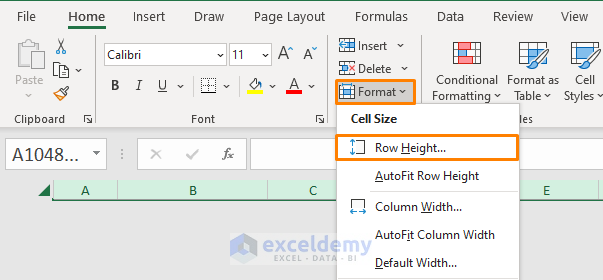
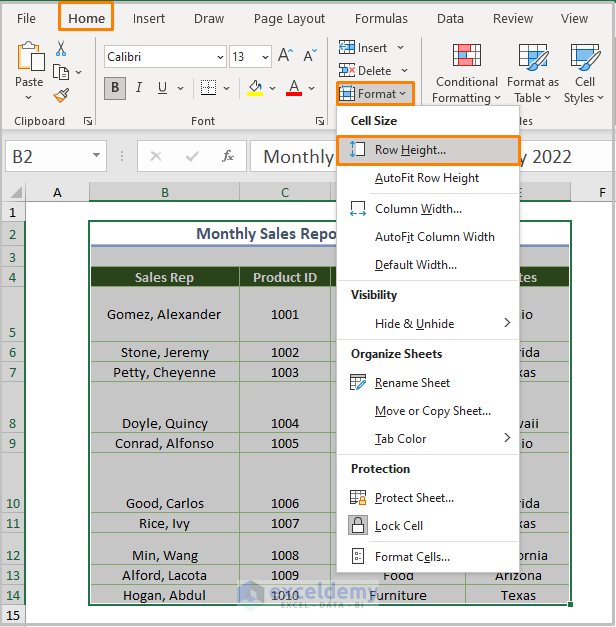
⇰ Click on the Format option from the Cells ribbon in the Home tab.
⇰ Choose the Row Height option from the Format option.
⇰ After selecting the worksheet or dataset, right-click and choose the Row Height option.
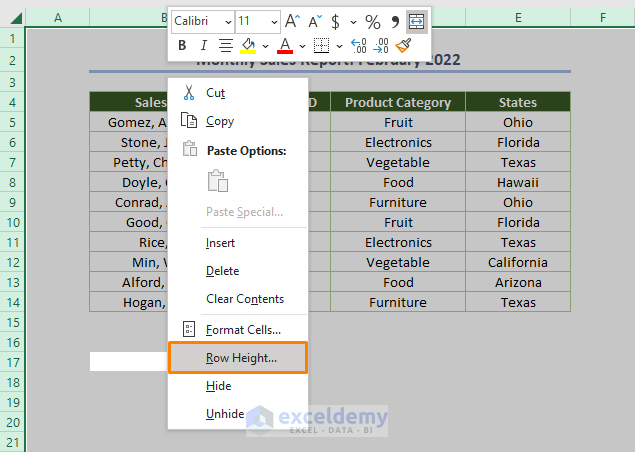
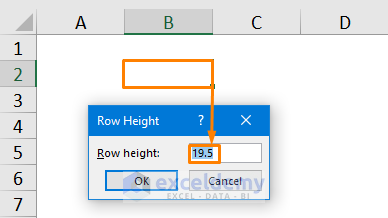
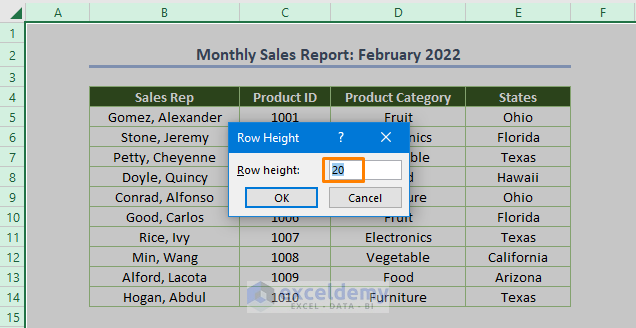
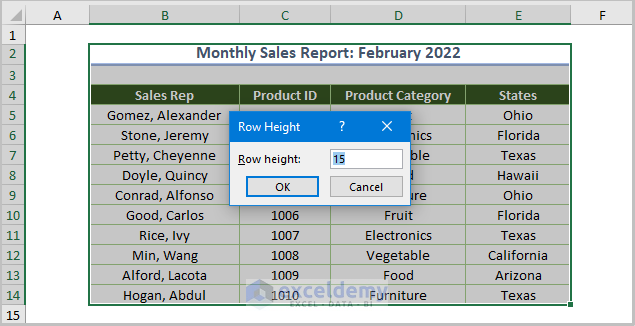
⇰ We will set the row height as 20.
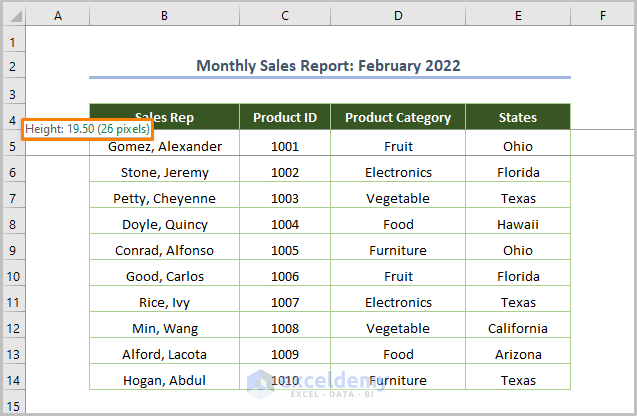
⇰ You’ll get the following output where the row height is 19.50 because the value of row height will be either 20.25 or 19.50.
You may save the worksheet as an Excel template and use it with the new default row height.
To explore more methods to change the row height, check out How to Change the Row Height.
Method 2 – Making the Default Row Height Locked
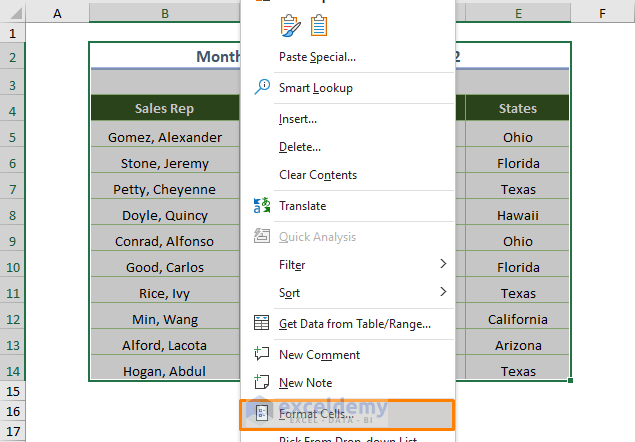
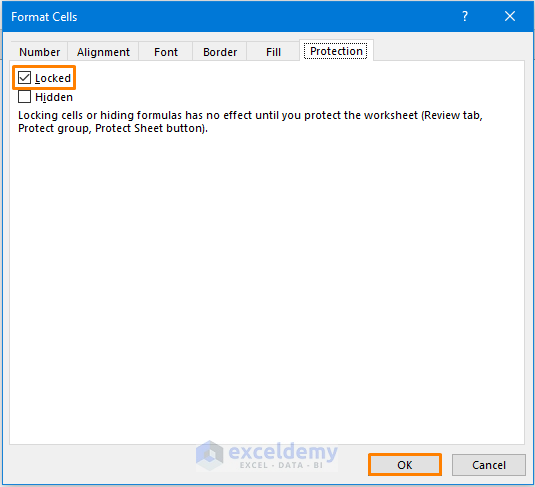
⇰ Select the whole dataset. Right-click and choose the Format Cells option.
⇰ Go to the Protection tab and check the box “Locked” from the options.
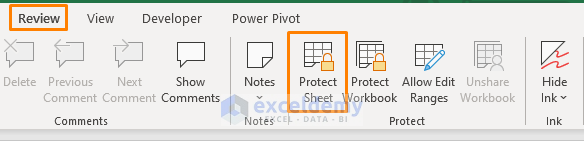
⇰ Click on the Protect Sheet from the Review tab.
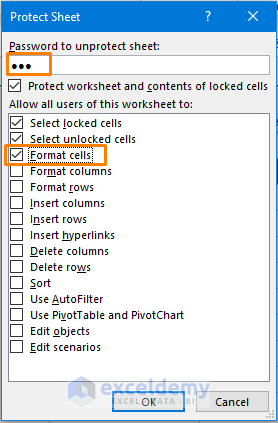
⇰ You’ll see the following dialog box. Check the box “Format Cells” and click OK.
⇰ The row height of your worksheet is protected and you cannot change the row height.
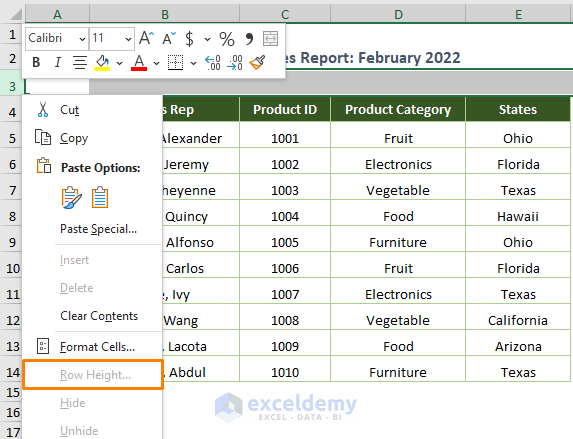
⇰ If you right-click on the row number, you’ll see that the Row Height option is inactive.
Method 3 – What If the Default Row Height is Zero
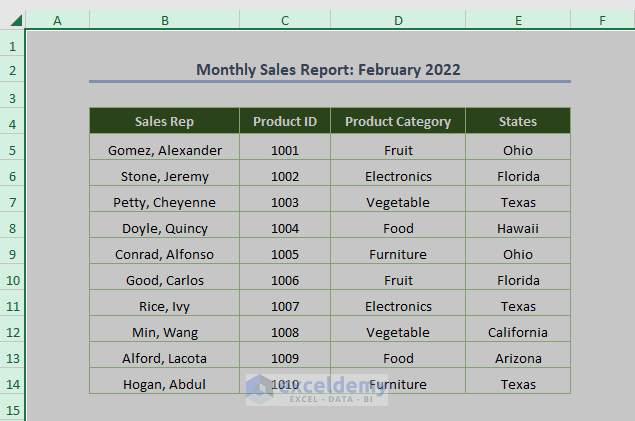
Sometimes you may have a worksheet, like the sample shown below, which has no visible data.
This is because the default row height of the sheet is 0.
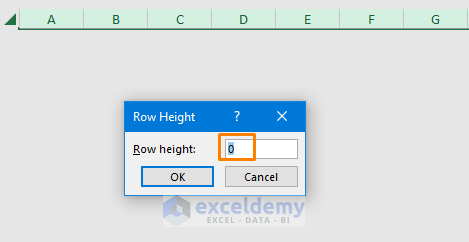
⇰ Select the Row Height option from the Format option.
⇰ Enter the desired value of row height in the blank space after the Row Height:
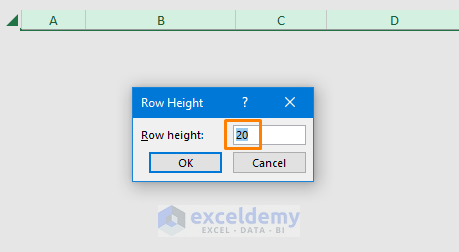
⇰ You will be able to see the dataset as illustrated in the following image.
Read More: How to Auto Adjust Row Height in Excel
Method 4 – Recovering Default Height of Row
If you have a dataset where the row height is different and you need to restore the default row height, you can do it in two ways.

4.1. Using the Row Height Option
⇰ Select the dataset.
⇰ Click on the Row Height option from the Format option.
⇰ Enter the row height as 15 and click OK.
4.2. Recovering Default Row Height Using VBA
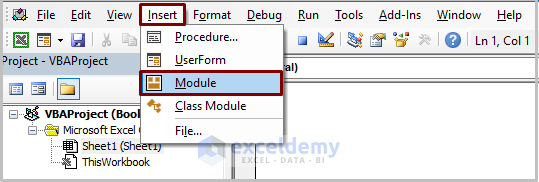
⇰ Open a module by clicking Developer > Visual Basic.

⇰ Go to Insert > Module.
⇰ Enter the following code into the newly created module.
Sub Recovering_Default_Row_Height()
    Dim hRow As Worksheet
    Set hRow = Worksheets("Recovering_VBA")
    With hRow
        .Cells.UseStandardHeight = True
    End With
End Sub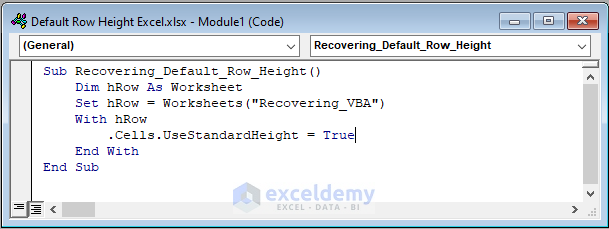
In the above code, we have declared hRow as Worksheet and assigned the Worksheets function to indicate the working sheet (the name of the sheet is “Recovering_VBA”) where we want to recover the default row height. We have used Cells.UseStandardHeight to restore the default row height as the UseStandardHeight returns True when the row height is equal to the default row height.
Run the code (the keyboard shortcut is F5 or Fn + F5). You’ll get the following output.
Read More: How to Copy Multiple Row Height in Excel
Download Practice Workbook
Related Articles
- Auto Row Height Not Working in Excel
- How to Adjust Row Height to Fit Text in Excel
- Row Height Units in Excel: How to Change?
<< Go Back to Row Height | Rows in Excel | Learn Excel
Get FREE Advanced Excel Exercises with Solutions!
