Note: General format in Excel means no specified format. Whenever you enter a numeric or alphanumeric value in a cell, Excel counts them in General format. That is why in this tutorial, we will convert text and numbers along with general format to Date format.
Method 1 – Using Error Checking to Convert General to Date in Excel
Occasionally, your date data might be in the General format due to incorrect data formatting. This is indicated by an error sign beside the affected cells.
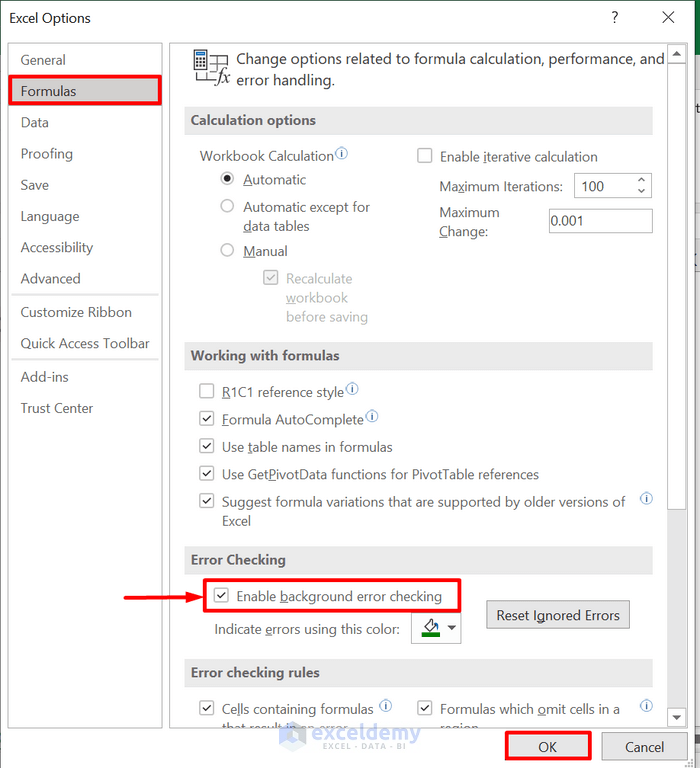
Before implementing this method, ensure that the Error Checking Option is enabled. Here’s how to do it in Excel 365:
1. Click on File > More > Options.
2. Choose Formulas.
3. Under Error Checking, enable the Enable background error checking option.
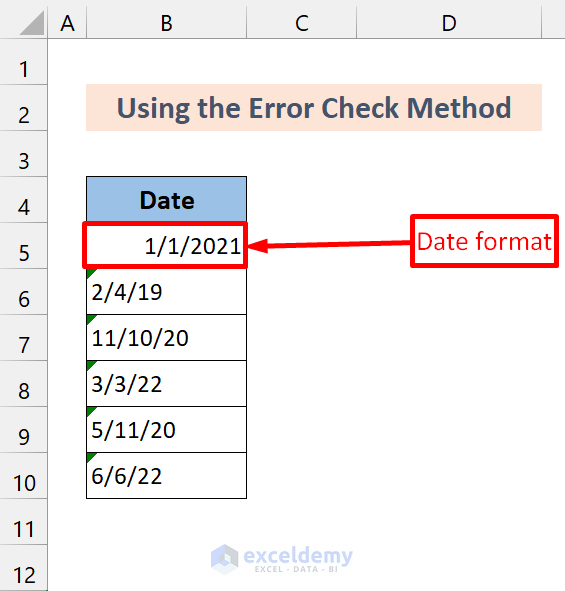
Now, take a look at the dataset:
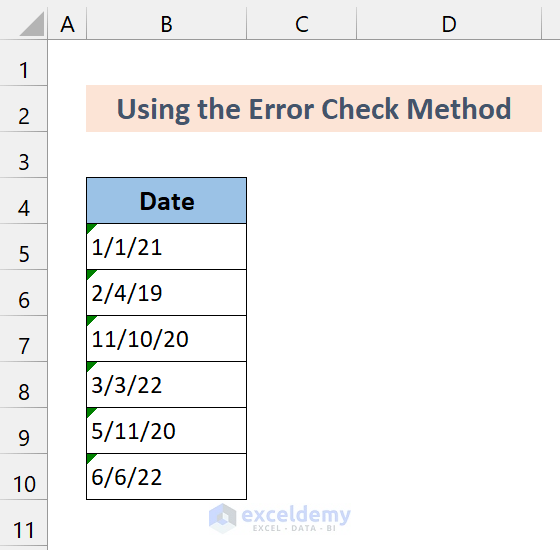
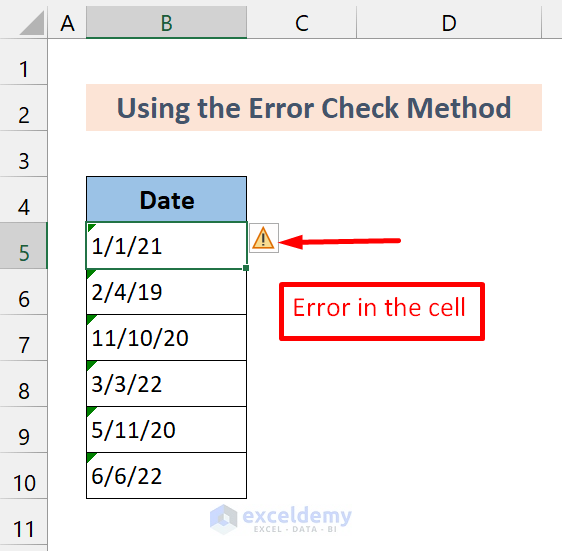
The dates are currently in the General format. To identify the issue, click on any cell, and you’ll see an error sign next to it.
Follow these steps to address the problem:
Steps
1. Click on the error-indicating box.
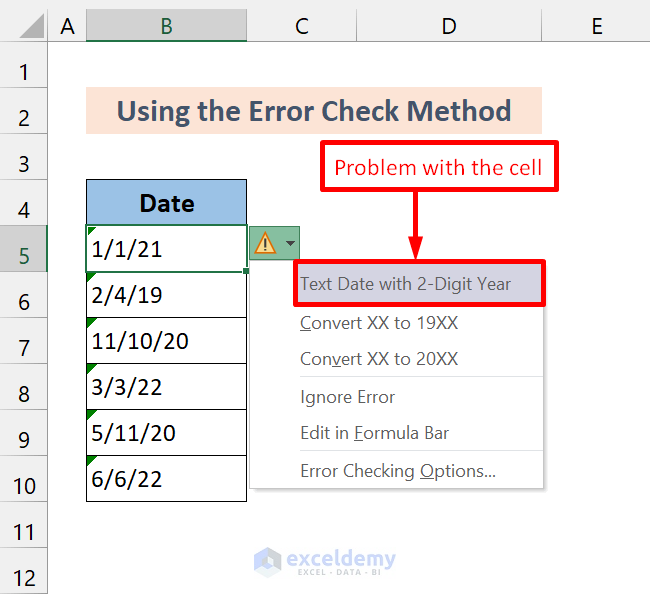 It indicates that the text date has a two-digit year, which is why it’s not in date format. To resolve this,
2. Select the Convert XX to 20XX option.
You’ll notice that it converts the general format to text format.
3. Now, select the remaining cells and choose Convert XX to 20XX option.
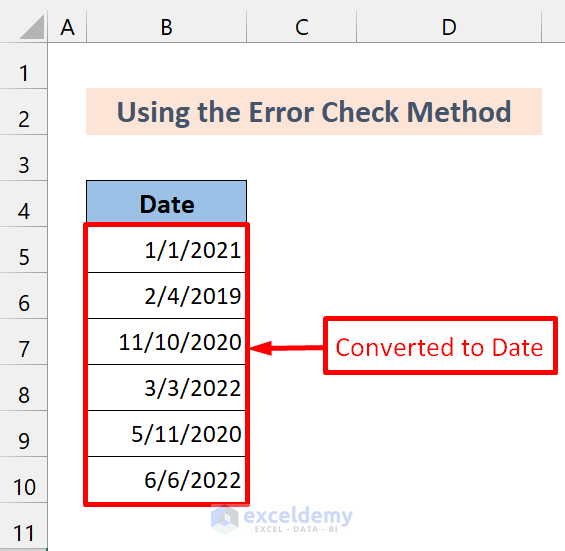
It will convert all those cells to date format.
Read More: How to Convert Text to Date in Excel
Method 2 – Applying Number Format Option in Excel to Convert General to Date
In this method, we’ll convert General-format dates to Date using various Number format options available in Excel, either from the Home tab or the Format Cells window. Here’s how:
Steps
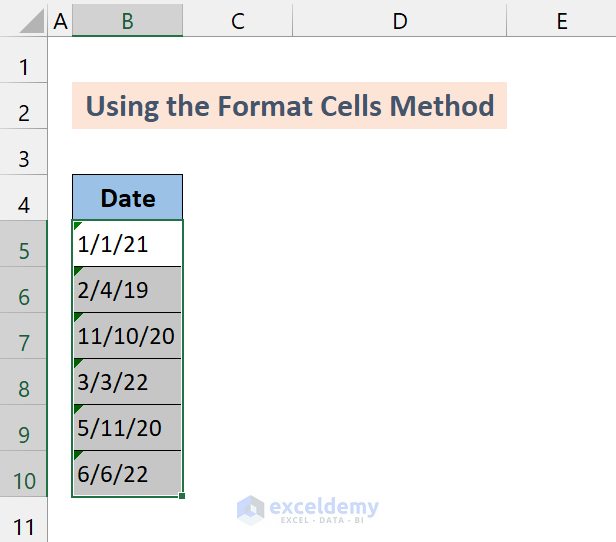
- First, select the range of cells containing General-format dates (B5:B10).
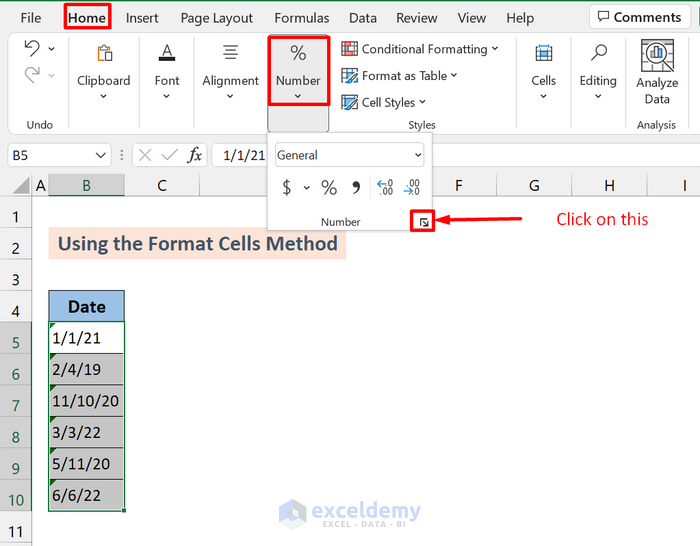
- From the Home tab, navigate to the Number group and click on the expand arrow. This will open the Format Cells dialog box.
- Now, choose Date from the Category options. You’ll see various types of date formats available in the Type option. Select a suitable one.
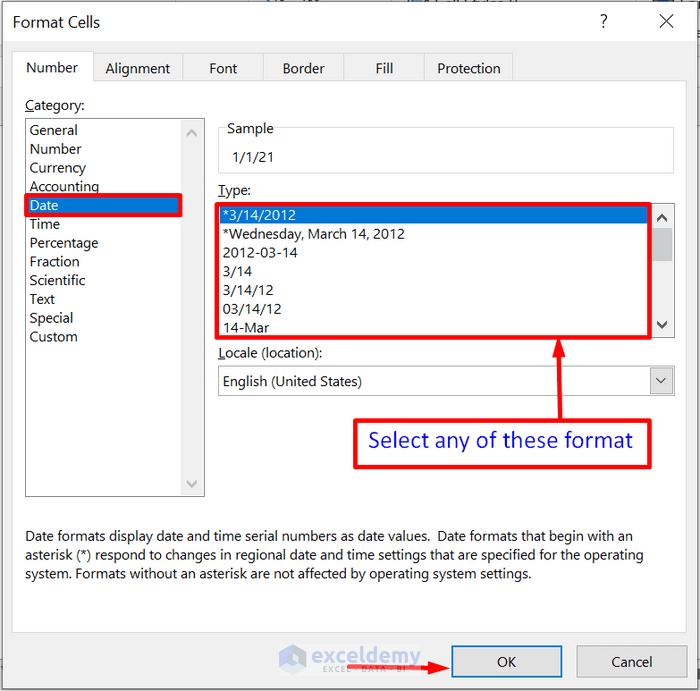
- Press OK.
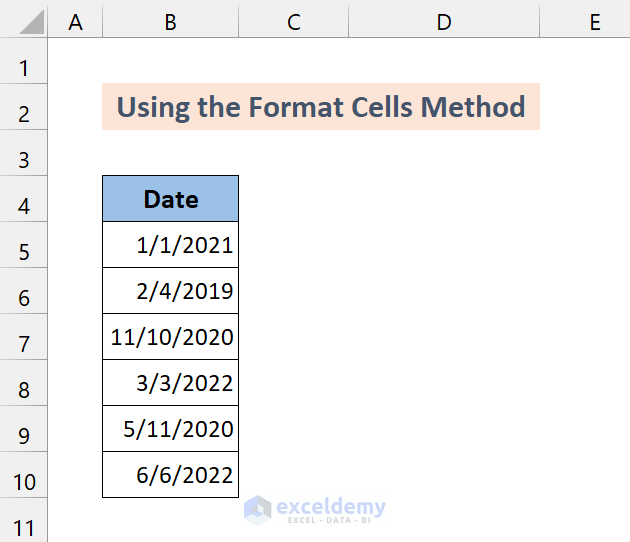
You’ll notice that we’ve successfully converted the General format to the Date format in Excel.
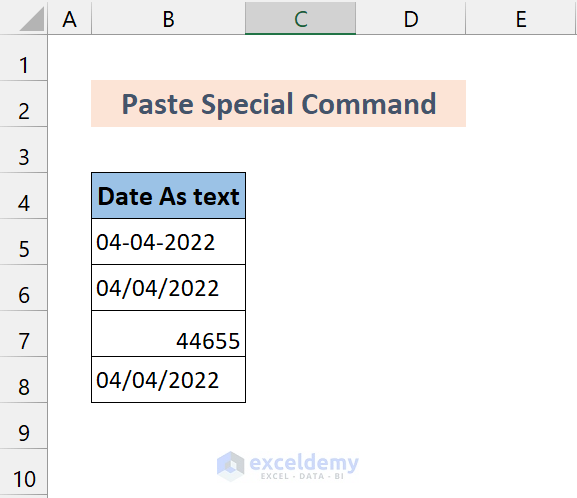
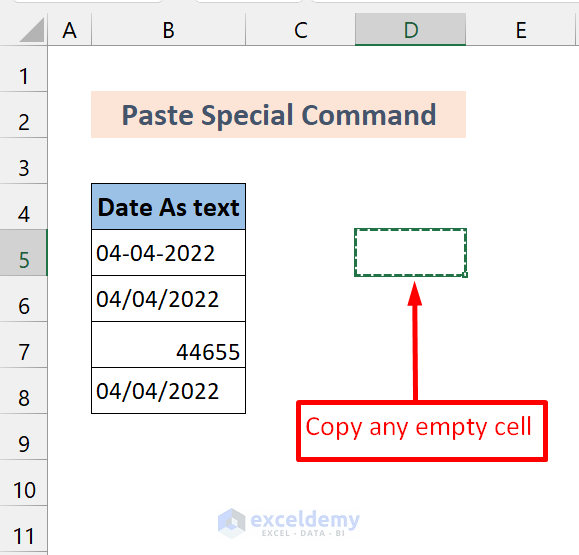
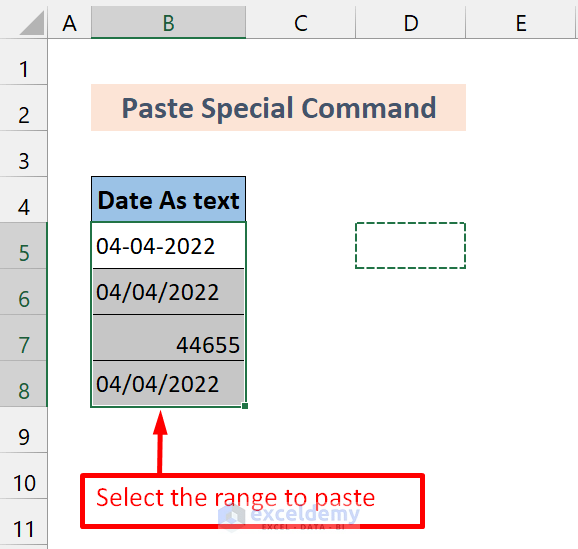
Method 3 – Using Excel Paste Special Option to Modify General Format to Date
Although not commonly used, this method can convert text format to date format. Here’s how to do it:
Steps
- Begin by copying any empty cell.
- Next, select the range of cells containing General-format dates (B5:B8).
- Right-click the selection and choose the Paste Special option. This will open the Paste Special dialog box.
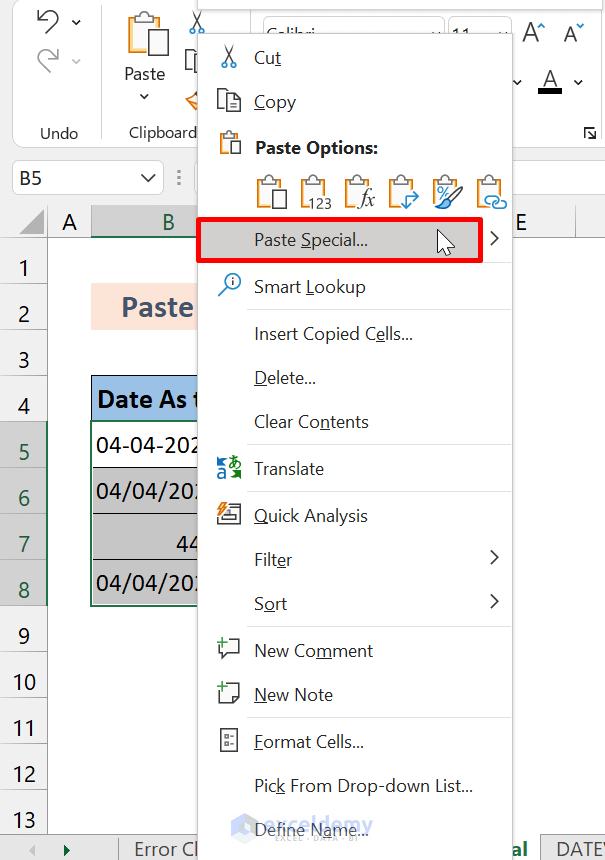
- Now, select the radio button labeled Add.
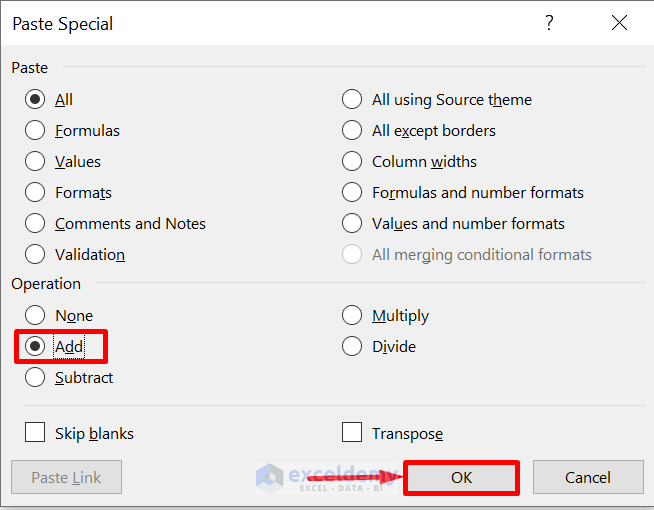
- Click OK. This action will convert the cells to General format. Excel converts a text string to a number and adds a zero, which doesn’t change the value. You’ll get the date’s serial number in General format.
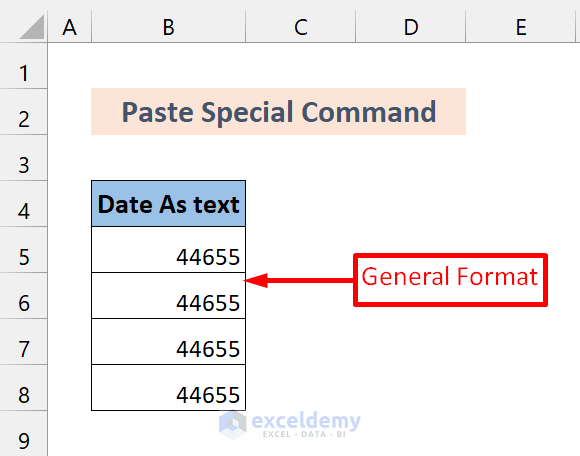
- Format the dates as desired using the Number Format options in the Home tab.
- The Format Cells dialog box will appear. Select Date from Category. In the Type option, choose a suitable one.
- Press OK.
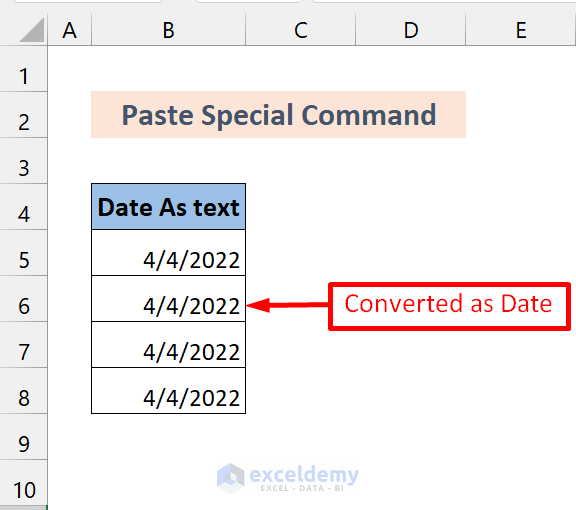
As you can see, we’ve successfully converted the text strings to date format.
Read More: How to Convert Text Date and Time to Date Format in Excel
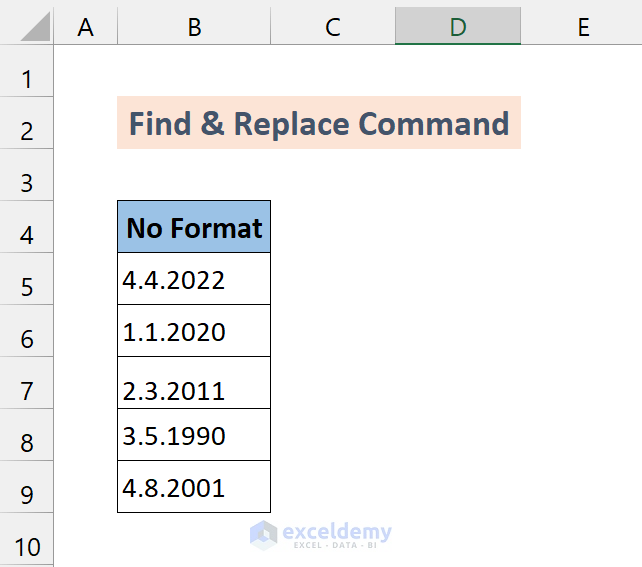
Method 4 – Applying Find & Replace Command to Switch General Format to Date in Excel
This method involves replacing a particular character with the slash (“/”) character, automatically converting it to Date format. Here’s how:
To demonstrate this method, we are using this dataset:
Steps
- Begin by selecting the range of cells containing General-format dates (B5:B9).
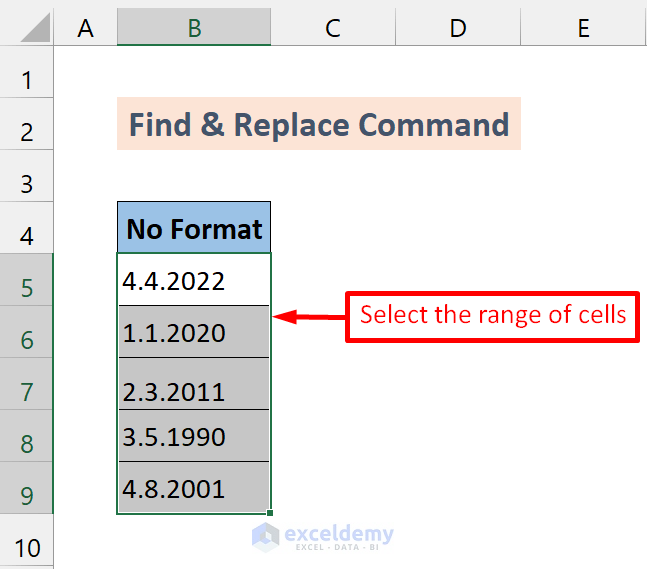
- Press Ctrl+F on your keyboard to open the Find and Replace dialog box.
- Select the Replace option.
- In the Find What box, type dot(“.”). In the Replace with box, type slash(“/”).

- Click Ok.
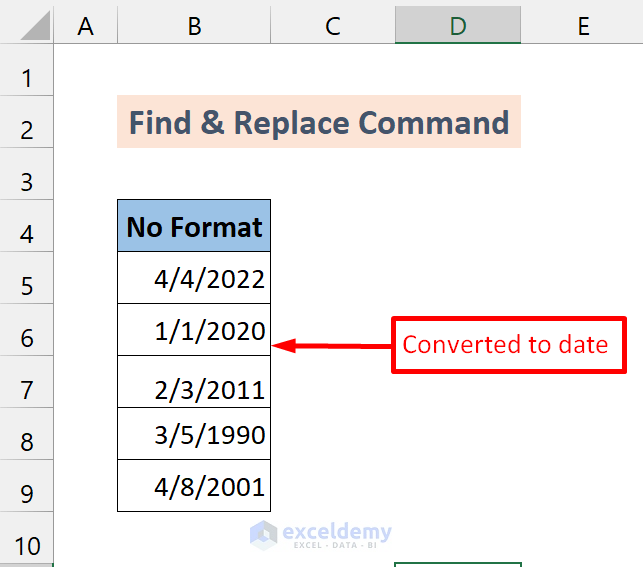
You’ll notice that this command has converted the dataset to date format.
Read More: How to Convert Number to Date in Excel
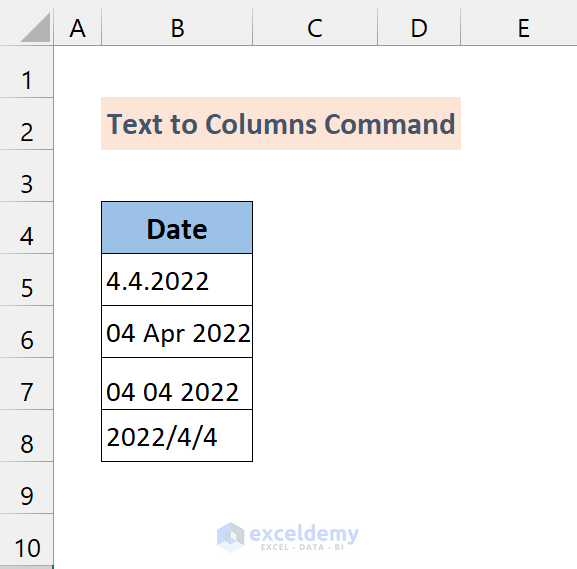
Method 5 – Converting General Format to Date Text Using Columns Wizard in Excel
This method is effective for specific types of general formats.
To demonstrate, we are going to use this dataset:
Steps
- Begin by selecting the range of cells (B5:B8) containing General-format dates.
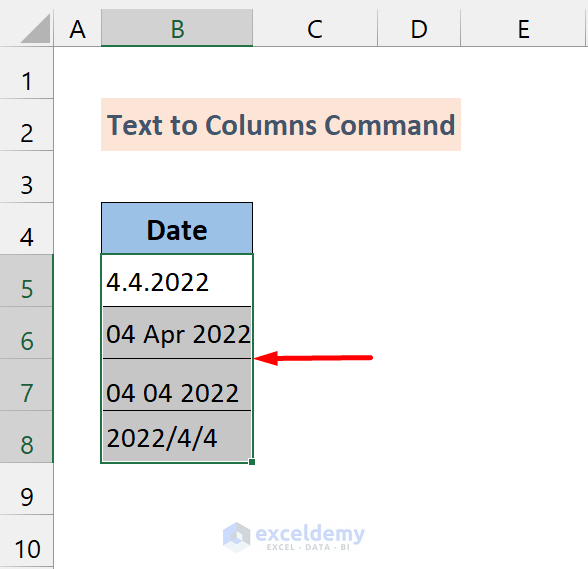
- Go to the Data tab and select the Text to Columns option.

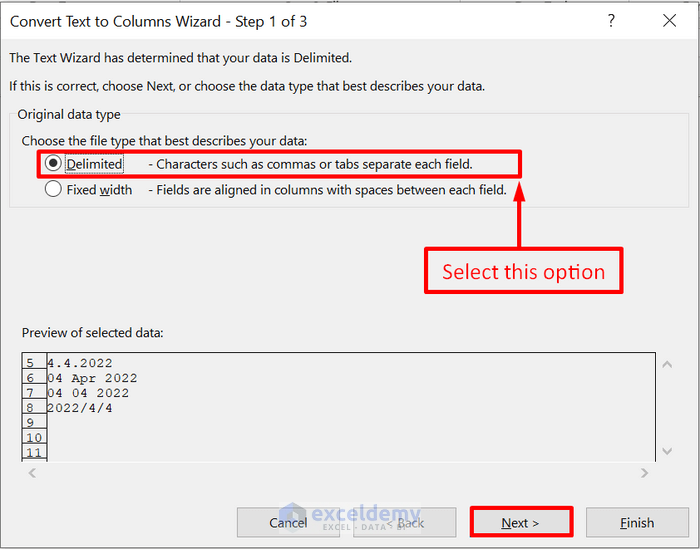
- In the dialog box, choose the Delimited radio button and click Next.
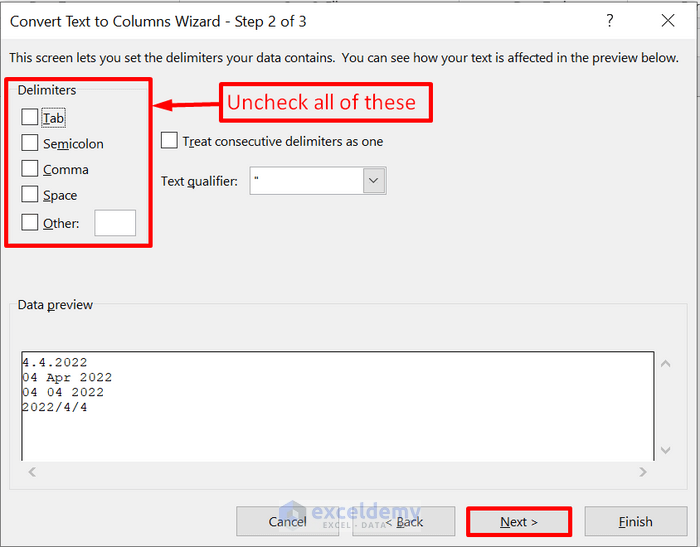
- Uncheck all the boxes under delimiters and click Next.
- In the Column data format, select Date, and from the dropdown, choose a suitable format (e.g, DMY).

- Click Finish.
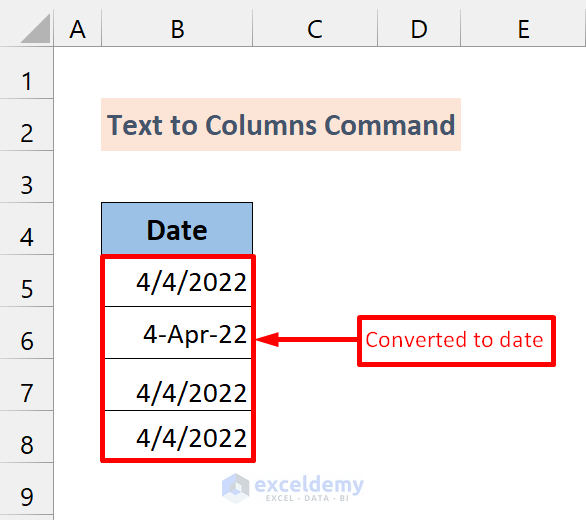
You’ll notice that we’ve successfully converted the General format to the Date format.
Method 6 – Inserting Excel VALUE, DATEVALUE, and DATE Functions to Convert General Format to Date
In this method, we’ll use functions to efficiently convert the General to Date format. Let’s explore three functions: VALUE, DATEVALUE, and DATE.
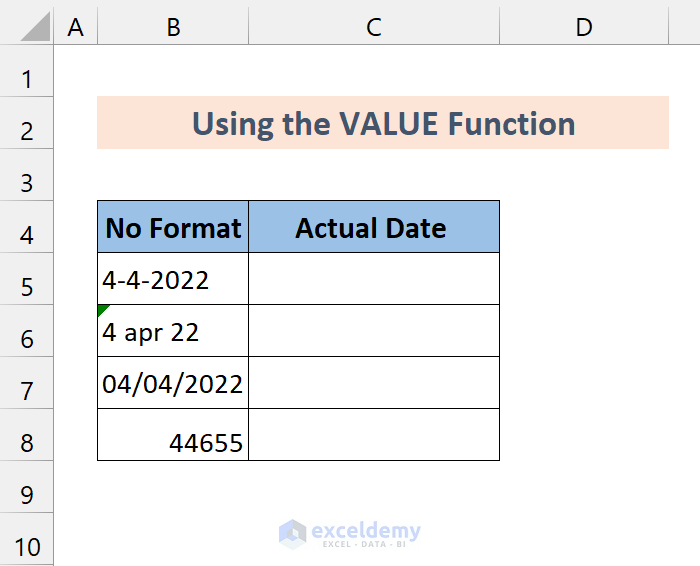
6.1 Using the VALUE Function
The VALUE function converts a text string representing a number to a number, effectively converting General to Date format.
Syntax:
(text): Required field – the text is enclosed in quotation marks or a reference to a cell containing the text you want to convert.
To demonstrate this, we are going to use this dataset:
Steps
- Enter the formula in Cell B5.
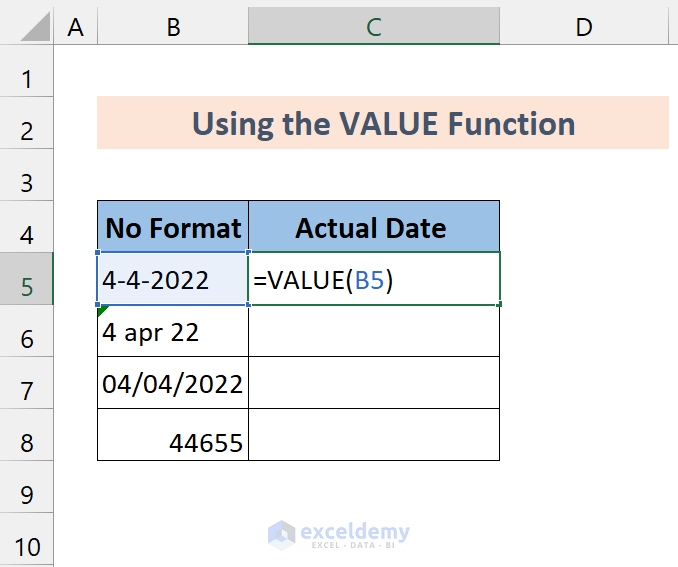
- Press Enter.
- Drag the Fill Handle icon over the range of cells B6:B8.
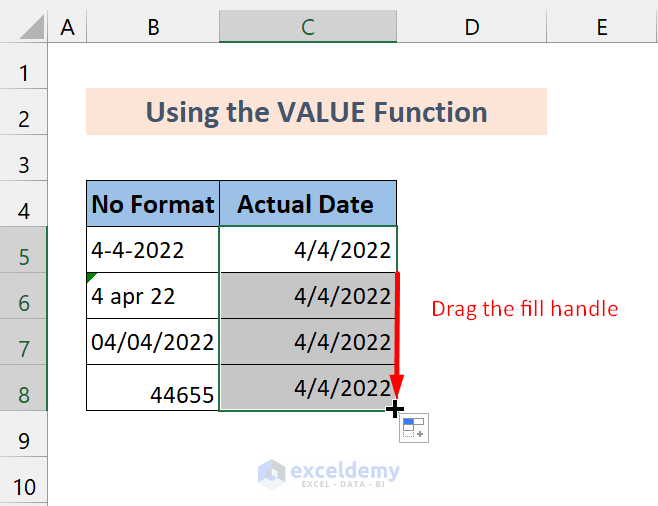
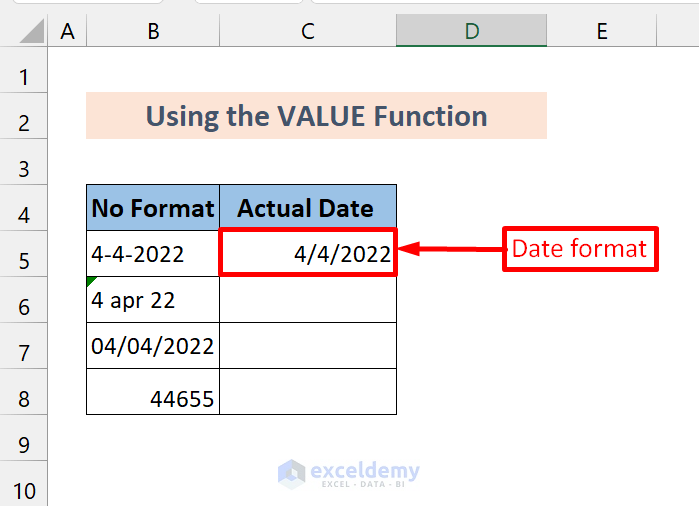
You’ll see that the General format has been successfully converted to the Date format.
6.2 Using the DATEVALUE Function
The DATEVALUE Function converts a text date into the date-time number codes, which are in General format. You’ll see that the General format has been successfully converted to the Date format.
Syntax:
- Simply pass the cell reference in the DATEVALUE function.
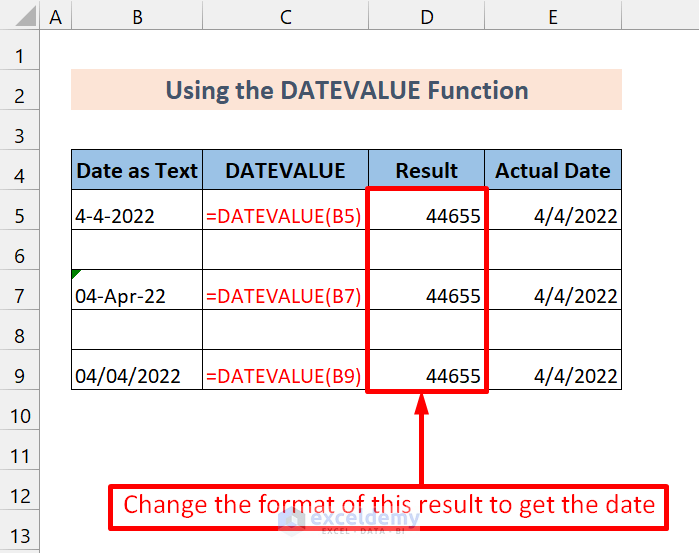
- After changing the Result column format by using the Format Cells option, you’ll see the date in the actual date format.
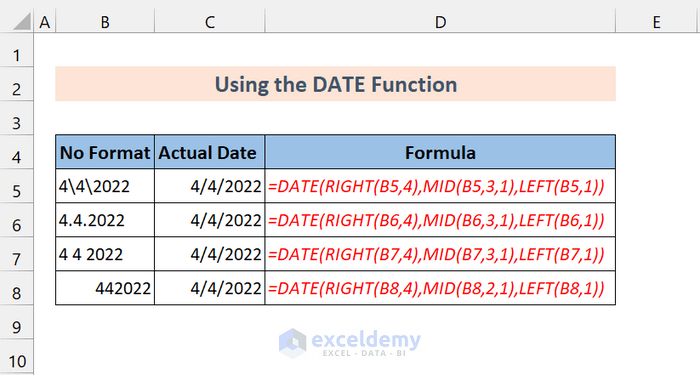
6.3 Using the DATE Function
The DATE function returns the sequential serial number representing a specific date. We’ll use it together with the RIGHT, MID, and LEFT functions.
Syntax of the DATE function:
Generic formula:
You can adjust the cell references and number of characters in the functions accordingly.
The following screenshot demonstrates a few examples of this method in action:
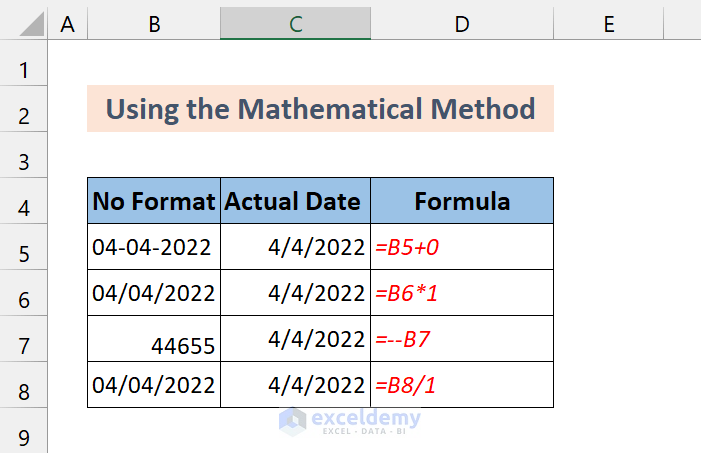
Method 7 – Using Mathematical Operations to Change General Format to Date in Excel
Here, you can perform simple mathematical operations to convert General to Date format. However, ensure that the actual Date values remain unchanged. Operations like addition, multiplication, division, or double negation can be used for conversion.
Operations:
=text+0
=text*1
=text/1
=–text
These operations will effectively convert the General format to Date without altering actual Date values.
The following screenshot will give you a clear idea about this method:
If the value is in date format already, you don’t have to do these operations.
Things to Remember
✎ Microsoft Excel stores dates since January 1, 1900. Using the Excel DATEVALUE function on earlier dates may result in a #VALUE! error.
✎ The DATEVALUE function cannot convert numeric values to dates. It converts text dates to actual date format. For numeric values, use the VALUE function.
✎ If these methods seem complex, consider converting dates using the Number Format group in the Home tab, which is a simpler alternative.
Download Practice Workbook
You can download the practice workbook from here:
Related Articles
- How to Convert Serial Number to Date in Excel
- How to Convert 8 Digit Number to Date in Excel
- How to Convert Number (YYYYMMDD) to Date Format in Excel
- How to Disable Auto Convert to Date in Excel
- Text Won’t Convert to Date in Excel
<< Go Back to Convert to Date | Date-Time in Excel | Learn Excel
Get FREE Advanced Excel Exercises with Solutions!

Text to column method was the first to work for me, after quite a bit of searching and thrashing. Thanks!
Hello Andrew,
You are most welcome. Glad to hear that Text to Column method worked for you. Keep exploring Excel with ExcelDemy!
Regards
ExcelDemy