Several Date formats are available in Excel.
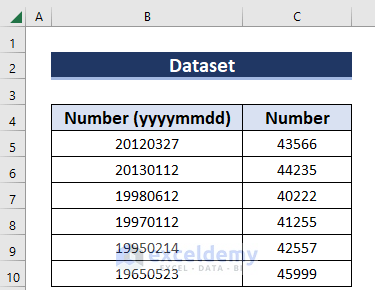
This is the sample dataset.
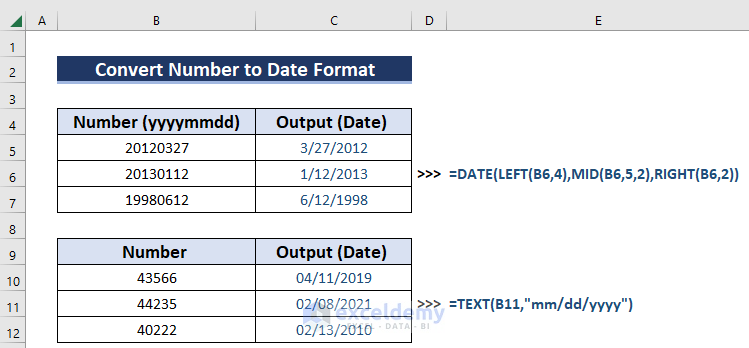
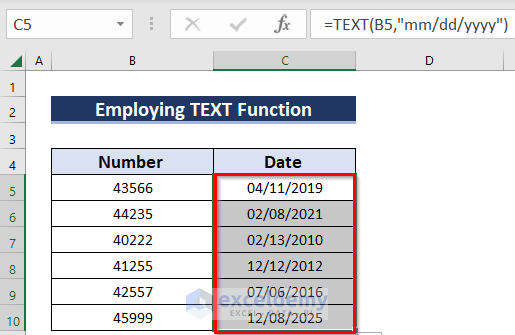
Method 1 – Using the TEXT Function to Convert Number (YYYYMMDD) to Excel Date Format
Steps:
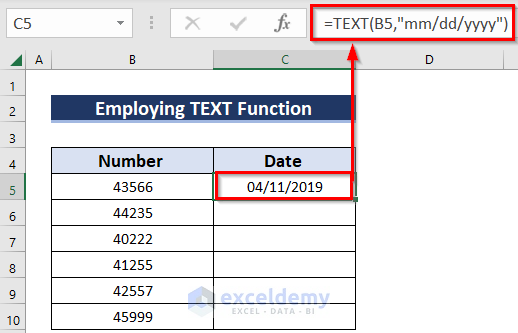
- Enter the following formula in C5.
=TEXT(B5,"mm/dd/yyyy")
- Press ENTER.
Formula Breakdown
- The TEXT formula takes B5 as the first argument.
- The second argument is format_text which contains the formatting (Here, “mm/dd/yyyy”) Other formats can be used.
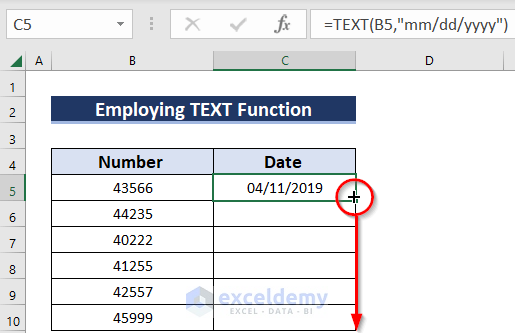
- Drag the Fill Handle across the cells you want to fill.
Dates will be displayed.
Read More: How to Convert Number to Date in Excel
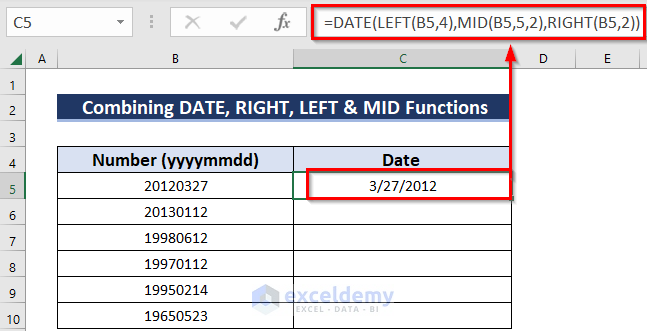
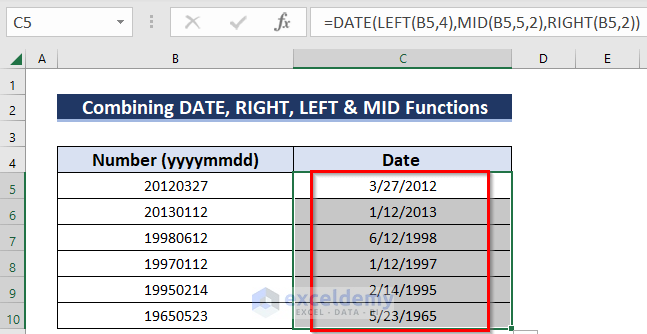
Method 2 – Combining the DATE, RIGHT, LEFT & MID Functions to Convert Number (YYYYMMDD) to Date
Steps:
- Enter the following formula in C5:
=DATE(LEFT(B5,4),MID(B5,5,2),RIGHT(B5,2))- Press ENTER and you will see the result for B5.
Formula Breakdown
- The first argument for the LEFT, RIGHT, and MID functions is text.
- Since yyyymmdd is the format of the dataset, the leftmost number up to 4 returns the year, middle 2 returns the month and the right 2 returns the date.
- The functions contain numbers in the second argument. 4 for the LEFT formula, 2 for RIGHT, and 2 for MID.
- The three functions are nested within the DATE function to return the result.
Read More: How to Convert Text to Date in Excel
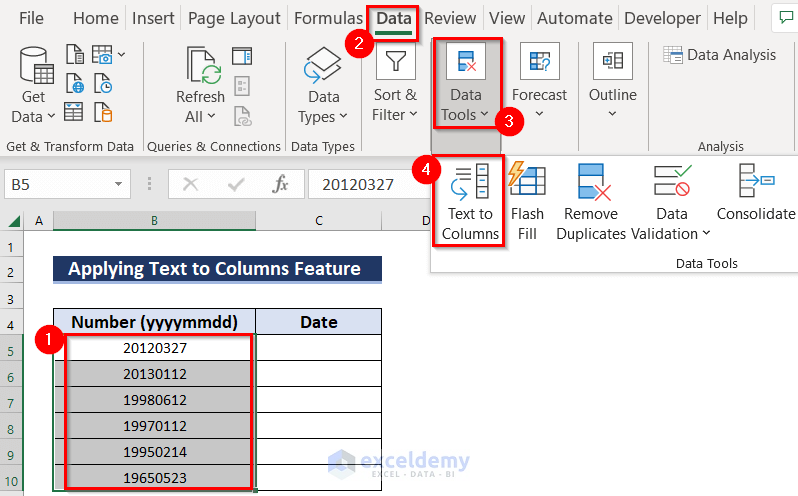
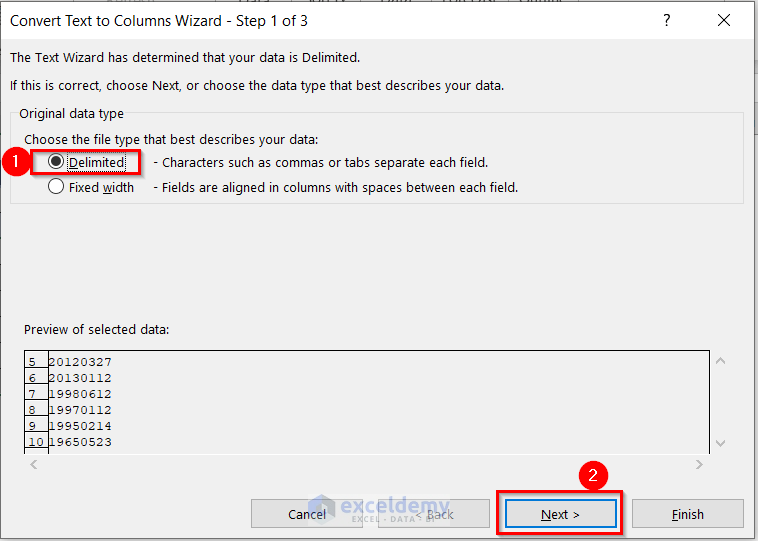
Method 3 – Applying Text to Columns Wizard to Convert Number (YYYYMMDD) to Date Format
Steps:
- Select the dataset you want to convert.
- Go to the Data tab.
- In Data Tools, select Text to Columns.
In the Text to Columns Wizard:
- Choose Delimited and click Next in the Convert Text to Columns Wizard.
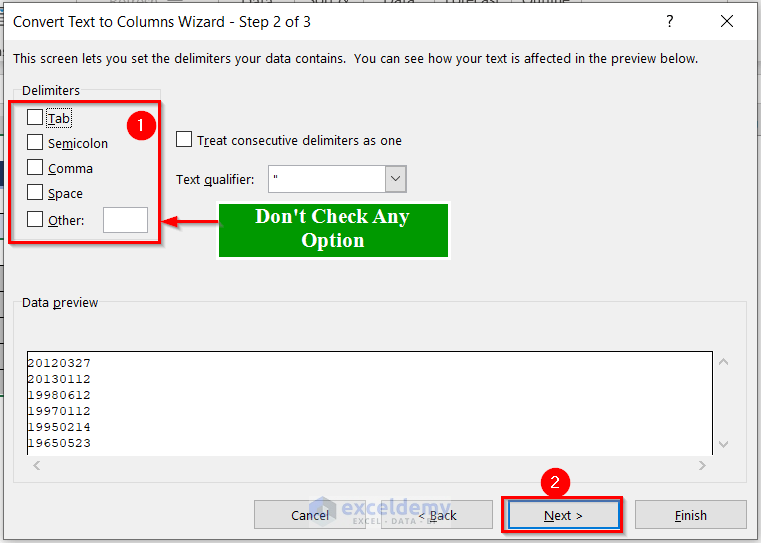
- Keep all the tabs unselected and click Next in the Convert Text to Columns Wizard.
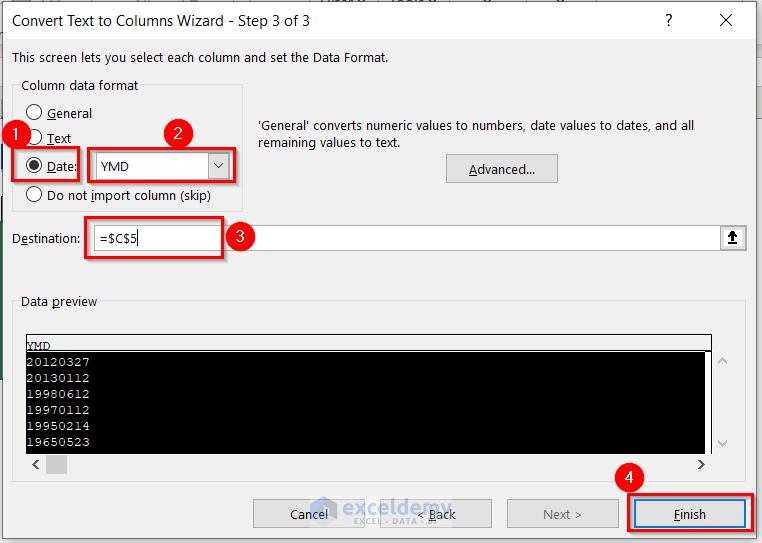
- Select Date and from the drop-down menu select YMD >> select Destination >> click Finish in the Convert Text to Columns Wizard.
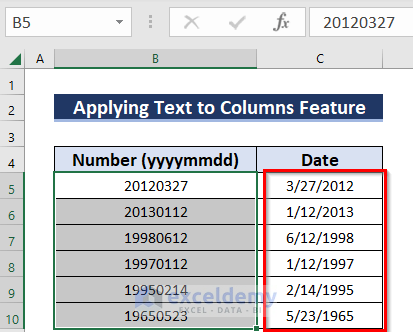
You will see the result as shown below.
Read More: How to Convert 8 Digit Number to Date in Excel
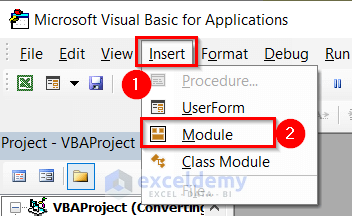
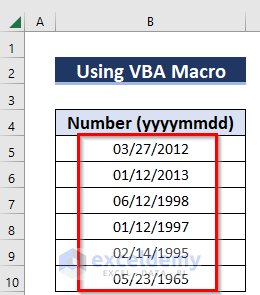
Method 4 – Using VBA Macros to Convert Number (YYYYMMDD) to Date Format
Steps:
- Press ALT+F11. The VBA Macro will open.
- In the Insert tab choose Module.
- Enter the code below.
Sub Converting_Num_yyyymmdd_To_Date()
Dim my_numbr As Range
Dim my_selected_range As Range
On Error Resume Next
xTitleId = "Converting Number to Date with Exceldemy"
Set my_selected_range = Application.Selection
Set my_selected_range = Application.InputBox("Range", xTitleId, my_selected_range.Address, Type:=8)
   For Each my_numbr In my_selected_range
       my_numbr.Value = DateSerial(Left(my_numbr.Value, 4), Mid(my_numbr.Value, 5, 2), Right(my_numbr.Value, 2))
       my_numbr.NumberFormat = "mm/dd/yyyy"
   Next
End Sub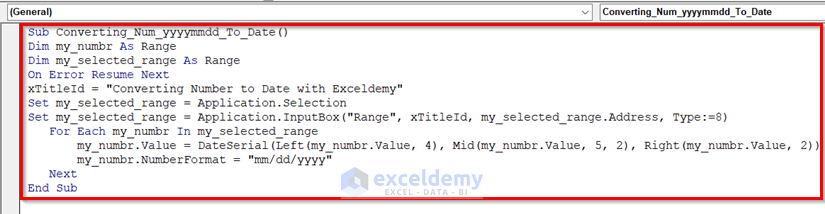
Code Breakdown
- A Sub Procedure named Converting_Num_yyyymmdd_To_Date was created.
- Two variables my_numbr and my_selected_range are declared as Range.
- A dialog box was used to select the data.
- A For Each Loop was used to apply the formula to every cell in the selection.
- Save the file as Excel Macro-Enabled Workbook and go back to the worksheet.
- In the Developer tab >> select Macros.
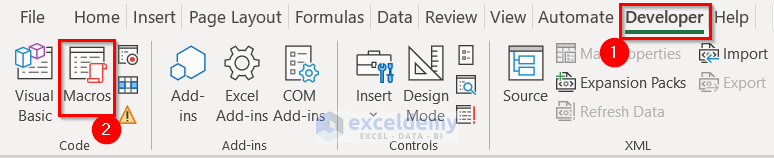
- In the Macro dialog box choose Converting_Num_yyyymmdd_To_Date >> click Run.
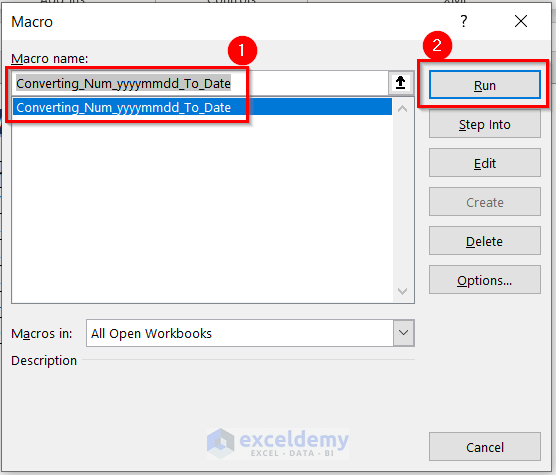
- Select the range and click OK.
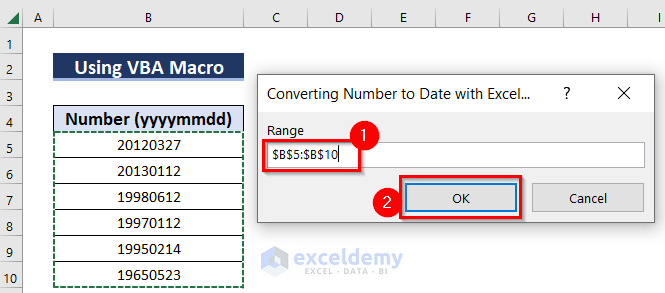
The result is displayed.
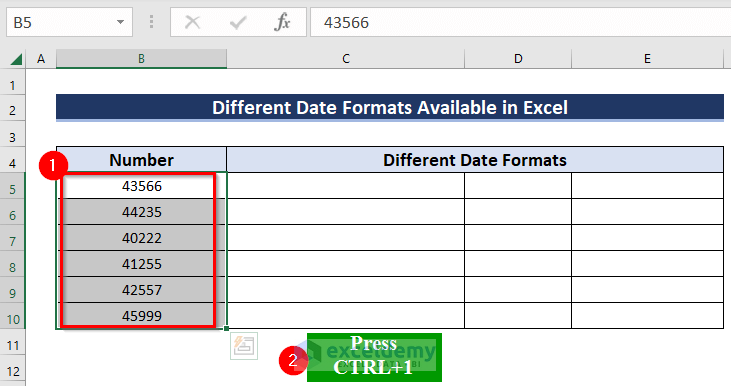
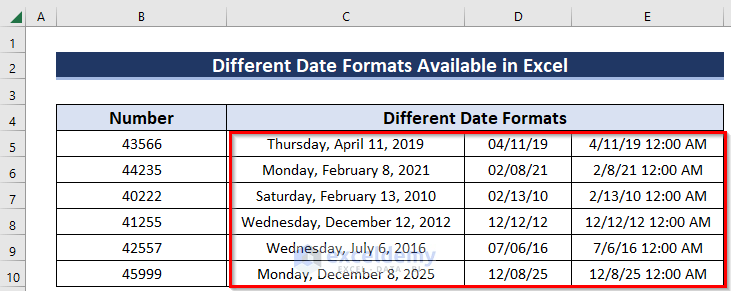
Different Available Formats of Date in Excel
Steps:
- Select the data.
- Press CTRL+1.
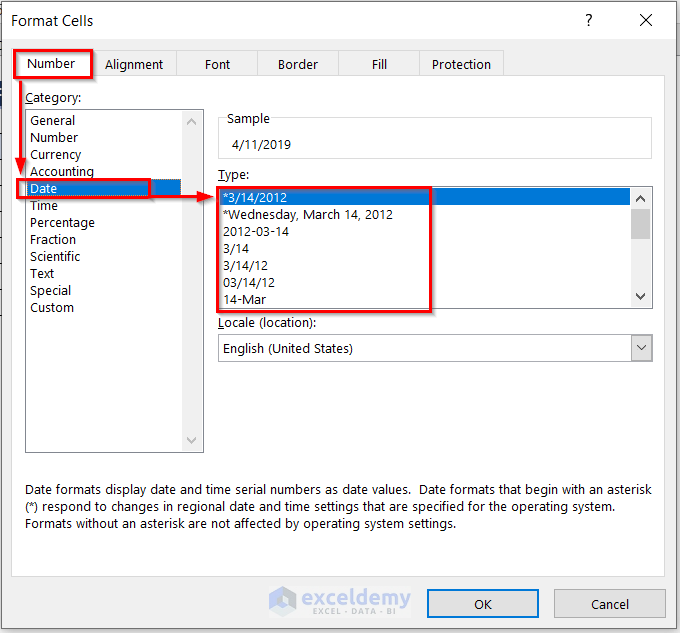
In Format Cells click Numbers and choose Dates.
- Choose a date format.
- Click OK.
Alternatively,
- In the Home tab select Data and then Number from the drop-down menu.
- Choose More Number Formats to see different date formats.
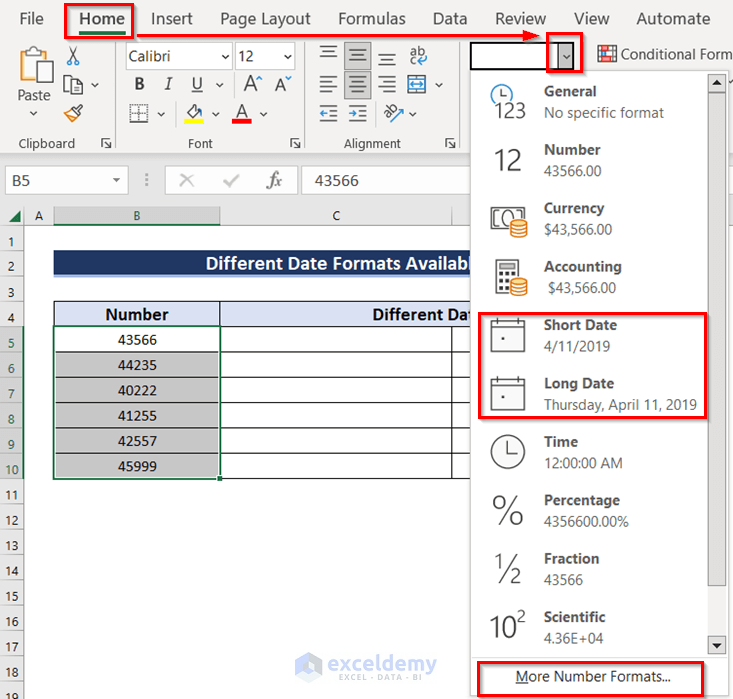
The picture below showcases 3 different formats.
Stop Auto Conversion of Numbers to Dates
Tips
1. Use a space or an apostrophe before the number. The apostrophe is preferable as the space might hamper the efficiency of other Excel functions.
2. Select the cells where you will enter data and press CTRL+1. Format Cells will open. Select Text and click OK.
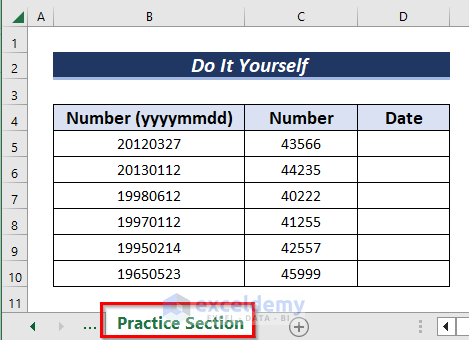
Practice Section
Practice by yourself.
Download Practice Workbook
You can download the practice workbook here.
Related Articles
- How to Convert General Format to Date in Excel
- How to Convert Serial Number to Date in Excel
- How to Convert Text to Date and Time in Excel
- How to Convert Text Date and Time to Date Format in Excel
- Text Won’t Convert to Date in Excel
<< Go Back to Convert to Date | Date-Time in Excel | Learn Excel
Get FREE Advanced Excel Exercises with Solutions!

Your copy/paste formula in the 2nd method is incorrect:
=DATE(LEFT(B5,4),MID(B5,3,2),RIGHT(B5,4))
In your screenshot, it is right as:
=DATE(LEFT(B5,4),MID(B5,5,2),RIGHT(B5,4))
FYI.
Greetings LIBBY,
Thank you for letting us know. We’ve updated it.
Feel free to comment if you have further inquiries. We are here to help.
Regards
Arin Islam (Exceldemy Team)