Here’s an overview of the dataset and the features we’ll use to convert UNIX time and timestamps into an Excel date.
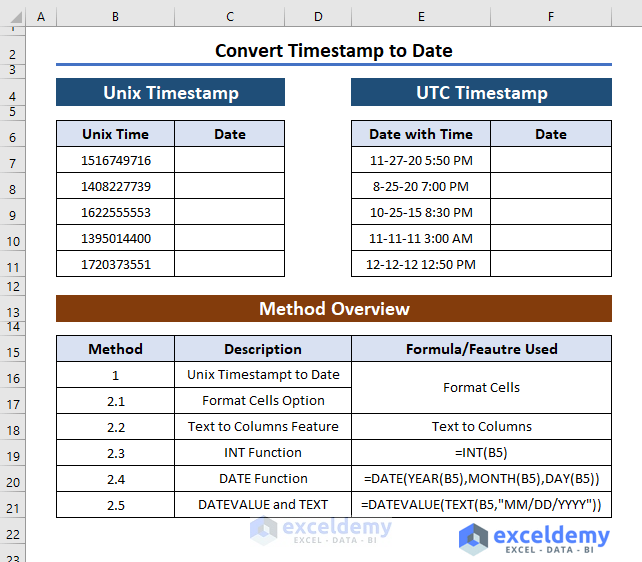
How to Convert a Timestamp to a Date in Excel: 2 Suitable Cases
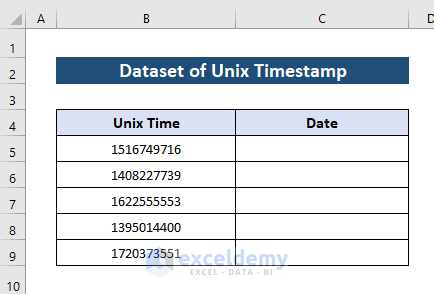
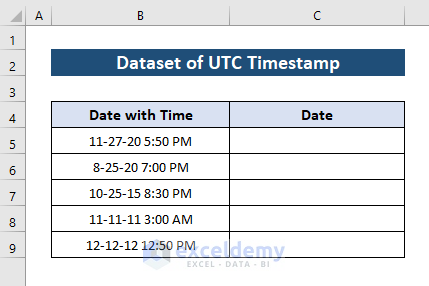
Let’s say, we have two types of timestamp data.
We have Unix-based Timestamp data:
Then we have UTC-based Timestamp data:
Case 1 – Convert a Unix Timestamp to a Date
Steps:
- Select Cell C5.
- Copy the following formula with the DATE function in that cell:
=B5/86400+ DATE(1970,1,1)
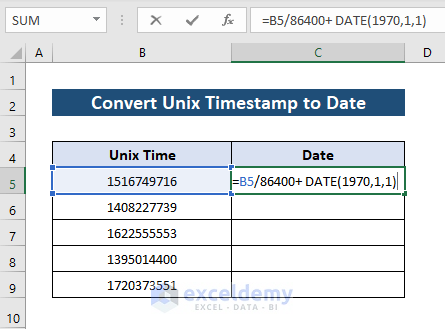
- Press Enter.
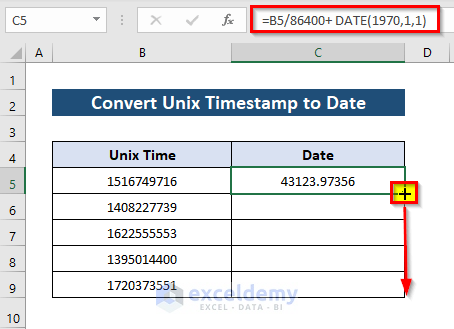
- Drag the Fill Handle tool to Autofill up to Cell C9 to convert all the timestamps to dates.

- Right-click on the selected cells.
- Select Format Cells from the context menu.
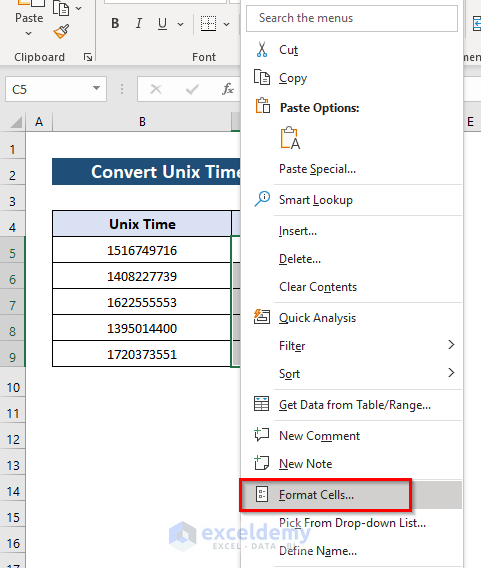
- The Format Cells dialog box will pop up.
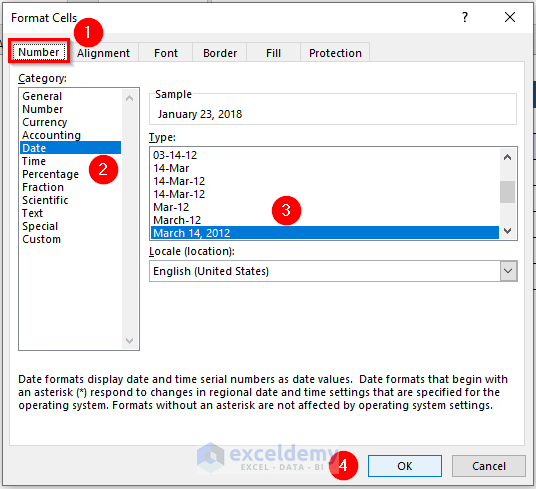
Note: You can also perform the same task by pressing CTRL+1.
- Select Date in the Category list under the Number tab, then select the Date Type in the right section.
- Click OK.
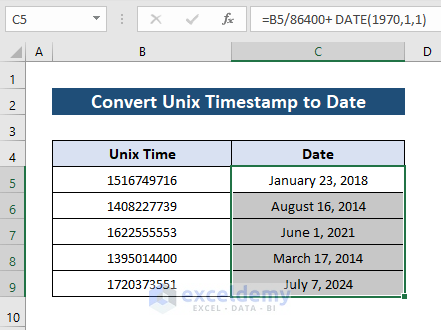
- You’ll see a date without time.
Read More: How to Convert Active Directory Timestamp to Date in Excel
Case 2 – Convert a UTC Timestamp to a Date
Method 2.1 – Using the Format Cells Option
Steps:
- Select Cell C5.
- Apply the following formula in that cell:
=B5
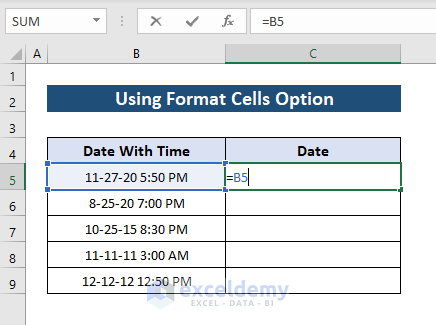
- Press Enter.
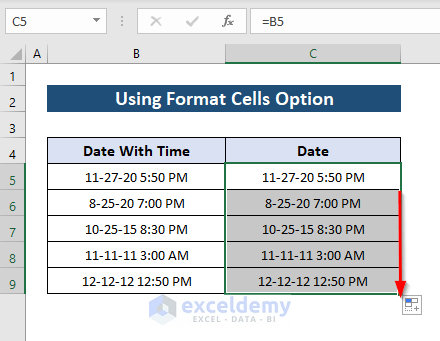
- Copy the formula up to Cell C9 to convert all the timestamps to date.
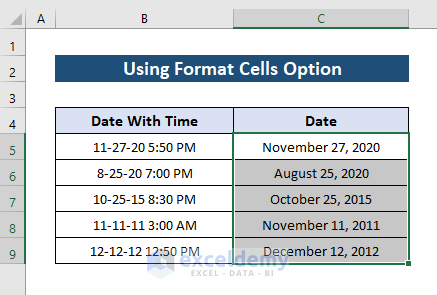
- Open the format cells dialog box and repeat the same steps in Case 1 and you will get the following results.
Method 2.2 – Applying the Text to Columns Wizard
Steps
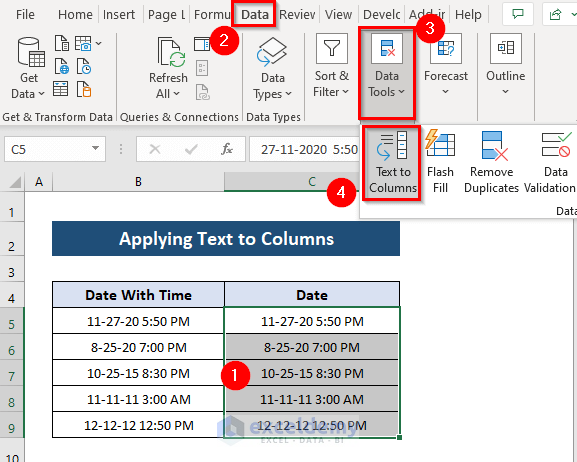
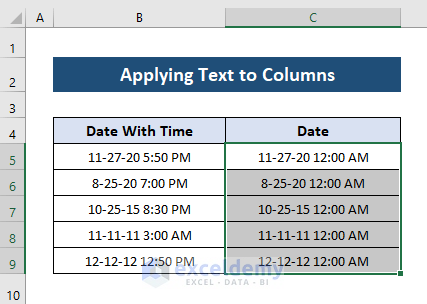
- Copy the cells from B5:B9 to C5:C9.
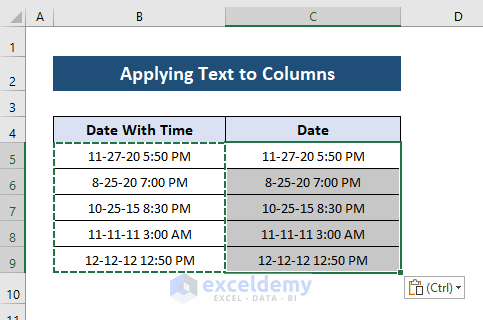
- Select the range of cells C5:C9.
- From the Ribbon section, go to Data tab and the Data Tools group, then select Text to Columns option from the list.
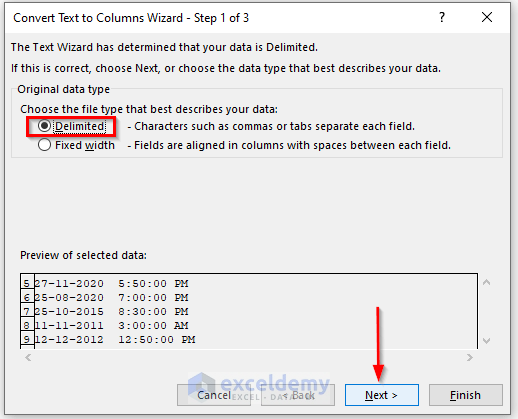
- The Convert Text to Columns Wizard – Step 1 of 3 window opens up.
- Select Delimited and click on Next.
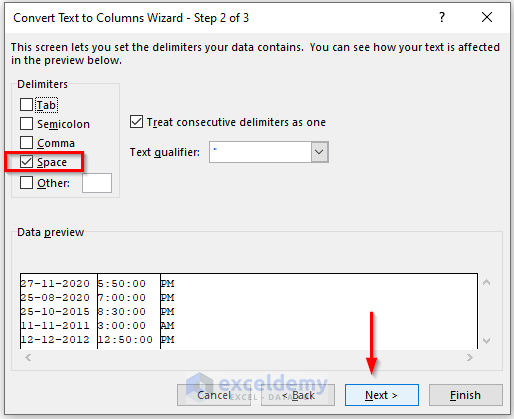
- In the Convert Text to Columns Wizard – Step 2 of 3, select Space and click on Next.
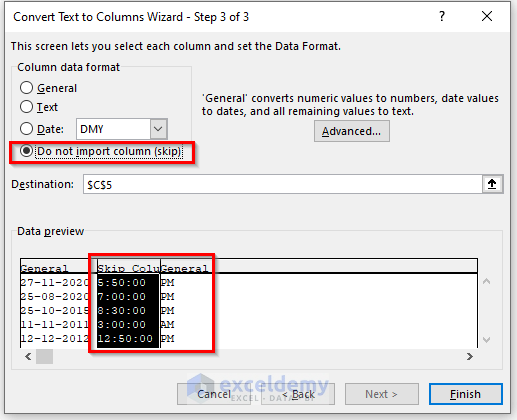
- In the Convert Text to Columns Wizard – Step 3 of 3, select General for the first column.
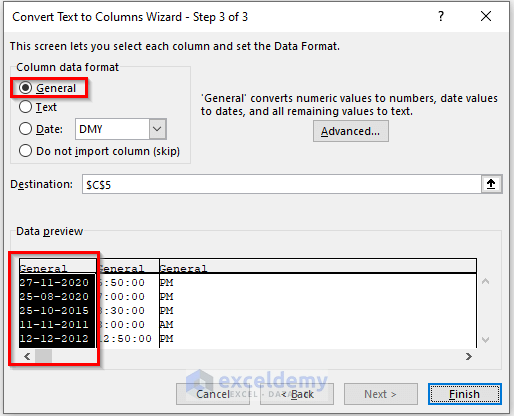
- For both the second and the third column, select the Do not import column(skip)
- Click on Finish.
- We get the result as follows:
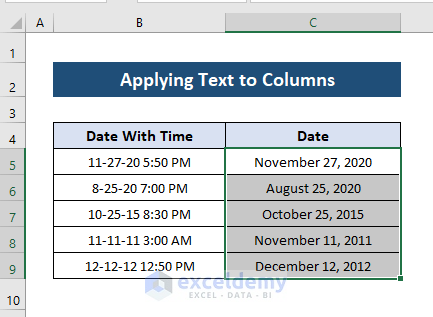
- Open the format cells dialog box and repeat the same steps in Case 1 and you will get the final results.
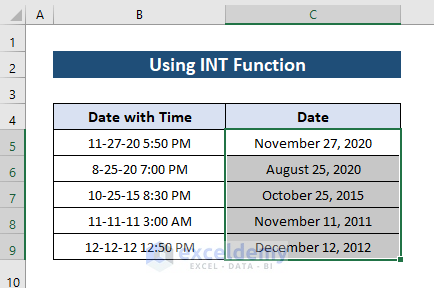
Method 2.3 – Modifying a Timestamp to a Date Using INT Function
Steps
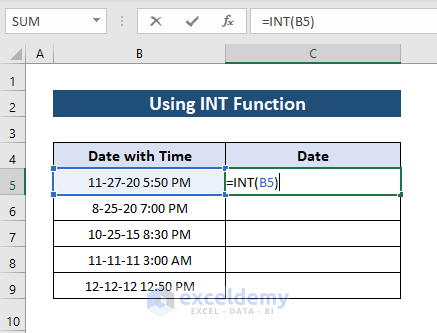
- Insert the following formula in Cell C5:
=INT(B5)
- Fill the rest of the cells using Autofill.
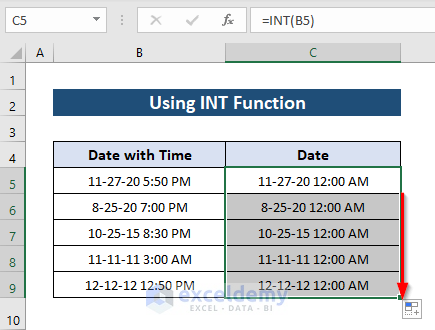
- Repeat the reformatting steps in Case 1 and you will get the following results.
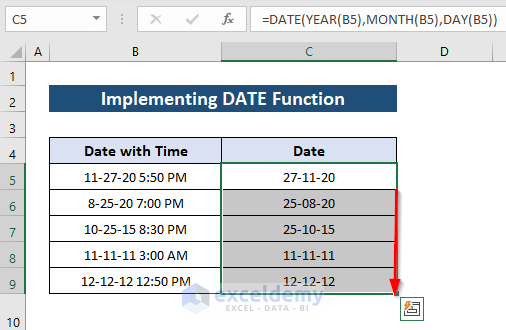
Method 2.4 – Implementing the DATE Function to Change a Timestamp to a Date
Steps
- Apply the following formula in Cell C5:
=DATE(YEAR(B5),MONTH(B5),DAY(B5))

- Fill the rest of the cells using the Autofill feature to get the complete result.
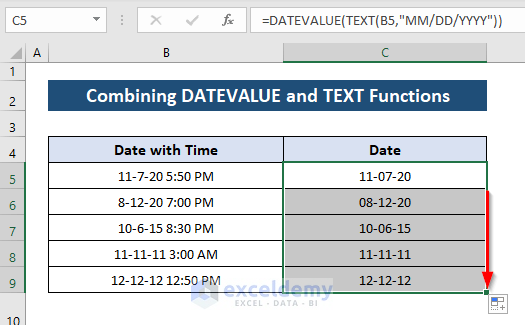
Method 2.5 – Combining DATEVALUE and TEXT Functions to Alter a Timestamp to a Date
Steps
- Select Cell C5 and apply the following formula:
=DATEVALUE(TEXT(B5,"MM/DD/YYYY"))
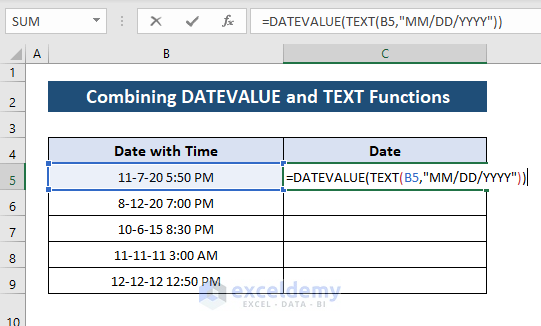
- Fill the rest of the cells using the Autofill feature to get the complete result.
Note: The TEXT function converts the value into the text format. On the other hand, the DATEVALUE function just converts the text formatted string to the date value.
Download the Practice Workbook
We have prepared a workbook so that you can practice. You can download it from the link below.
Related Articles
- How to Convert Week Number to Date in Excel
- How to Convert SAP Timestamp to Date in Excel
- How to Convert 13 Digit Timestamp to Date Time in Excel
<< Go Back to Convert to Date | Date-Time in Excel | Learn Excel
Get FREE Advanced Excel Exercises with Solutions!
