Method 1 – Converting Serial Number to Date in Excel with Format Cells Option
Steps:
- Select the C5:C16 cells >> Right-click to open the Contextual Menu >> choose the Format Cells option.
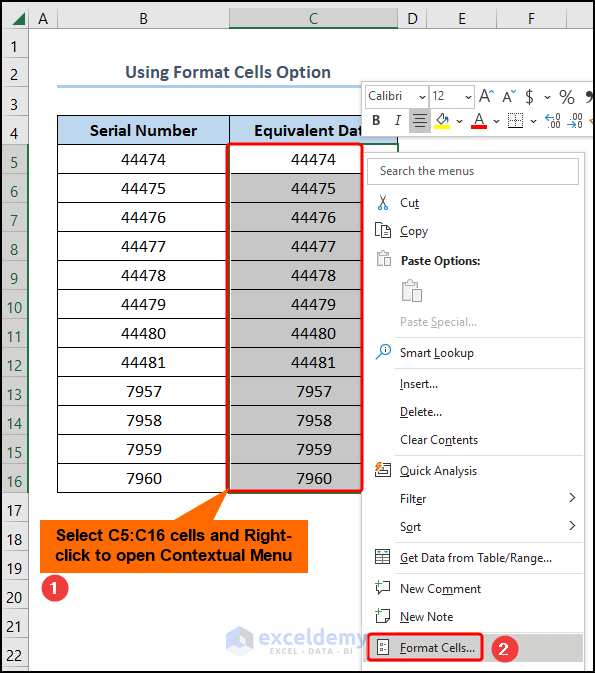
- In the Format Cells window, select Date >> click the Type (“3/14/2012”) shown below >> hit OK.

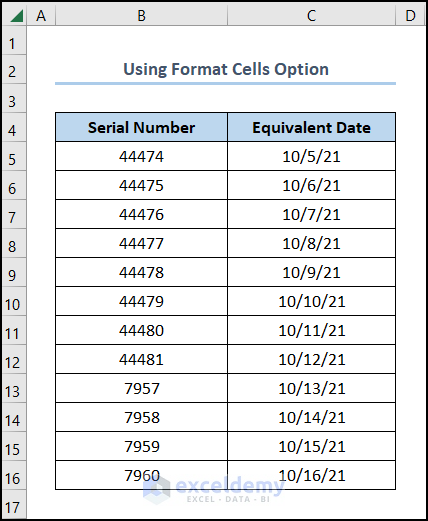
The serial numbers will be converted to date.
Read More: How to Convert Number to Date in Excel
Method 2 – Using Excel VALUE Function to Convert Serial Number to Date
Steps:
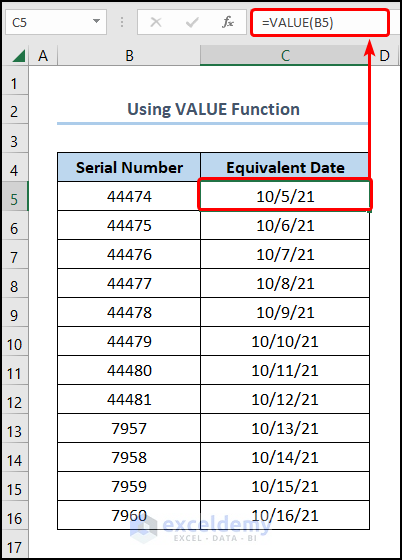
- Go to the C5 cell >> enter the following formula >> press ENTER >> change the number formatting to date.
=VALUE(B5)
The B5 cell refers to the “Serial Number: 44474”.
Method 3 – Applying TEXT Function to Transform Serial Number to Date in Excel
Steps:
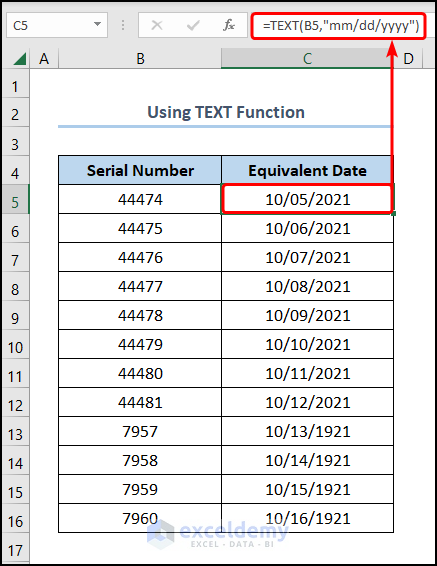
- Enter the C5 cell >> enter the following formula >> press ENTER.
=TEXT(B5,"mm/dd/yyyy")
The B5 cell points to the “Serial Number: 44474” while, the “mm/dd/yyyy” is the specified date format.
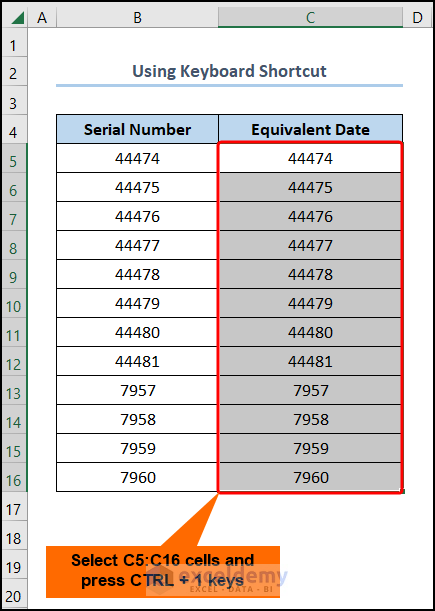
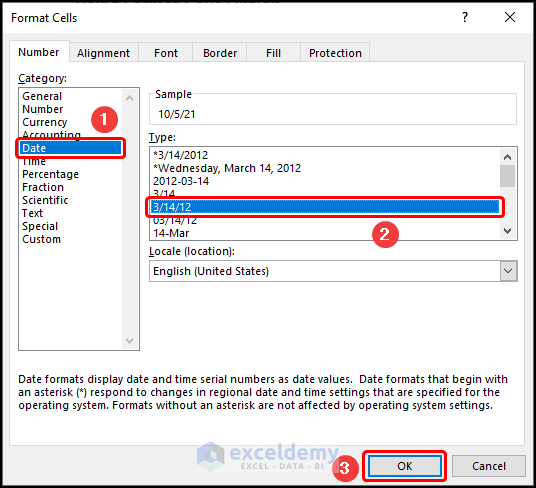
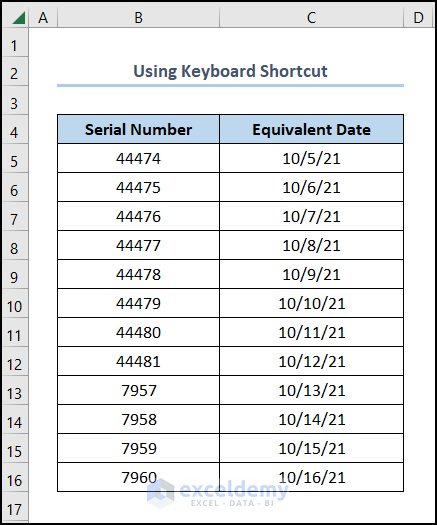
Method 4 – Changing Serial Number to Date with Keyboard Shortcuts in Excel
Steps:
- Select the C5:C16 cells >> click the CTRL + 1 keys on your keyboard.
- Choose the Date tab >> select the Type (“3/14/2012”) as shown below >> click on OK.
Read More: How to Convert General Format to Date in Excel
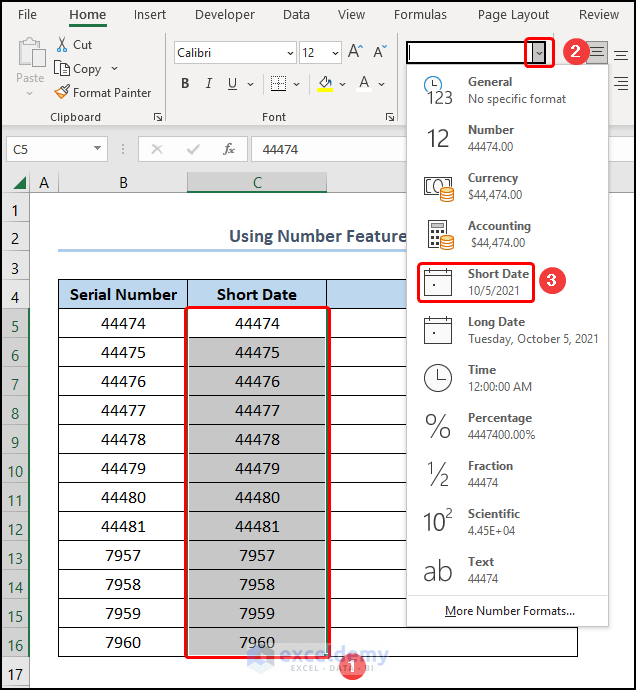
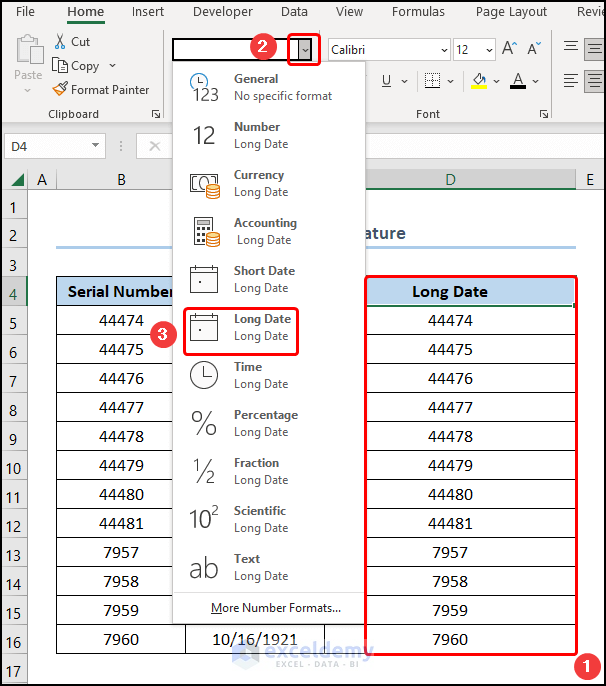
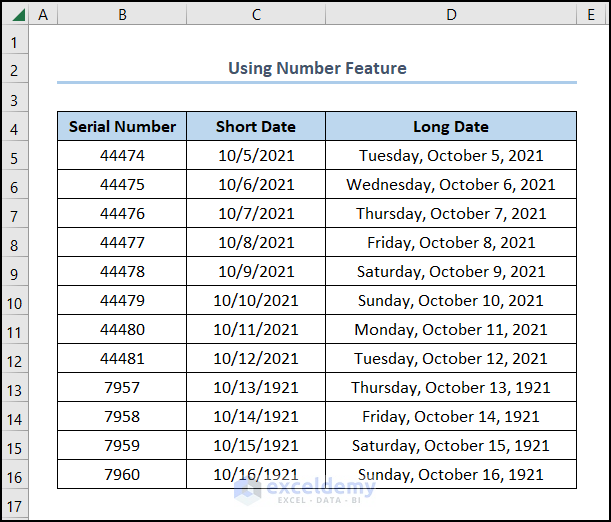
Method 5 – Using Excel Number Feature to Convert Serial Number to Date
Steps:
- Select the C5:C16 cell >> click the drop-down arrow >> select Short Date.
- Copy the serial numbers to the D5:D16 cells >> click the Long Date option.
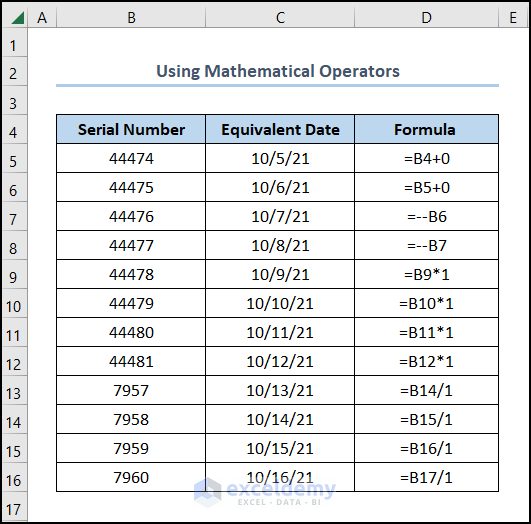
Method 6 – Changing Serial Number to Date with Mathematical Operators
Steps:
- Enter any of the following formulas to obtain the output.
=B5+0
=--B7
=B9*1
=B13/1
The B5, B7, B9 and B13 cells represent “Serial Numbers” whereas the (+), (– –), (*) and ( / ) are the Addition, Double Negation, Multiplication and Division operators.
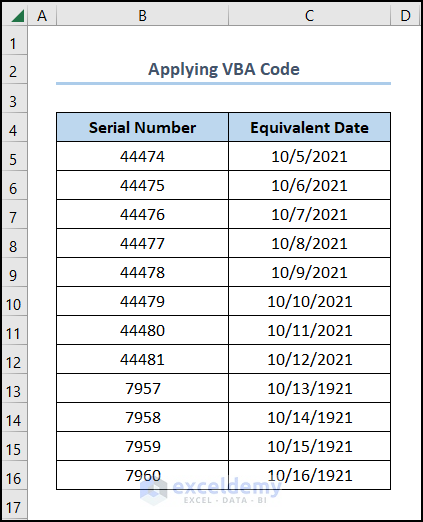
Method 7 – Applying Excel VBA Code to Convert Serial Number to Date
Steps:
- Navigate to the Developer tab >> click the Visual Basic button.
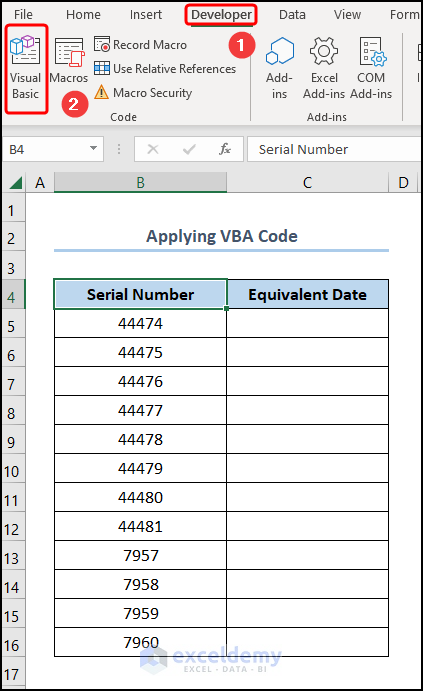
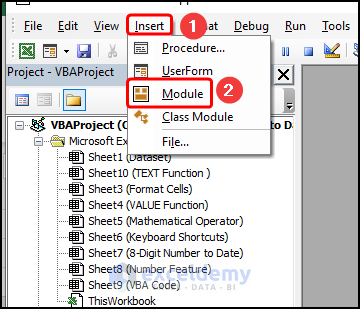
- Go to the Insert tab >> select Module.
Enter the code into the window.
Sub serial_to_date()

Dim arr As Range
Dim val As Range
Set arr = Application.Selection
For Each val In arr
val.Offset(0, 1).Value = CDate(val.Value)
Next val

End Sub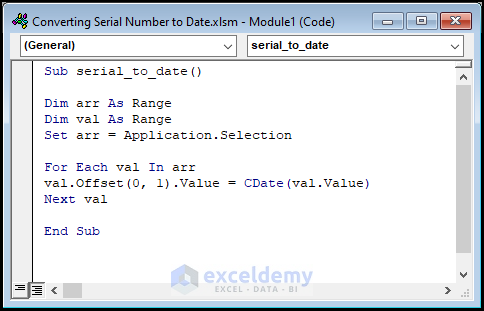
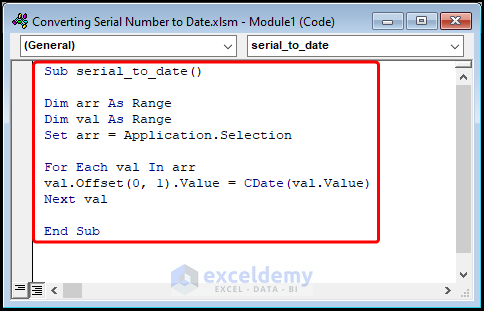
- The sub-routine is given a name, here it is serial_to_date().
- Define the variables arr and val as Range.
- Use the Set statement to store the selected cells into the arr
- Use a For Loop to iterate through each value and apply the Offset property to paste the values in the adjacent column.
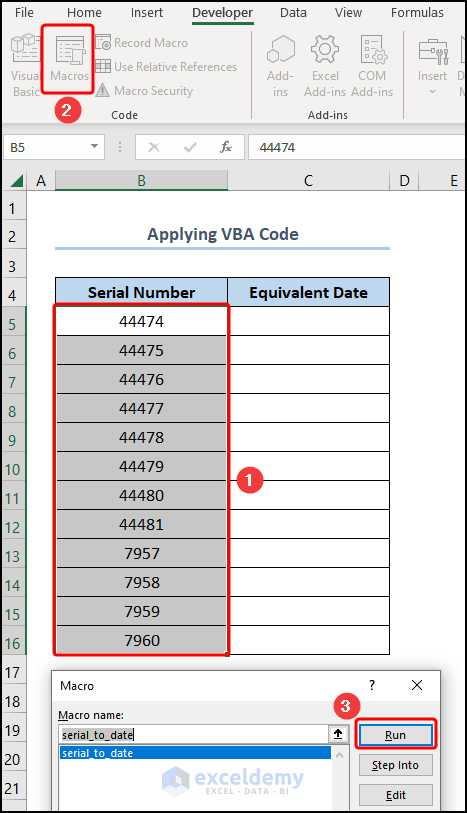
- Select the B5:B16 cells >> click the Macros button >> hit Run.
Read More: How to Convert Number (YYYYMMDD) to Date Format in Excel
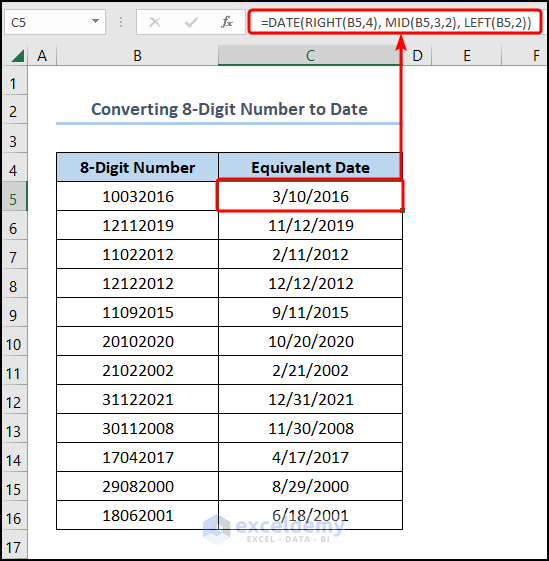
How to Convert 8-Digit Number to Date in Excel
Steps:
- Go to the C5 cell >> enter the following code into the Formula Bar >> press ENTER >> drag the Fill Handle tool to copy the formula to the cells below.
=DATE(RIGHT(B5,4), MID(B5,3,2), LEFT(B5,2))
- RIGHT(B5,4) → returns the specified number of characters from the end of a string. Here, the B5 cell is the text argument whereas 4 is the num_chars argument such that the function returns the 2 characters from the right side.
- Output → “2016”
- MID(B5,3,2) → returns the characters from the middle of a text string, given the starting position and length. Here, the B5 cell is the text argument, 3 is the start_num argument, and 2 is the num_chars argument such that the function returns the first character from the left side.
- Output → “03”
- LEFT(B5,2) → returns the specified number of characters from the start of a string. Here, the B5 cell is the text argument whereas 2 is the num_chars argument such that the function returns the 2 characters from the left side.
- Output → “10”
- DATE(RIGHT(B5,4), MID(B5,3,2), LEFT(B5,2)) → becomes
- DATE(“2016”, “03”, “10”) → returns number that represents date in Microsoft Excel date-time code. Here, the “2016” is the year argument, next “03” is the month argument, and “10” is the day argument.
- Output → 42439
Note: You can open the Format Cells dialog box by pressing CTRL + 1 and change the cell formatting to date.
Download Practice Workbook
Related Articles:
- How to Convert Text to Date in Excel
- How to Convert Text to Date and Time in Excel
- How to Convert Text Date and Time to Date Format in Excel
- Text Won’t Convert to Date in Excel
<< Go Back to Convert to Date | Date-Time in Excel | Learn Excel
Get FREE Advanced Excel Exercises with Solutions!
