In this article, we will learn to save a worksheet in Excel. Generally, we can save an Excel workbook very easily. But to save a single worksheet in Excel, we need to follow a different method. Today, we will demonstrate 2 handy approaches. Using these methods, you can easily save a worksheet in Excel. So, without any delay, let’s start the discussion.
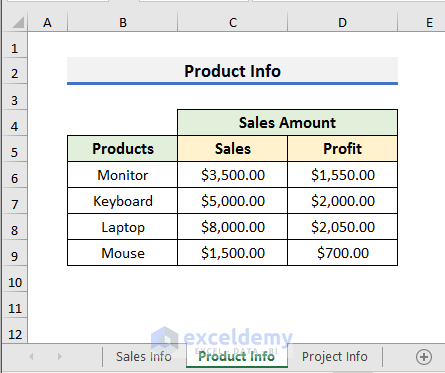
To explain the methods, we will use a workbook that contains three worksheets. These worksheets contain information about the Sales, Product, and Project info of a company. We will try to save a single sheet from these sheets in the following methods.

1. Using Context Menu to Save a Worksheet in Excel
In the first approach, we will use the Context Menu to save a worksheet in Excel. This is a simple and easy process. Let’s follow the steps below to learn the technique.
STEPS:
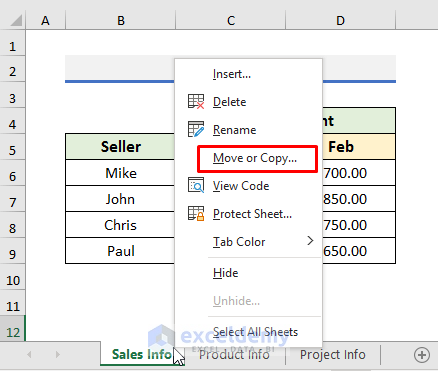
- First of all, right–click on the sheet name in the Sheet Tab bar. A Context Menu will appear.
- Secondly, select Move or Copy from the Context Menu. It will open the Move or Copy dialog box.
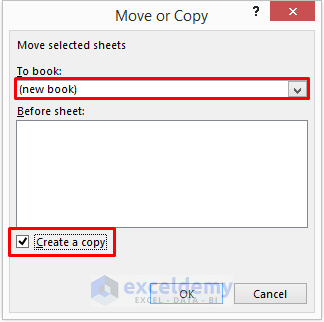
- After that, select ‘(new workbook)’ in the ‘To book’ box and check ‘Create a copy’ in the Move or Copy dialog box.
- Click OK to proceed.
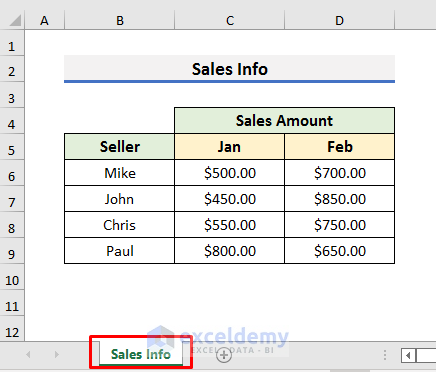
- As a result, you will see the desired worksheet in a new workbook.
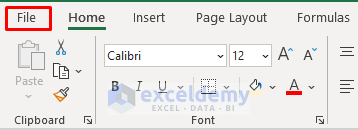
- In the following step, click on the File tab of the new workbook.
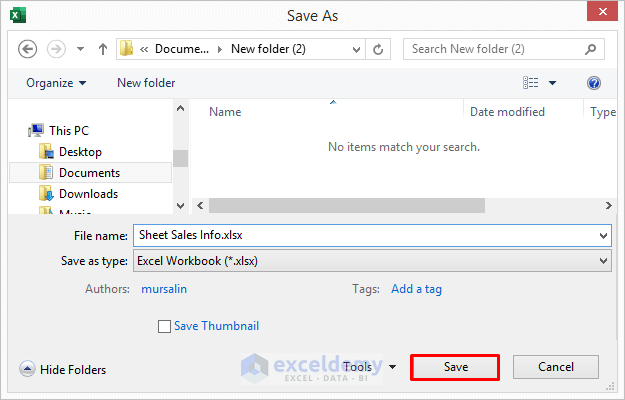
- Now, select Save As and then, select Browse. It will open the Save As dialog box.

- Finally, in the Save As dialog box, type the file name and click on Save.
- Alternatively, you can save the file by pressing Ctrl + S on the keyboard.
- It will open a dialog box. Type the name of the file and click on Save to proceed.
2. Applying VBA for Saving a Worksheet
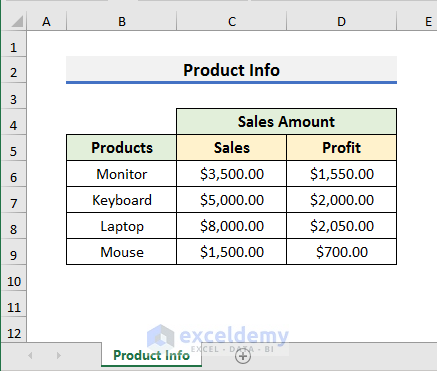
Another way to save a worksheet in Excel is to use VBA. VBA lets us perform many long tasks within seconds. Here, we will use a VBA code that will keep the desired worksheet and delete all other sheets from the workbook. Again, we will use the previous workbook to explain the steps. But we will save the Product Info sheet.
So, without further ado, let’s observe the steps below.
STEPS:
- In the first place, go to the Developer tab and select Visual Basic. It will open the Visual Basic window.
- Alternatively, you can press Alt + F11 to open the Visual Basic window.

- In the Visual Basic window, select Insert and then, select Module.
- The Module window will appear.

- After that, type the code in the Module window:
Sub Delete_Others_and_Save_a_Worksheet()
Dim SaveWkS As Worksheet
For Each SaveWkS In Application.ActiveWorkbook.Worksheets
If SaveWkS.Name <> "Product Info" Then
    SaveWkS.Delete
End If
Next
    Application.DisplayAlerts = True
    Application.ScreenUpdating = True
End Sub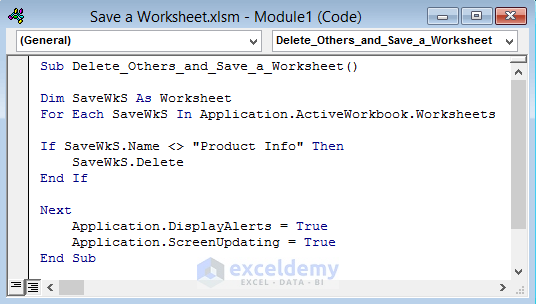
Here, the code will delete all other sheets except the Product Info sheet. In your case, write the name of your worksheet that you want to save in place of Product Info in the above code.
- In the following step, press Ctrl + S to save the code.
- After saving the code, hit the F5 key to run the code.
- After running the code, a warning message will pop up.
- Click Delete to delete other sheets one by one.

- After deleting all other sheets, the workbook will contain the desired worksheet mentioned in the VBA code.
- Close the Visual Basic window to proceed.
- Finally, press Ctrl + S to save the single worksheet.
Read More: How to Save Multiple Sheets in Excel
How to Save a Workbook in Excel
Saving a workbook in Excel is very simple and straightforward. Follow the steps below to know how you can save a workbook in Excel.
STEPS:
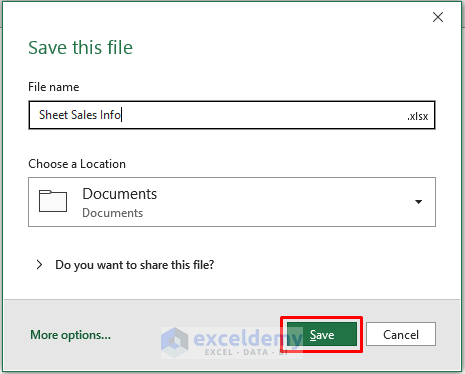
- Firstly, click on the Save icon on the right–top of the screen or press Ctrl + S on the keyboard to open the ‘Save this file’ dialog box.

- In the ‘Save this file’ dialog box, type a name and choose a location to save the workbook.
- Then, click Save to proceed.

- Alternatively, you can save the workbook using the File tab in Excel.
- For that purpose, click on the File tab in the ribbon.

- In the next step, click on Save As and then, select This PC to save the workbook on your computer. You can also save the file online by using any drive.
- Now, choose the file location. Here, we want to save the workbook in the Documents folder.
- After that, type the file name and choose the file type.
- Finally, click on Save.

How to Use Excel File Extensions to Save a Workbook
Generally, Excel saves a file as an Excel Workbook (.xlsx). But you can save the file in other formats too. People normally save it in other formats to open the file with other applications.
The most commonly used file types in Excel are discussed below.
- Excel Workbook (*.xlsx): It’s been the default file extension for Excel since 2007.
- Excel Macro-Enabled Workbook (*.xlsm): It contains Excel files with macros. You must apply this format while working with macros.
- CSV (*.csv): This is called comma delimited text file. It is often used to import/export data.
- Excel 97-2003 Workbook (*.xls): Files from Excel 2003 and older use this format.
- Web Page (*.html): In this format, the file is saved as a folder and contains the necessary files and all images.
- Excel Template (*.xltx): Mainly, files with templates are saved in this format.

There are also other file extensions in Excel. You can use the extension according to your need to save a workbook in Excel.
Download Practice Book
Download the practice book here.
Conclusion
In this article, we have demonstrated 2 handy methods to Save a Worksheet in Excel. Here, we have also discussed the way to save a workbook and different file extensions available in Excel. I hope these methods will help you to perform your tasks easily. Furthermore, we have also added the practice book at the beginning of the article. To test your skills, you can download it to exercise.
Related Articles
- How to Save a Worksheet in Excel to a Separate File
- How to Save a Copy of an Excel File
- How to Save Multiple Tabs in Excel as Separate Files
- How to Save Multiple Excel Sheets as One File
- How to Save Excel File with Password
<< Go Back to How to Save Excel File | Excel Files | Learn Excel
Get FREE Advanced Excel Exercises with Solutions!
