In this article, we will comprehensively discuss how to save a workbook in Excel.
Saving your file is essential if you don’t want to lose your data when you close it. Although there are ways to recover unsaved files, it’s much easier, safer and convenient to just save them.
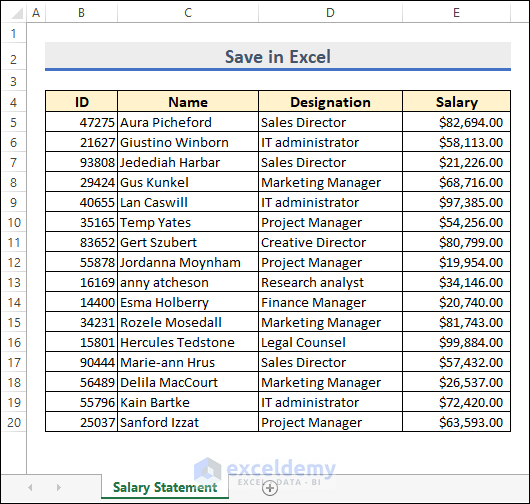
Download Practice Workbook
How to Save an Excel File in XLSX Format
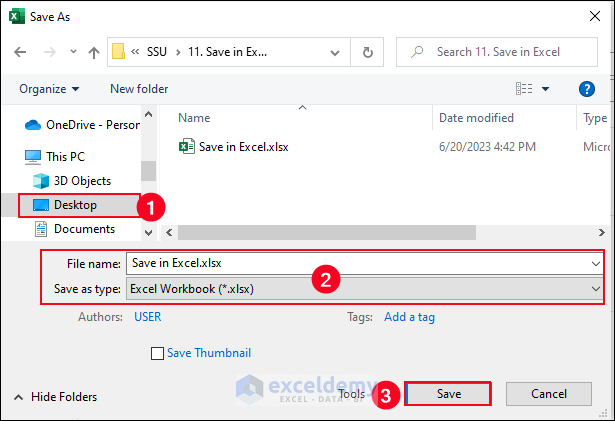
Most Excel files are saved with the default *.xlsx extension. Let’s save a file in this format on the Desktop.
Steps:
- Open an Excel workbook.
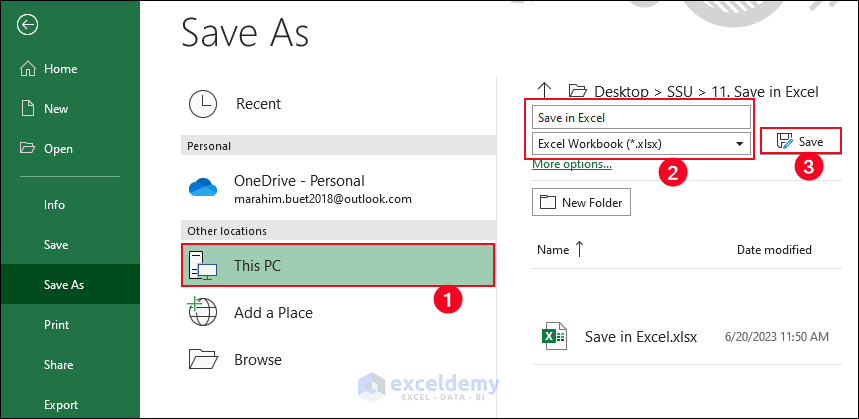
- Go to the File tab >> Select Save As >> Choose Browse.
- Select the Desktop as the location to save the file.
- Enter your desired file name in the File name field.
- Select Excel Workbook(*.xlsx) from the Save as type drop-down list.
- Click Save.
The Excel file will be saved as type xlsx on the Desktop.
How to Save a Workbook in Excel
Now we’ll save an Excel workbook in 5 different ways: using the File menu, using keyboard shortcuts, via the Quick Access Toolbar, as a PDF file, and by applying VBA code.
Method 1 – Using the File Menu
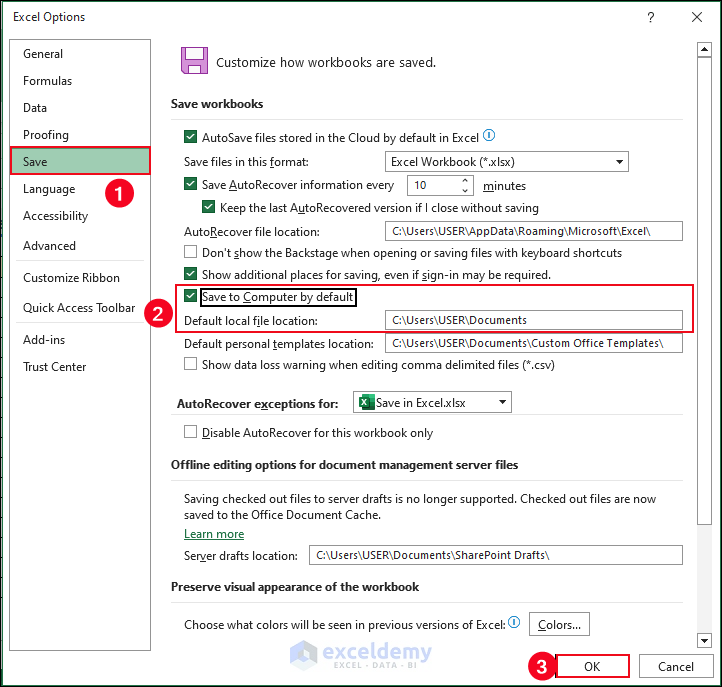
Step 1 – Change the Default Save Location
- Press Alt + F + T.
- In the Excel Options dialog box, choose Save.
- Check the Save to Computer by default option and set the default location.
- Click OK.
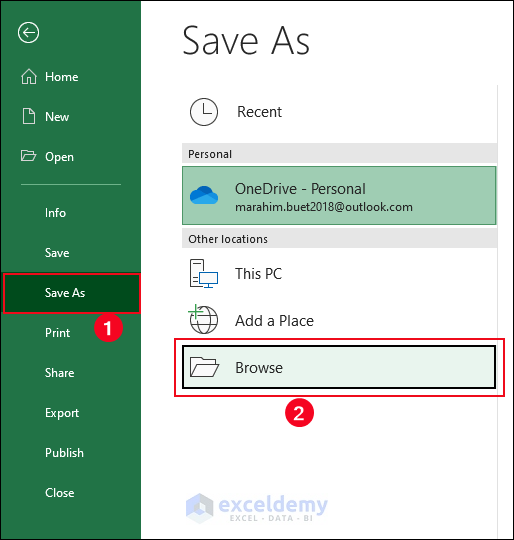
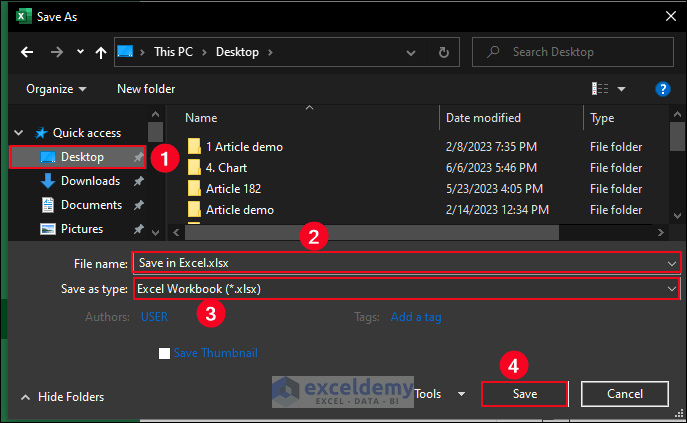
Step 2 – Open the Save As Option
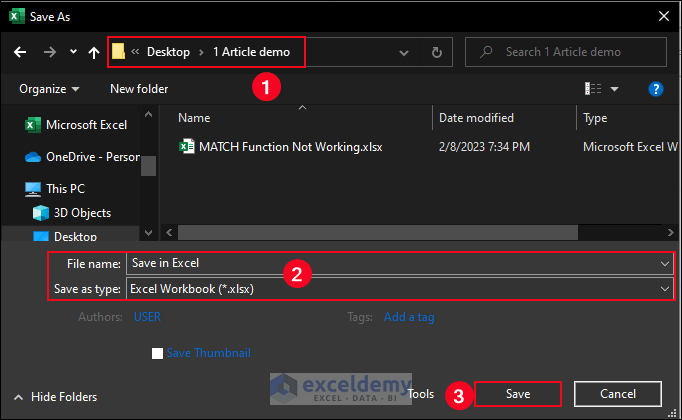
- Press Alt + F + A + C to pop up a location where you want to save your Excel file.
- Select This PC as location.
- Set the file type to .xlsx extension.
- Click Save.
Your Excel workbook is saved.
Method 2 – Using Keyboard Shortcuts
We saved our Excel workbook in a specific location in the previous method. To save your current Excel file in the same location and with the same file extension after modifying the data, simply press Ctrl + S.
To save your Excel file to another location, press F12 to pop up the Save As window, then change the location like in the previous method.
Method 3 – Using the Quick Access Toolbar
Another way to save your Excel file is by using the Quick Access Toolbar feature.
Steps:
- Click on the Quick Access Toolbar.
- Select More Commands.
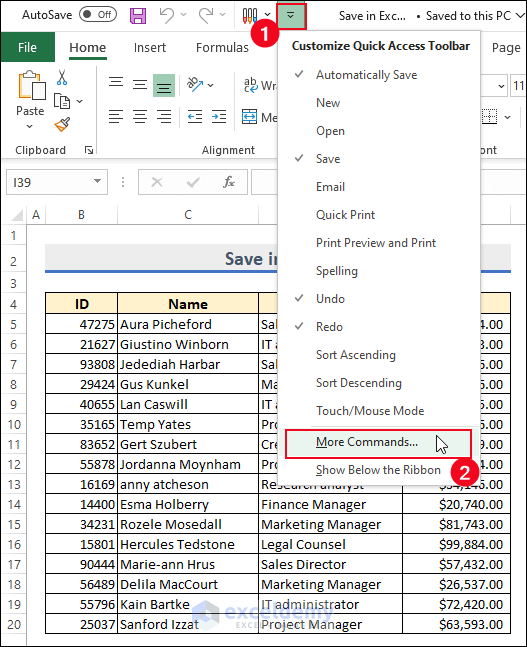
The Excel Options dialog box pops up.
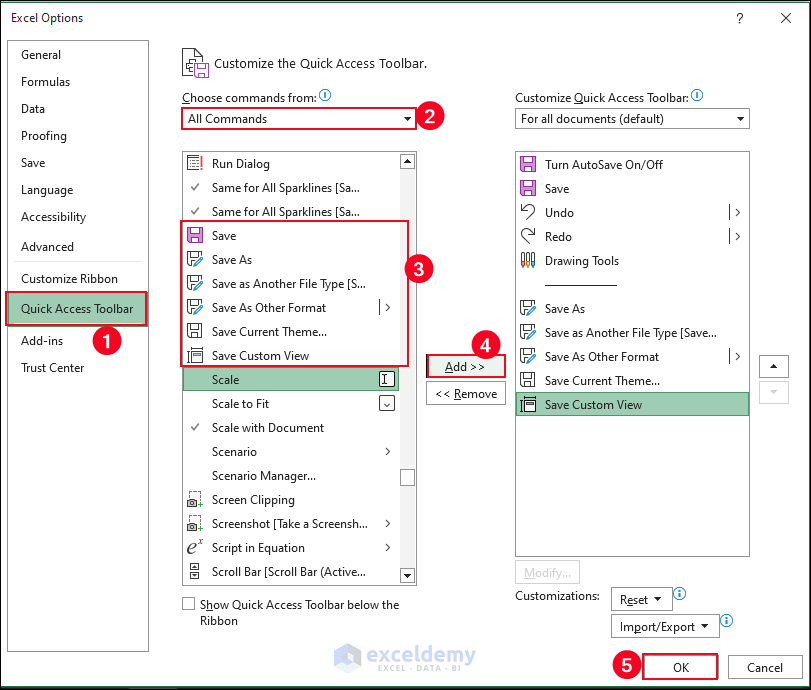
- Select All Commands from the Choose commands from drop-down list.
- Scroll down and select the options to insert into the Quick Access Toolbar.
- Click Save.
- Click on Add.
- Similarly add other options as desired.
- Click OK.
Now the Save options are available on the Quick Access Toolbar.
- To save your Excel file, simply click on the Save As icon.
Method 4 – Save an Excel Workbook as PDF
Steps:
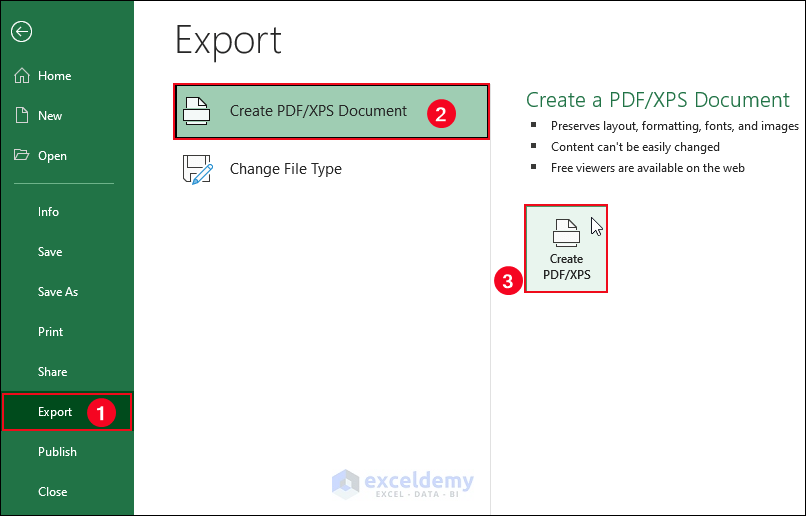
- Go to the File tab.
- Select Export >> Create PDF/XPS Document >> Create PDF/XPS.
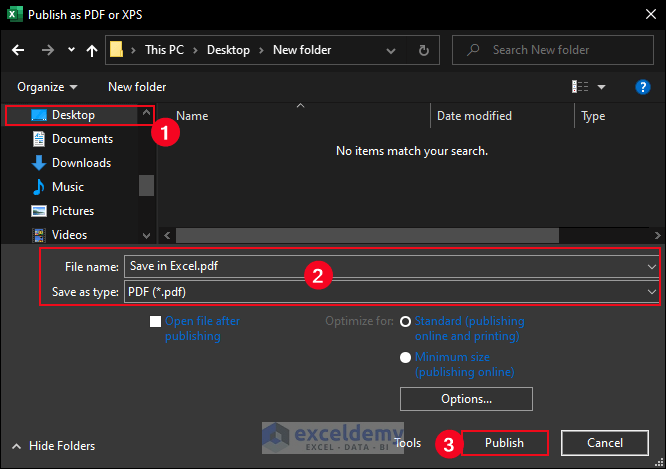
- Select the Desktop as the location.
- Enter your desired file name in the File name field.
- Select PDF(*.pdf) from the Save as type drop-down list.
- Click Publish.
The Excel file is saved with *.pdf extension.
Method 5 – Running VBA Code
In our last method, we’ll apply VBA code to save our workbook in Excel.
Steps:
- Press Alt + F11 to pop up the Microsoft Visual Basic Applications window.
- Select Module from the Insert tab to open a Module for inserting the VBA code.
- Paste the below VBA code in that Module.
Sub Delete_Others_and_Save_a_Worksheet()
Dim SaveWS As Worksheet
For Each SaveWS In Application.ActiveWorkbook.Worksheets
If SaveWS.Name <> "Salary Statement" Then
	SaveWS.Delete
End If
Next
	Application.DisplayAlerts = True
	Application.ScreenUpdating = True
End Sub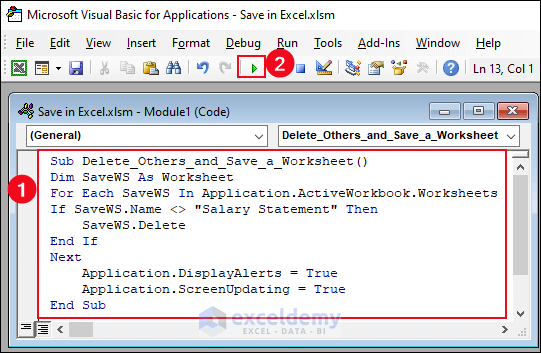
- Save the code.
- Press F5 to run the macro..
After running the Macro, a warning message will pop up.
- Click Delete to delete other sheets one by one.

After deleting all the other sheets, the workbook will only contain the desired worksheet specified in the VBA code.
- Press Ctrl + S to save the single worksheet.
How to AutoSave an Excel File
Excel provides an automated method of saving files.
Steps:
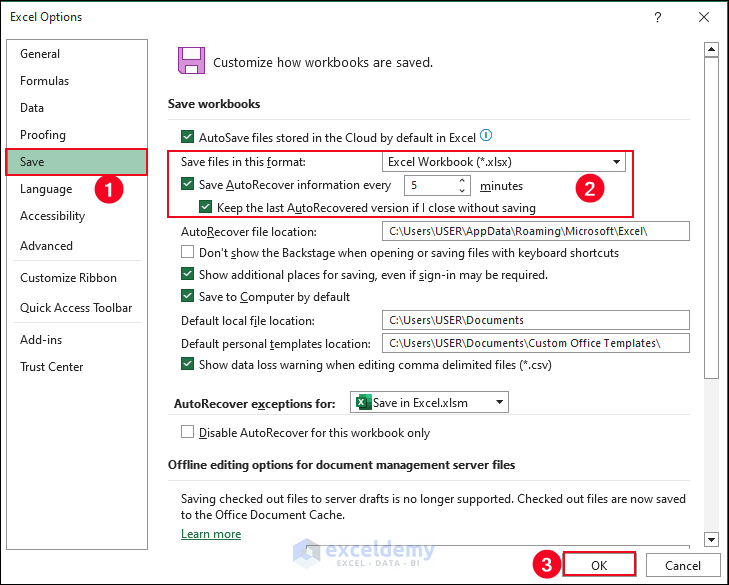
- Select the File tab >> Options.
The Excel Options dialog box pops up.
- Enter 5 minutes for the Save AutoRecover information option.
- Click OK.
- If you are saving the file to the cloud, the AutoSave feature will activate automatically. However if the file is stored locally, the AutoSave feature can be manually enabled/disabled by toggling it ON/OFF on the option located in the top left corner of the Title bar.

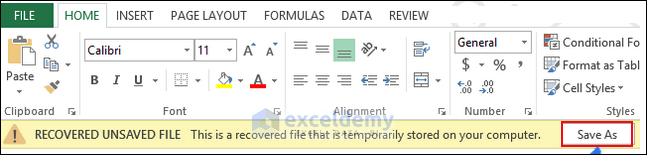
How to Recover Unsaved Excel Files
If Excel crashes while you have unsaved edits, don’t worry, your unsaved work can be recovered!
Steps:
- Go to the File tab.
- Select Open >> Recent >> Recover Unsaved Workbooks.
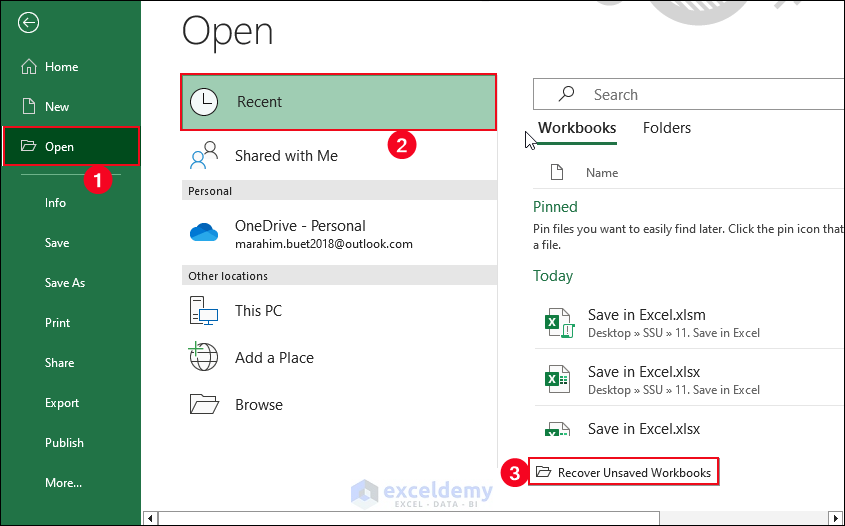
Note: Alternatively, go to the File tab >> Info >> Manage Workbook >> Recover Unsaved Workbooks.
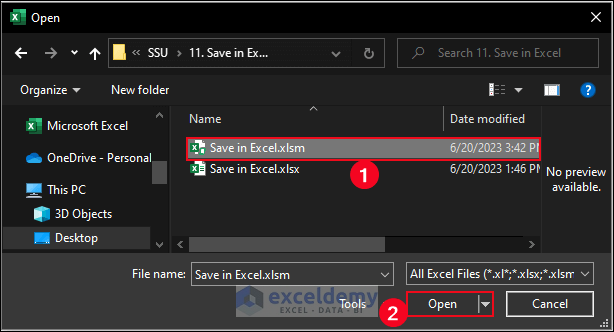
The Open dialog box will appear.
- Select the necessary file and click Open.
The Excel file will open and the program will guide you to save the file.
- Click on the Save As option in the yellow bar above your worksheet and save the document to your desired location.
How to Save an Excel 97-2003 Workbook
Older versions of Excel saved files with the .xls extension. We can still save Excel files in this format, although some features may be lost.
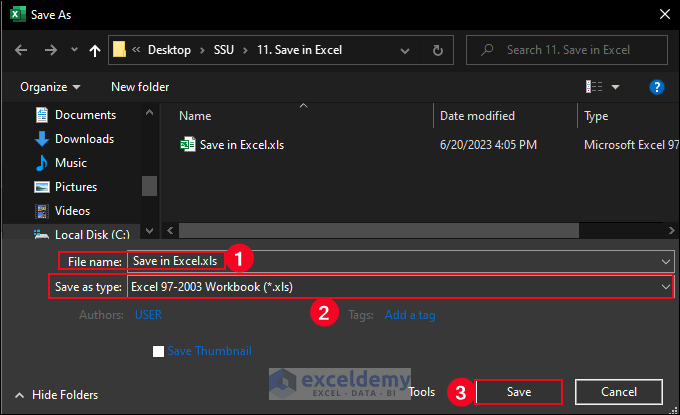
Steps:
- Press Alt + F + A + O.
The Save As dialog box pops up.
- Enter your desired file name in the File name field.
- Choose Excel 97-2003 Workbook(*.xls) from the Save as type drop-down list.
- Click Save.
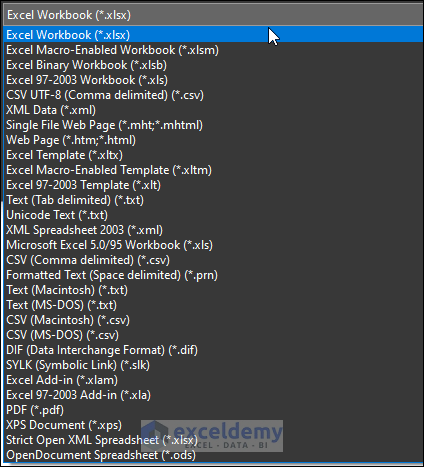
Excel File Extensions to Save a Workbook
Generally, Excel saves a file as type Excel Workbook (.xlsx). But you can save the file in other formats too, and may need to in order to open the file with other applications.
The most commonly used file types in Excel are:
- Excel Workbook (*.xlsx): The default file extension for Excel since 2007.
- Excel Macro-Enabled Workbook (*.xlsm): Contains macros. You must save in this format if your workbook contains macros.
- CSV (*.csv): This format (Comma Separated Values) is a lightweight file type often used to import/export data.
- Excel 97-2003 Workbook (*.xls): Files from Excel 2003 and older use this format.
- Web Page (*.html): In this format, the file is saved as a folder containing the necessary files and all images.
- Excel Template (*.xltx): Mainly, files are saved as templates in this format.
There are just some of the options available in the Save as type drop-down list.
Things to Remember
- Use Ctrl + S to save your Excel file quickly while working (after making edits, deleting data and so on).
- To bring up the Save As dialog box for more complex saves, such as changing the location or file type, press F12.
Frequently Asked Questions
1. Can I save my Excel file with a different name or in a different location?
Answer: Yes, by choosing the “Save As” option instead of “Save“. This will open a dialog box where you can specify the new file name and the location.
2. Can I recover a previously saved version of my Excel file?
Answer: Yes, Excel provides a feature called “AutoRecover” that allows you to recover previously saved versions of your file in case of an unexpected shutdown or crash. When you reopen Excel after a crash, it automatically opens the Document Recovery pane, where you can choose to recover your unsaved file or the last autosaved version.
3. Can I save specific worksheets or a range of cells within an Excel file?
Answer: Yes, by copying them to a new workbook. To save specific worksheets, right-click on the worksheet tab and select “Move or Copy.” In the dialog box, choose the “Create a copy” option and select the desired location to save the copied worksheet. To save a range of cells, select the cells you want to save, right-click, choose “Copy,” and then paste the cells into a new Excel file or another application.
Save in Excel: Knowledge Hub
<< Go Back to Excel Files | Learn Excel
Get FREE Advanced Excel Exercises with Solutions!
