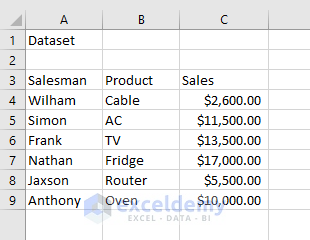
The following dataset is saved in a CSV file. Here, we’ll demonstrate easy and effective solutions to save CSV files and see the desired changes.
Solution 1: Save as Excel CSV UTF-8 File to See Changes
STEPS:
- Go to File.
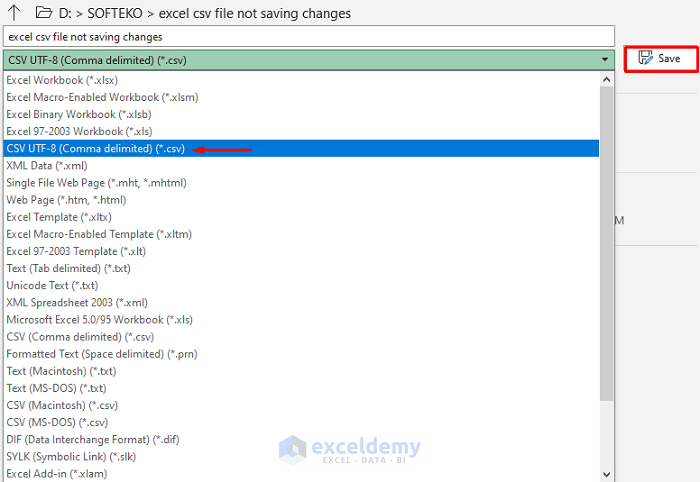
- Select Save As in the File window.

- Tin the Save As window, select CSV UTF-8 from the drop-down options.
- Press Save and you’ll get the CSV file you desire.
Read More: How to Save Excel File as CSV
Solution 2: Save Changes Through CSV UTF-16 File
STEPS:
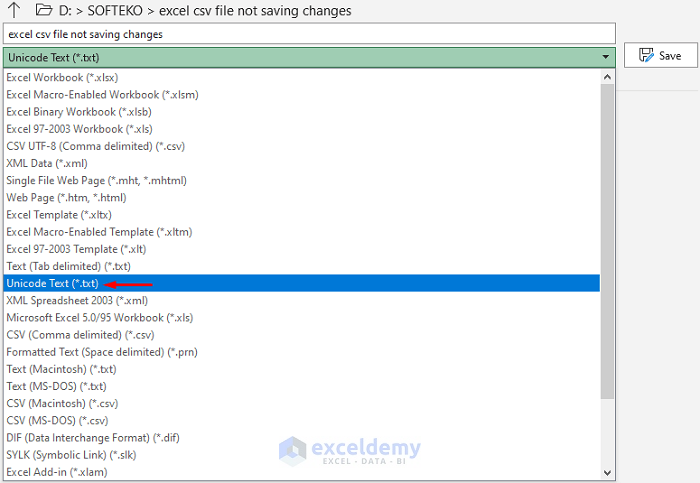
- Select File ➤ Save As.
- Choose Unicode Text from the drop-down list.
- Press Save. You’ll get a .txt file.
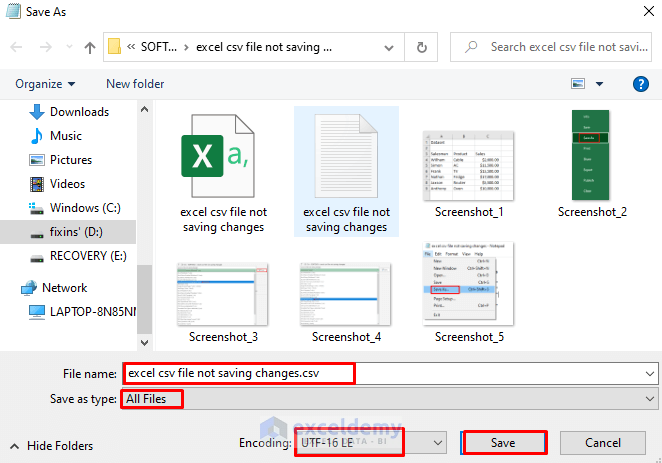
- Open the text file and click Save As.
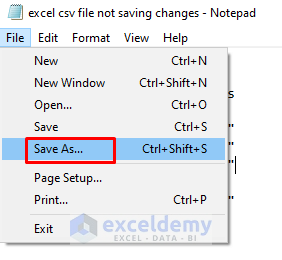
- A dialog box will pop out.
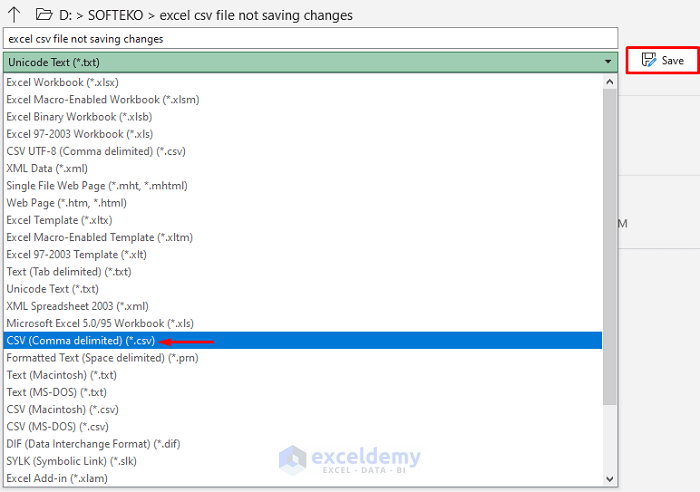
- Type .csv at the end of the file name and choose All Files in the Save as type.
- Select UTF-16 LE in the Encoding field and press Save.
- It’ll return a CSV file that correctly contains the special characters.
Solution 3: Specify a Comma as a Separator in Excel CSV File
STEPS:
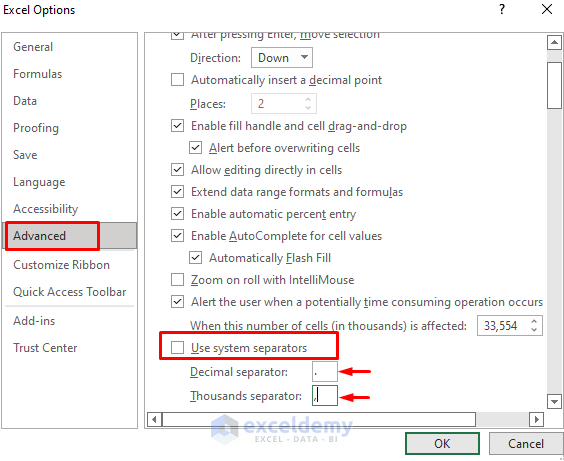
- Go to File ➤ Options.
- The Excel Options window will appear.
- Uncheck the box for Use system separators in the Advanced tab.
- Type Dot (.) as the Decimal separator and Comma (,) as the Thousands separator.
- Press OK.
- Save the file in CSV. See the below picture to understand better.
- You’ll get the expected outcome.
Read More: How to Save Multiple Sheets in Excel to CSV
Solution 4: Open a CSV File Through Text Editor
To view a CSV File with the modifications, open the file through a Text Editor application such as Notepad. This way, you’ll get all the changes to the CSV file.
Solution 5: Use Excel Power Query to Import CSV File
STEPS:
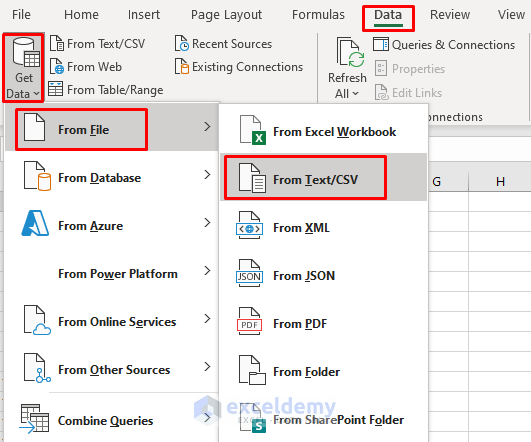
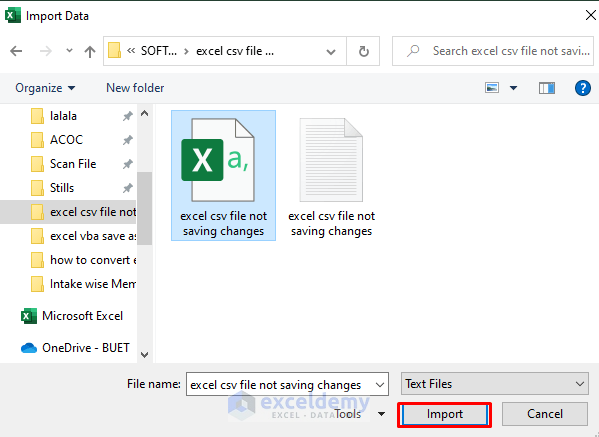
- Go to the Data tab first.
- Choose the Get Data ➤ From File ➤ From Text/CSV.
- As a result, a dialog box will emerge.
- Select the desired CSV file and press Import.
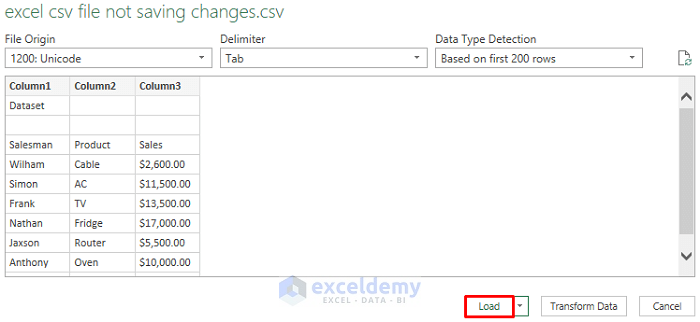
- Press Load in the pop-out dialog box.
- It’ll return a new worksheet containing the CSV file data.
Read More: How to Save Excel as PDF
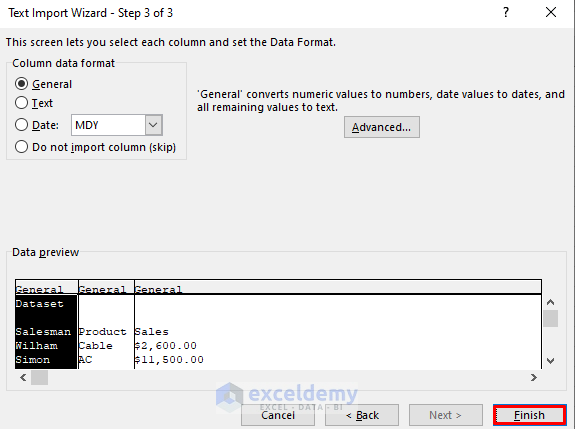
Solution 6: Save a File Using Text Import Wizard
STEPS:
- Select Options in the File window.
- In the pop-out dialog box, go to the Data tab.
- Check the box for From Text (Legacy).
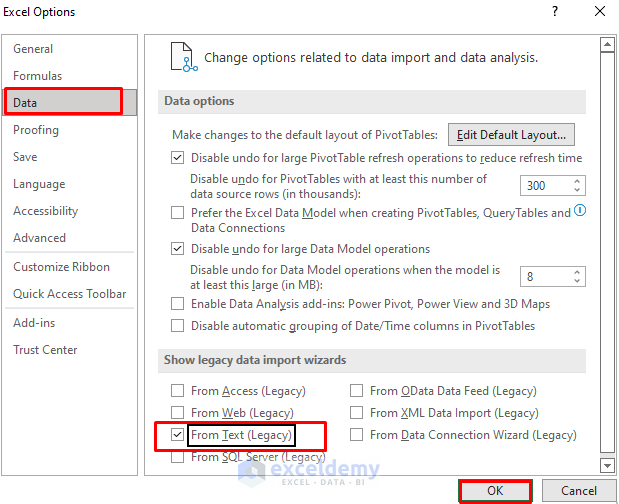
- Press OK.
- Open a .txt file.
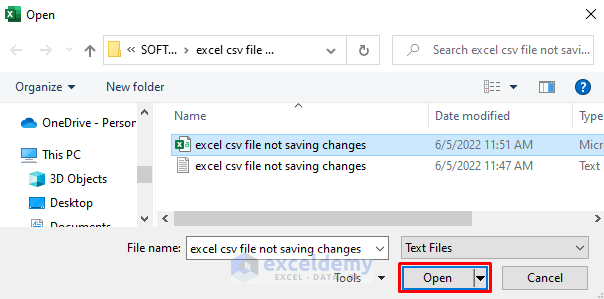
- It’ll return a dialog box, as displayed below.
- Press Next.

- Press Next after choosing Tab as Delimiters.
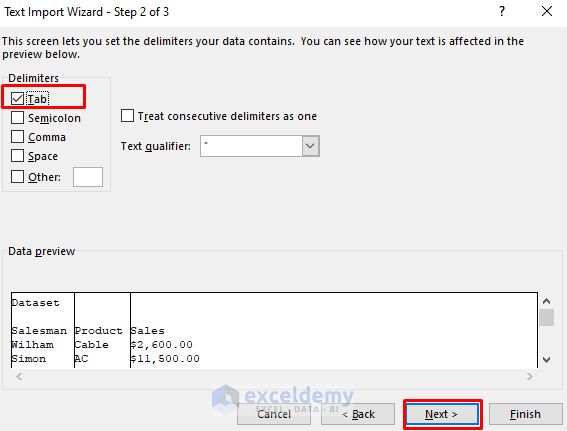
- Press Finish and you’ll get your desired file in Excel.
Download the Practice Workbook
Download the following workbook to practice.
Related Article
- How to Save One Sheet in Excel as PDF
- [Fixed!] Why Is Excel Not Saving My Formatting?
- [Fixed!] Document Not Saved Excel Network Drive
<< Go Back to How to Save Excel File | Excel Files | Learn Excel
Get FREE Advanced Excel Exercises with Solutions!
