This article illustrates how to protect and share a workbook in Excel in 2 ways. If you share your workbook, anybody can undo it. Therefore you need to protect the sharing so that only you can decide whether to withhold it. This article shows how you can allow users only to edit your workbook and not allow them to share it. The following picture highlights the purpose of this article. Have a quick look to learn how to do that.
Protect and Share Workbook in Excel: 2 Quick Ways
1. Use the Protect and Share Workbook Feature
You can use the Protect and Share Workbook feature in Excel to do that. Follow the steps below for that.
📌 Steps
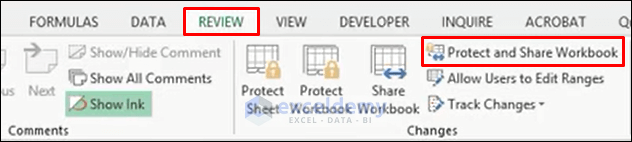
- First, check if your Excel has the Protect and Share Workbook feature in the Review tab as shown in the picture below.
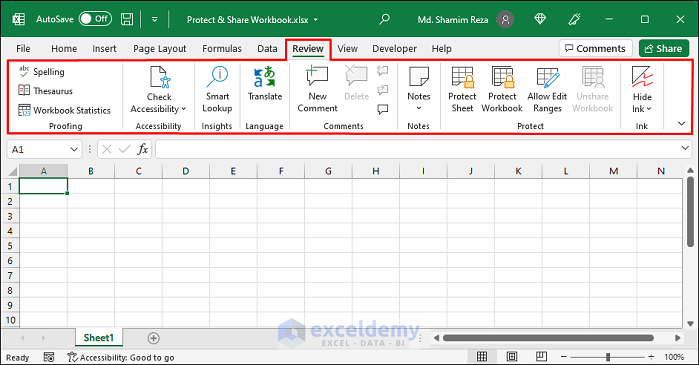
- If it is visible then go to Step 6. Otherwise, the Review tab will look as follows.
- Now, press ALT+F+T to open the Excel Options window. Then, click on the Customize Ribbon tab. Next, expand the Review tab under the Main Tabs. Now, select New Group (Custom) and, then click on Rename at the bottom right corner of the window.
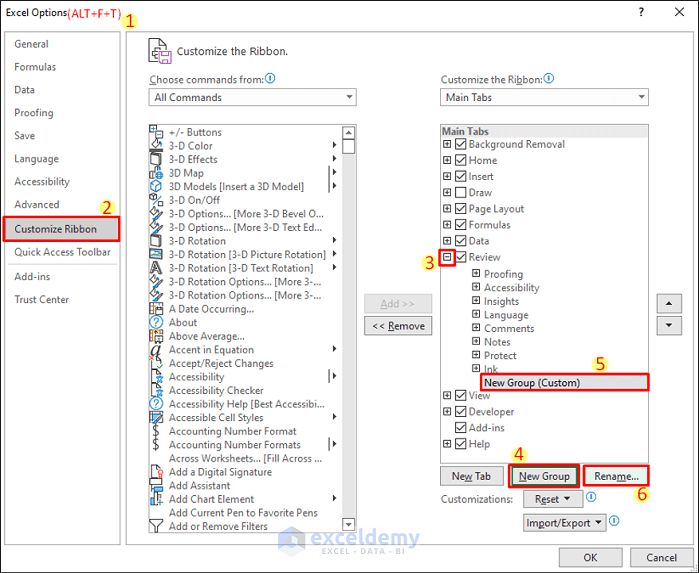
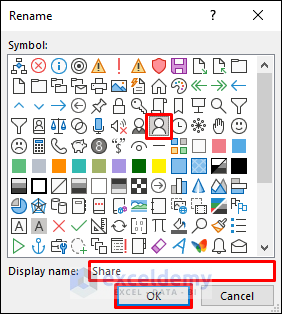
- Then you can select a Symbol for the group contents. Next, change the Display Name as required. Click OK after that.
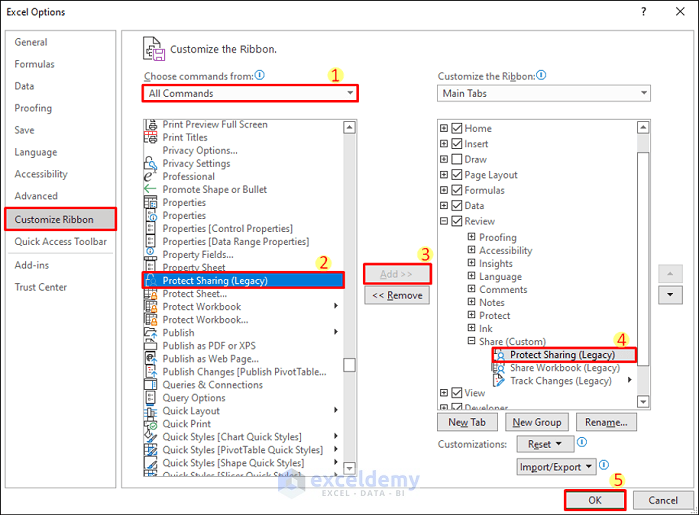
- Now, select All Commands from the ‘Choose commands from’ dropdown list. Then, scroll down and select the Protect Sharing (Legacy) command. Next, click on the Add button. After that, you can add the Share Workbook (Legacy) and Track Changes (Legacy) commands in the same way. Then, select OK. After that, you see those commands added in the Review tab.
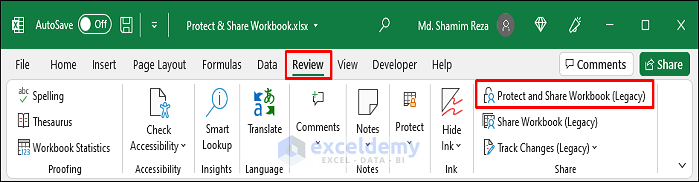
- Now, select Protect and Share Workbook from the Review tab.
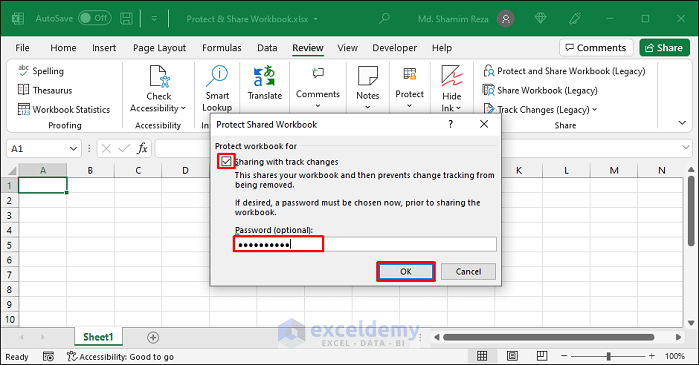
- Then check the checkbox for Sharing with track changes. Next, enter a password. Then, click OK.
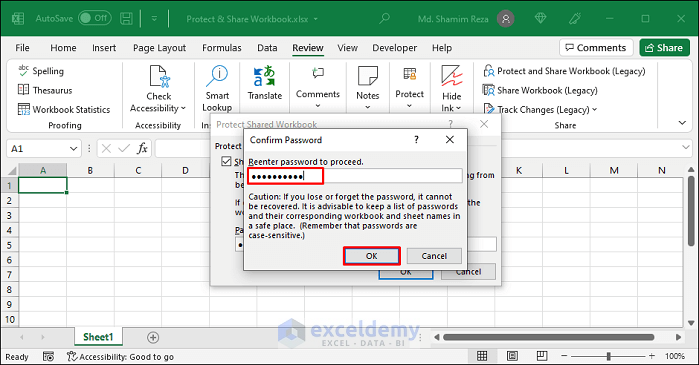
- Next, reenter the password to confirm. Then, select OK.
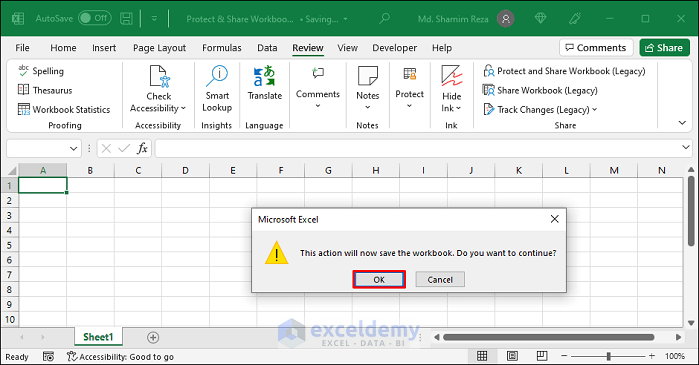
- After that, you will see the following warning. Now, select OK. Then, you will see the word Shared after the workbook name at the top of your Excel window.
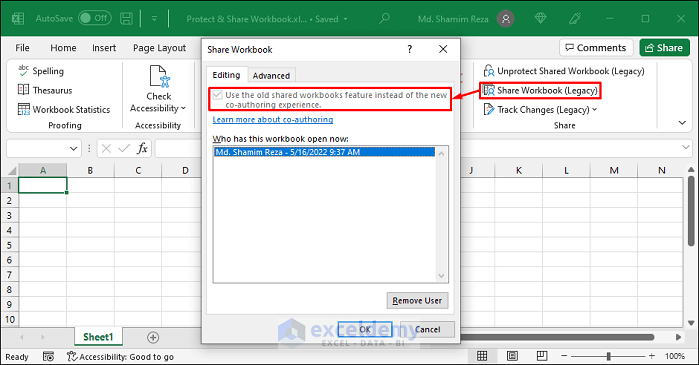
- Now, nobody will be able to change the shared condition of the workbook as the option will become greyed out.
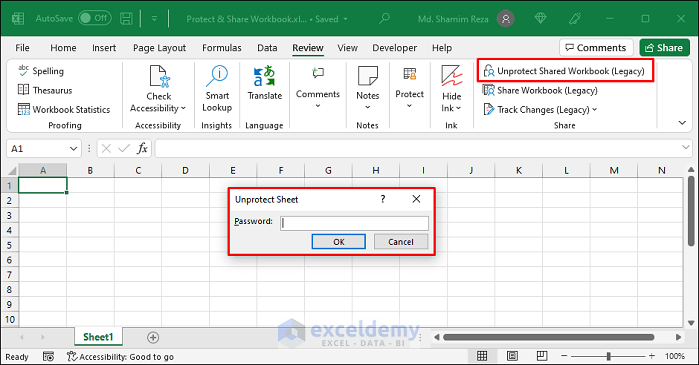
- You can unprotect the workbook by providing the password. Then, you will be able to withhold it.
Read More: How to Protect Excel Workbook from Editing
2. Share a Workbook by Co-Authoring
You can use the Co–Authoring feature in newer Excel versions to allow users to view or edit your workbook. But, they won’t be able to decide whether to share it or not. Follow the steps below to see how to do that.
📌 Steps
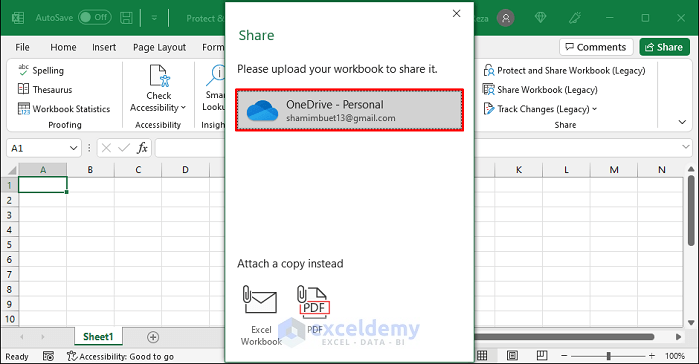
- First, click on the Share icon situated above the upper right corner of the ribbon. Alternatively, you can select File >>Share for that.

- Next, select any server (Onedrive) from the list to upload the workbook so that people can access it.
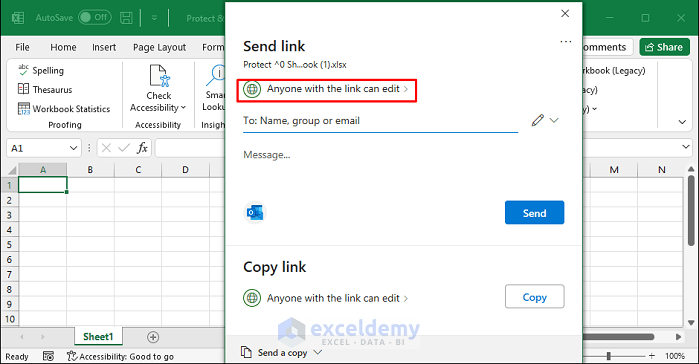
- Then, click on Anyone with the link can edit option.
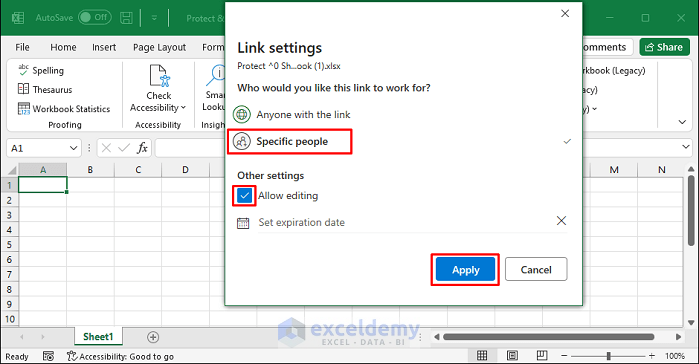
- Next, choose Specific People to allow only the specified users to edit your workbook. After that, select Apply.
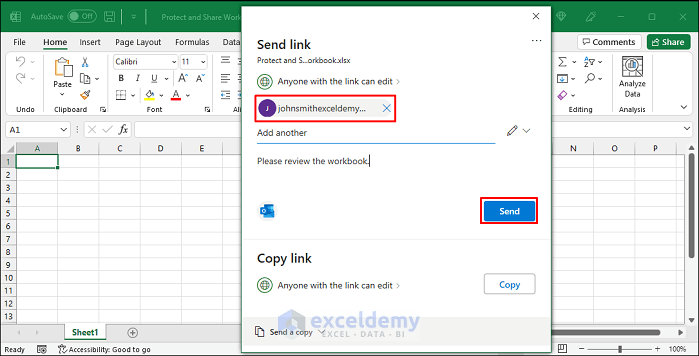
- Now, enter the email addresses of the people with whom you want to share the workbook. Then, click on Send.
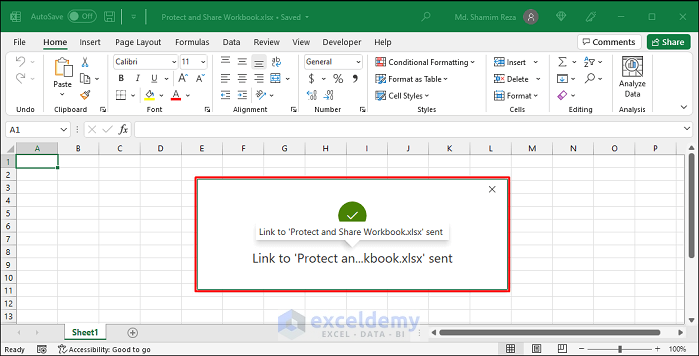
- After that, you will see a confirmation message as follows.
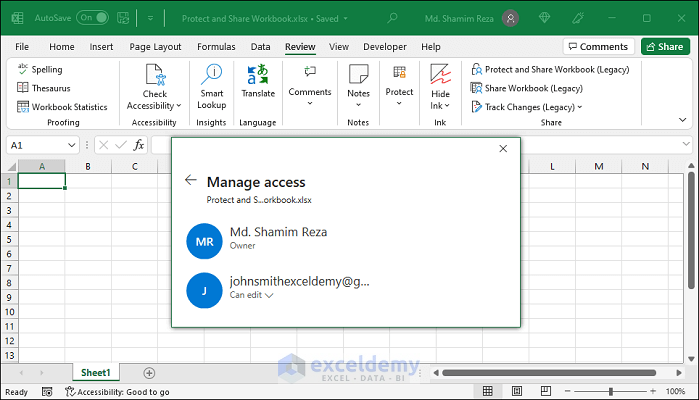
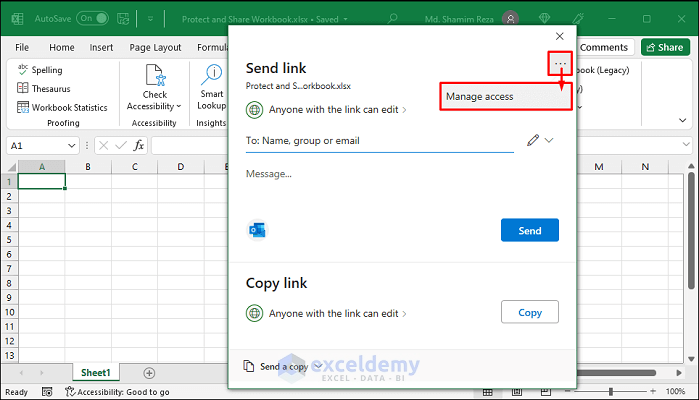
- Now, you can click on the Share icon to open the share window. Next, click on the three dots in the upper right corner. Select Manage access after that.
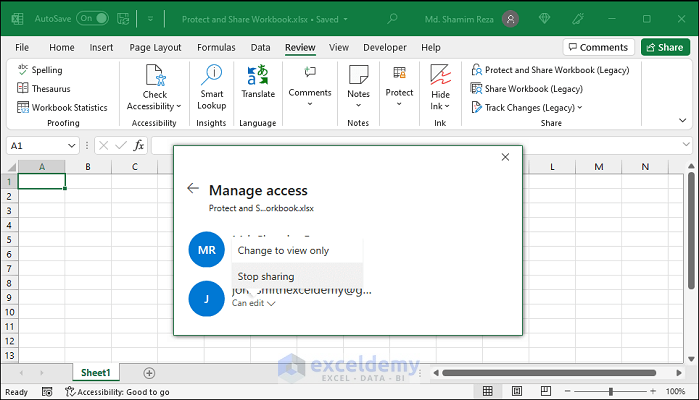
- Now, to change the permission for any particular user, click on the option below the name of the user.

- After that, you can either stop sharing or change the permission to view only.
Read More: How to Mark Workbook as Final in Excel
Things to Remember
- You must use a password to protect the sharing.
- You need to upload the workbook on a server that is accessible to the users you want to share the workbook.
Download Practice Workbook
You can download the practice workbook from the download button below.
Conclusion
Now you know how to protect and share a workbook in Excel. Please let us know if this article has provided you with your desired solution. You can also use the comment section below for further queries or suggestions. Stay with us and keep learning.
Related Articles
- How to Protect Excel File with Password
- [Fixed!] Protect Workbook in Excel Not Working
- Difference Between Protect Sheet and Protect Workbook in MS Excel
<< Go Back to Protect Workbook in Excel | Excel Protect | Learn Excel
Get FREE Advanced Excel Exercises with Solutions!
