For a confidential workbook, we just need to protect it with a password for security purposes. Excel has several ways to do it easily. You can set different kinds of protection in a file according to your needs. In this article, I’ll show 3 quick and effective ways to protect an Excel file with a password.
How to Use Password to Protect Excel Workbook: 3 Ways
Let’s get introduced to our dataset that represents some Salesperson’s Sales for 2021 in different Regions.

1. Use Protect Workbook Command from Review Tab to Protect Excel File with Password
You will get a command named Protect Workbook in the Review ribbon. We can apply it to protect our workbook structure from other users like no one can add, hide, or unhide sheets.
Steps:
- First, click as follows: Review ➤ Protect ➤ Protect Workbook.
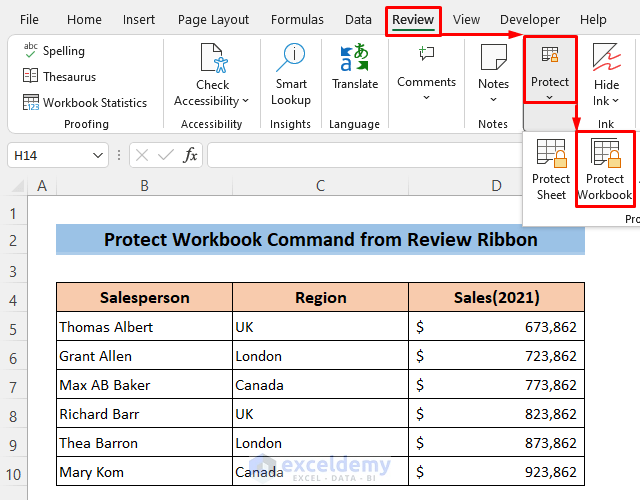
- Next, type a password. I typed 1234.
- Then press OK.

- Finally, Reenter the password and press OK again.
💬 Note: You will get the Windows option available in Excel 2007, 2010 for Windows OS, and 2011, 2016 for Mac OS. Using the Windows option other users can’t move, resize, or close the workbook window, and hide/unhide windows.

Now have a look, these options are unavailable after protecting the Structure.

Read More: How to Protect Excel Workbook from Editing
2. Apply Protect Workbook Command from File Option to Protect Excel File with Password
If you want that no one can open your workbook without a password then it is also possible to do it in Excel. No user will be able to open the workbook without the password.
Steps:
- Click on File beside the Home tab.
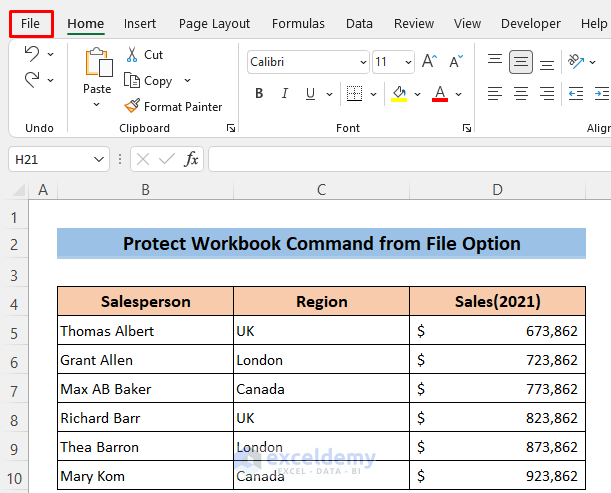
- After appearing in the File menu, click as follows: Info ➤ Protect Workbook ➤ Encrypt with Password.
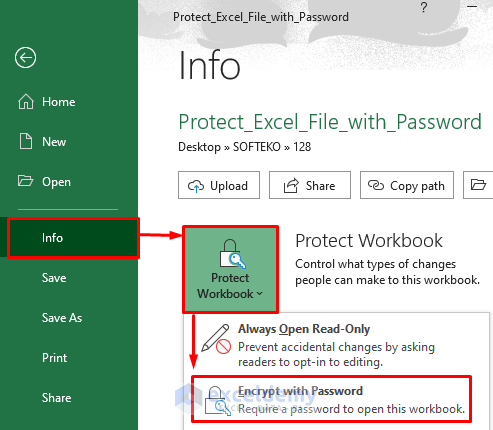
- Give your desired password and press OK.

- Reenter the password and press OK

Now close the file and try to open the file again, it will ask for the password first.

3. Use General Options to Protect Excel File with Password
There is another option in Excel by which we can set passwords to open a file also to modify a file. Or you can use them separately.
Steps:
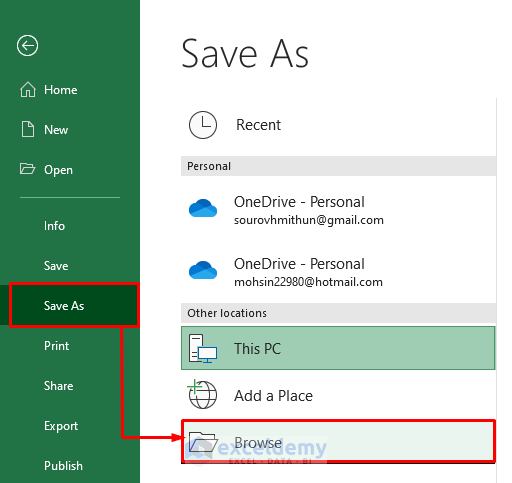
- Click on the File tab.
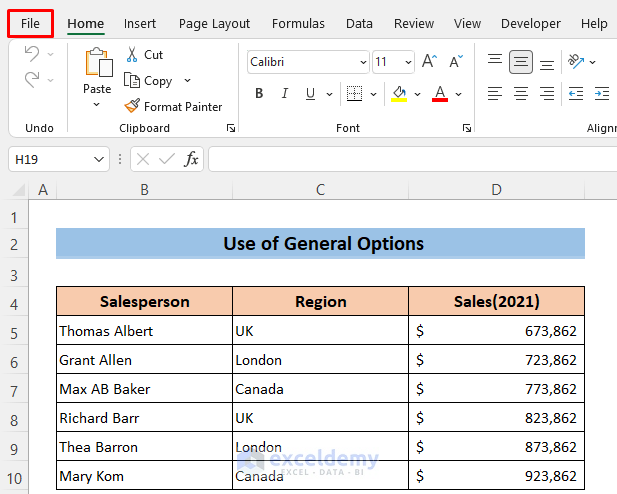
- Next, click Save As ➤ Browse.
Here, a dialog box will open up.
- Then click on Tools.
- Later, select General Options from the drop-down

- Now set a password to open the file.
- After that set another password to modify the file. I typed 1234 in both fields.
- Next, press OK.

- Type the password again to proceed and press OK.

- Then Reenter the password to modify.
- Finally, just press OK to finish.

Now close the workbook and open it again, it will ask for the password.
- Give the password to open the file.

- Next, it will ask for the Password to modify.

Read More: Protect and Share Excel Workbook
Caution
- There is no way to recover the Excel password. So keep your password written down in a safe place otherwise you may lose your important file if you can’t remember the password.
Download Practice Workbook
You can download the free Excel template from here and practice independently.
The password for the file is- 1234.
Conclusion
I hope the procedures described above will be good enough to protect an Excel file with a password. Feel free to ask any question in the comment section and please give me feedback.
Related Articles
- How to Mark Workbook as Final in Excel
- [Fixed!] Protect Workbook in Excel Not Working
- Difference Between Protect Sheet and Protect Workbook in MS Excel
- How to Protect Excel File with Password
<< Go Back to Protect Workbook in Excel | Excel Protect | Learn Excel
Get FREE Advanced Excel Exercises with Solutions!
