Method 1 – Use the ‘Open as Read-Only’ Feature to Protect a Workbook from Editing
Steps:
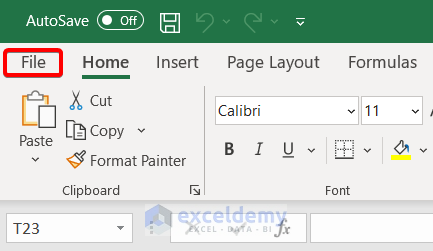
- Go to the File tab.
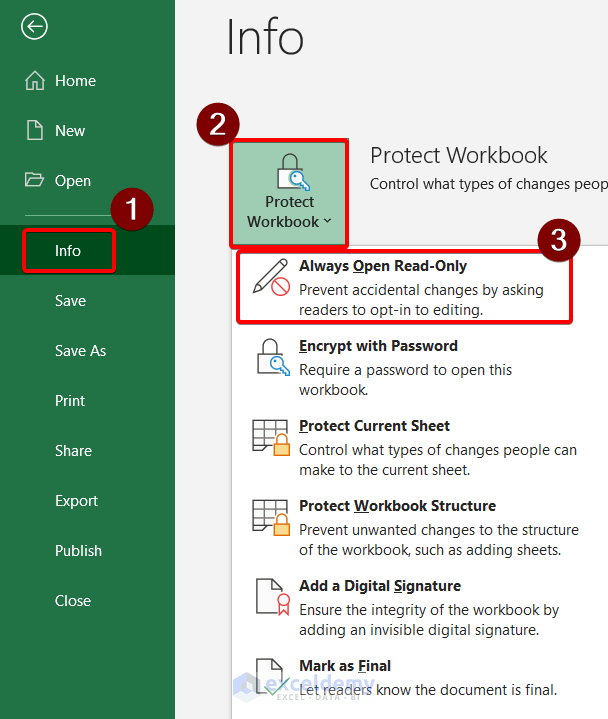
- Go to Info ➤ Protect Workbook ➤ Always Open Read-Only.
This will shift your Excel workbook to Read-Only mode. When someone else will try to open the Excel file, it will show the following dialog box:
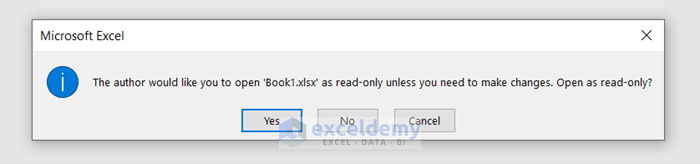
Hitting Yes to proceed with the Read-Only mode. But hitting No will enable editing the workbook.
Read More: Protect and Share Excel Workbook
Method 2 – Encrypt with a Password to Protect an Excel Workbook from Editing
Steps:
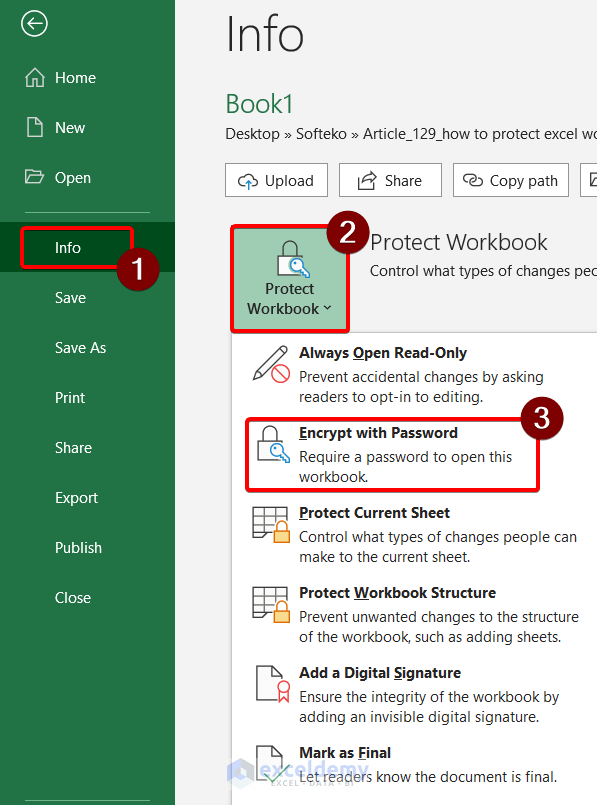
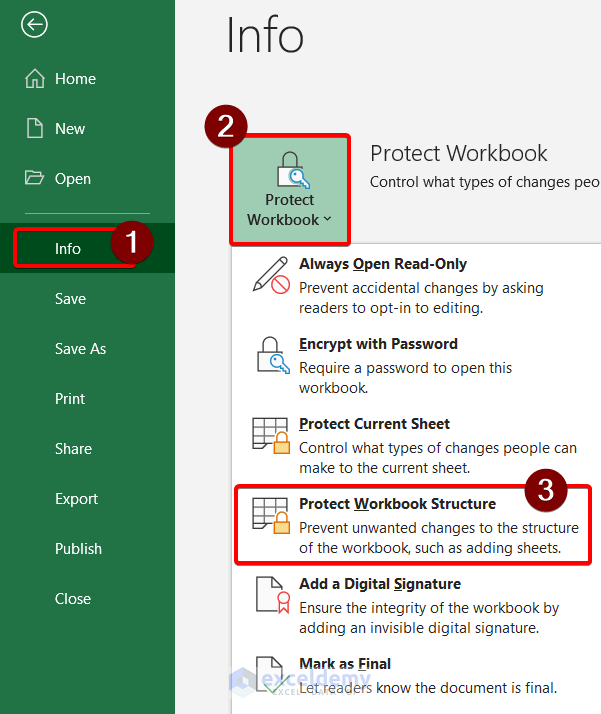
- Go to File.
Go to Info ➤ Protect Workbook ➤ Encrypt with Password.
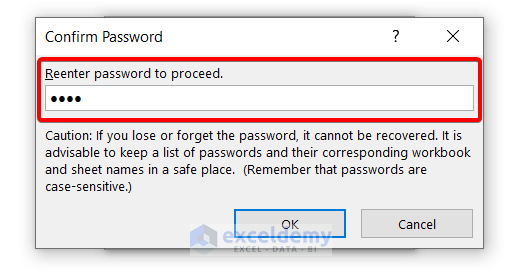
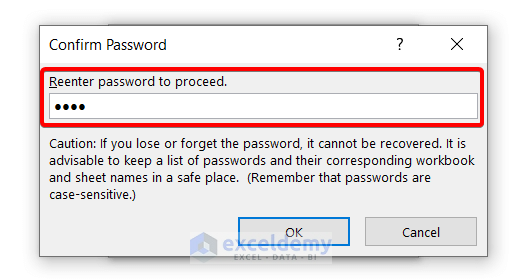
- Insert a password in the Encrypt Document dialog box.

- Re-enter the password in the Confirm Password dialog box.
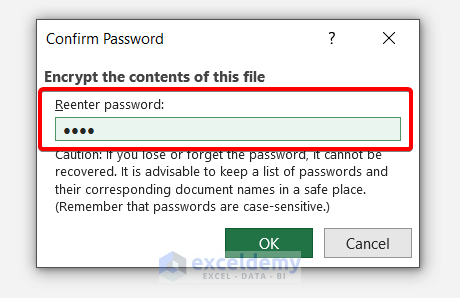
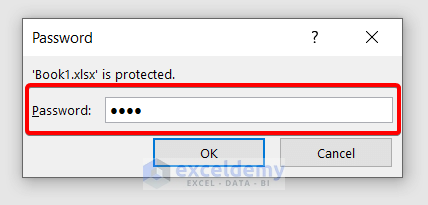
When you re-open the Excel workbook, you must insert a password in the Password dialog box.
Method 3 – Use a Protect Workbook Structure to Protect a Workbook
Steps:
- Go to File.
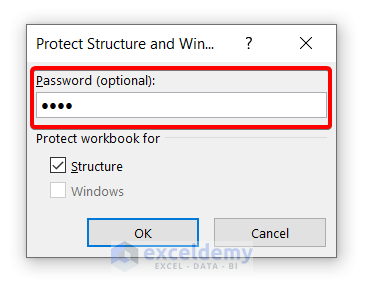
- Go to Info ➤ Protect Workbook ➤ Protect Workbook Structure.
- Insert a password in the Protect Structure and Win dialog box.
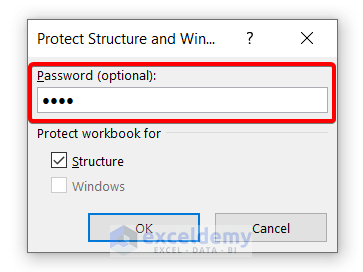
- Re-enter the password in the Confirm Password dialog box and hit OK.
This will encrypt your Excel workbook with a password. If you want to unlock your Excel workbook,
- Go to the Review tab.
- Click on Protect Workbook.
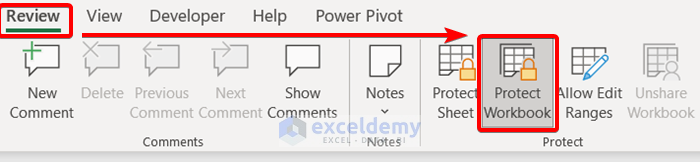
- Insert your password into the Unprotect Workbook dialog box.
- Press OK.

This will unprotect the Excel workbook, and you will have access to the editing.
Method 4 – Use the Protect Workbook Command
Steps:
- Go to the Review tab.
- Click on Protect Workbook.
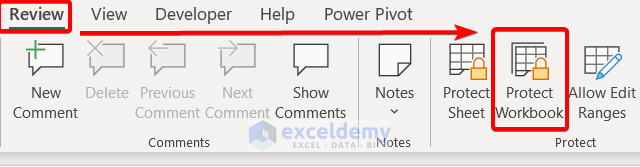
- Insert a password in the Protect Structure and Win dialog box.
- Re-enter the password in the Confirm Password dialog box and hit OK.
This will encrypt your Excel workbook with a password and protect it from editing.
If you want to unlock your Excel workbook,
- Go to the Review tab.
- Click on Protect Workbook.
- Insert your password into the Unprotect Workbook dialog box.
- Press OK.
This will unprotect the Excel workbook, giving you access to the editing.
Read More: [Fixed!] Protect Workbook in Excel Not Working
Method 5 – Use ‘Mark as Final’ to Protect a Workbook from Editing
Steps:
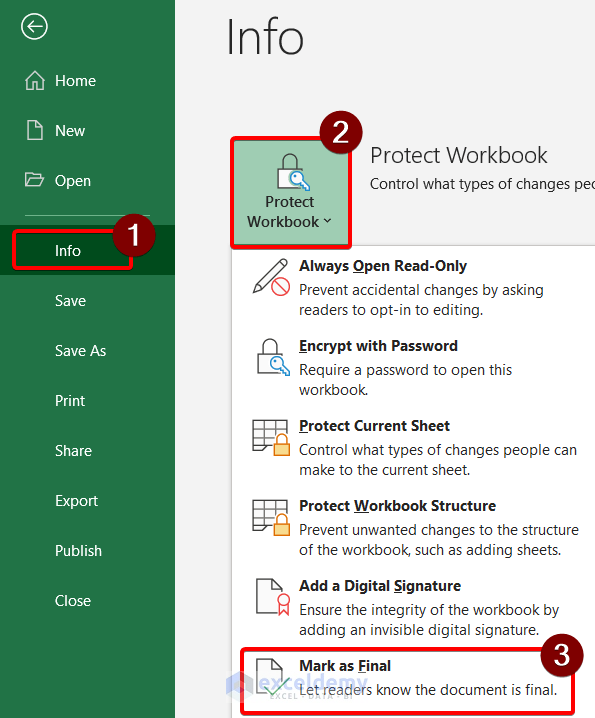
- Go to File.
- Go to Info ➤ Protect Workbook ➤ Mark as Final.
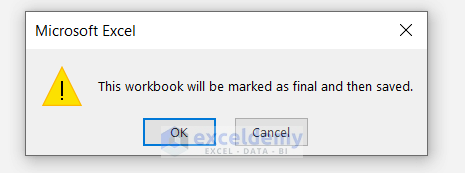
- A small dialog box will appear. Press OK.
Excel will automatically mark your Excel workbook as a final version.
When someone else tries to open the workbook, Excel will show the following warning box.
To proceed,
- Press OK.
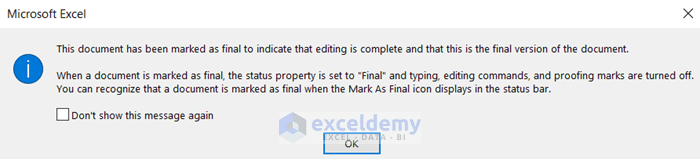
If you want to edit the workbook further, click Edit Anyway.
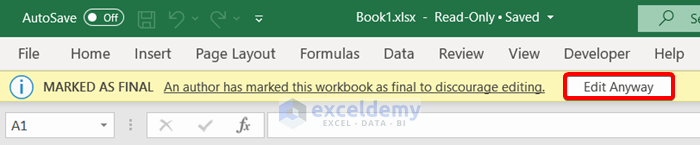
Excel will allow you to edit the workbook.
Read More: Difference Between Protect Sheet and Protect Workbook in MS Excel
Related Article
<< Go Back to Protect Workbook in Excel | Excel Protect | Learn Excel
Get FREE Advanced Excel Exercises with Solutions!

This doesn’t work in Office 365. DANG.
Hello Carol,
Thanks for your feedback! It should work in Microsoft Excel as well. Sometimes the steps or options may appear slightly different depending on your version or update. Please make sure you’re following the correct method for protecting the workbook structure, and feel free to share where you’re getting stuck—we’d be happy to help!
Regards,
ExcelDemy