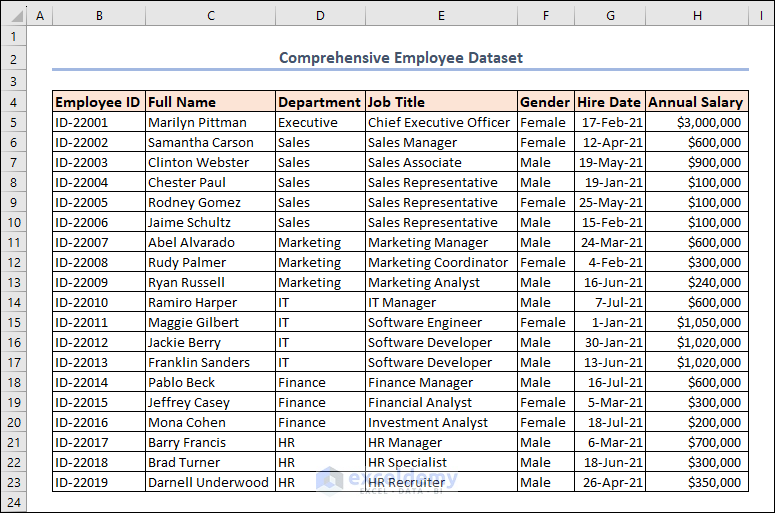
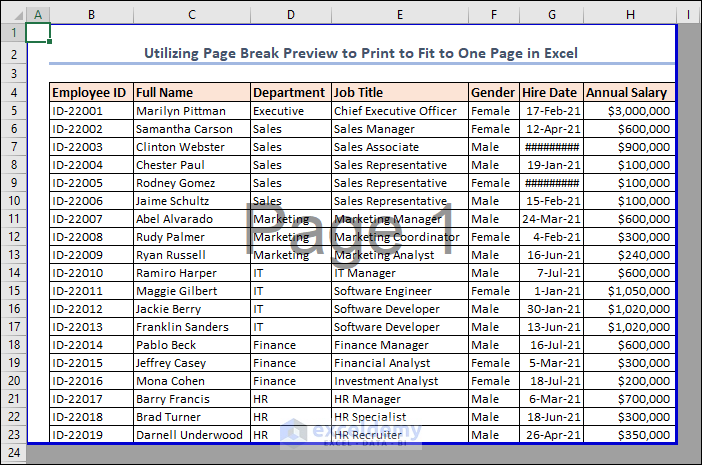
Dataset Overview
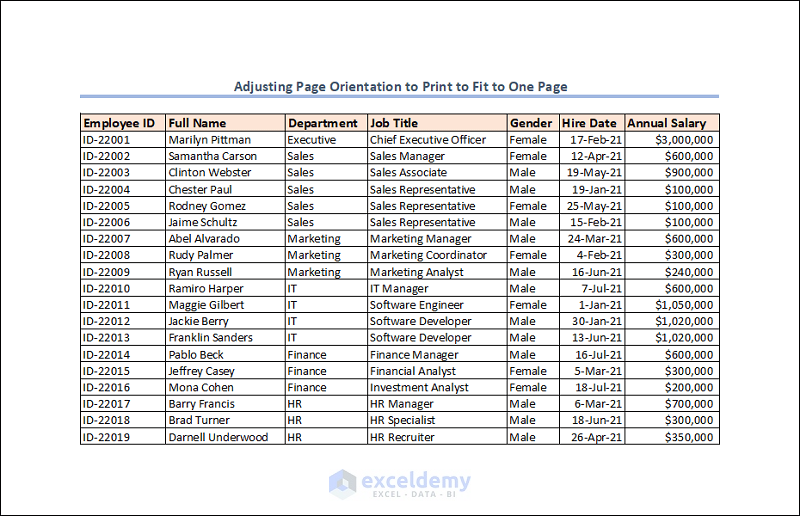
To achieve this, we’ll work with a Comprehensive Employee Dataset that includes columns for Employee ID, Full Name, Department, Job Title, Gender, Hire Date, and Annual Salary (located in columns B to H).
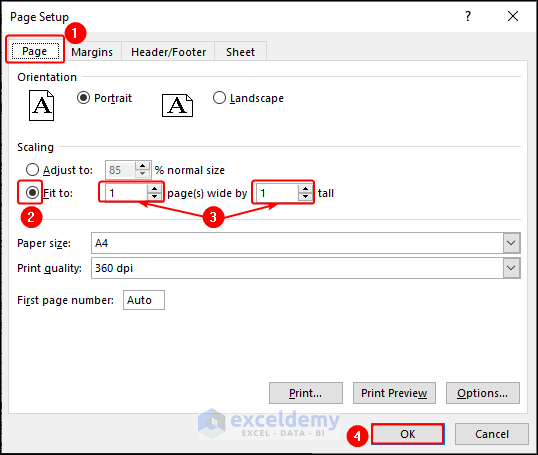
Method 1 – Using the Page Setup Dialog Box
- Go to the Page Layout tab.
- In the Page Setup group, click the small arrow-shaped dialog box launcher.
![]()
This opens the Page Setup dialog box.
- Under the Page tab, select the radio button next to Fit to in the Scaling section.
- By default, Excel sets both boxes to 1 (as shown in the image).
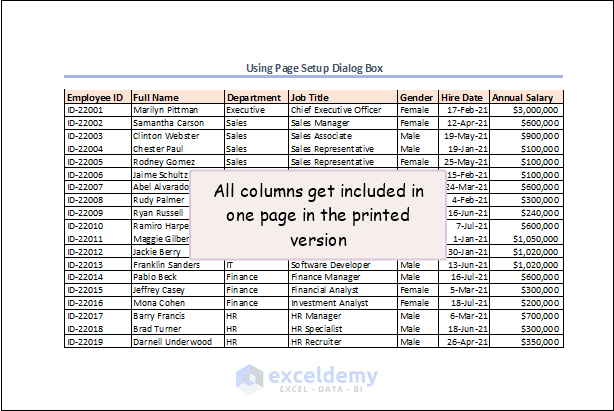
This method ensures that your data fits within a single printed page in Excel.
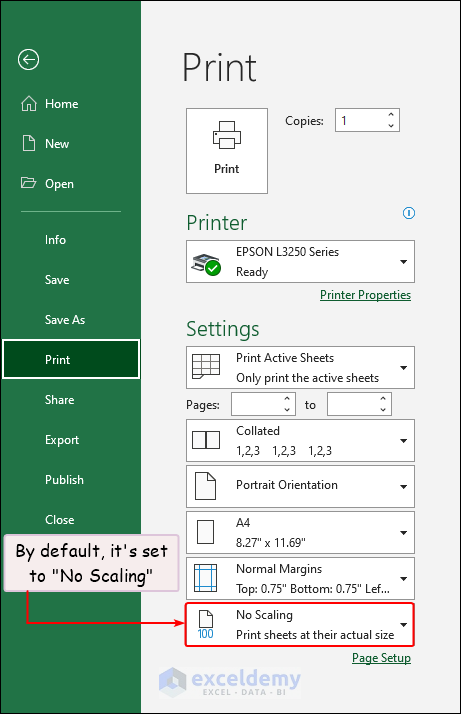
Method 2 – Adjust Scaling in Print Preview
- Open the Print Preview window by going to File and selecting Print, or simply press CTRL + P.
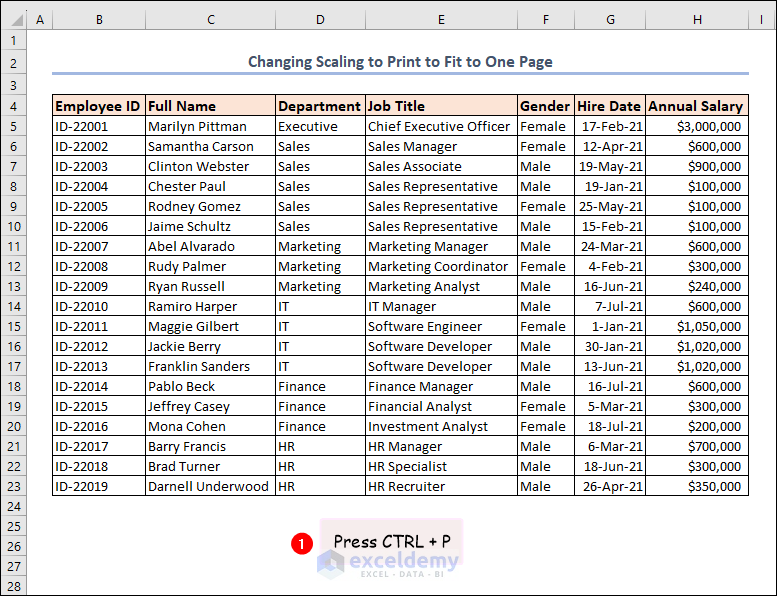
- By default, Excel uses No Scaling in the Settings section.
- Click on the Scaling option and choose Fit Sheet on One Page from the drop-down list.
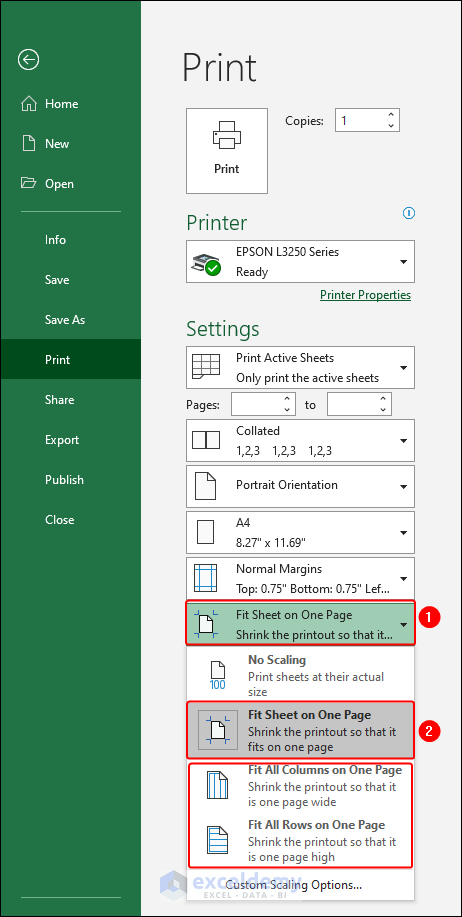
This method achieves the same result as the previous one—fitting your worksheet onto a single printed page.
Method 3 – Adjust Page Orientation
- Press CTRL + P to bring up the Print option.
- Click on Portrait Orientation and change it to Landscape Orientation.
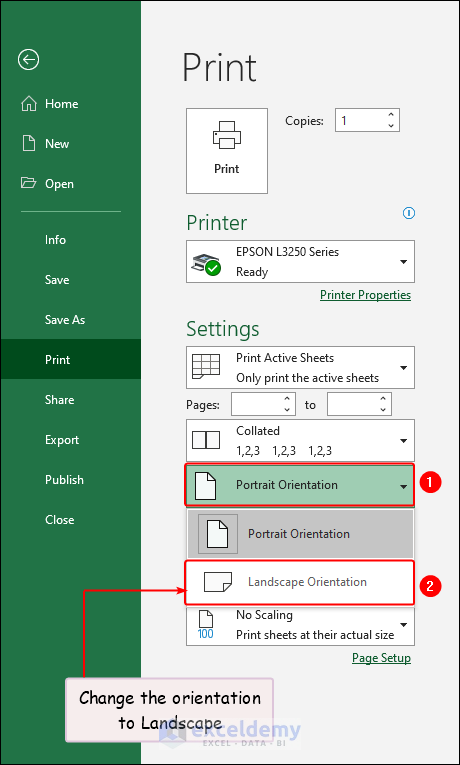
Choose the orientation based on your dataset to ensure optimal printing.
Note: Portrait is the default orientation in Excel, while Landscape allows for more columns than rows.
Method 4 – Use Different Paper Size
- In the Printer section, select Microsoft XPS Document Writer.
- In the Settings section, choose A3 as the paper size.
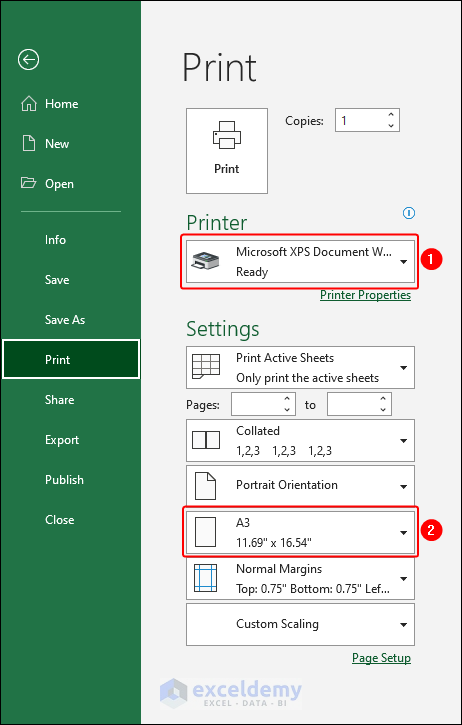
Excel will consolidate all the data onto a single page during printing.
Method 5 – Adjust Margins for One-Page Printing
When printing an Excel spreadsheet, there’s typically white space at the page boundaries, ensuring a visually pleasing layout. However, with large worksheets, additional columns might spill onto a new page, along with extra rows.
To fit the entire worksheet on a single page, make slight adjustments to the page margins:
- In the Settings section, modify the Margins type. By default, there are three options, but you can also set custom margins.
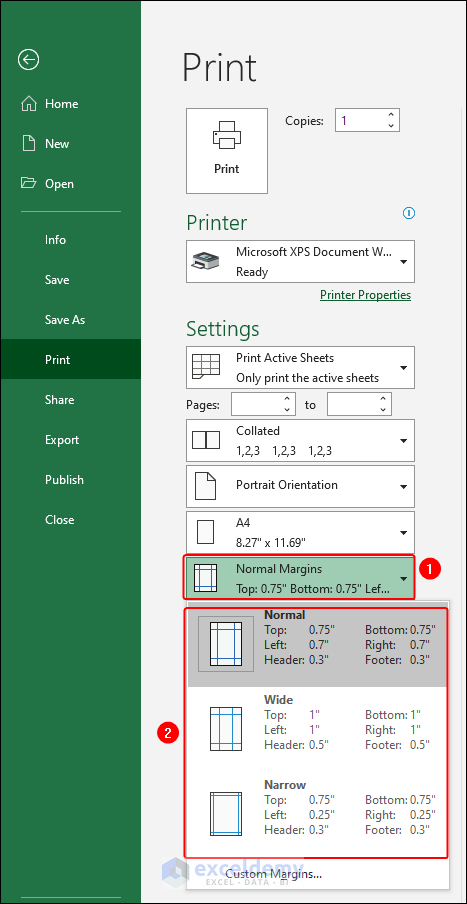
Excel automatically adjusts the spreadsheet to fit on one page during printing.
Method 6 – Customize Column Width or Row Height
Sometimes, columns are wider than necessary. To optimize space and fit everything on one page:
- Go to the View tab and select Page Layout in the Workbook Views group.

- Fine-tune column width or row height within the Page Layout view.
- Proceed with printing.
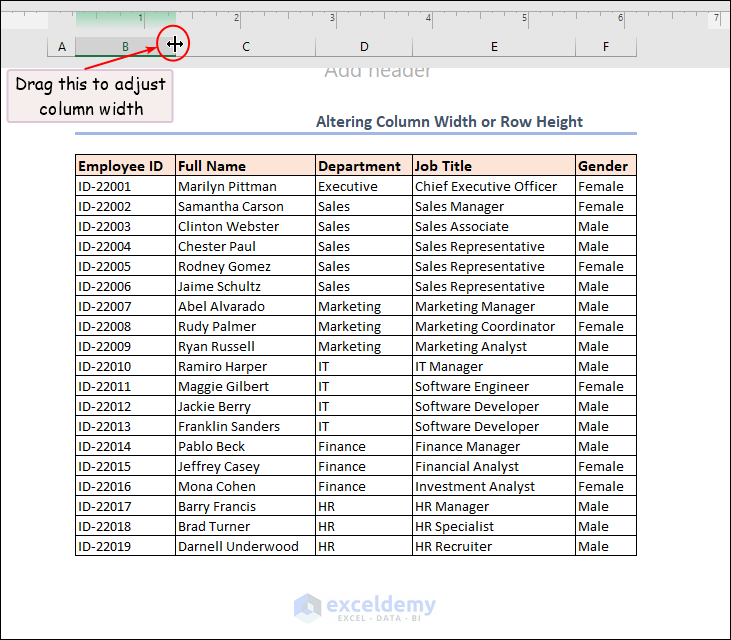
- Return to Normal view afterward.
Keep in mind that adjusting row or column sizes may condense data, so consider using Text Wrapping in Excel to address visibility issues.
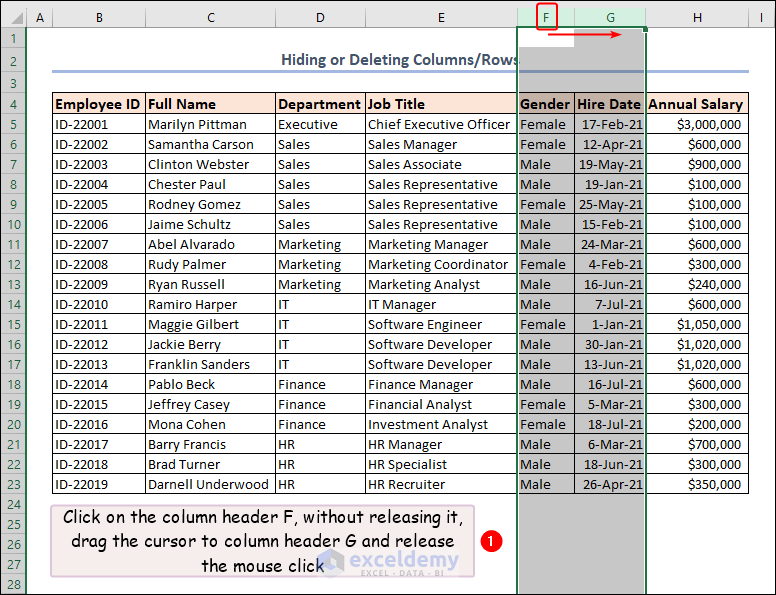
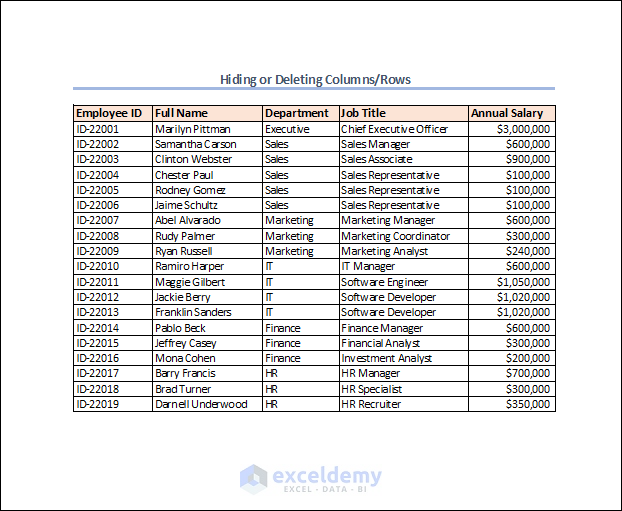
Method 7 – Hide or Delete Columns/Rows
To achieve a one-page fit for your worksheet, selectively hide unwanted columns or rows:
- Assume you don’t need the Gender and Hire Date columns in your printed report.
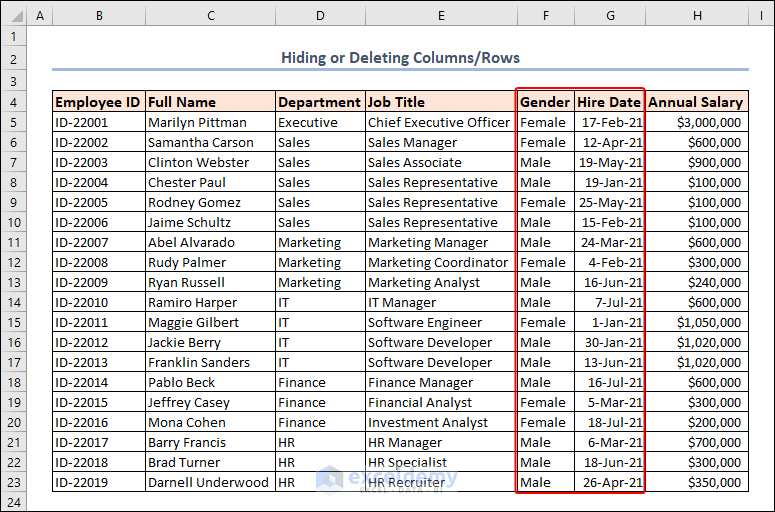
- Click the column header of Column F, drag to Column G, and release to select both columns.
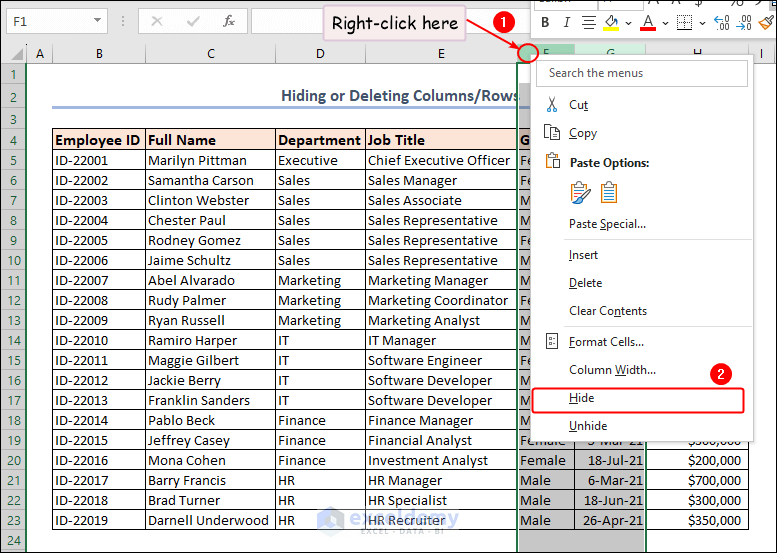
- Right-click any column header and choose Hide from the context menu.
These columns will be hidden.
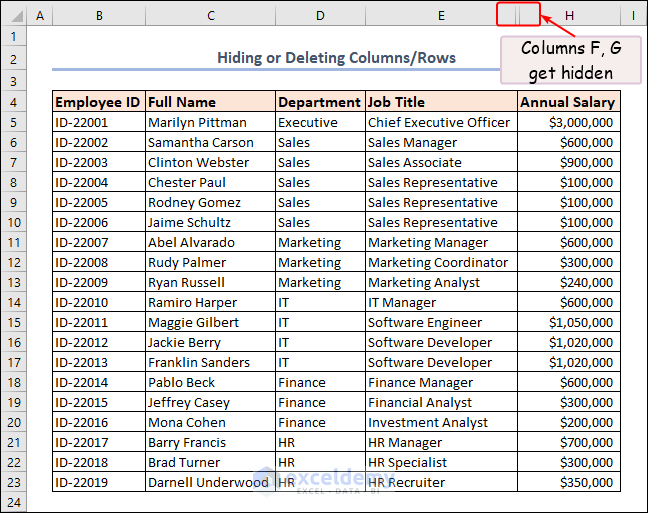
You can unhide them later to display your complete dataset.
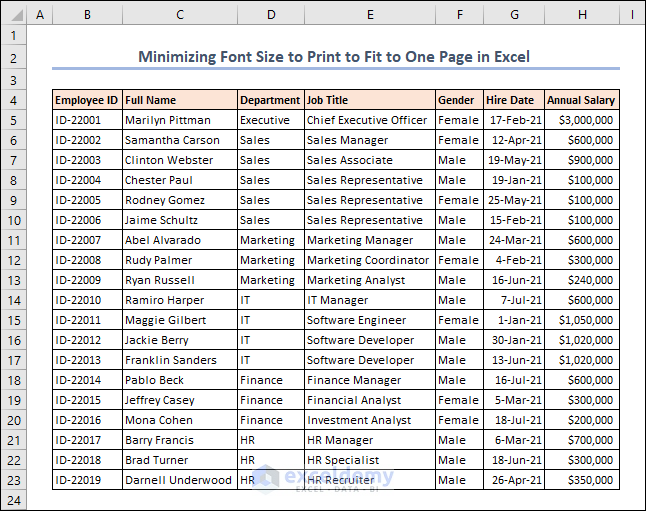
Method 8 – Reduce Font Size
Resize specific columns by minimizing font size:
- Select the entire dataset (e.g., B4:H23).
- Go to the Home tab and change the font size to 9.
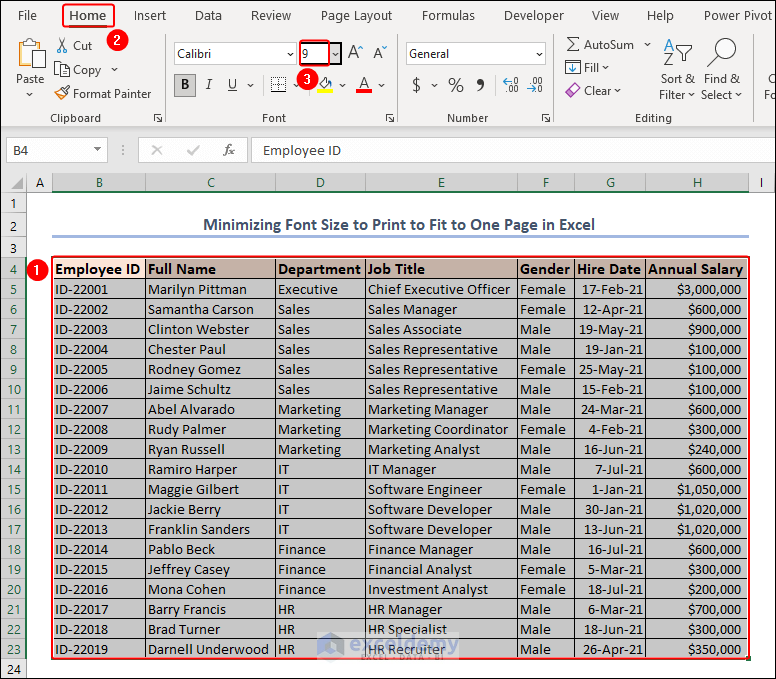
- This ensures essential information is displayed while allowing future adaptability.
Method 9 – Use Page Break Preview
- Go to the View tab and select Page Break Preview in the Workbook Views group.

- A dashed blue line represents one page up to that point.
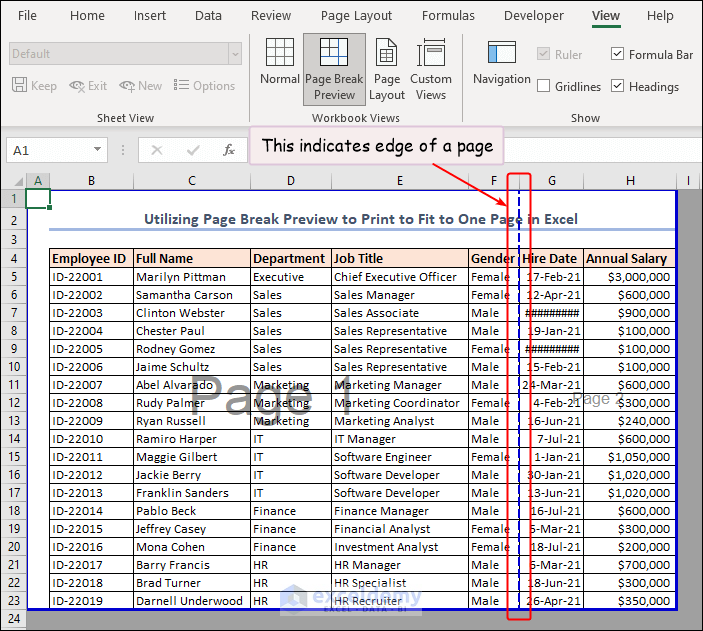
- Click and drag the line to the right-most blue solid line.
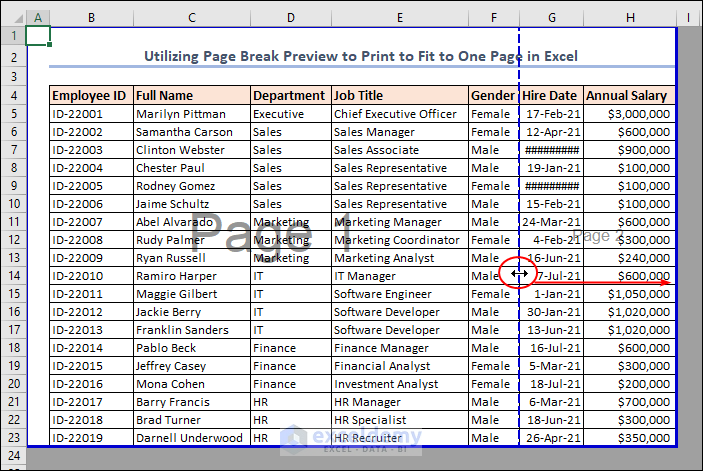
Now, the entire sheet is considered one page during printing.
Method 10 – Applying VBA Code to Print to Fit to One Page in Excel
VBA macros offer a smart alternative to achieve one-page printing in Excel. Follow these steps:
- Enable the Developer Tab:
- By default, the Developer tab is hidden. To enable it:
- Go to the File tab.
- Click on Options.
- In the Customize Ribbon section, check the Developer option.
- Click OK to save the changes.
- By default, the Developer tab is hidden. To enable it:
- Access the Visual Basic for Applications (VBA) Window:
- Click on the Developer tab.
- Click the Visual Basic button in the Code group.
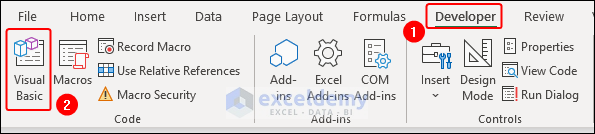
This opens the VBA window.
- Insert a Module:
- Click the Insert tab in the VBA window.
- Choose Module from the list.
- A small Module window will appear.
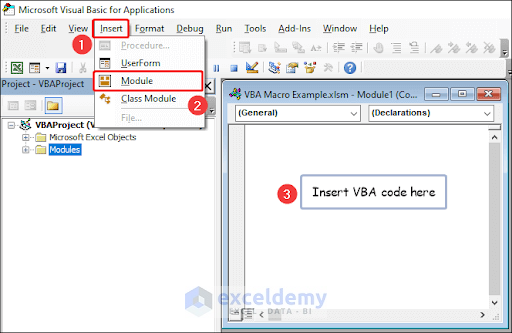
- Paste the VBA Code:
- Enter the following code to fit the worksheet to one page:
Sub fit_to_page()
Dim ws1 As Worksheet

Set ws1 = ActiveSheet

With ws1.PageSetup
    .Orientation = xlPortrait
    .Zoom = False
    .FitToPagesTall = 1
    .FitToPagesWide = 1
    .PrintArea = "B2:H23"
End With

End Sub
This code ensures that your data fits within a single printed page.
- Run the Code:
- Click the green play button or press F5 on your keyboard.

The automation saves time and consistently produces professional-looking printouts.
Benefits of Fitting Data to One Page While Printing in Excel
- Improved Readability:
- One-page printing ensures all content is visible without flipping or scrolling.
- Complete Data Presentation:
- All columns and rows are included, preventing important information from being omitted.
- Professional Appearance:
- Single-page printouts look polished and professional.
- Reduced Paper Waste:
- Minimizes the number of pages needed for printing.
- Ease of Distribution:
- Sharing concise one-page printouts simplifies communication and understanding.
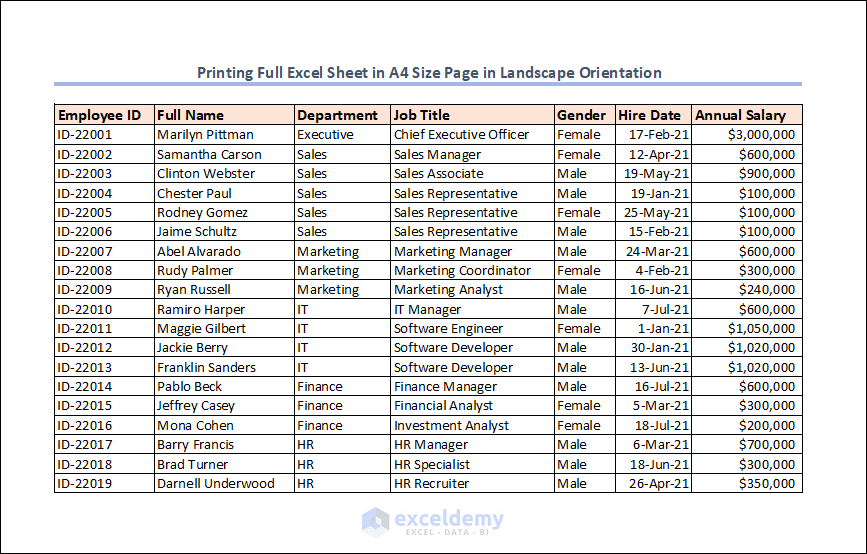
How to Print a Full Excel Sheet in A4 Size Page (Landscape Orientation)
- In the Print option, choose A4 as the paper size.
- Select Landscape as the orientation.
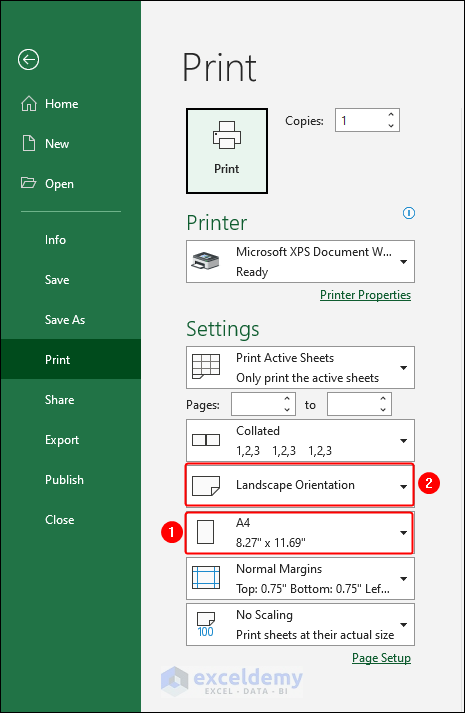
This generates an aesthetically pleasing and print-ready output.
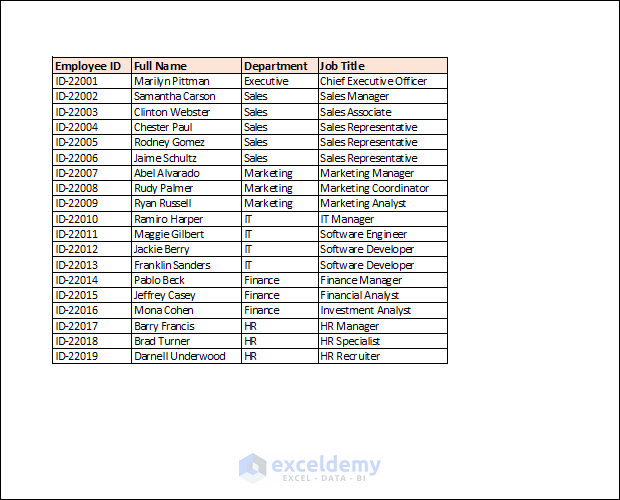
How to Print a Selected Area Only in Excel
- Select the desired portion of the dataset (e.g., B4:E23).
- Press CTRL + P on the keyboard.
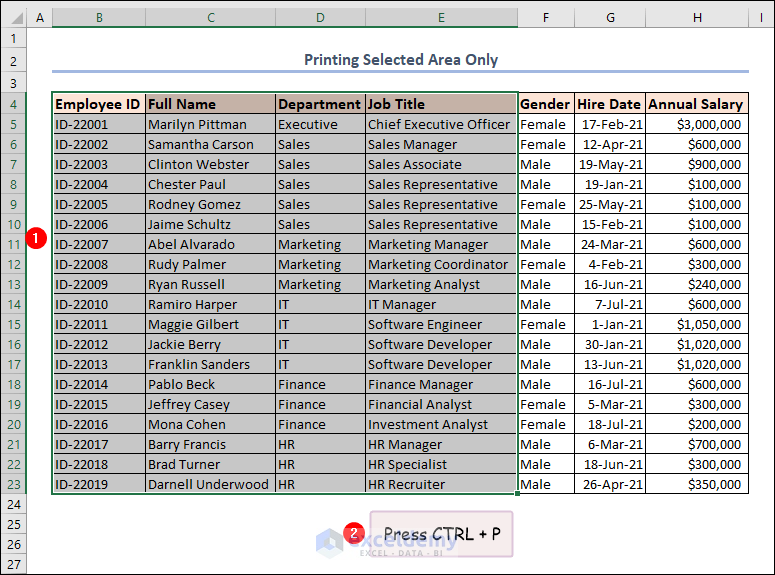
- In the Settings section, choose Print Selection from the first box.
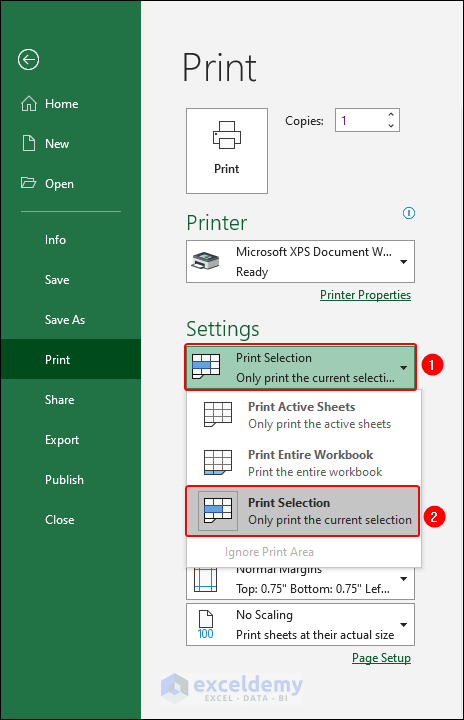
When you print, only the selected portion will be included in the hard copy.
Things to Remember
- Scaling Options:
- Excel offers various scaling options, such as fitting all columns on one page, fitting all rows on one page, or fitting the entire sheet on one page. Choose the option that best suits your requirements.
- Preview Before Printing:
- Always preview the printout before actually printing to ensure that the data fits properly on the page. This helps identify any formatting or layout issues that may need adjustment.
- Excel Version Considerations:
- Different versions of Excel may offer varying print options. Double-check the available features specific to your Excel version for a seamless printing experience.
- Troubleshooting:
- If you encounter any issues while printing to fit one page in Excel, refer to Excel documentation or seek online support for specific troubleshooting steps.
Frequently Asked Questions
- What does “print to fit page” mean in Excel?
- Printing to fit the page in Excel means adjusting your worksheet so that it fits within the boundary of a single printed page.
- What else should I keep in mind when using the “Print to Fit Page” feature in Excel?
- Consider adjusting page margins and orientation for better layout. Also, be aware of complex worksheets or selected ranges that may need special attention.
- How can I preview the printout before printing?
- Excel provides a print preview feature. Simply press CTRL + P to see how the data will appear on the printed page before sending it to the printer.
Download Practice Workbook
You can download the practice workbook from here:
Related Articles
<< Go Back to Page Setup | Print in Excel | Learn Excel
Get FREE Advanced Excel Exercises with Solutions!
