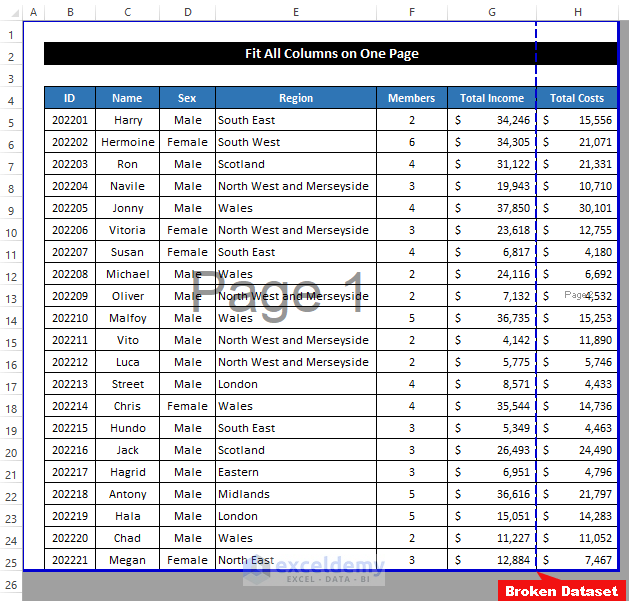
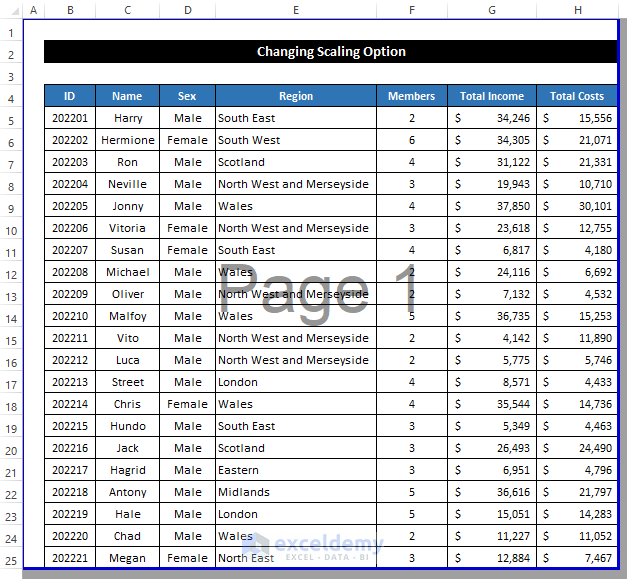
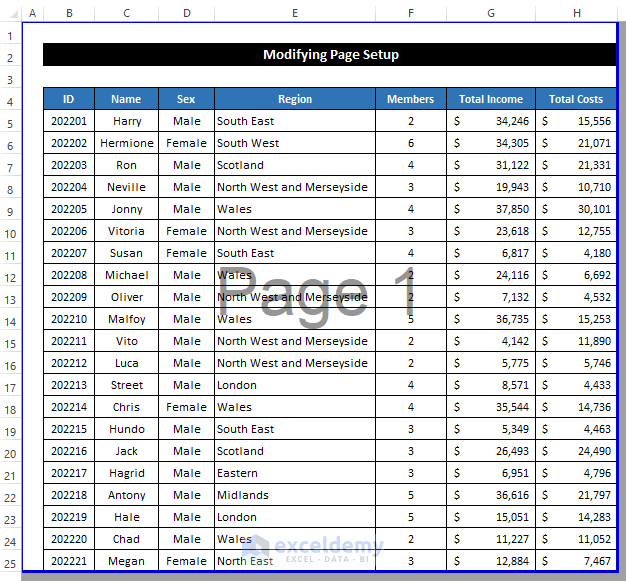
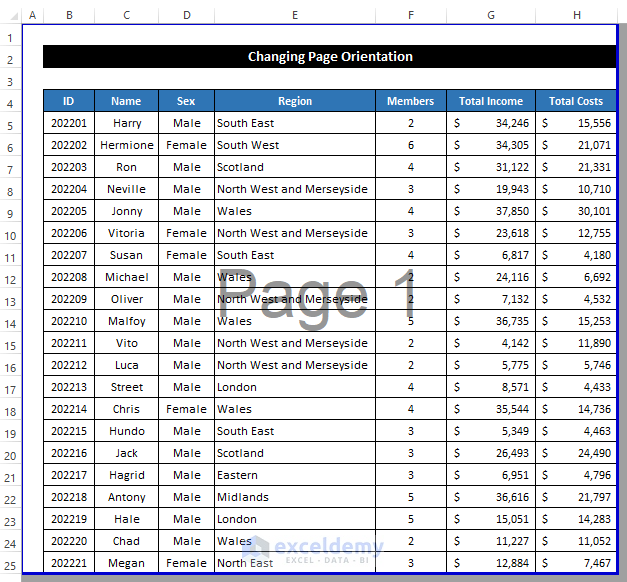
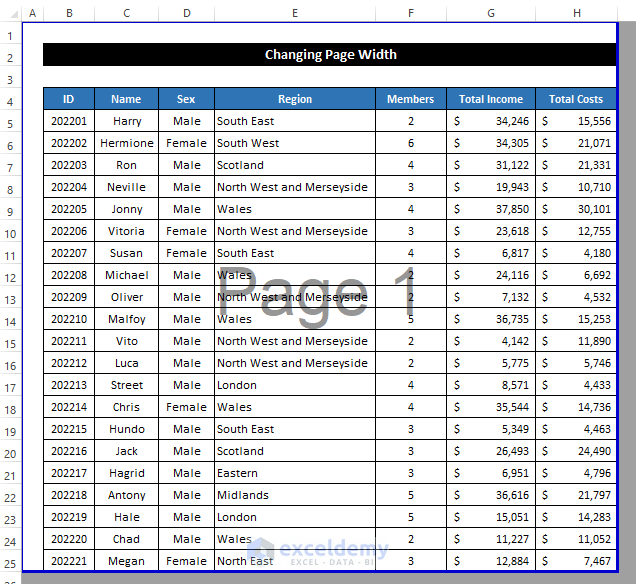
The sample dataset contains 21 employees in the range of cells B4:H25. Looking at Page Break Preview shows that the table is broken over two pages.
Method 1 – Changing Scaling Option from Print Window
Steps:
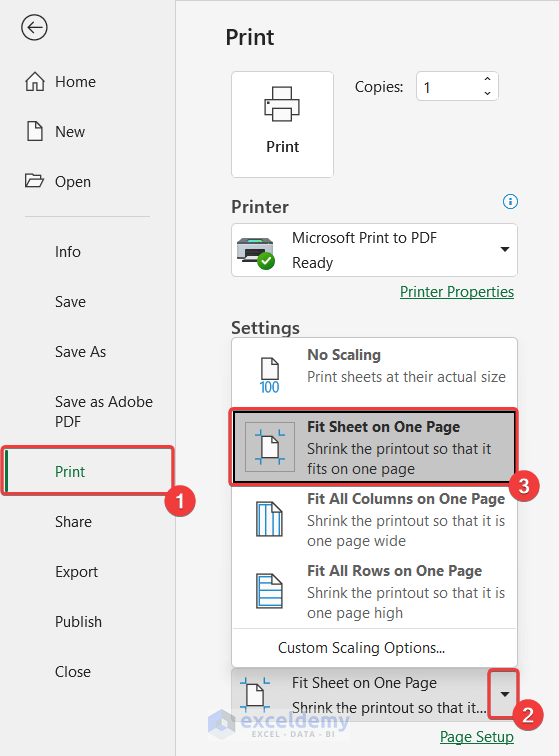
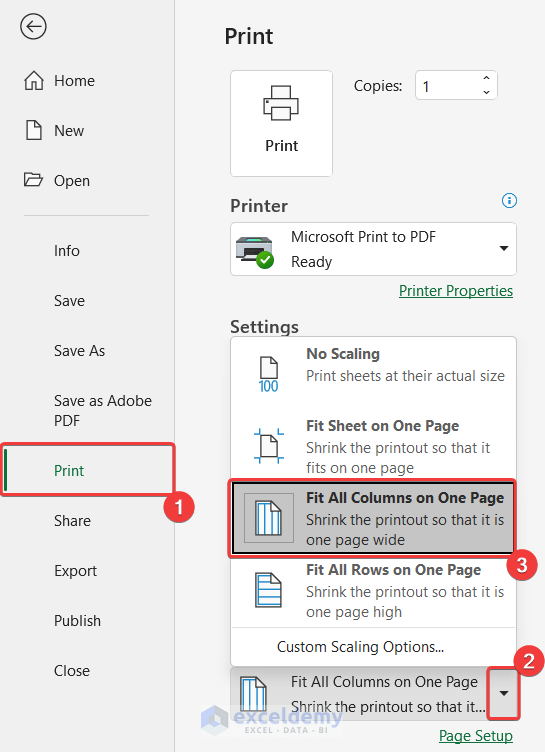
- Click File > Print. Alternatively press ‘Ctrl+P’ to launch the print section.
- Click on the drop-down arrow of the last scaling option and choose the Fit Sheet on One Page option.
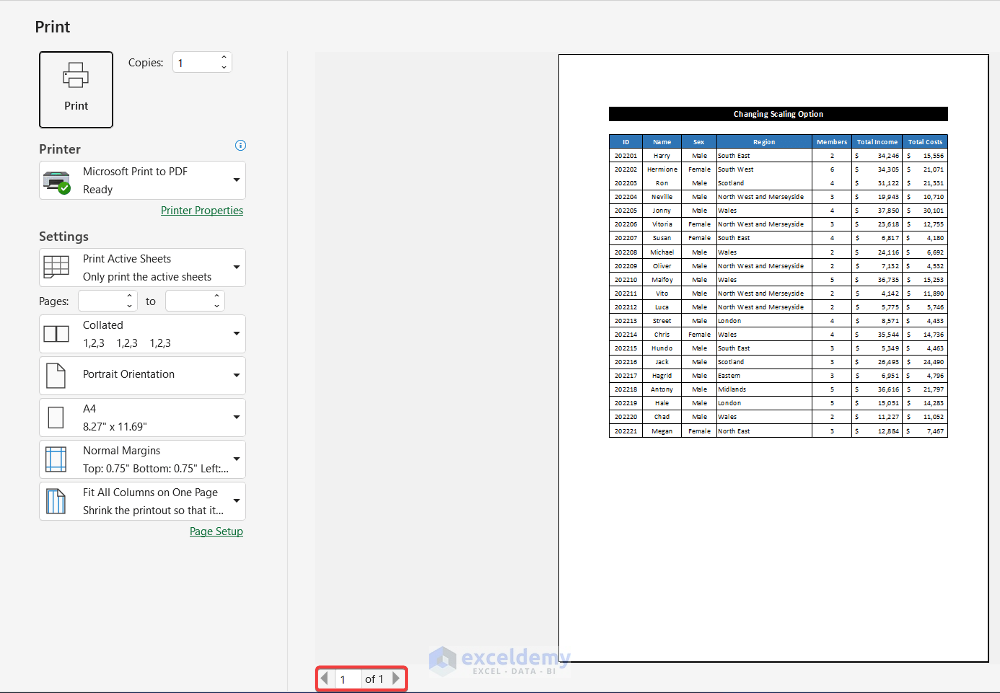
- The number of pages reduces to 1.
- Select the desired printer to print the dataset.
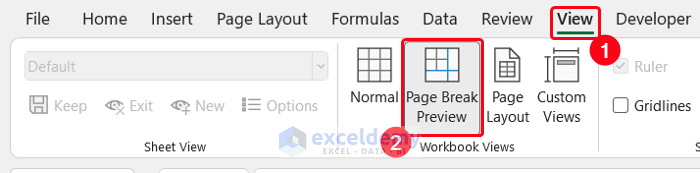
- In the View tab, click on the Page Break Preview option from the Workbook Views group.
- All the columns fit on one page.
Method 2 – Fit All Columns on One Page
Steps:
- Click File > Print.
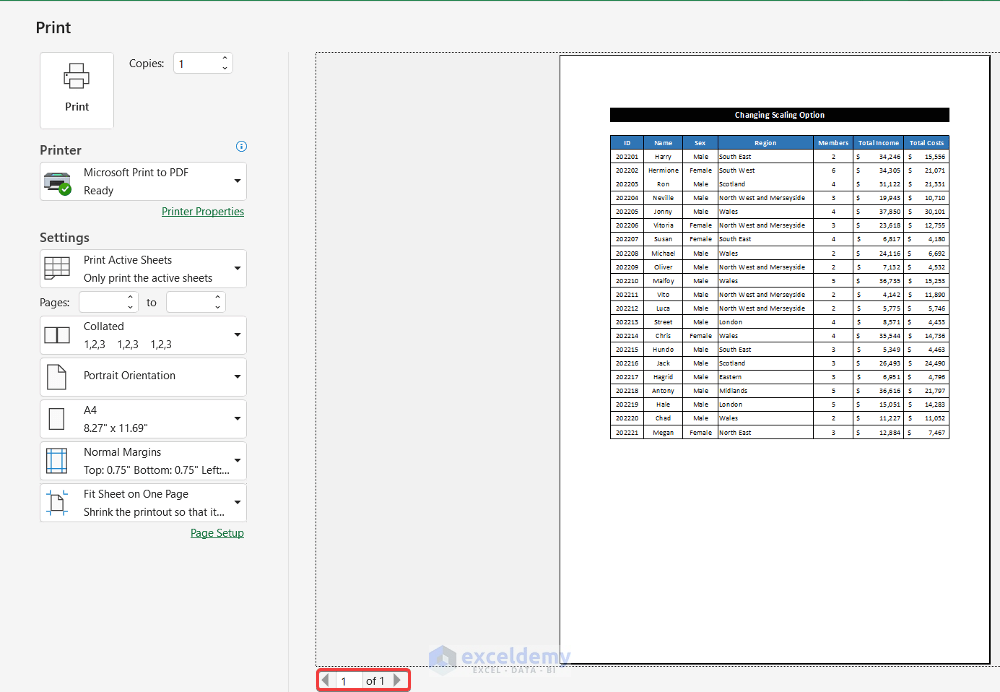
- Click the last scaling option on the drop-down arrow menu and choose the Fit All Columns on One Page option.
- The number of pages has been reduced to 1.
- Select the printer if you want to print the dataset.
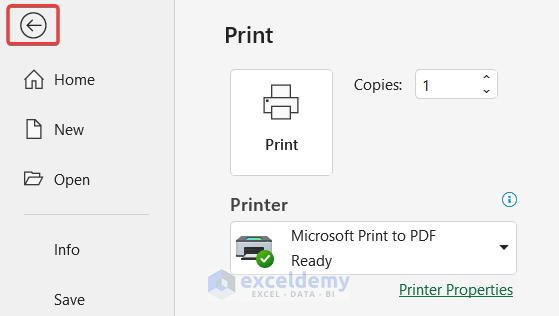
- Alternatively, go back into the Excel worksheet using the Back button.
- In the View tab, click on the Page Break Preview option from the Workbook Views group.
- All the columns of the dataset fit on one page.
Read More: How to Change the Printing Scale So All Columns Will Print on a Single Page
Method 3 – Modifying Page Setup
Steps:
- In the Page Layout tab, click on the Page Setup dialog box launcher.
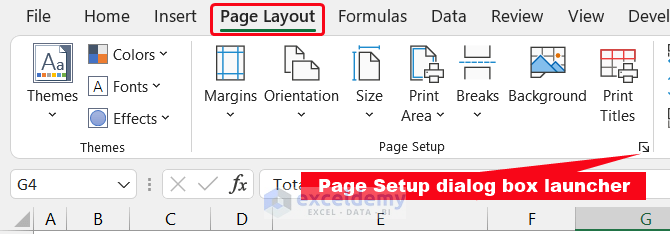
- A small window titled Page Setup will appear.
- In the Page tab, choose the Fit to option and keep the value of both boxes 1.
- Click OK to close the box.
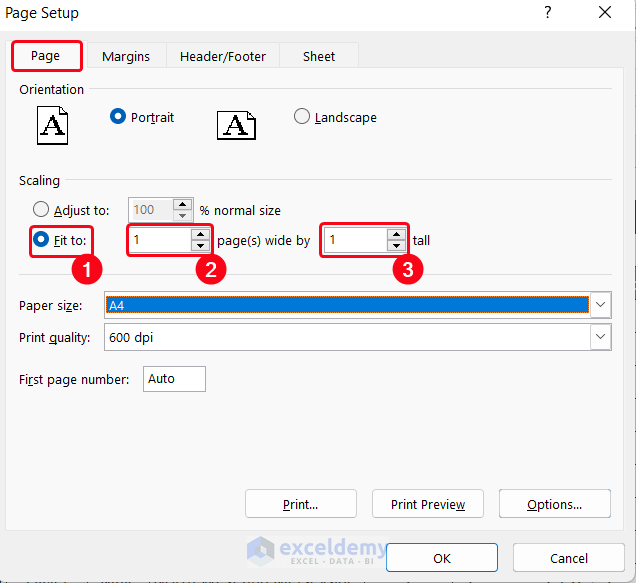
- In the View tab, click on the Page Break Preview option from the Workbook Views group.
- The columns of the dataset now fit on one page.
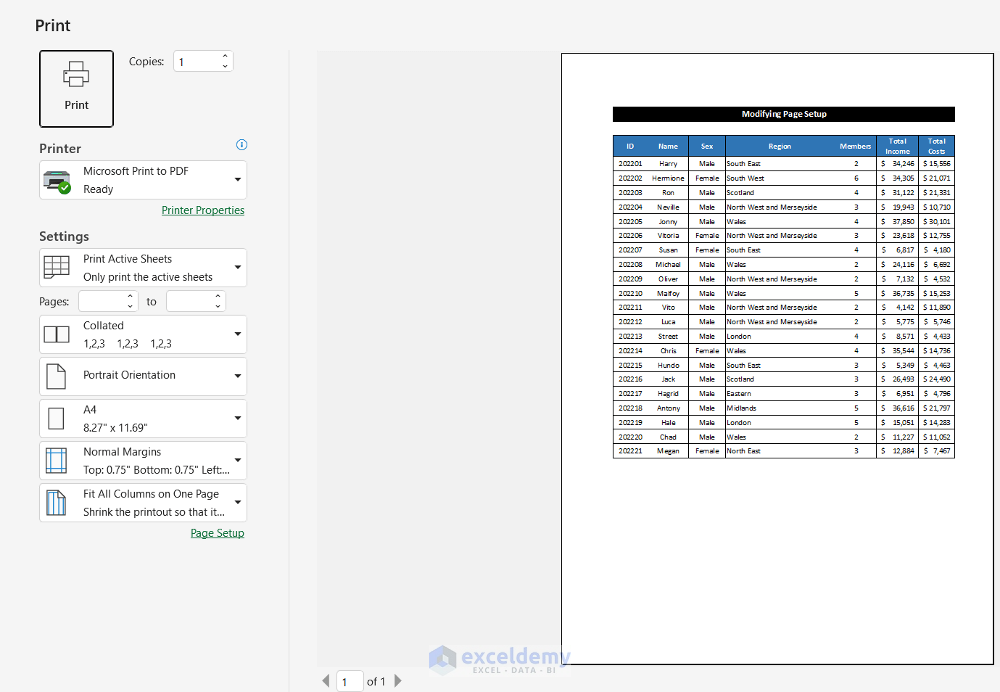
- If you want to print this dataset press ‘Ctrl+P’ to open the Print window.
Read More: How to Fit to Page in Excel (3 Easy Ways)
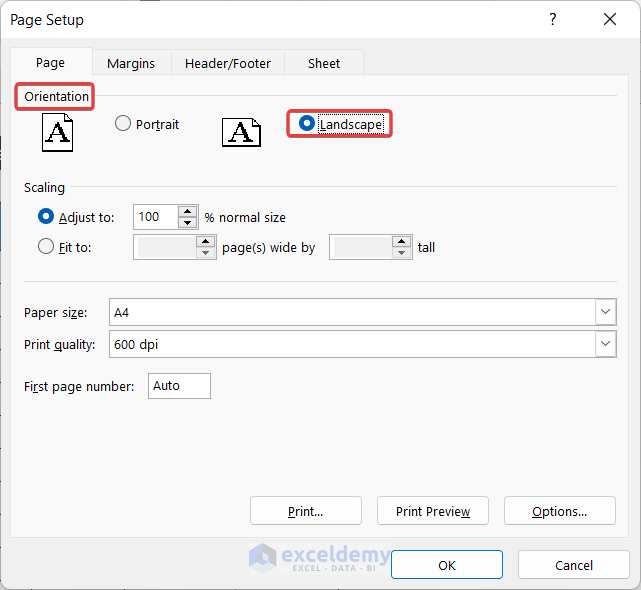
Method 4 – Changing Page Orientation
Steps:
- In the Page Layout tab, click on the Page Setup dialog box launcher.
- A small window titled Page Setup will appear.
- In the Page tab, change the Orientation option from Portrait to Landscape.
- Click OK to close the box.
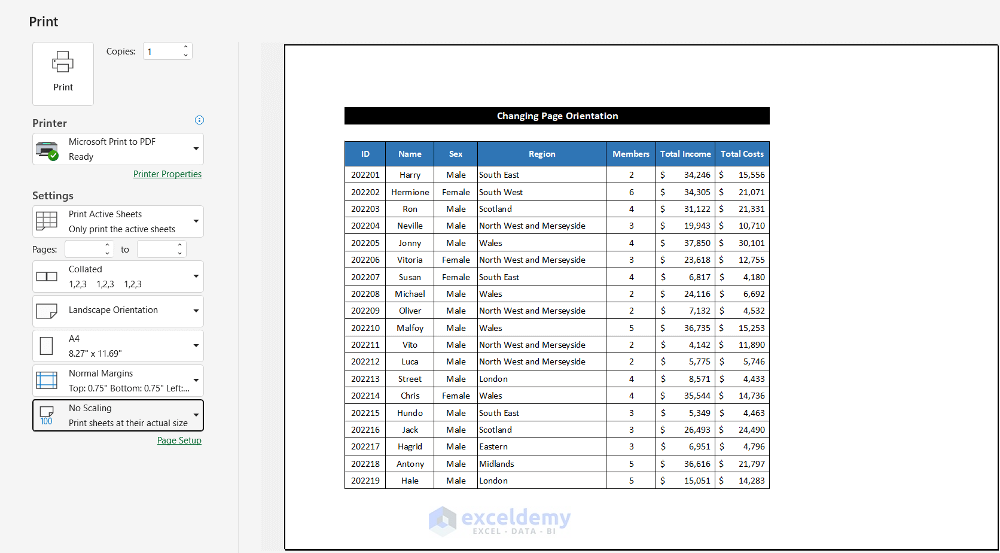
- In the View tab, click on the Page Break Preview option from the Workbook Views group.
- The columns of the dataset now fit on one page.
- If you want to print this dataset press ‘Ctrl+P’ to open the Print window as below.
Read More: How to Fit Excel Sheet on One Page in Word (3 Simple Ways)
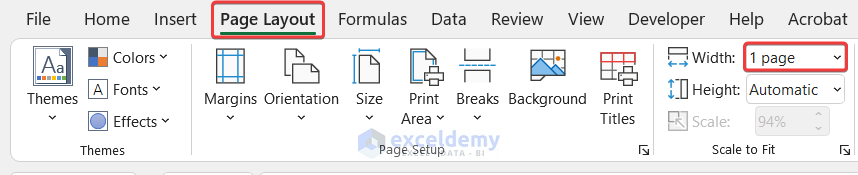
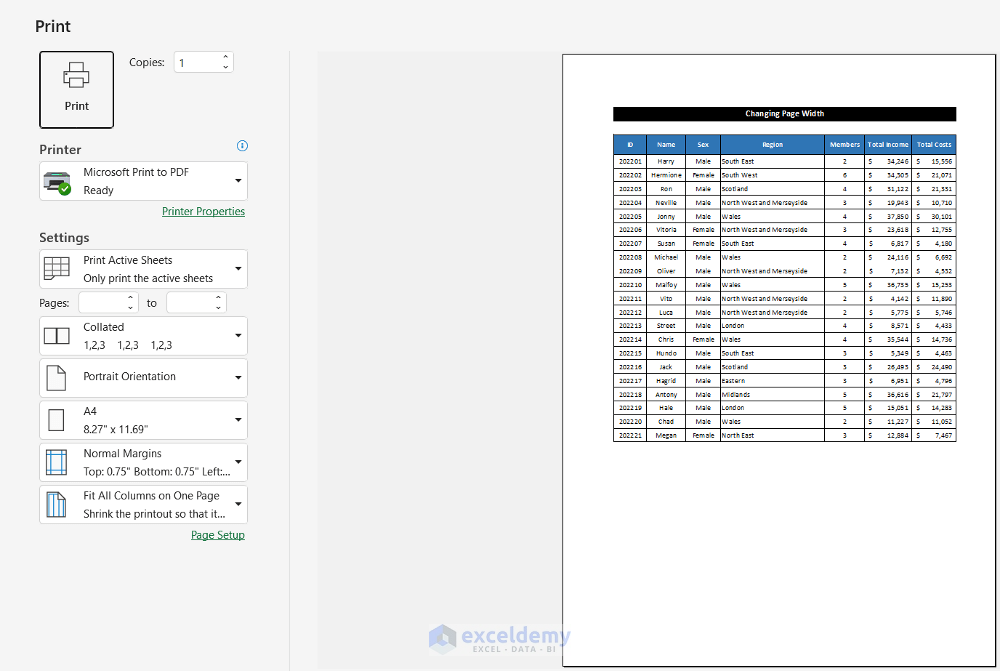
Method 5 – Changing Page Width in Scale to Fit Group
Steps:
- Go to the Page Layout tab.
- Change the Width option Automatic to 1 page in the Scale to Fit group.
- In the View tab, click on the Page Break Preview option from the Workbook Views group.
- All the columns of the dataset fit on one page.
- If you want to print this dataset press ‘Ctrl+P’ to open the Print window as below.
Read More: How to Adjust Page Size for Printing in Excel (6 Quick Tricks)
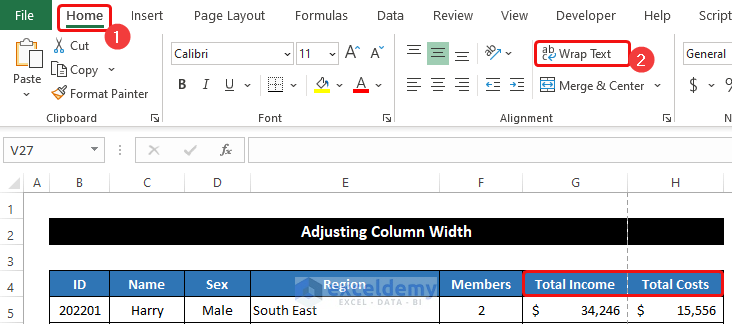
Method 6 – Adjusting Column Width
Steps:
- The headers of columns G and H are much longer compared to their other cell values.
- To shorten the headers, select the range of cells G4:H4.
- In the Home tab, select the Warp Text command from the Alignment group.
- Move the mouse cursor to the boundary line between columns G and H. The cursor will convert into a resize icon.
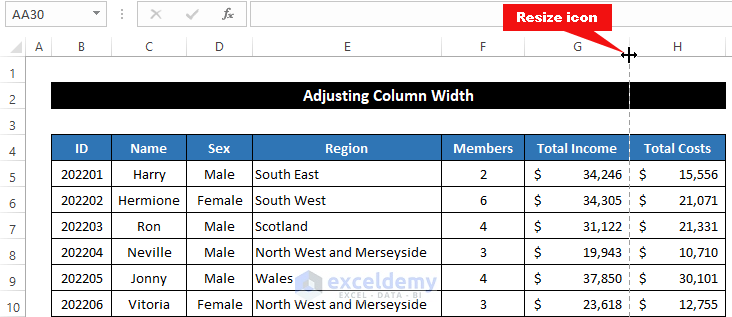
- Click and drag the resize icon to the left.
- The column width will be adjusted.
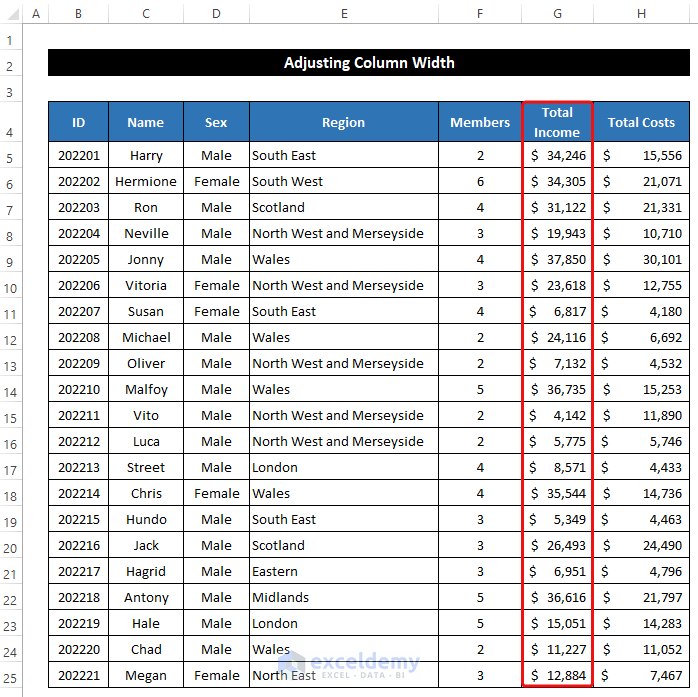
- Follow the same process for column H.
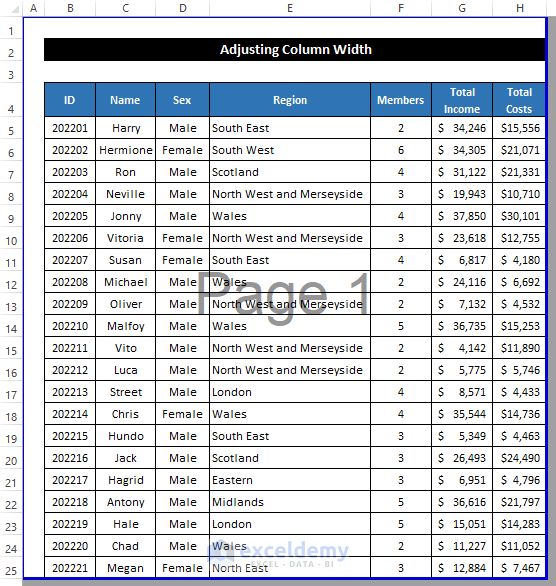
- In the View tab, click on the Page Break Preview option from the Workbook Views group.
- All the columns of the dataset now fit on one page.
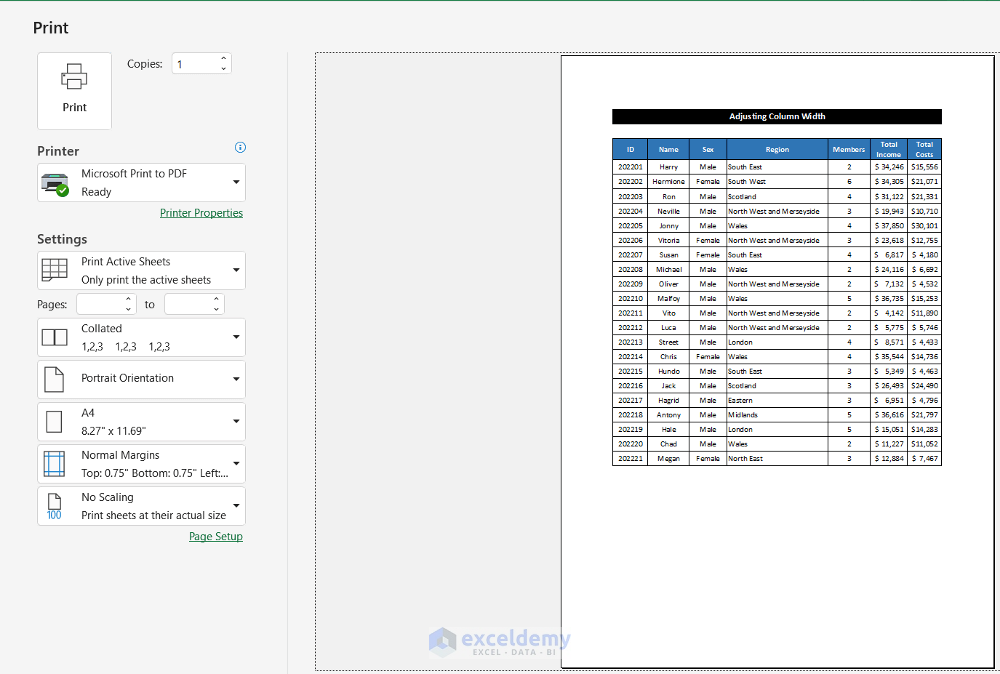
- If you want to print this dataset press ‘Ctrl+P’ to open the Print window as below.
Read More: How to Stretch Excel Spreadsheet to Full Page Print (5 Easy Ways)
Download Practice Workbook
Download this practice workbook for practice while you are reading this article.
Related Articles
- How to Add Legal Paper Size in Excel
- Why Is My Excel Sheet Printing So Small (Reasons and Solutions)
- Excel Fit to Page Scale/Preview Looks Small (5 Suitable Solutions)
- How to Add A3 Paper Size in Excel (2 Quick Ways)

