Download the Practice Workbook
5 Methods to Stretch Excel Spreadsheet to Full Page Print
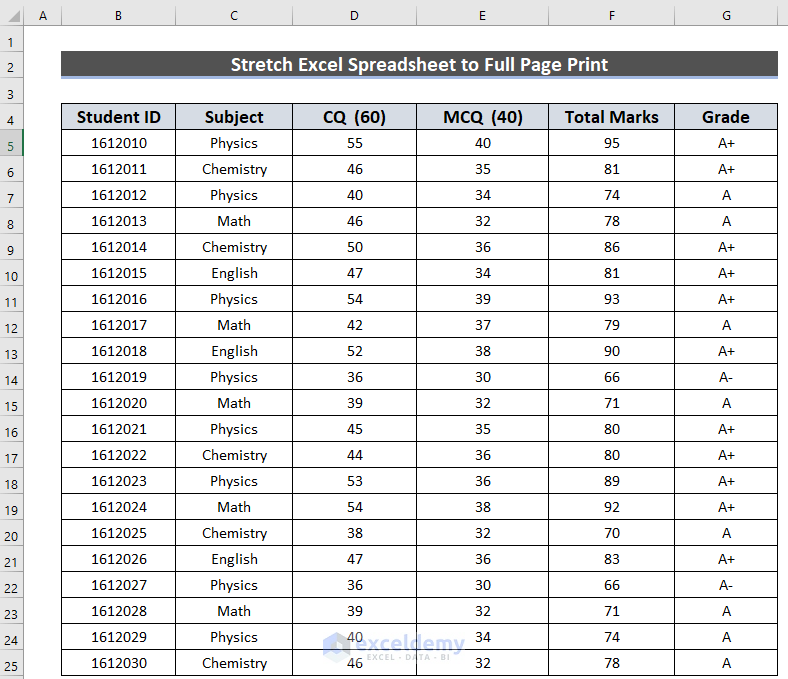
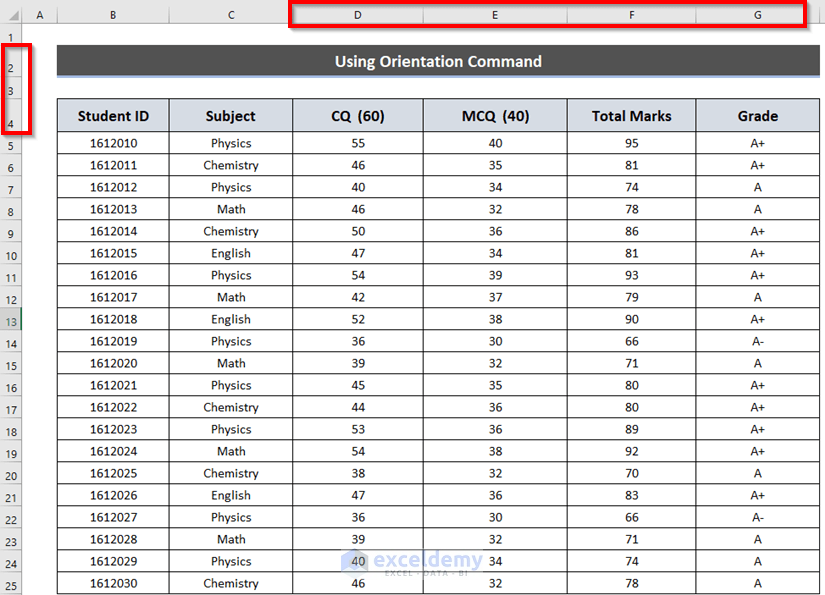
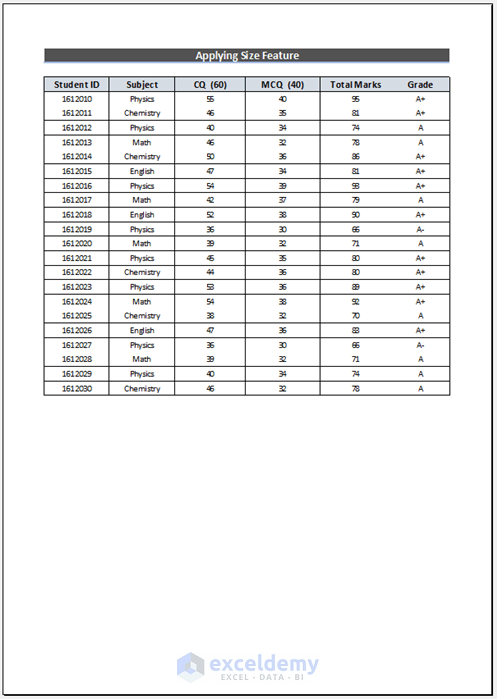
We’ll use a sample data set of student grades in different subjects with their IDs and two exam scores.
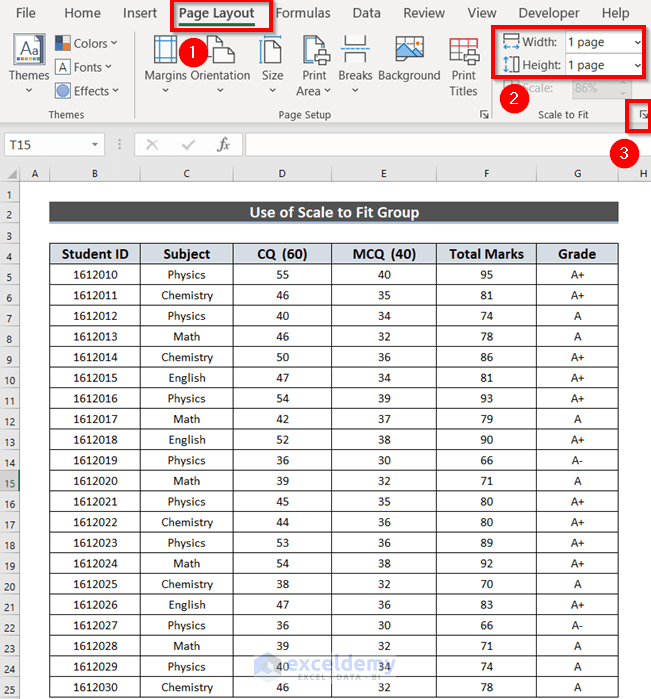
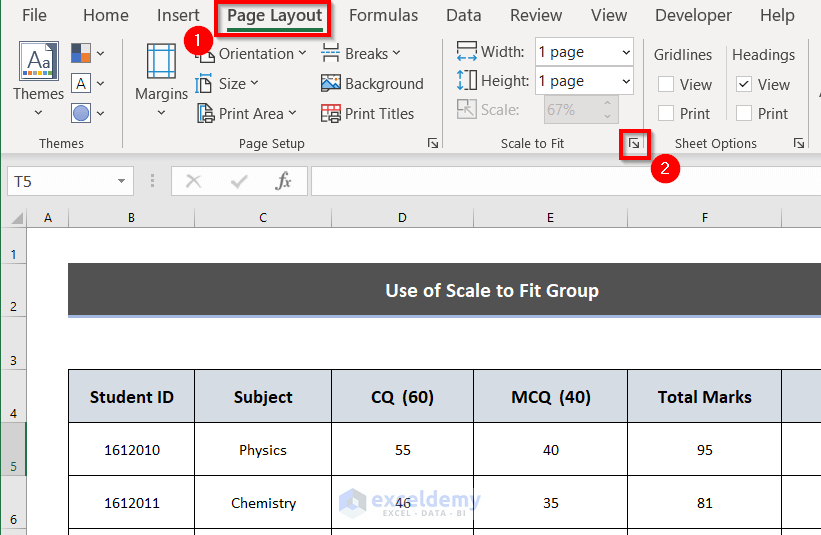
Method 1 – Using Scale to Fit Group to Stretch an Excel Spreadsheet to Full Page Print
Steps:
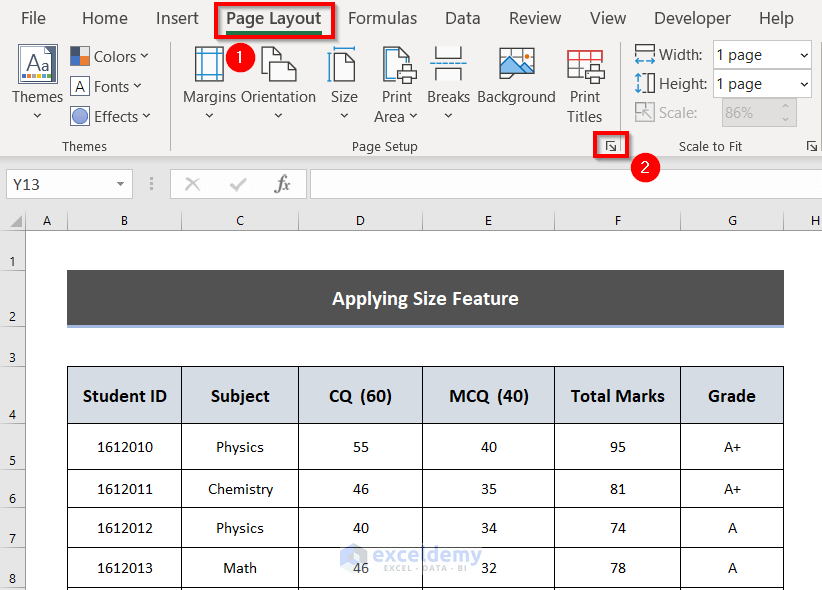
- From the Page Layout ribbon, change the Width and Height to 1 page, which is under Scale to Fit group. You can also use Excel keyboard shortcuts Alt + P to go to the Page Layout ribbon.
- Click on the Dialog Arrow.
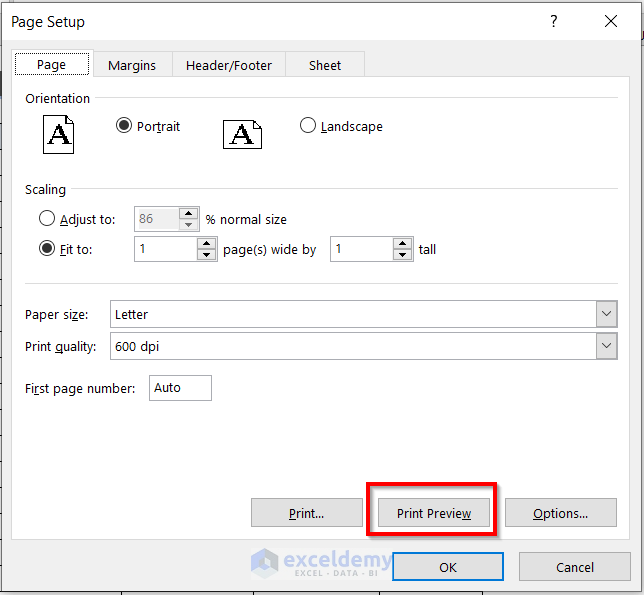
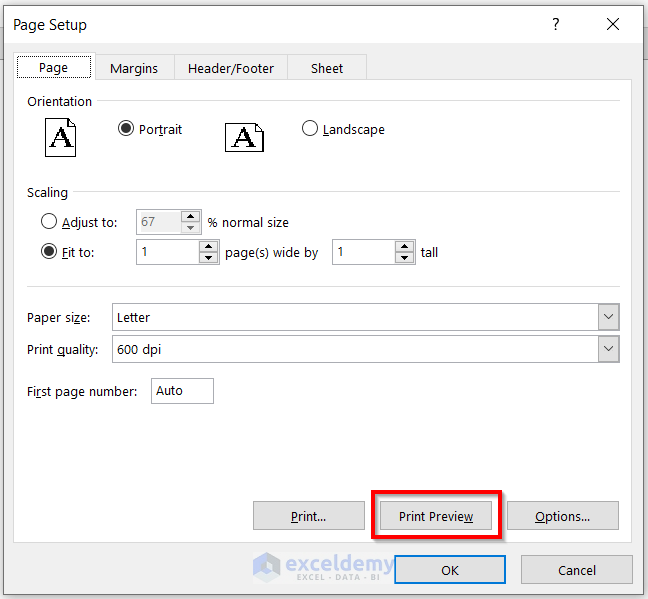
A dialog box named Page Setup will appear.
- Select the Print Preview option.
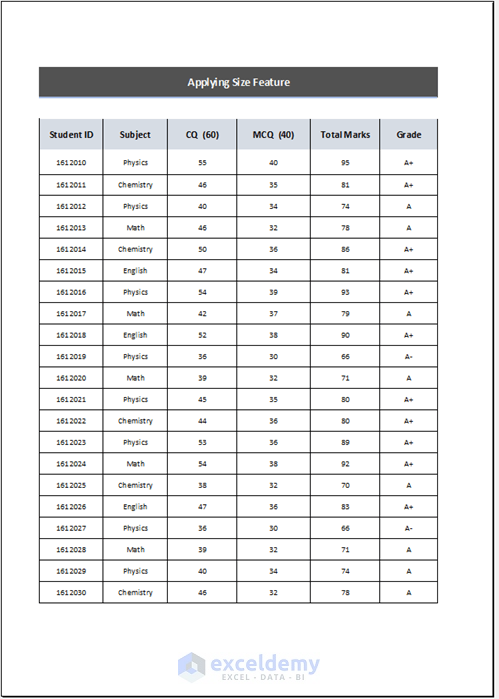
There may be white space in your preview. Change the row height or column width to spread your data over the whole page.
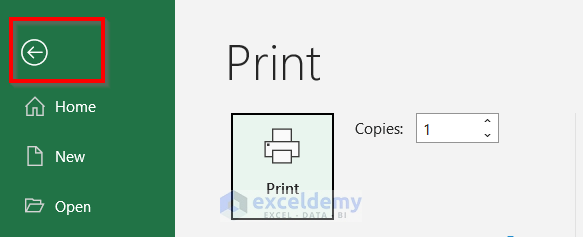
- Click on the Go Back Arrow.
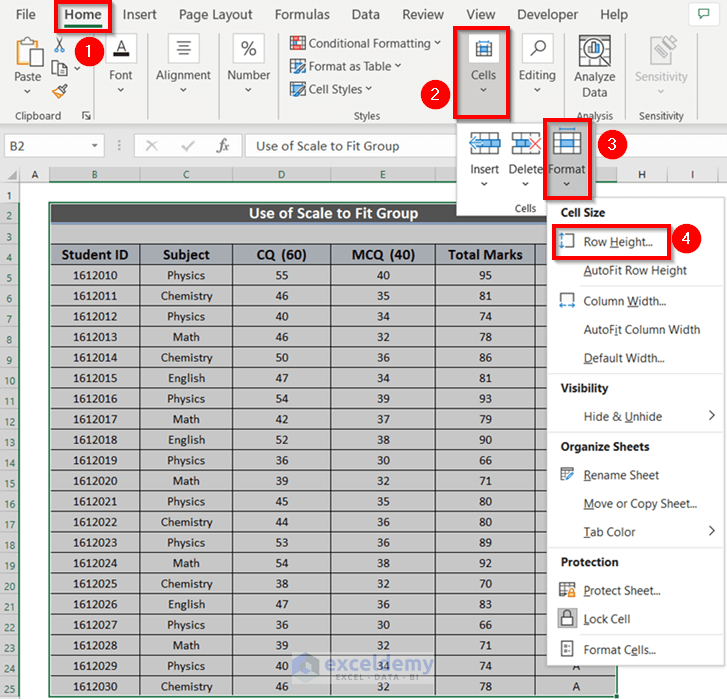
- Select your data.
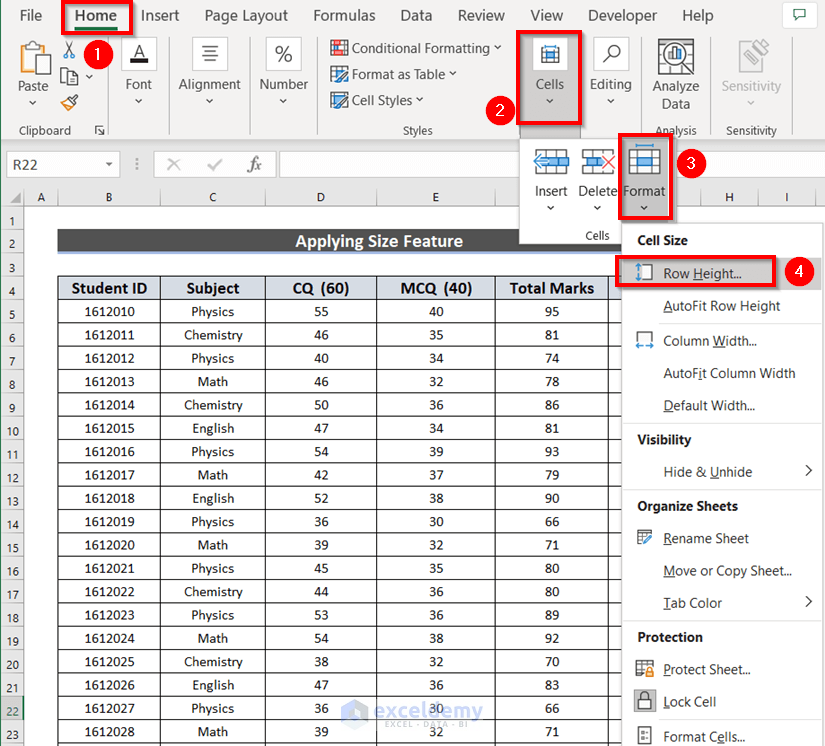
- Go to the Home tab.
- From the Cells option, choose the Format command.
- Select the Row Height option.
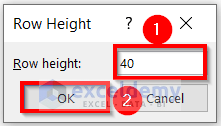
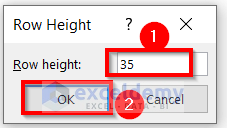
A dialog box named Row Height will appear.
- Insert the preferred Row height. We have written 40 as Row height.
- Press OK to make the changes.
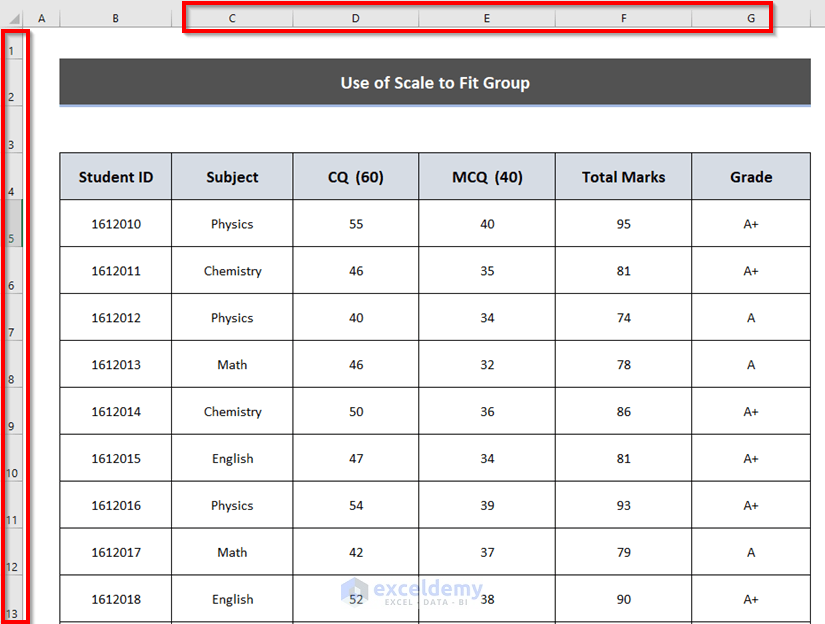
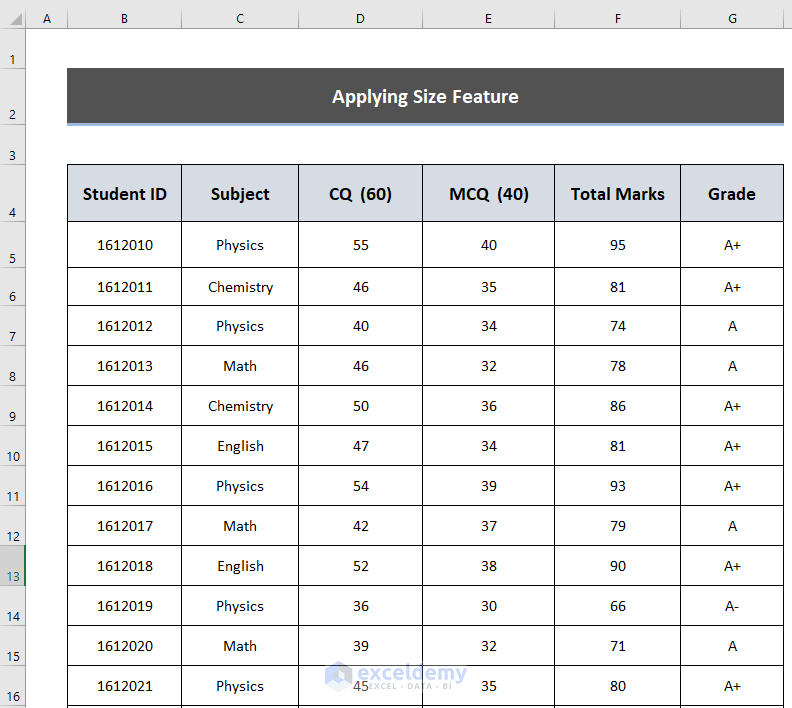
- You will see the changed Row height.
- We have also changed the width of the Columns with a similar process.
- From the Page Layout tab, select the Drop-Down Arrow.
- Select the Print Preview option from that Page Setup dialog box.

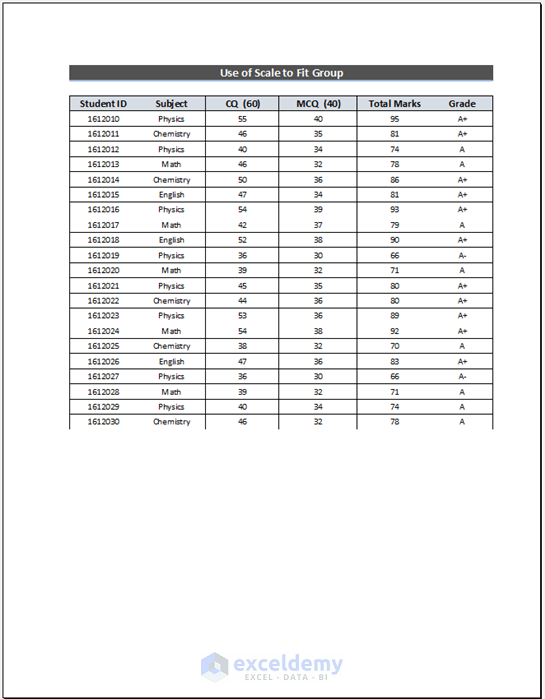
- You can see the stretched Excel spreadsheet to full-page print.
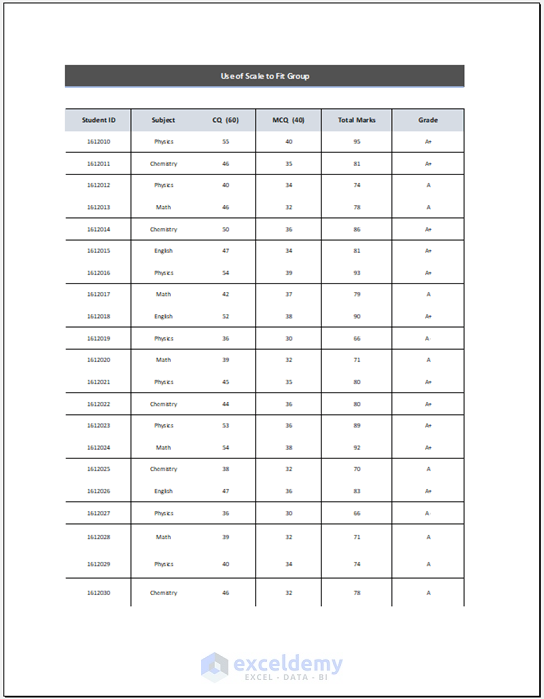
If you print out your page, you will see a clear image of your all data as you set them. We have included a zoomed image of the print copy.

Read More: How to Fit to Page in Excel (3 Easy Ways)
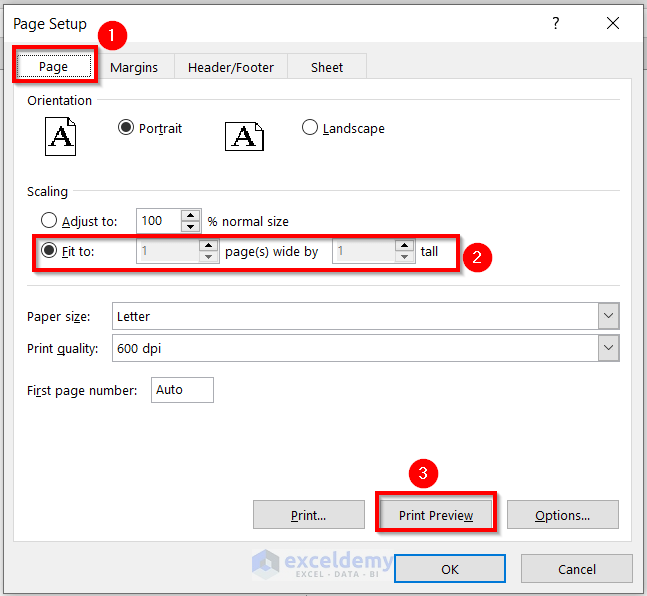
Method 2 – Applying Margins to Stretch the Excel Spreadsheet to Full Page
Steps:
- From the Page Layout ribbon, go to the Drop-Down Arrow.
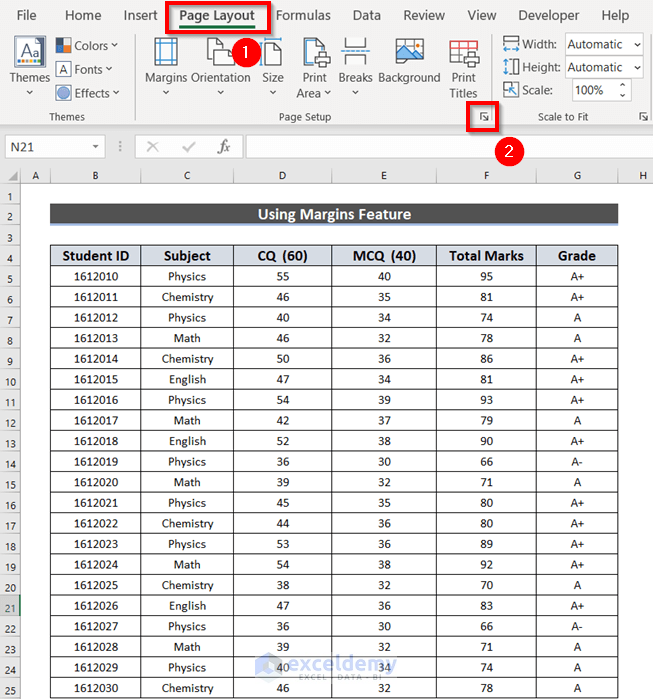
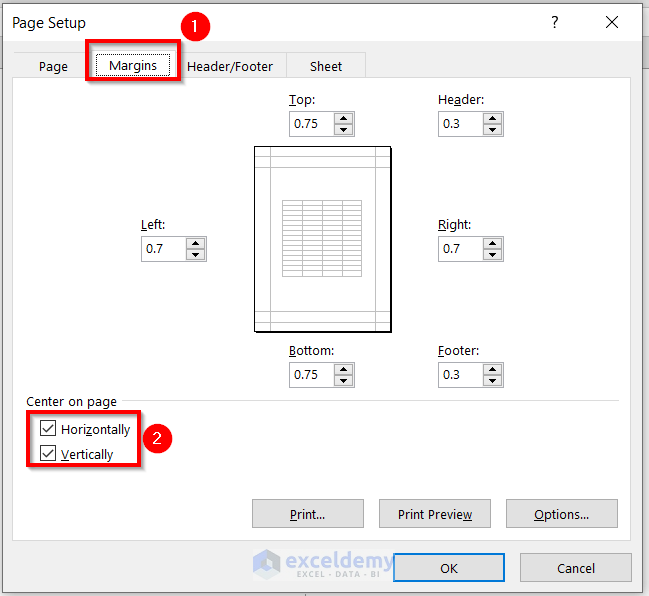
- Select the Margins tab from the Page Setup dialog box.
- Check the Horizontally and Vertically options.
- Go to the Page tab in the Page Setup dialog box.
- Click on the Fit to option.
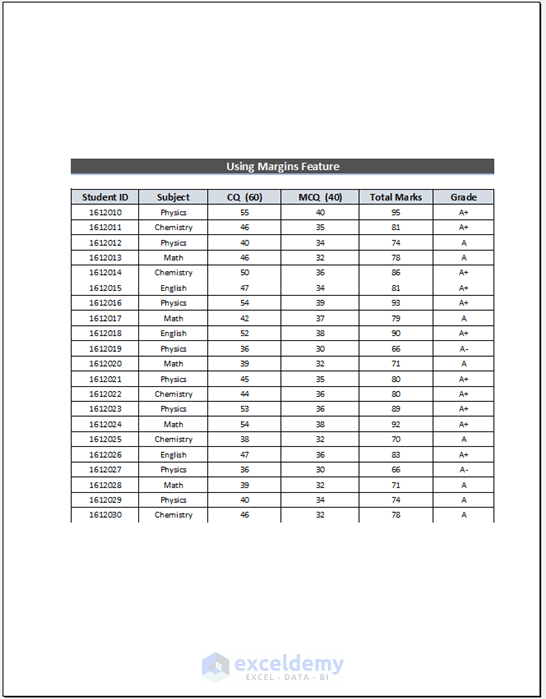
- Go to the Print Preview option to see the image of the printed copy.
- Here’s the print preview.
- You can change the Margins option from Normal to Narrow to set your data to the full page.
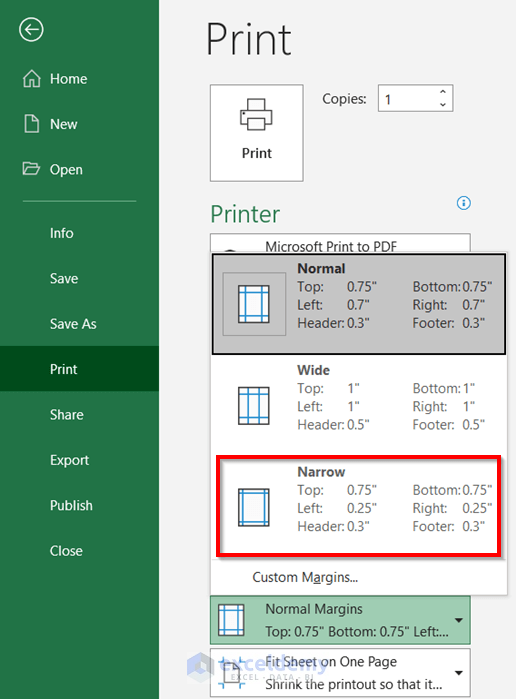
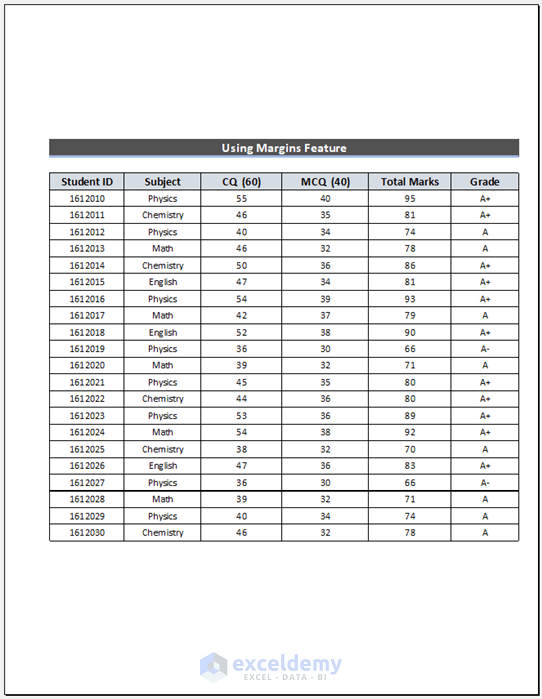
- You will get the stretched Excel spreadsheet to full-page print.
Read More: How to Adjust Page Size for Printing in Excel (6 Quick Tricks)
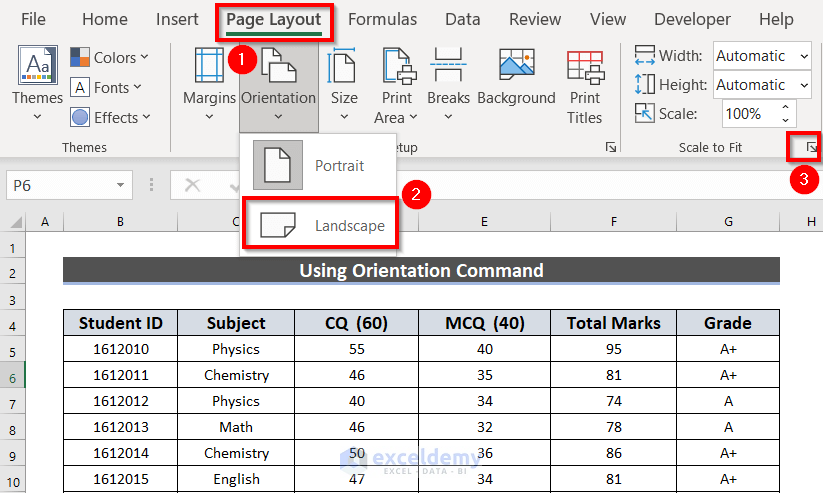
Method 3 – Using the Orientation Command
Steps:
- From the Page Layout tab, go to Orientation and choose the Landscape option.
- Go to the Drop-Down Arrow.
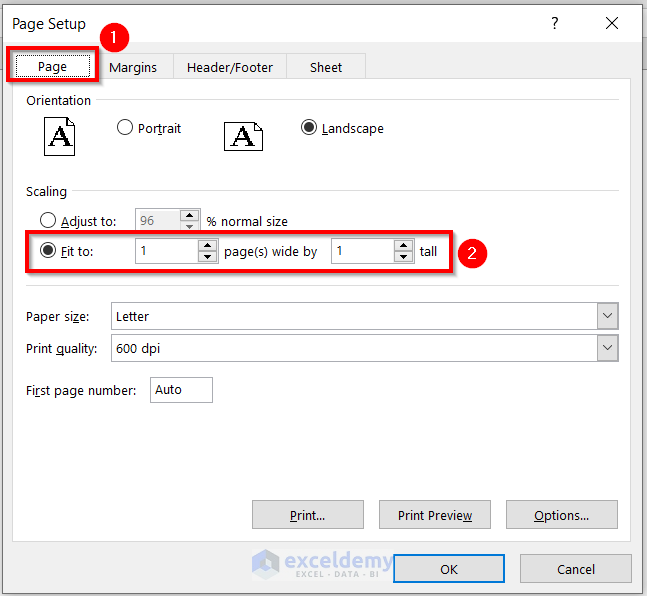
- Go to the Page tab in the Page Setup dialog box.
- Click on the Fit to option.
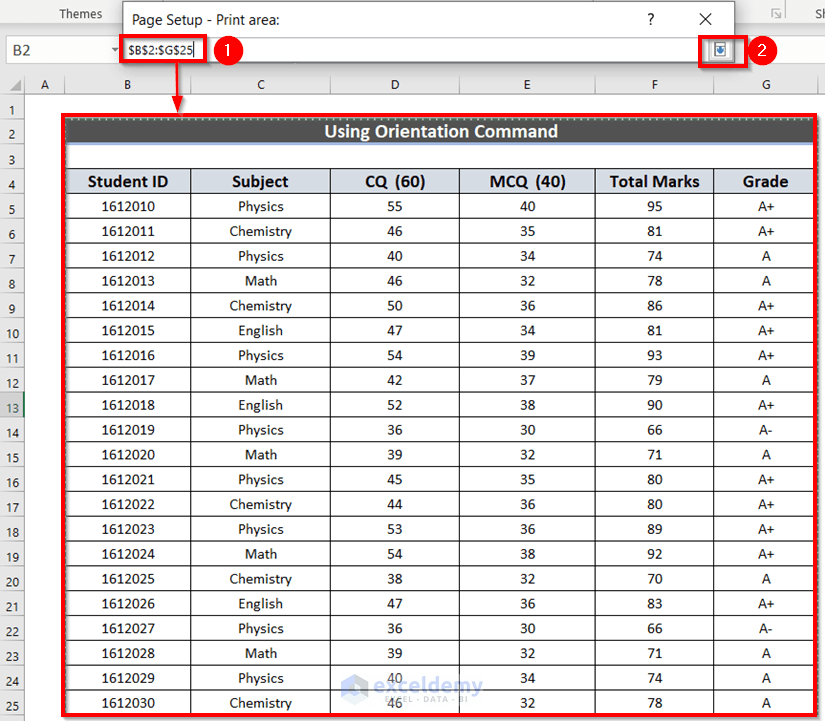
- From the Sheet tab in the Page Setup dialog box, go to Drop-Down Arrow which is adjacent to the Print area.

- Select the data up to which you want to print. We have selected the data range B2:G25.
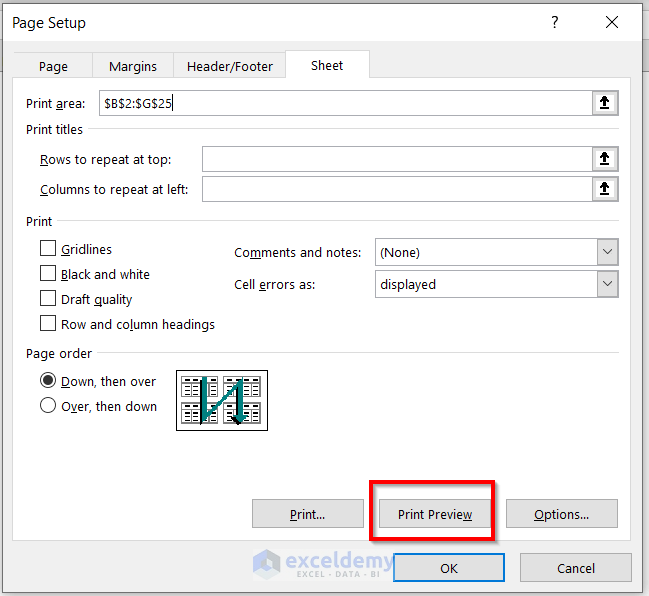
- Click on the Drop-Down Arrow to go back to the Page Setup dialog box.
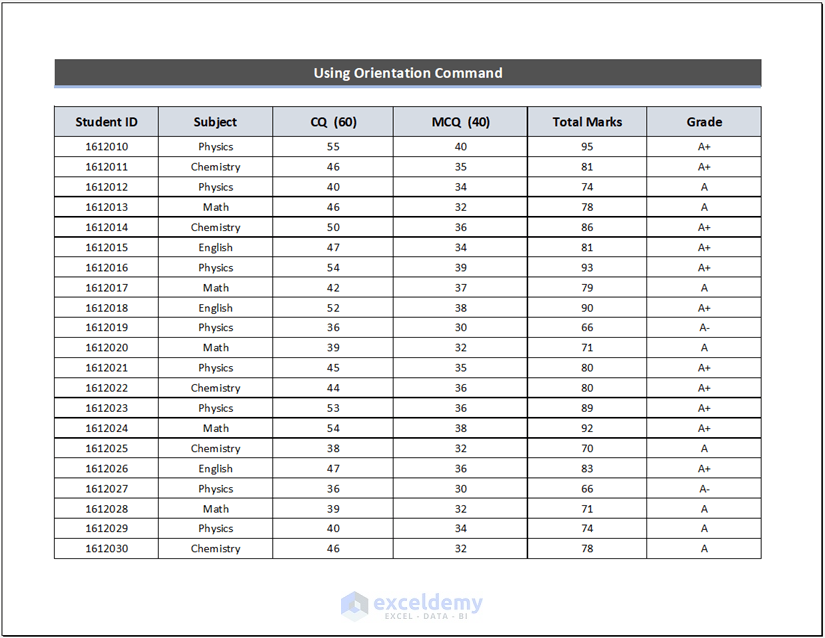
- Select the Print Preview option to see the image of the printed copy.
- Here’s our preview.

- Go back to the worksheet.
- We extended some column width and row height to fill the blank space of the printed copy.
- From the Page Layout tab, open the Page Setup dialog box.
- Select the Print Preview option to see the changes.
Read More: How to Fit All Columns on One Page in Excel (5 Easy Methods)
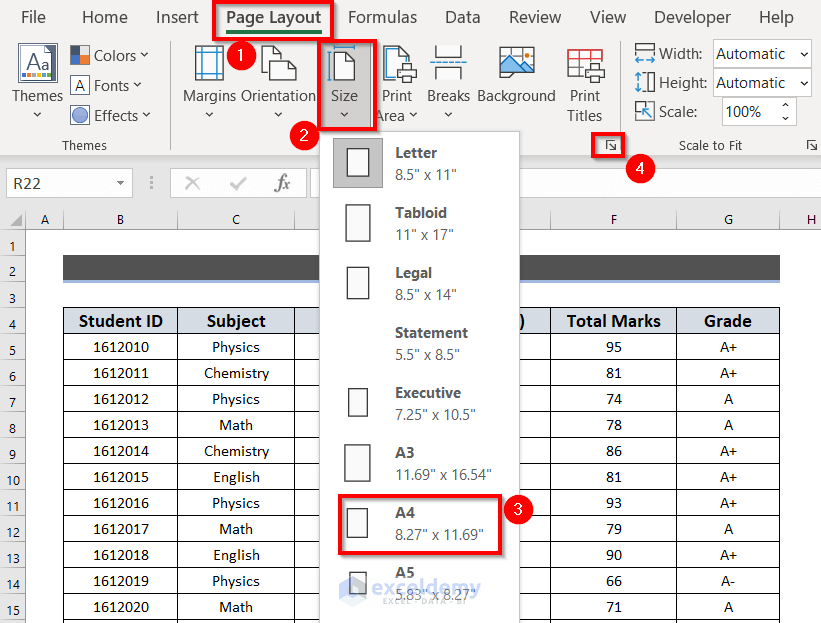
Method 4 – Using Page Size to Stretch an Excel Spreadsheet to the Full Page
Steps:
- From the Page Layout tab, go to the Size command and choose a page size.
- Press the Drop-Down Arrow.
A dialog box named Page Setup will appear.
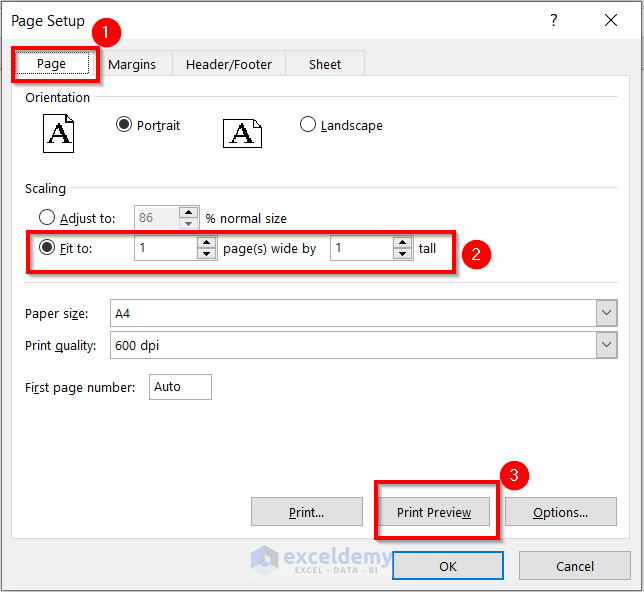
- Go to the Page tab in the Page Setup dialog box.
- Click on the Fit to option.
- Press the Print Preview option.
- Here’s our sample preview with some blank space.
We will change the Row Height.
- Select your data.
- Go to the Home tab.
- From the Cells option, choose Format.
- Select the Row Height option.
- Insert a new row height value and press OK.
- Here’s the new look.
- From the Page Layout tab, open the Page Setup dialog box.
- Select the Print Preview option to see the changes.
- Here’s the print preview.
Read More: How to Change the Printing Scale So All Columns Will Print on a Single Page
Method 5 – Use the Print Area Command to Stretch an Excel Spreadsheet to Full Page
Steps:
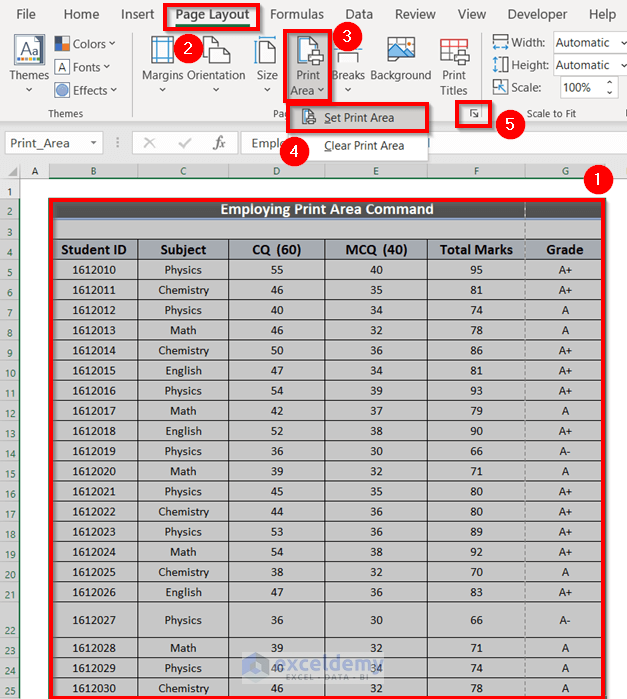
- Select the data. We have selected the range B2:G25.
- From the Page Layout tab, go to the Print Area command and choose Set Print Area.
- Click on the Drop-Down Arrow.
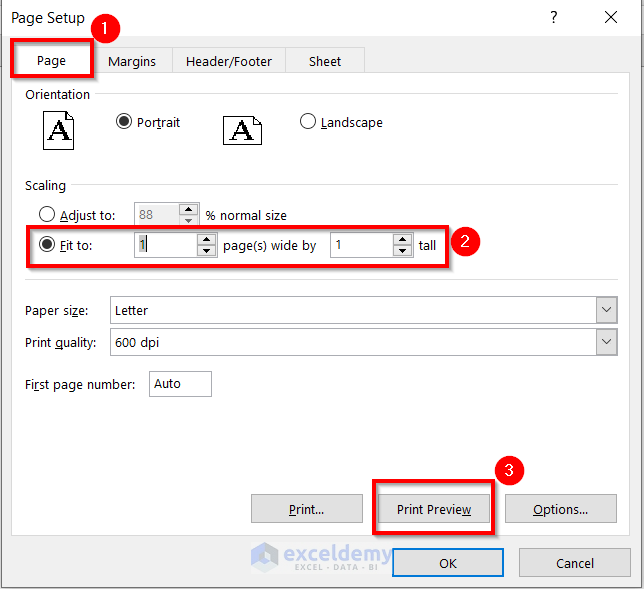
A dialog box named Page Setup will appear.
- Go to the Page tab.
- Click on the Fit to option.
- Press the Print Preview option.
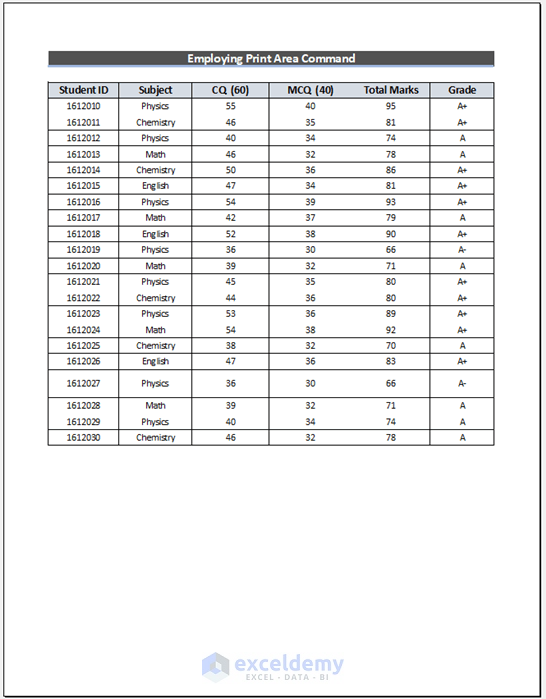
Here’s our previewed page that has some white space below. We’ll change the row height or column width to spread the data over the full page.
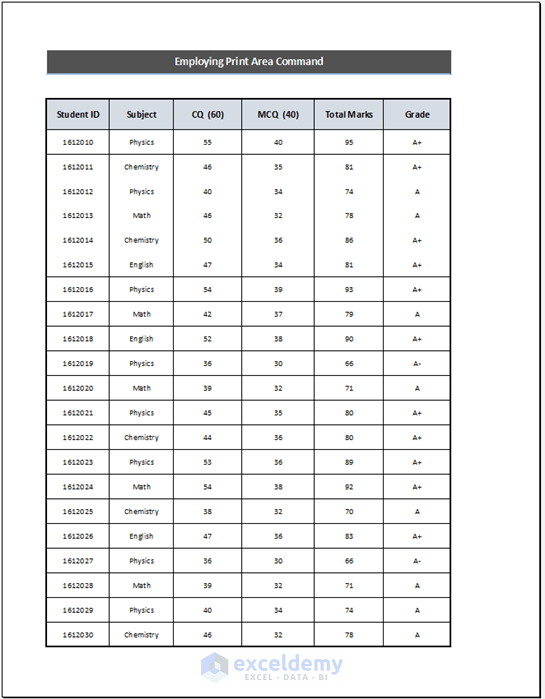
- You can change Row height by following Method 1.
- Go to Print Preview.
Read More: Excel Fit to Page Scale/Preview Looks Small (5 Suitable Solutions)
Things to Remember
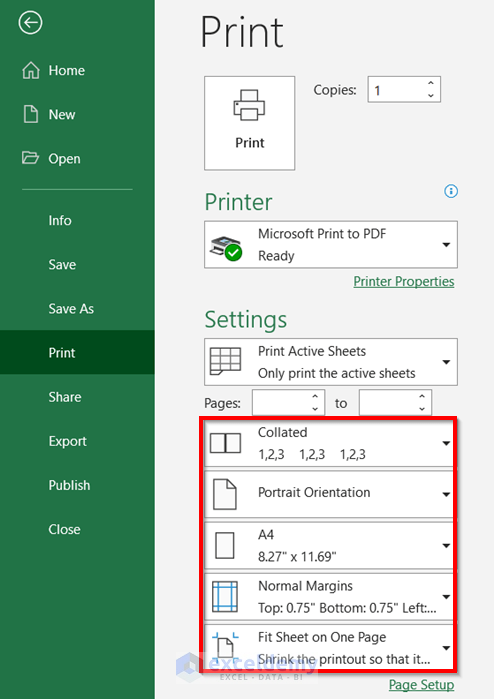
- Some options such as the Print Preview can be accessed via the Print command in the File tab.
Related Articles
- Fit Excel Sheet on One Page in Word (3 Simple Ways)
- How to Add Legal Paper Size in Excel
- Why Is My Excel Sheet Printing So Small (Reasons and Solutions)
- How to Add A3 Paper Size in Excel (2 Quick Ways)


Thank you so much!!! helped a lot
Hello Stephanie,
You are most welcome. Thanks for your feedback and appreciation. Glad to hear it was helpful.
Keep exploring Excel with ExcelDemy!
Regards,
ExcelDemy
Thank you for the information. It was very useful
Hello Chioma Laszczewska,
You are most welcome. Thanks for your feedback. Glad to hear that our tutorial was helpful to you.
Keep exploring Excel with ExcelDemy!
Regards,
ExcelDemy