Here’s a simple overview of putting a comma separator for numerical values in Excel.
Download the Practice Workbook
How to Add Comma in Excel: 10 Easy Methods
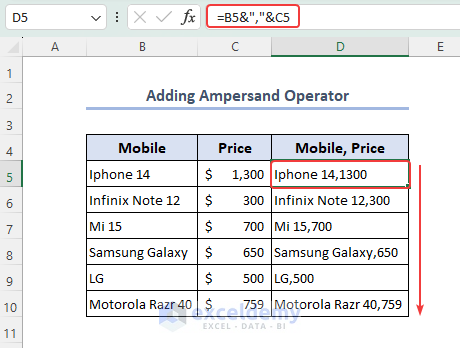
Method 1 – Adding the Ampersand (&) Operator
We will use an Ampersand (&) to attach the data from the B5 and C5 cells and insert a comma between them.
- Put the following formula in the result cell:
=B5&","&C5
- Press Enter and use the Fill Handle to copy the formula down to other cells you need.
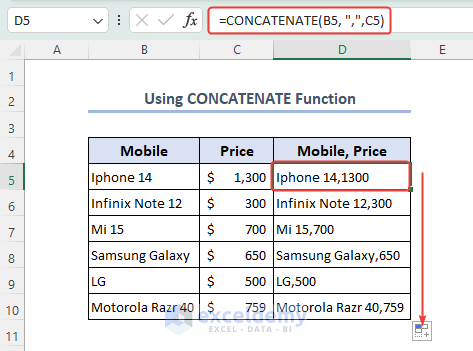
Method 2 – Using the CONCATENATE Function to Add a Comma
- Use the following formula to copy the values from B5 and C5 with a comma between them.
=CONCATENATE(B5, ",",C5)
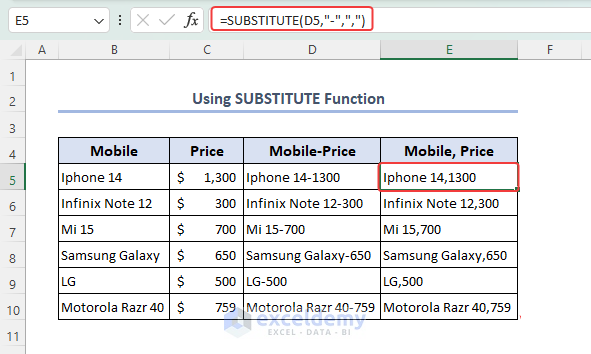
Method 3 – Applying the SUBSTITUTE Function to Replace Other Characters with a Comma
- We have used the SUBSTITUTE function to substitute the “-” in the D5 cell with “,”:
=SUBSTITUTE(D5,"-",",")
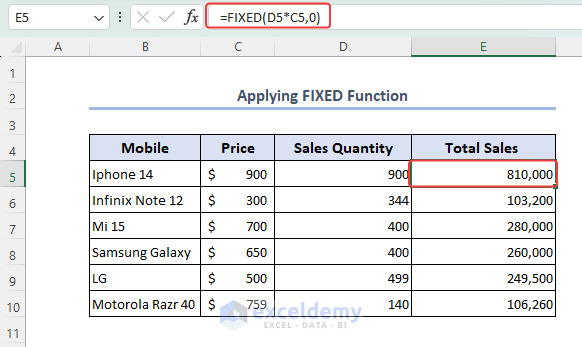
Method 4 – Using the FIXED Function to Add a Comma After 3 Digits
- The FIXED function puts a comma after 3 digits as a thousand separator but returns the value as text. The formula is given below:
=FIXED(D5*C5,0)
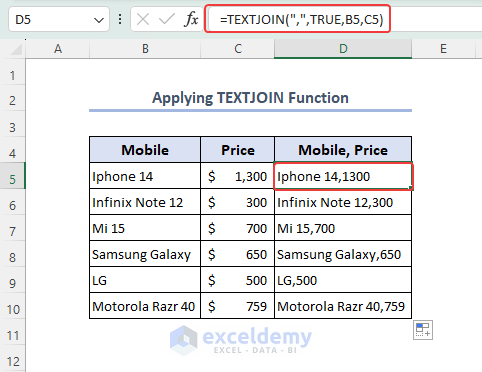
Method 5 – Using the TEXTJOIN Function to Combine a List with a Comma
- We’ll use the TEXTJOIN function to put a comma between B5 and C5. The formula is given below:
TEXTJOIN(",",TRUE,B5,C5)
Formula Explanation
- TEXTJOIN: It is an Excel function used to join multiple text strings together.
- “,”: This is the delimiter or separator that will be used to separate the text values. In this case, it’s a comma (“,”).
- TRUE: This parameter specifies that empty cells should be ignored. If a cell is empty, it will not be included in the final text string. /wpsm_box]
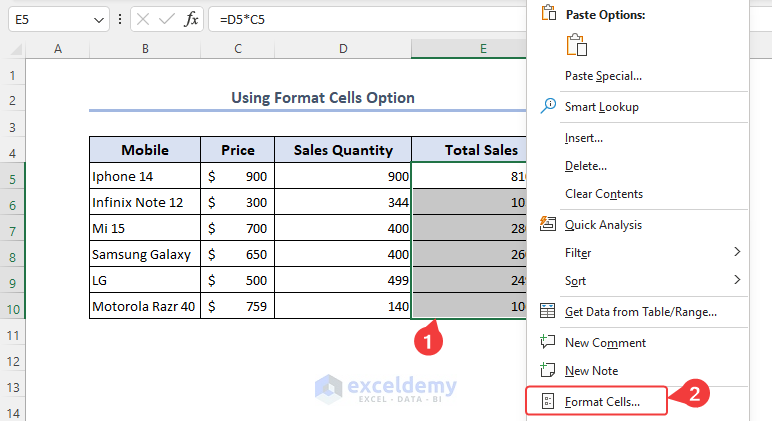
Method 6 – Using the Format Cells Option to Put a Comma
- Select the E column and right-click on it.
- Choose the Format Cells option from the Context Menu.
- Select the Number from the Format Cells window and check Use 1000 Separator (,).
- Press OK.
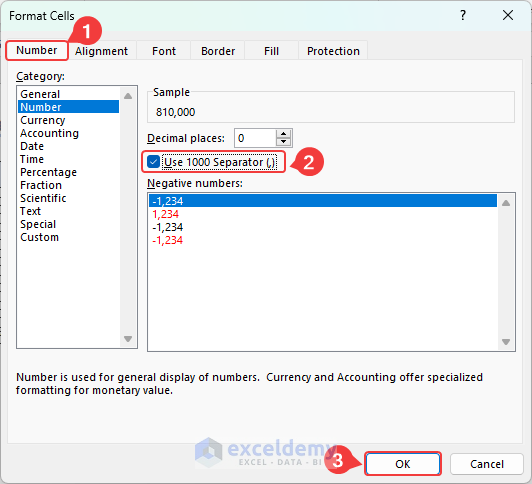
- You can also use the Custom Number Format and customize your own rule for inserting Commas.
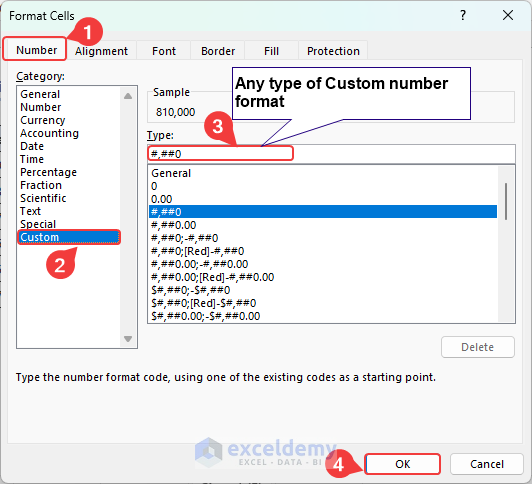
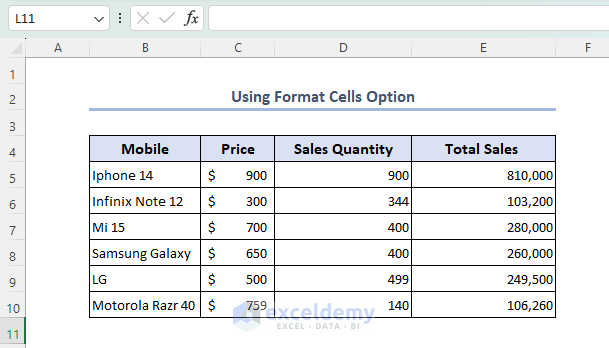
- You will get a Comma after three digits.
Method 7 – Add a Comma Using the Accounting Number Format
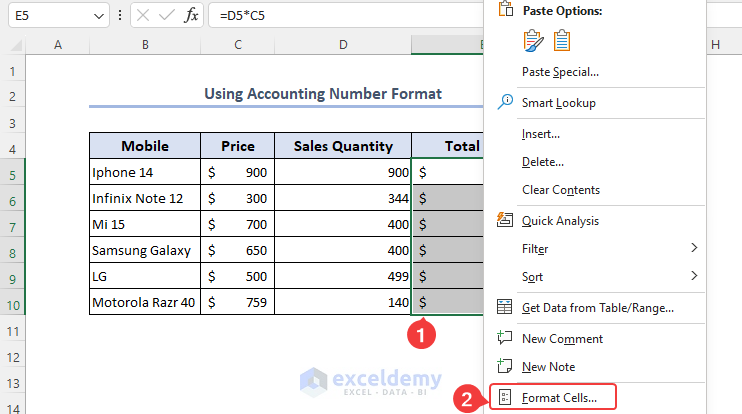
- Select column E and right-click on it.
- Select Format Cells.
- Choose the Accounting category from the Number tab.
- Press OK.
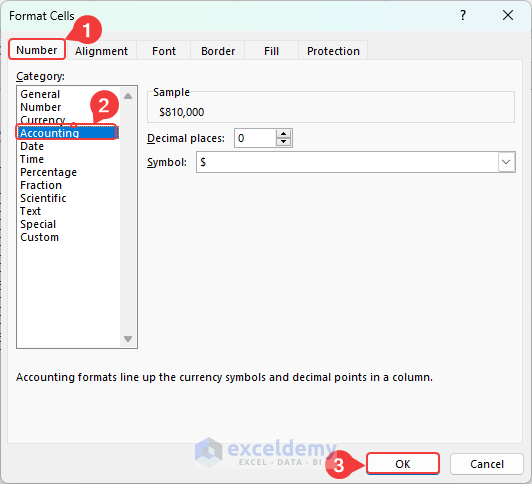
- In column E, Excel has added a comma using the Accounting category.

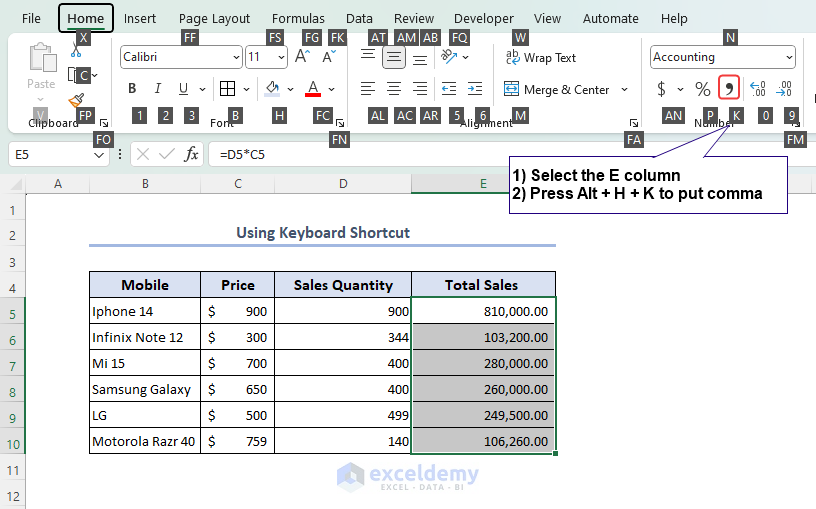
Method 8 – Using the Shortcut Keys to a Add Comma
- Select the E column.
- Press Alt + H + K to add a comma in the E column.
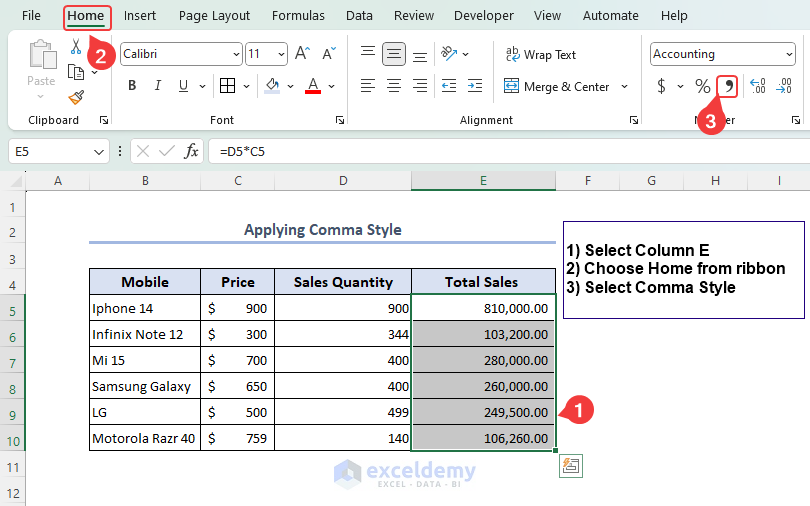
Method 9 – Using the Comma Style to Put a Comma in Numbers
- Select the column E.
- Go to the Home tab and select Comma Style.
Method 10 – Applying VBA to Add a Comma at the End
- Select Developer and choose Visual Basic.

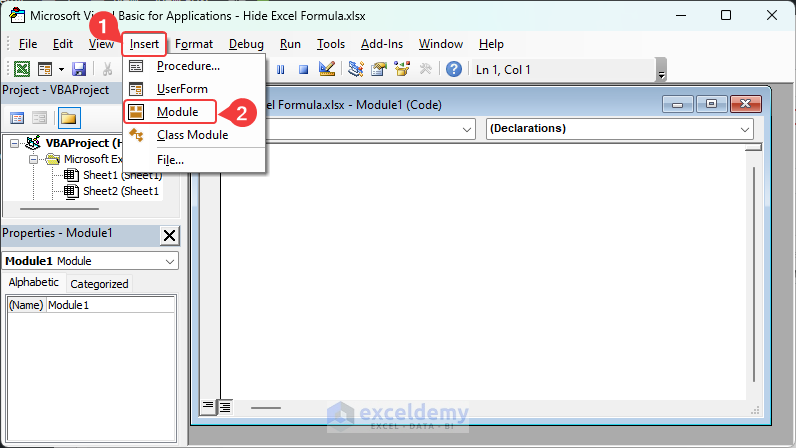
- Select Insert and choose Module.
- Paste the code below to add the comma at the end.
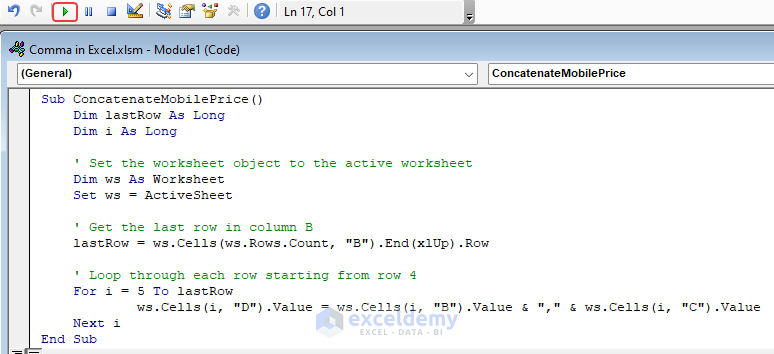
- You can copy the code from here.
Sub ConcatenateMobilePrice()
    Dim lastRow As Long
    Dim i As Long

    ' Set the worksheet object to the active worksheet
    Dim ws As Worksheet
    Set ws = ActiveSheet

    ' Get the last row in column B
    lastRow = ws.Cells(ws.Rows.Count, "B").End(xlUp).Row

    ' Loop through each row starting from row 4
    For i = 5 To lastRow
            ws.Cells(i, "D").Value = ws.Cells(i, "B").Value & "," & ws.Cells(i, "C").Value
    Next i
End Sub
Code Explanation In this part, we declare variables lastRow, i, and ws to store the last row number, loop counter, and the active worksheet object, respectively. This line determines the last used row in column B. It starts from the last row of the worksheet (ws.Rows.Count) and moves upwards until it finds the last non-empty cell in column B (ws.Cells(ws.Rows.Count, “B”).End(xlUp)). The row number of the last non-empty cell in column B is then stored in the lastRow variable. In the loop, we start from row 5 and iterate through each row until we reach the last row (lastRow). For each iteration, the code concatenates the values in column B and column C using the & operator, with a comma in between and stores the result in column D (ws.Cells(i, “D”).Value).
Sub ConcatenateMobilePrice()

    Dim lastRow As Long

    Dim i As Long

    ' Set the worksheet object to the active worksheet

    Dim ws As Worksheet

Set ws = ActiveSheet' Get the last row in column B
lastRow = ws.Cells(ws.Rows.Count, "B").End(xlUp).Row ' Loop through each row starting from row 4
For i = 5 To lastRow
ws.Cells(i, "D").Value = ws.Cells(i, "B").Value & "," & ws.Cells(i, "C").Value
Next i
End Sub
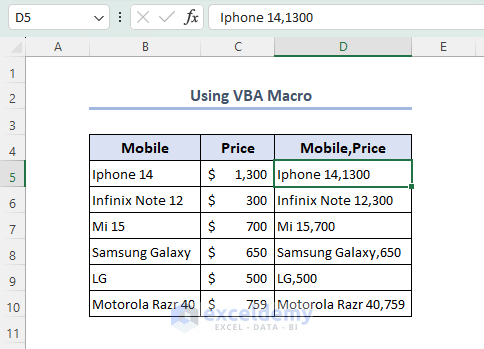
- Run the code and you’ll get a column D with commas.
How to Add Commas in Excel Between Names
- Select column C first and choose Find & Select, then go to Replace.
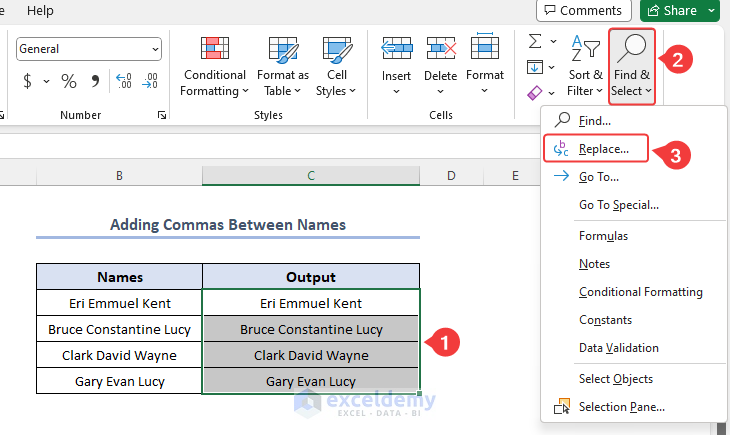
- Select Replace.
- Put a space in Find what.
- For Replace with, insert a comma.
- Pick Replace All.
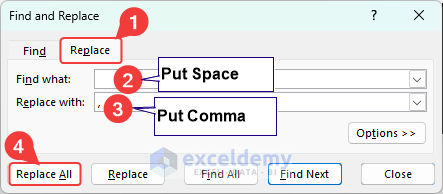
- Close the notification and the box.
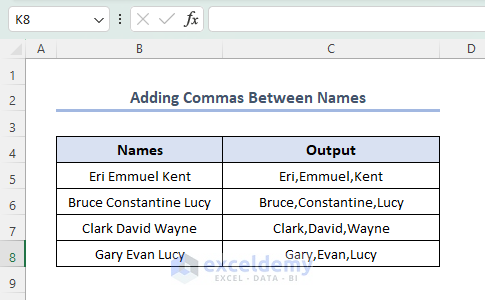
- We get the commas between names.
How to Add Commas in Excel Between Numbers
- To add commas between numbers, we have used the following formula:
=LEFT(C5,3)&","&MID(C5,4,3)&","&RIGHT(C5,3)
Formula Explanation The formula =LEFT(C5,3)&”,”&MID(C5,4,3)&”,”&RIGHT(C5,3) manipulates the value in cell C5 by extracting substrings from it and combining them with commas.
- We get commas in the D column.

Things to Remember
- Consider the number of decimal places you want to display. The comma formatting in Excel affects only the whole number part of a value and does not modify decimal places.
- If you want to display decimal places as well, you need to adjust the formatting accordingly.
Frequently Asked Questions
Can I apply comma formatting to a range of cells?
Yes, you can apply comma formatting to a range of cells in Excel. Simply select the range of cells you want to format and follow the steps mentioned earlier to add commas to the numbers.
Can I remove commas from numbers in Excel?
Yes, you can remove commas from numbers by changing the number formatting of the cell or range of cells. Select the cell or range, right-click, choose Format Cells, and then select the appropriate number formatting option without commas.
Does Excel support other regional comma separators?
Yes, Excel supports regional settings and automatically adjusts the comma separator based on the language and regional settings of your computer. For example, in some regions, a period may be used as a comma separator.
Is it possible to add commas to numbers using formulas in Excel?
Yes, you can use formulas to add commas to numbers in Excel. The TEXT function is commonly used for this purpose. For example, you can use the formula “=TEXT(C5,”#,##0.00″)” to add commas and display two decimal places for the value in cell C5.
How to Add Commas in Excel: Knowledge Hub
- Put Comma After 2 Digits
- Put Comma after 3 Digits
- Put Comma After 5 Digits
- Insert Comma Between Words
- Add Comma Before Text
- Insert Comma for Multiple Rows
- Add a Comma Between City and State
- Use Comma in Excel Formula
- Add Thousand Separator
- Change Semicolon to Comma
- Excel Number Format Thousands with Comma
- Change Comma Style
- Change Comma to Indian style
- Convert Column to Row with Comma
- [Fixed!] Style Comma Not Found
<< Go Back to Concatenate Excel | Learn Excel
Get FREE Advanced Excel Exercises with Solutions!
