In order to decorate our data while working with Microsoft Excel, we often use tables. Normally, the data are organized in different rows and columns in a table within a certain border. It is possible to happen to anyone that at the time of Print preview, the table border is not available. If you are looking for a solution to the problem table border not showing in Print Preview, you will be glad to know that you have come to the right place for the solution. I am going to explain 2 simple solutions to this problem in this article. I hope it will be very helpful for you.
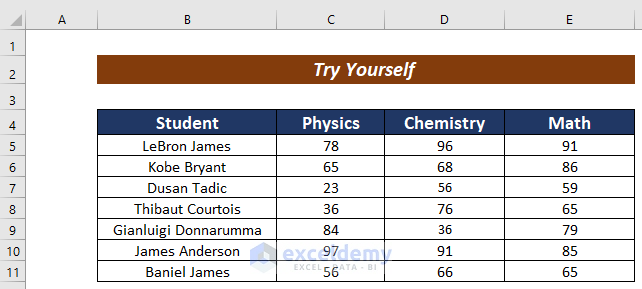
For more clarification, I am going to use a dataset of Annual Exam Results in the Student, Physics, Chemistry, and Math columns.
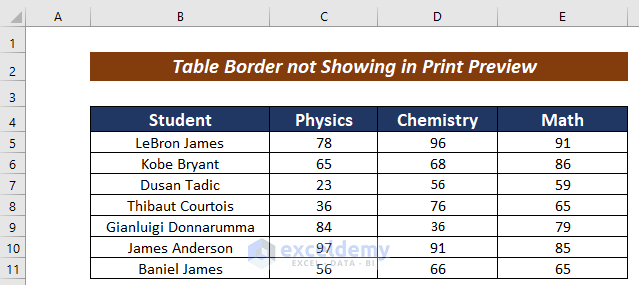
Table Border Not Showing in Print Preview: 2 Simple Solutions
There may be several reasons for the table border not showing in the preview (or after print) while printing it, like borders not selected, and gridlines are not set to print. Let’s see how to deal with the issue and show the borders.
1. Using Gridlines as Table Border in Print
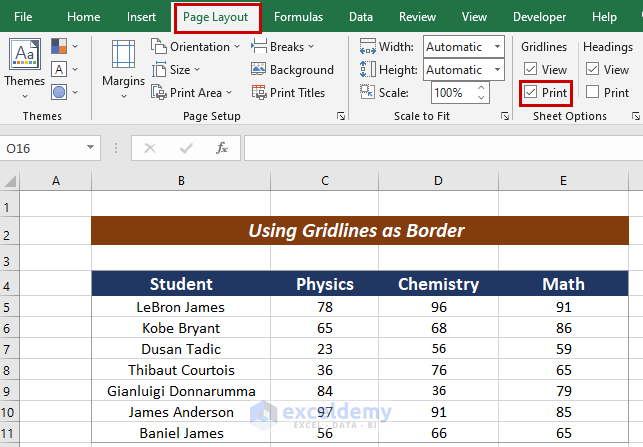
Gridlines are the default format in Excel Worksheet. We can use these gridlines as a border to solve the problem of table border not showing in Print Preview. For this, you need to follow some sequential processes. They are described in the below section.
Steps:
- First of all, go to the Page Layout tab.
- Check the Print box from the Gridlines option in the ribbon.
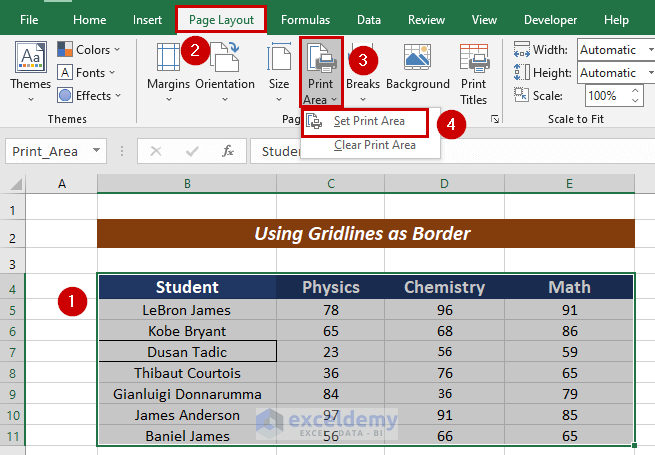
- Followingly, select the whole table. In this case, my table range is B4:E11.
- Click on the Page Layout tab.
- Choose Print Area from the ribbon.
- Next, pick the Set Print Area This command will choose the selected area for Print.
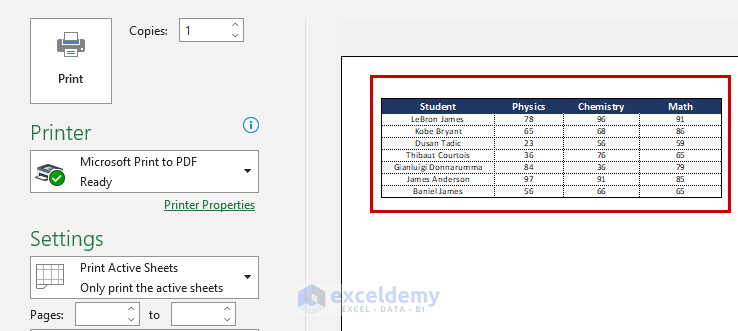
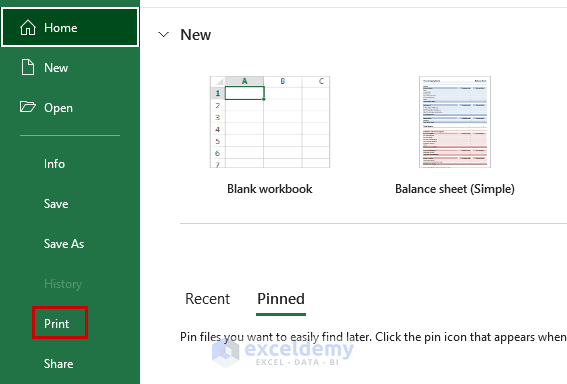
- After that, go to the File tab.
- From the available options, select Print.

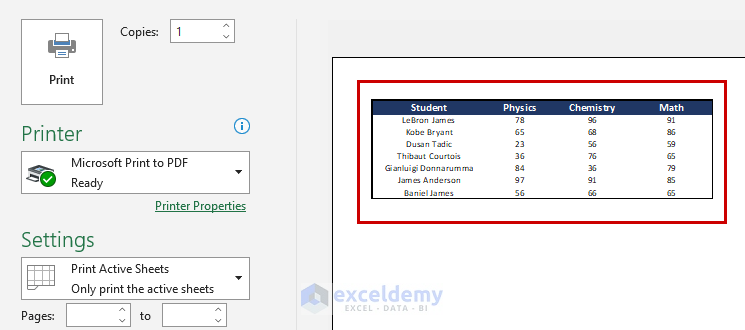
Alternatively, you can press CTRL + P to have the Print Preview.
We can see in the Print Preview section that the Gridlines have worked there as the table border.
2. Showing Border Using Borders from Home Tab
We can set the table border manually to solve this problem. This is not a complicated process at all. The steps are simplified in the following section.
Steps:
- Firstly, select the whole table. Here, my table range is B4:E11.
- Next, click on the Home tab.
- Choose the Borders option from the ribbon.
- From the available options, pick a type that covers the whole table. I have picked the Thick Outside Borders options.

- Now, go to the Page Layout tab.
- Then, click on Print Area from the ribbon.
- Next, pick the Set Print Area This command will choose the selected area for Print.

- Followingly, go to the File tab.
- Select Print from the available options.
Now, in the Print Preview section, we can see our desired table border.
Read More: [Fixed!] Print Preview in Excel Doesn’t Match Document
Practice Section
You can practice here. Practice will improve your efficiency in solving this problem.
Download Practice Workbook
Conclusion
At the end, I like to add that I have tried to explain 2 simple solutions for the table border not showing in the Print Preview problem in this article. It will be a matter of great pleasure for me if this article could help any Excel user even a little. For any further queries, comment below.
Related Articles
- How to Delete Blank Pages in Print Preview in Excel
- [Fixed!] Print Preview in Excel Does Not Show All Pages
- [Fixed!] Print Preview Not Available in Excel
<< Go Back to Print Preview in Excel | Print in Excel | Learn Excel
Get FREE Advanced Excel Exercises with Solutions!
