Watch Video – Add a New Row Automatically in a Table
Below is the dataset, which calculates each person’s BMI in column E using weight/(height)2 taken respectively from columns D and C.

Adding a New Row Automatically
Steps:
- Go to the File tab and select Options to open the Excel Options.
- Under the Proofing tab, select AutoCorrect Options.
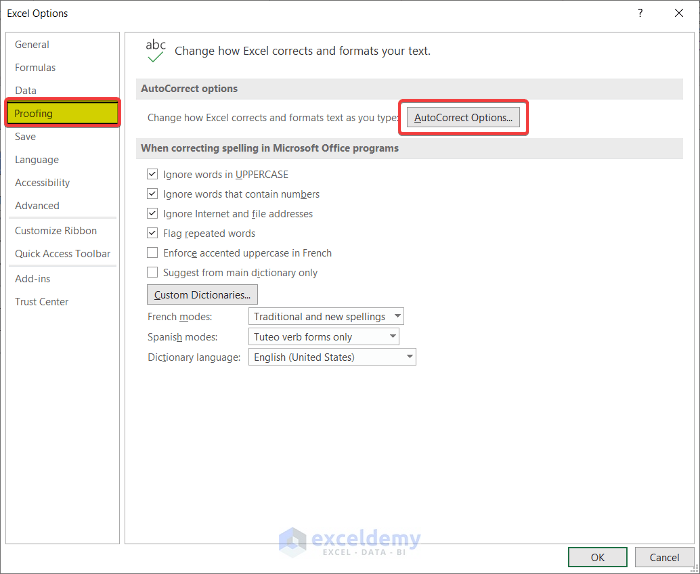
An AutoCorrect window will pop up.
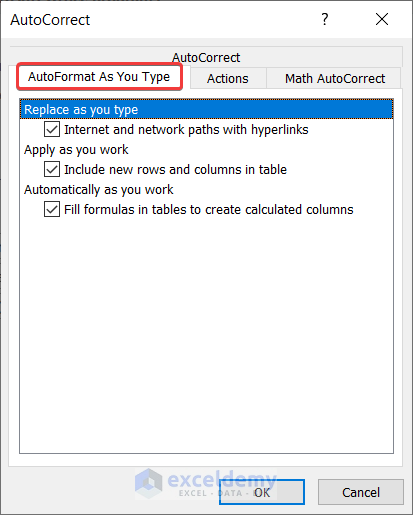
- In the AutoCorrect window, select AutoFormat As You Type.
- Check Include new rows and columns in table and Fill formulas in tables to create calculated columns.
- Select OK and close the Excel Options.
- Go back to the table, and under it, start typing a new row.
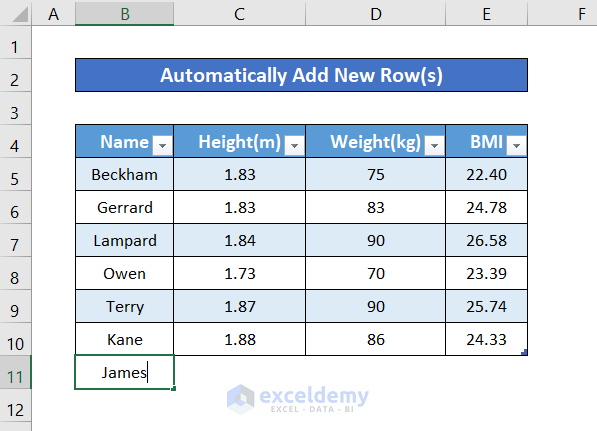
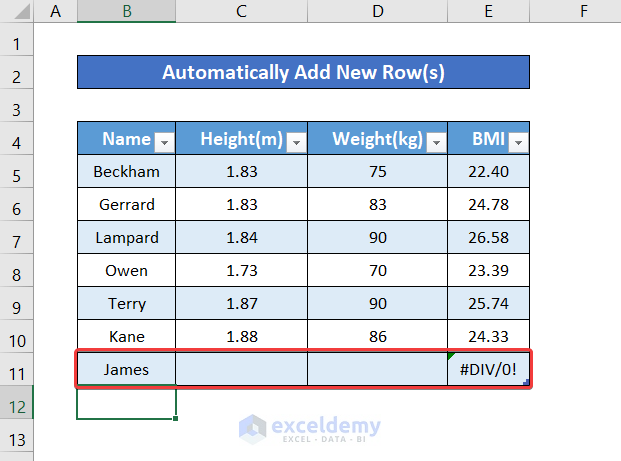
The new row is automatically added at the end of the table, including the formula columns filled.
Adding a New Row Manually
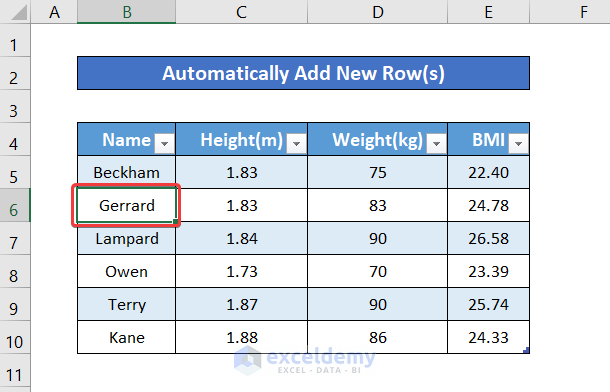
Let’s take the same sample dataset as a table, where column E has been calculated using the BMI formula from the values of columns C and D.
Method 1 – Adding a New Row by Using Keyboard Shortcuts in Excel
1.1 First Shortcut
Steps:
- Select a cell above which you want to insert the new row.
- Press Ctrl + Shift + =. It will insert a new row above it.

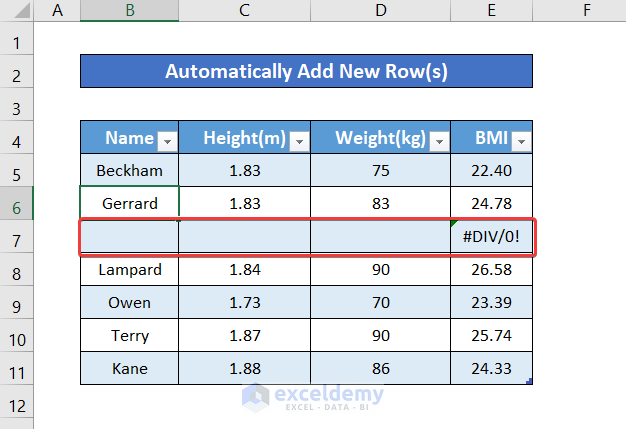
As you can see, a new row has been added with the formulas replicated.
1.2 Second Shortcut
Steps:
- Select a cell above which you want to insert a new row.
- Press Alt+I .
- Press R. It will insert a new row, like above.
Read More: Create Table in Excel Using Shortcut
Method 2 – Adding a New Row by Quick Access Toolbar
Steps:
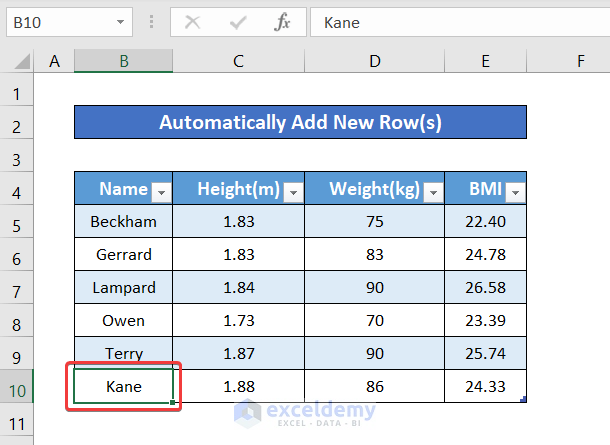
- Select the row or a cell in a row before which you want to insert a row in the table. I have selected cell B10.
- Press and release the Alt. You will access the quick access toolbar.
- Press H (to access the Home tab) and then I (to go to Insert).
- Press A to insert a table row above.
Method 3 – Adding a New Row Using VBA in an Excel Table
Steps:
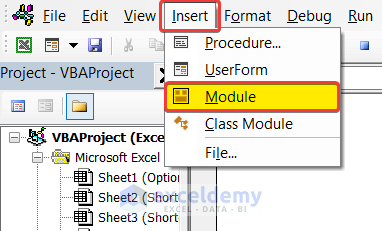
- Under the Developer tab, select Visual Basic (or press Alt+F11 for a shortcut).

- In the Visual Basic window, select Insert and then select Module.
- Enter the following formula:
Public Sub AddNewRow()
'Create rows below

ActiveCell.Offset(1, 0).Rows("1:1").EntireRow.Insert Shift:=xlDown

End Sub
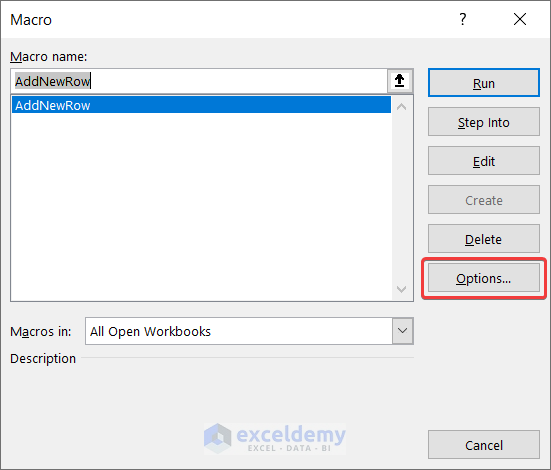
- Close the VBA window and in the Developer tab, select Macros.

- In the Macros window, select Options (you can also run the macro through here, but for reusability, keep following the procedure and assign a shortcut).
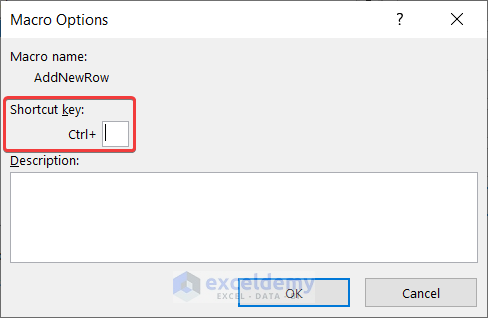
- A Macro Options window will pop up. You can select a shortcut key here for feasibility while reusing the code. I am using Ctrl + Shift + N, You can replace Shift + N with a shortcut you prefer.
- Select OK.
- select a cell before the row where you want to insert one.
- Press Ctrl + Shift + N (or the key you have selected for the shortcut).
Read More: How to Create a Table with Subcategories in Excel
Things to Remember
- In the newly added rows, the column containing the formula shows zero division error, because of the lack of data in the rest of the cells. Once you input a value for all the cells the formula cell will display a value.
- In the first method, you can just keep filling up the rows and it will be added as a table row automatically.
- In the manual methods, rows will be inserted before the row you have selected (or the row your selected cell belongs to).
- If you use the VBA code, it creates a row after the cell or the row you have selected.
- In the macros window, you can skip the key assignment and just run the code from there. But for reusability, assign a shortcut.
Download the Practice Workbook
Download the notebook with the template and VBA included.
Related Articles
- Create a Table in Excel Based on Cell Value
- How to Create a Table with Existing Data in Excel
- How to Create a Table Without Data in Excel
- How to Create a Table with Merged Cells in Excel
- How to Create a Table in Excel with Multiple Columns
- How to Make a Table in Excel with Lines
<< Go Back to Excel Table | Learn Excel
Get FREE Advanced Excel Exercises with Solutions!
