One of the major drawbacks of an Excel table is that you can not create a table with merged cells. Let’s assume you have a data set that consists of multiple merged cells like below.
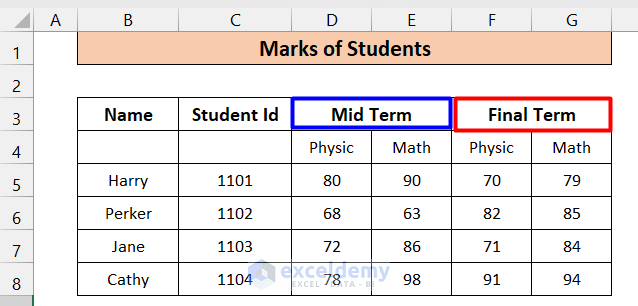
D3, E3, and F3, G3 are merged. If you want to create a table with these cells, you will get the following result.
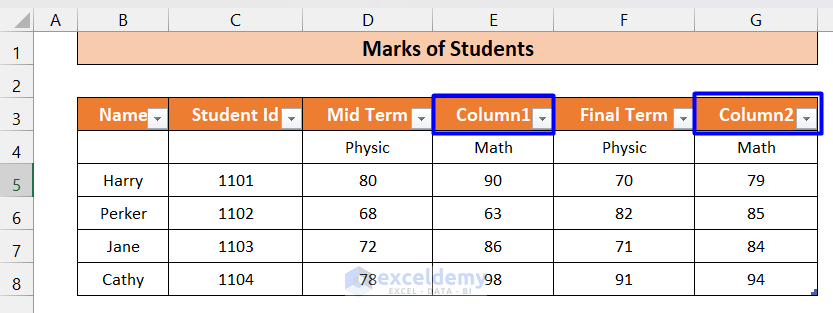
Excel has unmerged the merged cells and created additional column headers. We have to follow a technique that will allow us to create a table consisting of merged cells. Note that this will not be an actual excel table, but the data formatting will be like an excel table.
Method 1 – Use of Center Across Selection Option to Merge Cell While Creating a Table
In this method, we need to transform the Table into a normal range. Then we will apply a special alignment option.
Steps:
- Select any cell of the Table and go to the Table Design
- In the Tools group, click on Convert to Range.
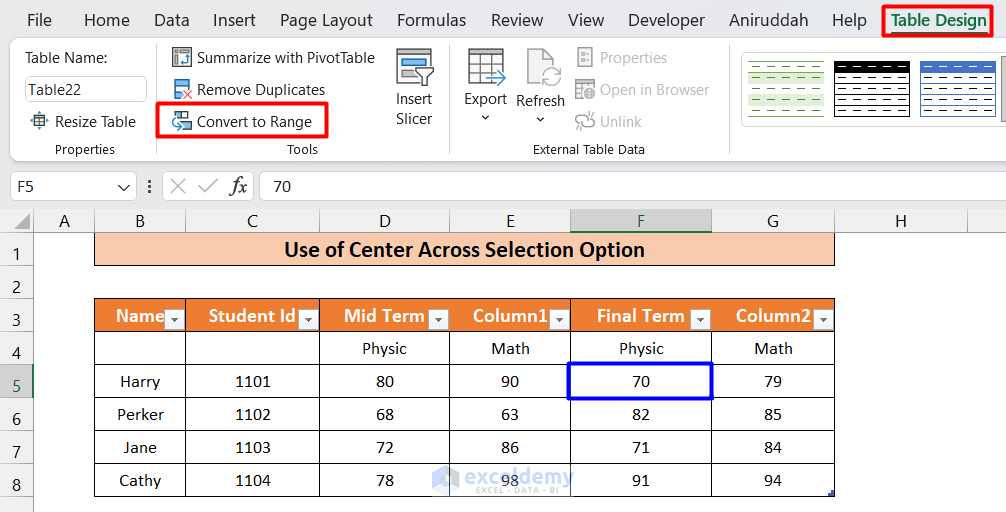
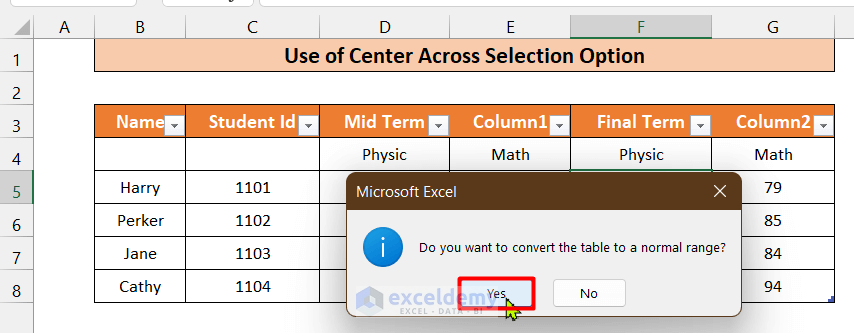
- In the dialog box, click on Yes. This will convert the Table into a normal range.
- Erase the texts of cells E3 and E4.
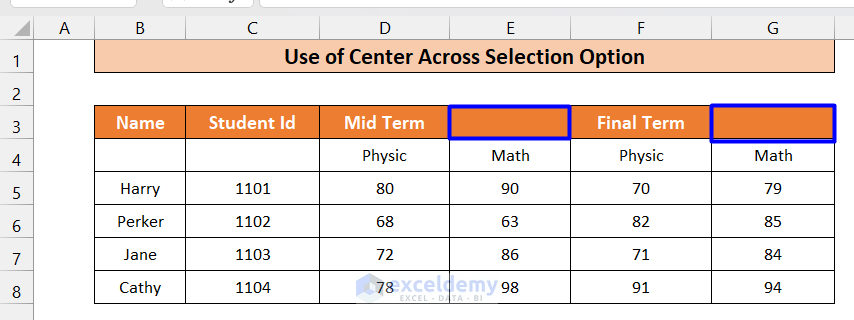
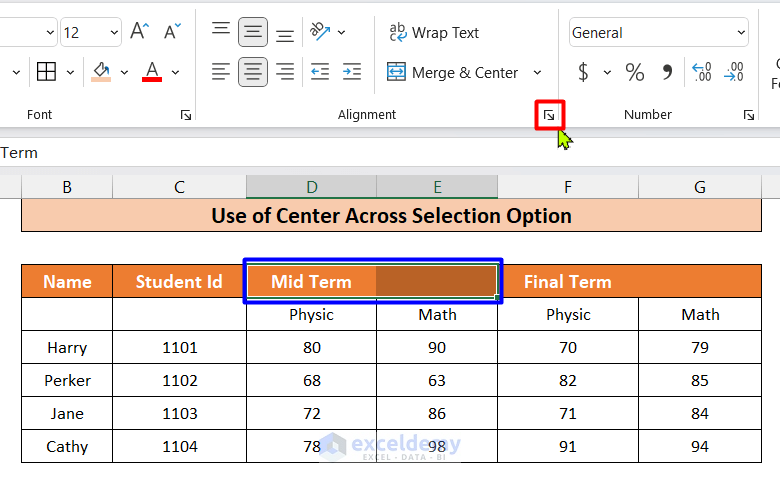
- Select D3 and E3 cells, in the Alignment group, click on the arrow icon to open all the commands of the alignment group.
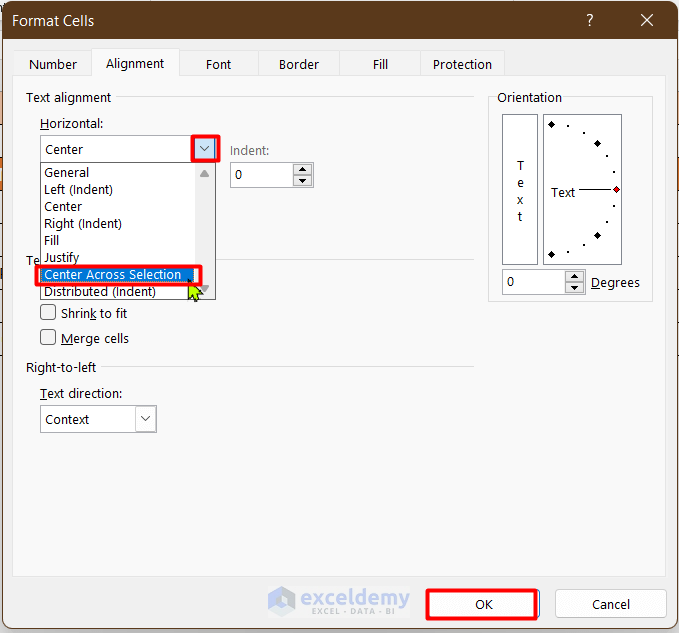
- The Format Cells dialog box will pop up. From the drop-down menu under the Horizontal option, select the Center Across Selection option and click OK.
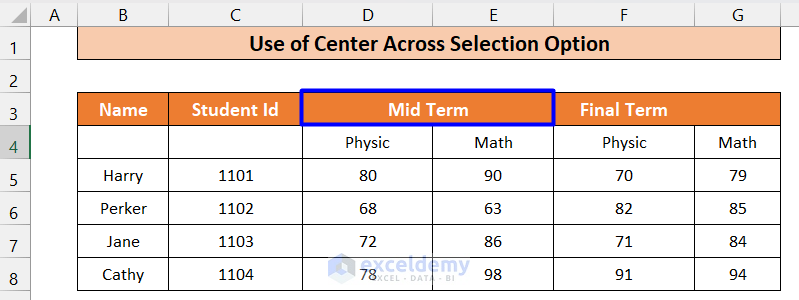
- You will see that the “Mid Term” text has come in the middle of D3 and E3 cells and makes it look like they are merged. However, the text is in D3 while E3 is empty.
- Follow the same steps for cells F3 and G3.
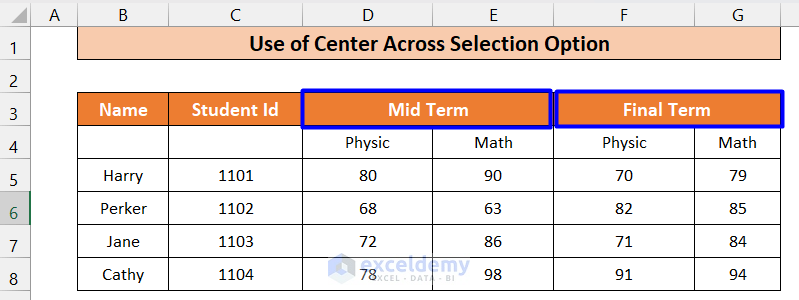
- This Table looks exactly like an excel table but lacks features of excel tables such as Sorting and Filtering.
- If your merged cells are not in the header columns (on the top row), you can convert it into an excel table.
- A limitation of this method is that, it is only applicable when the cells need to be horizontally merged. For vertically merged cells, we have to follow other methods.
Read More: How to Create a Table with Existing Data in Excel
Method 2 – Application of Convert to Range Feature to Generate a Table with Merged Cells
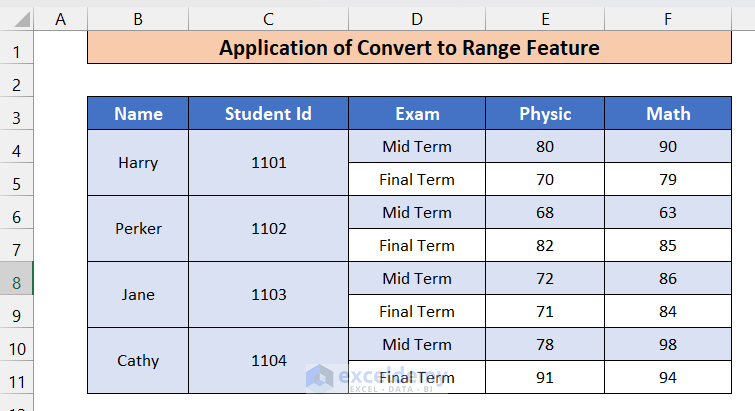
This method is applicable for both vertically and horizontally merged cells. We are using another sample data set with multiple vertically merged cells for illustration.
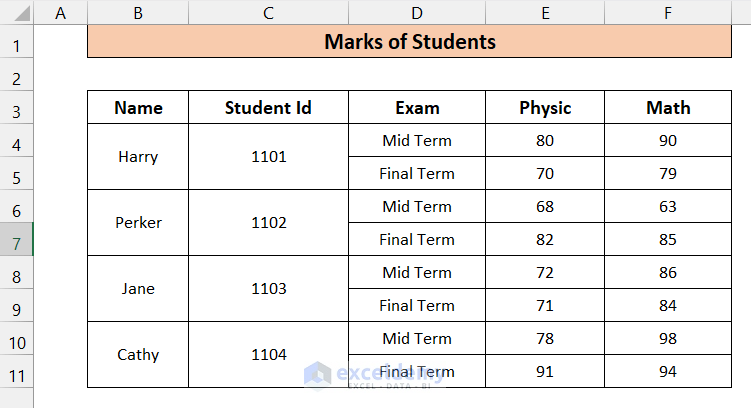
In the above data set, B4–B5, B6–B7, B8–B9, B10–B11, C4–C5, C6–C7, C8–C9, and C10–C11 are merged. We want to create a table from this dataset. To do that, follow the steps below.
Steps:
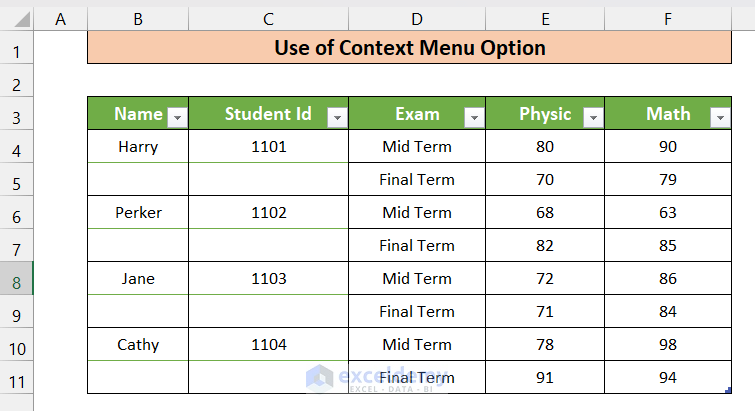
- Select all the dataset cells and convert them to a table.
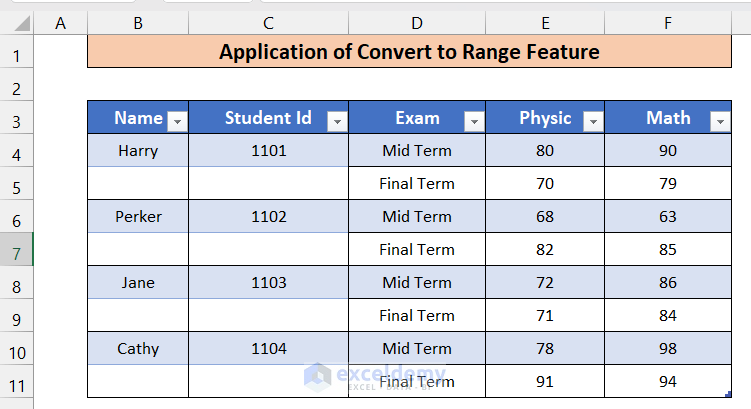
- We can see that Excel has automatically unmerged the merged cells with the Merge & Center option being unavailable. To merge those cells again, we have to convert the Table into a range.
- Select any cell of the Table and go to the Table Design
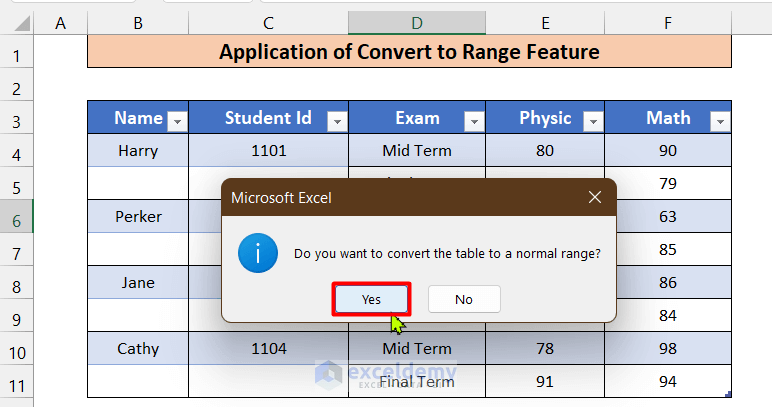
- In the Tools group, click on Convert to Range.
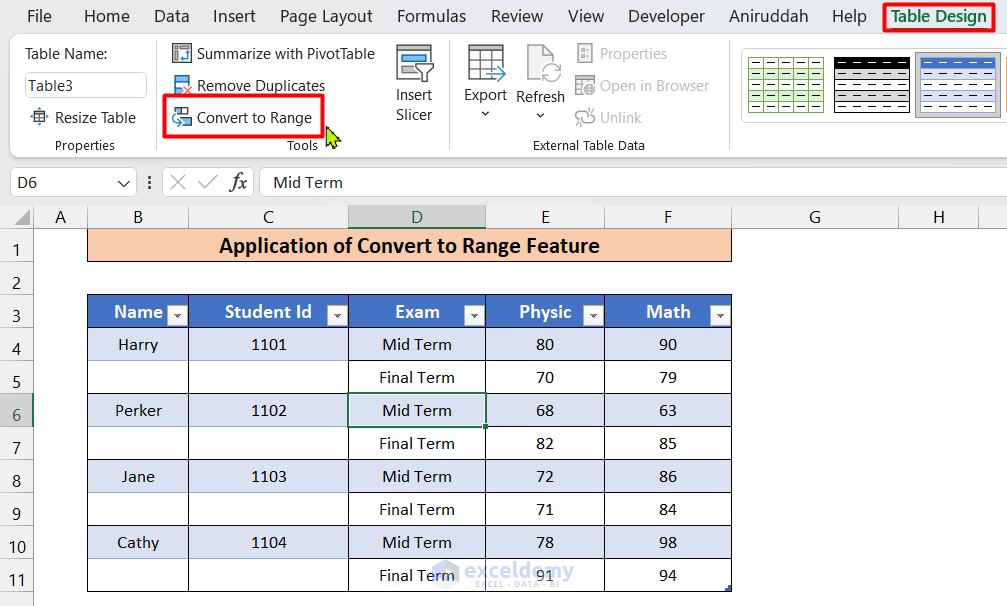
- In the dialog box, select Yes.
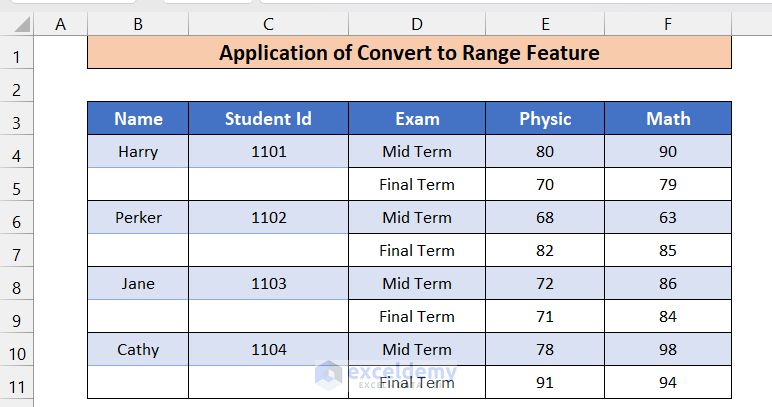
- The Table will be converted into a range.
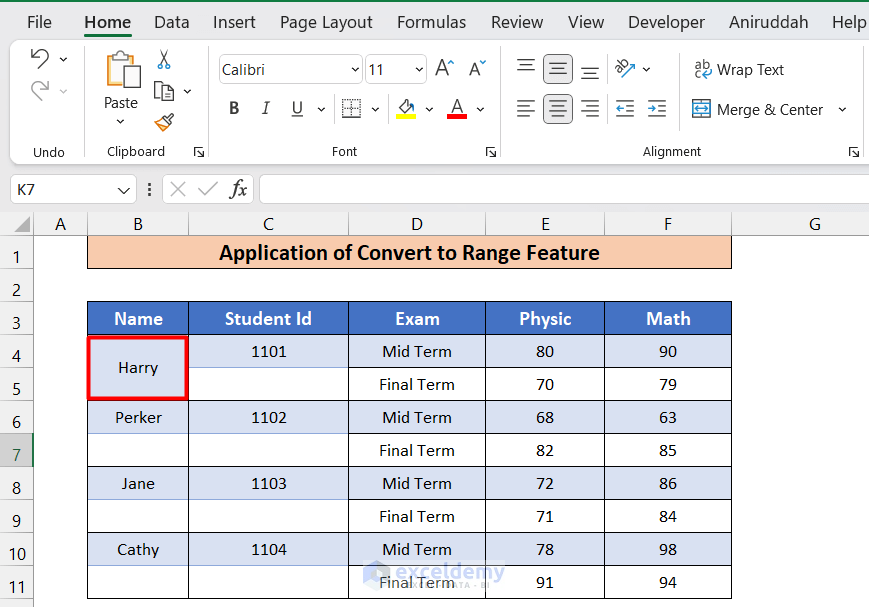
 To merge those unmerged cells, select the cells B4 and B5 and click on the Merge & Center option.
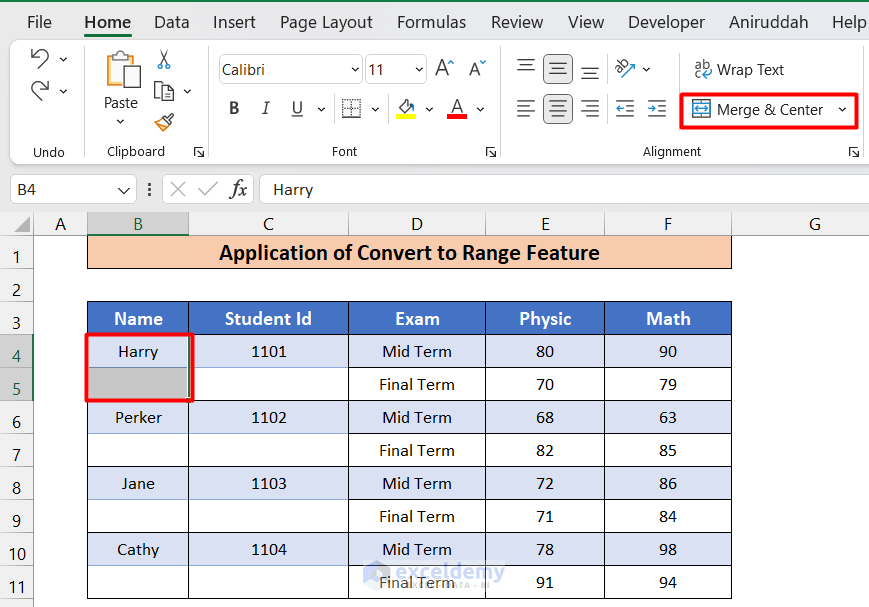
- The cells will be merged.
- Follow the same steps for the remaining cells to get the final result as shown below.
Read More: How to Make a Table in Excel with Lines
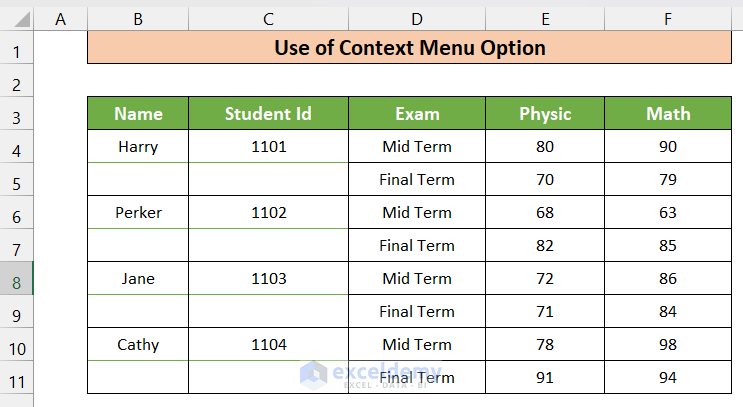
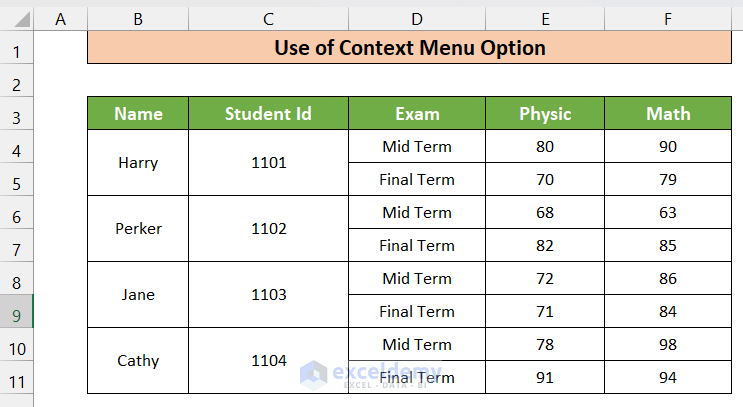
Method 3 – Using Context Menu Option to Create a Table with Merged Cells
There is an alternative method to convert a table to a range. After converting the Table to a range, the rest of the procedure is the same as method 2.
Steps:
- Convert the dataset into a table by following the same steps of method 2.
- Select any cells of the Table and right-click on the Mouse. From the Context menu, select Table > Convert to Range.
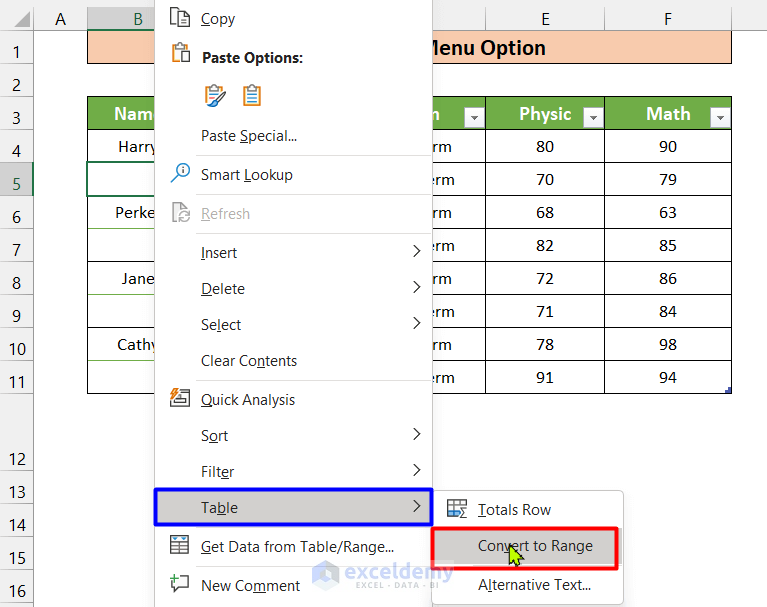
- In the pop-up box, select Yes.
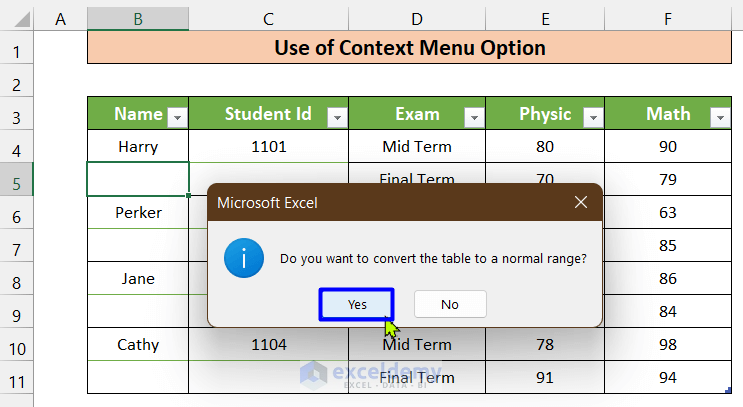
- On clicking Yes, the Table will be converted into a range.
- Follow the same steps of Method 2 to merge the cells.
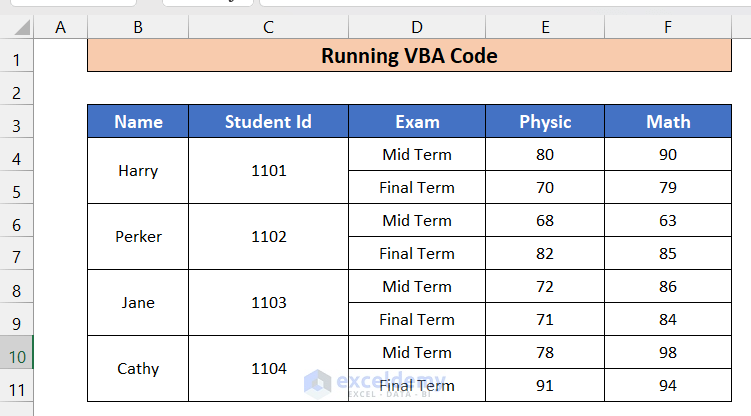
Method 4 – Run a VBA Code to Create a Table with Merged Cells
We can also run VBA code to convert an excel table to a range and merge the unmerged cells by using the same procedures mentioned in the previous methods.
Steps:
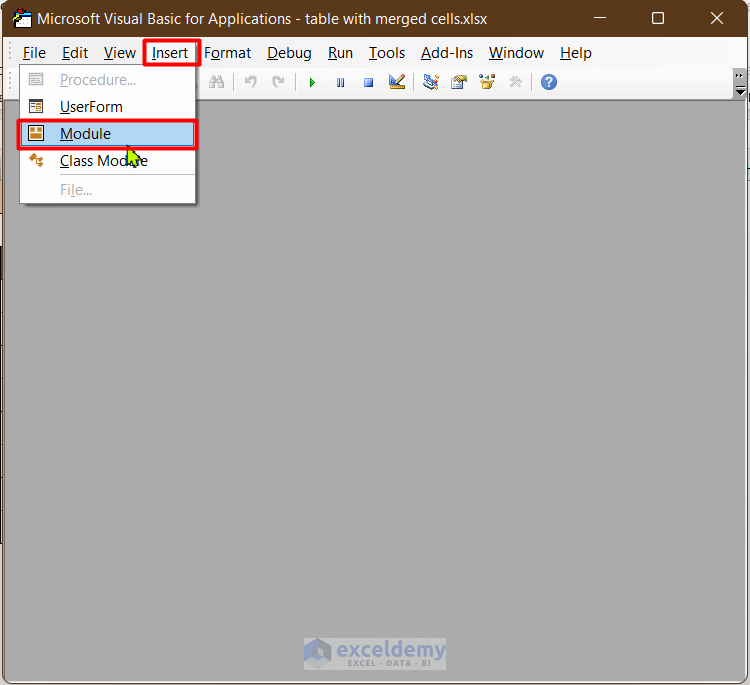
- Press ALT+F11 to open Microsoft Visual Basic window. In the window, Go to the Insert tab (from the Toolbar) > Select Module (from the options).
- Enter the following code into the Module.
Sub TableToRange()
Dim wrkSheet As Worksheet
Dim wrkList As ListObject
Set wrkSheet = ActiveWorkbook.ActiveSheet
For Each wrkList In wrkSheet.ListObjects
wrkList.Unlist
Next
End Sub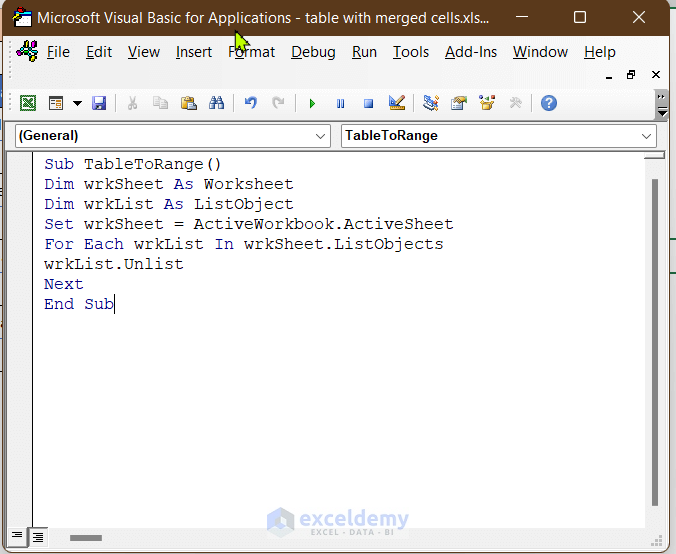
- Press the F5 key to run the macro. After running the code, you will see that the Table has been converted to a range.
- Use the same procedure to merge the required cells to get the final result.
Read More: Create a Table in Excel Based on Cell Value
Download Practice Workbook
Related Articles
- Create Table in Excel Using Shortcut
- How to Create a Table Without Data in Excel
- How to Create a Table in Excel with Multiple Columns
- How to Create a Table with Subcategories in Excel
- How to Add New Row Automatically in an Excel Table
<< Go Back to Excel Table | Learn Excel
Get FREE Advanced Excel Exercises with Solutions!
