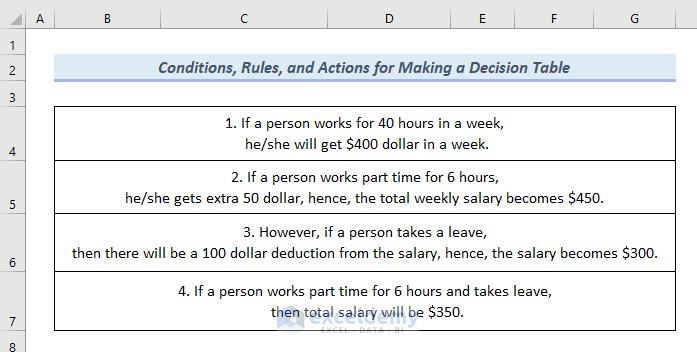
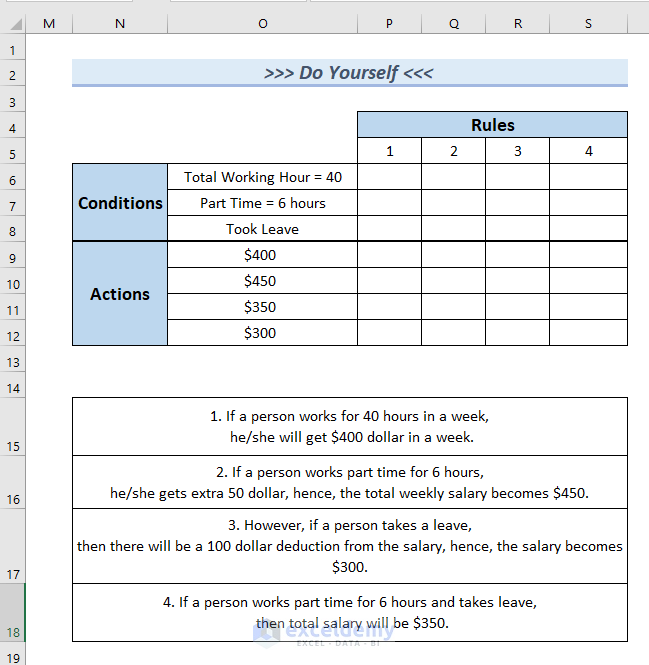
Using the Conditions, Rules, and Actions in the table below, create a decision table.
Step 1 – Create an Outline
- Set the Borders.
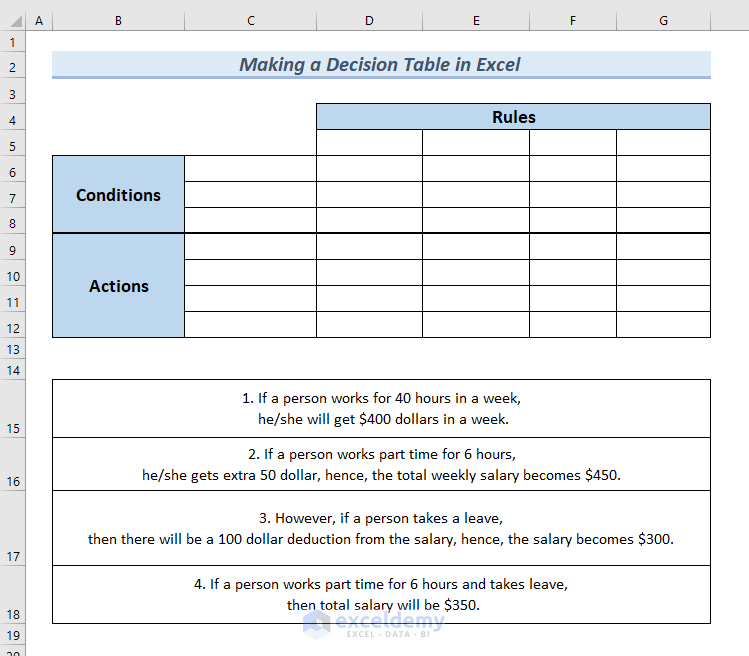
- Enter the Conditions in C6:C8.
- Enter the Actions in C9:C13.
- Enter 4 employees in D5:G5.
This is the outline:
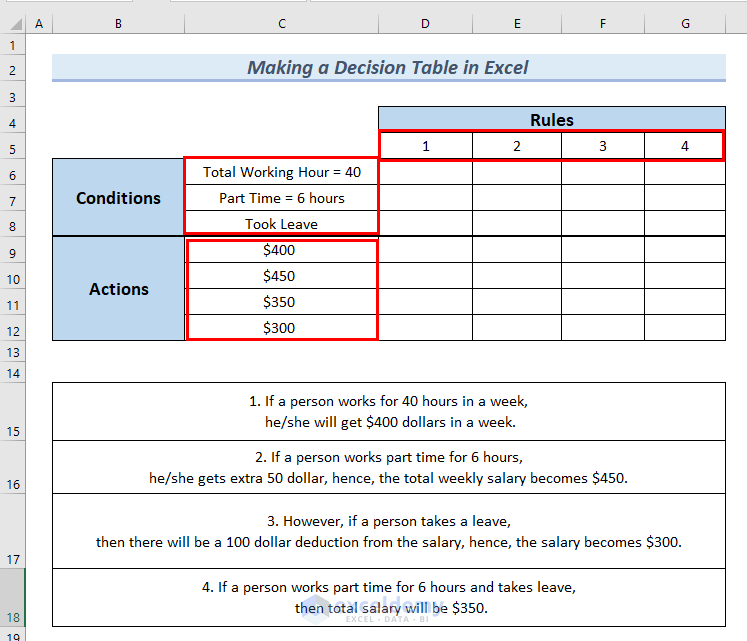
Step 2 – Entering Conditions and Actions in the Decision Table
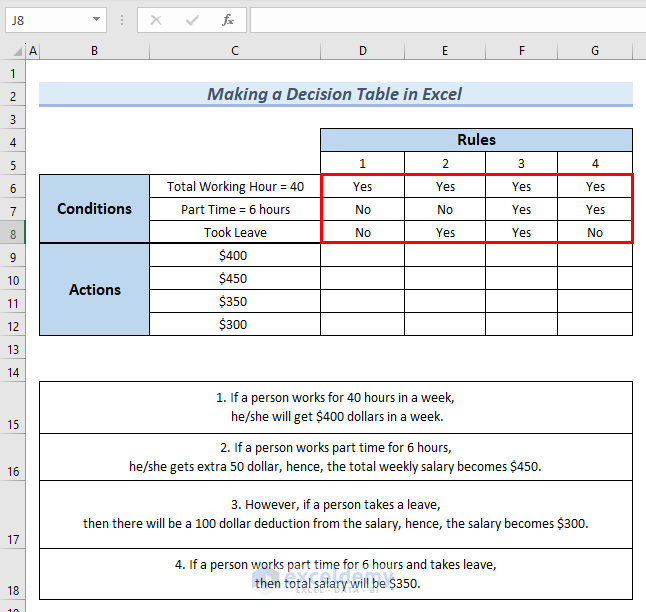
- Enter the Conditions data in D6:G8. Here, Yes if the condition is met. Otherwise, No.
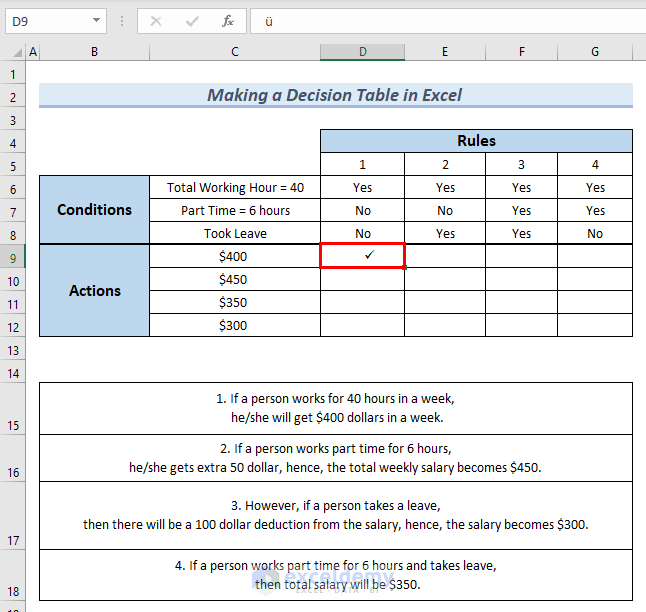
According to rule 1, If a person works 40 hours in a week, he/she will earn $400 dollars a week.
Enter a Check mark in D9: Employee 1 meets the first condition:
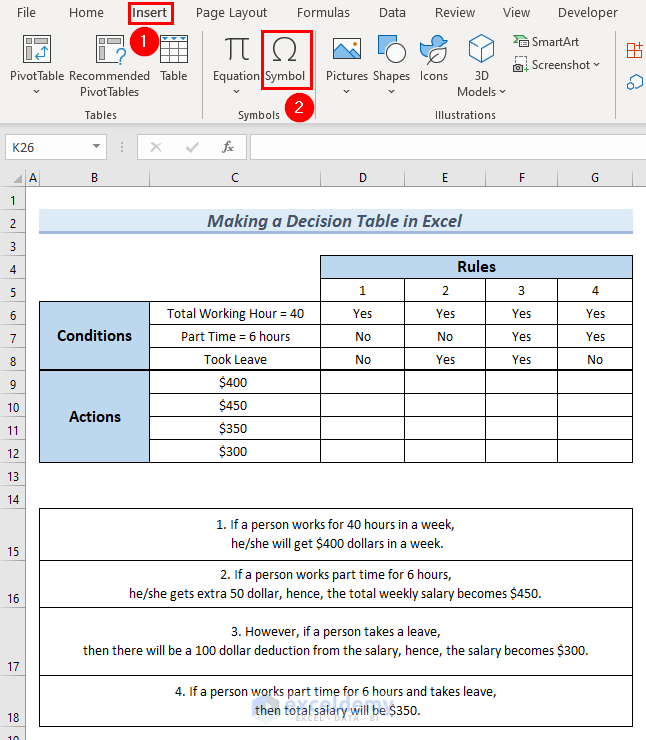
- Go to the Insert tab.
- In Symbols >> select Symbols.
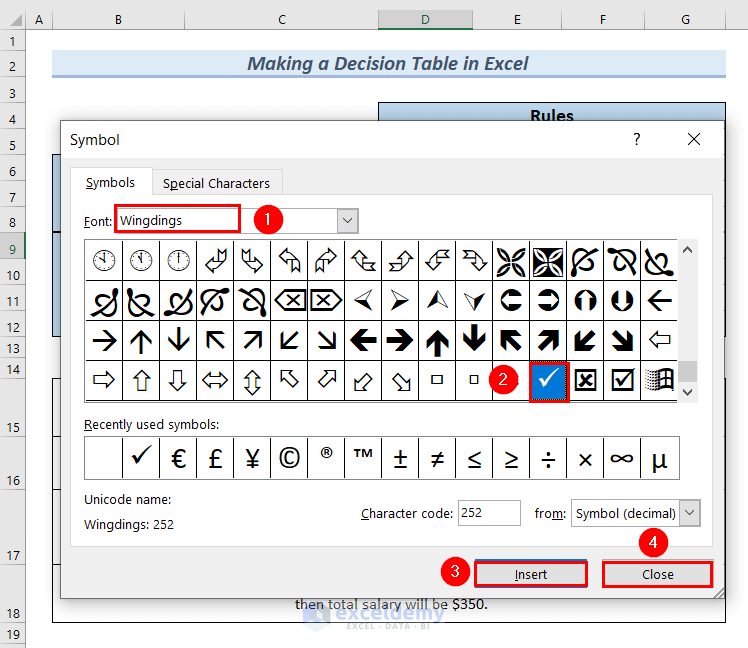
In the Symbol dialog box:
- enter Windings in the Font box.
- Select Check mark.
- Click Insert >> click Close.
This is the output.
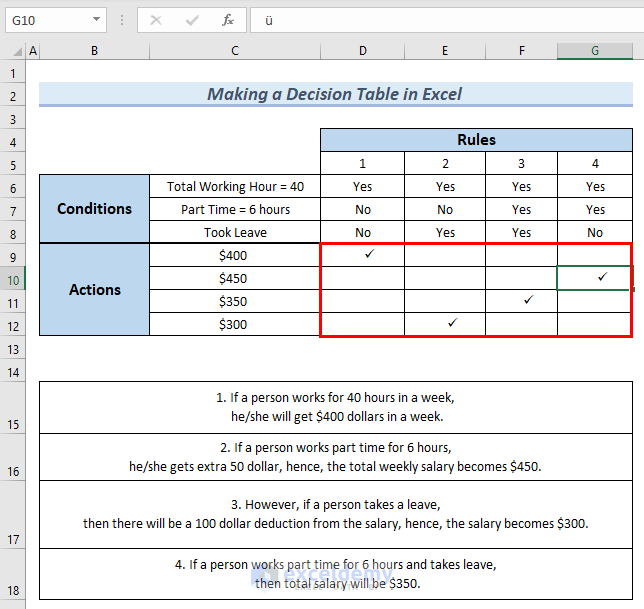
- Enter Check marks in G10, F11, and E12.
The Decision Table is complete.
Read More: How to Create a League Table in Excel
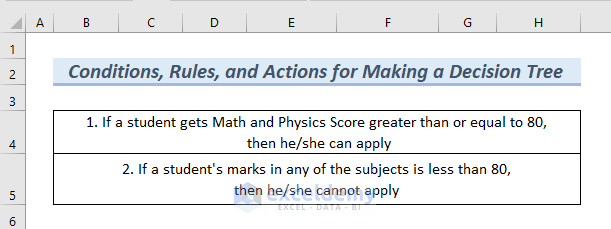
How to Create a Decision Tree in Excel
Use the Conditions, Rules, and Actions below to create a decision tree.
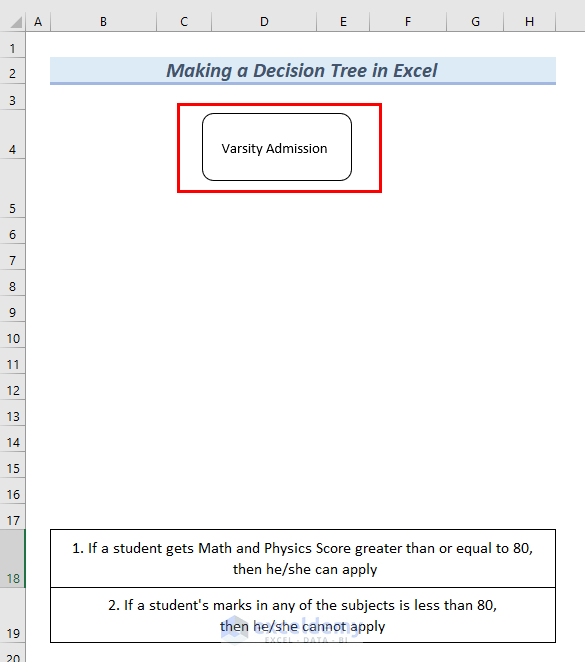
Step 1 – Insert a Rounded Corner Rectangle
Enter Conditions, Rules, and Actions.
- Go to the Insert tab >> select Shapes.
- Select a Rounded corner rectangle.
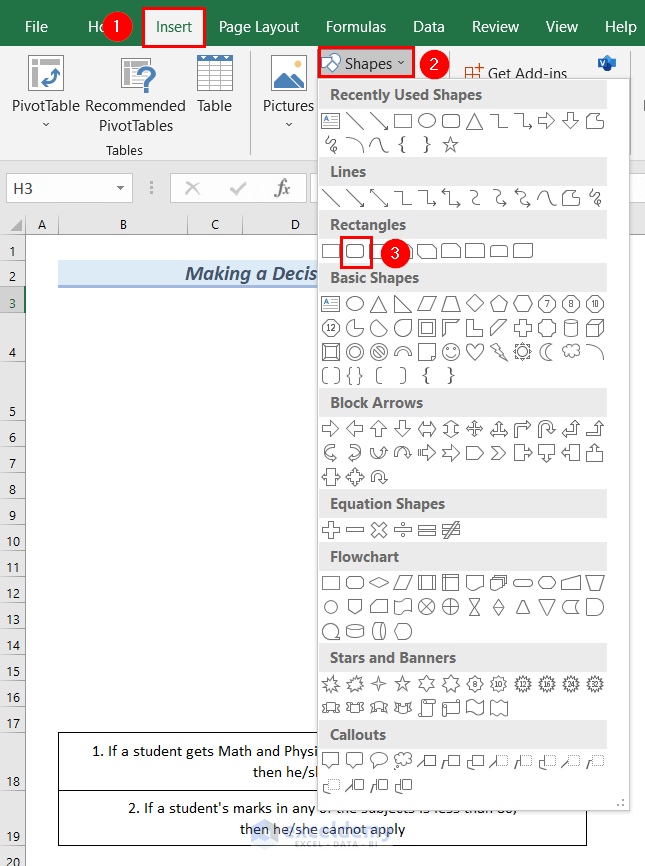
- Insert it in the worksheet.
This is the output.

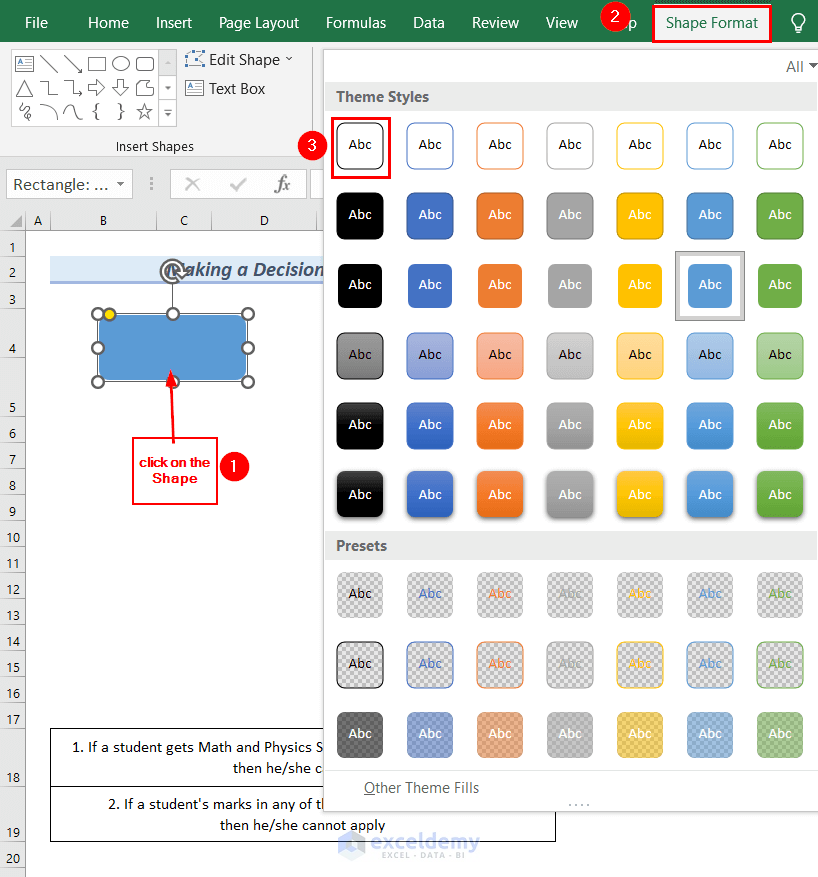
Step 2 – Formatting the Shape
- Select the Rounded corner rectangle >> go to Shape Format.
- In Theme Styles, select a Theme.
This is the output.
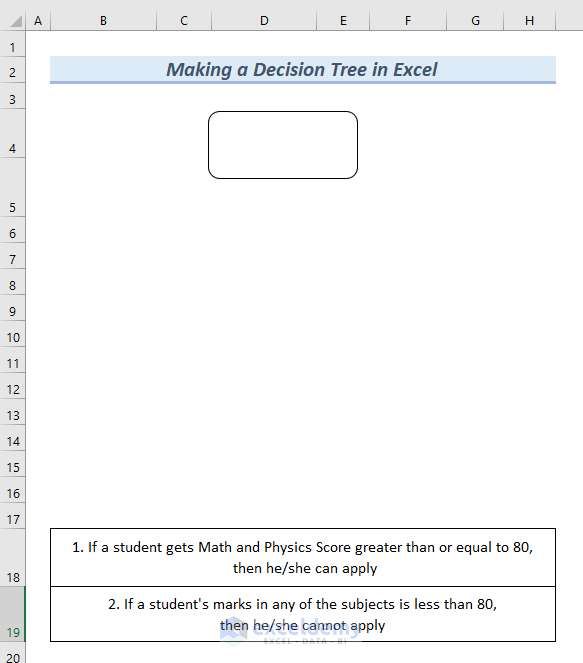
- Enter Varsity Admission into the shape.
The first shape starts the discussion tree.
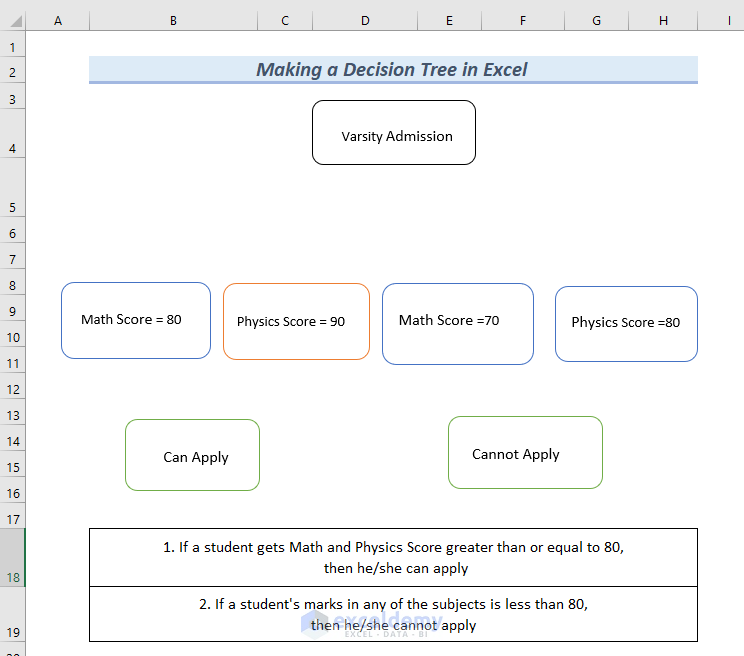
Step 3 – Enter Conditions and Actions Shapes
This is the output.
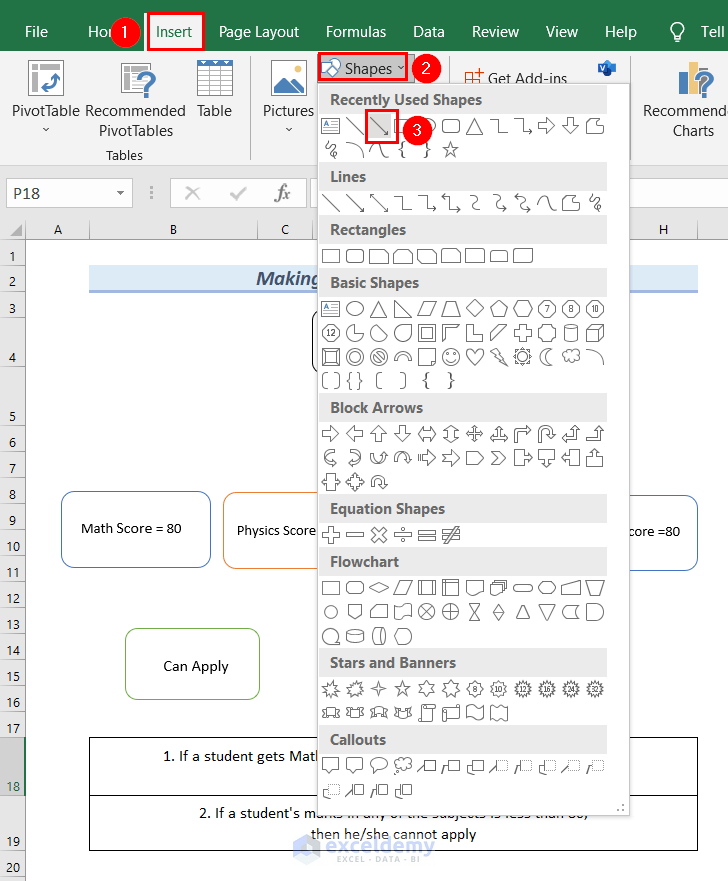
Connect the shapes with an arrow.
- Go to the Insert tab >> select Shapes.
- Select a Line Arrow.
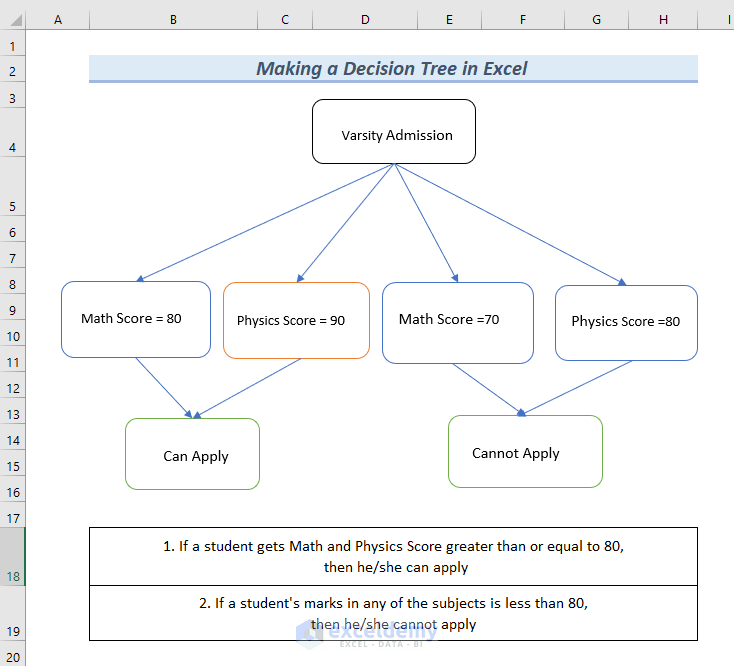
- Connect Varsity Admission, Condition and Math Score = 80.

- Connect the rest of the Shapes with Line Arrows, according to the Conditions and Actions.
This is the output.
Practice Section
Practice here.
Download Practice Workbook
Download the Excel file and practice.
Related Articles
- How to Create Table from Another Table in Excel
- How to Create Table from Another Table with Criteria in Excel
- How to Mirror Table on Another Sheet in Excel
- How to Create Table from Multiple Sheets in Excel
- How to Create a Lookup Table in Excel
- How to Make 3D Table in Excel
- How to Make a Table Bigger in Excel
<< Go Back to Excel Table | Learn Excel
Get FREE Advanced Excel Exercises with Solutions!

Column 4 of the rules should be Yes, Yes, No.
Dear CHARLES MOREHEAD,
Thanks for your valuable suggestion. I have considered the suggestion and updated the article.
Regards,
Naimul Hasan Arif