Method 1 – Make a 3D Table with a 3D Dataset
- We have the following dummy dataset containing 3 tables. The tables are interconnected through the 3 variables: product_company, year, and region. The rows and columns of the tables are formatted in such a way that they can be perceived as the sides of a 3D table.
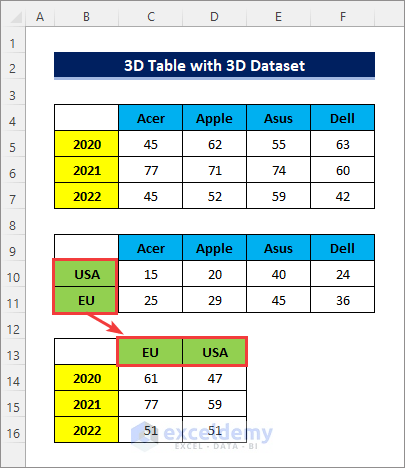
Important! Note that the regions are in reverse order between the tables.
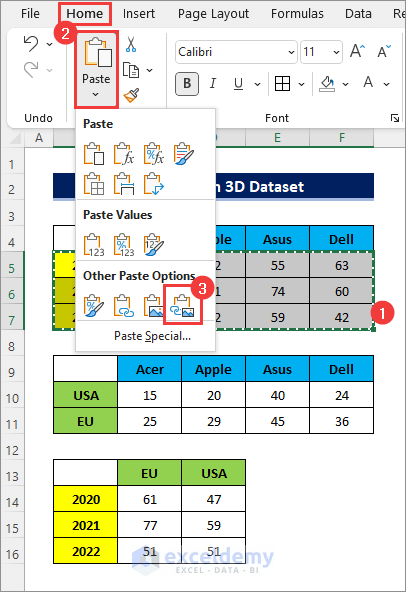
- Copy the first table without the headers and paste it as Linked Picture (I).
- Drag the picture to an empty space.
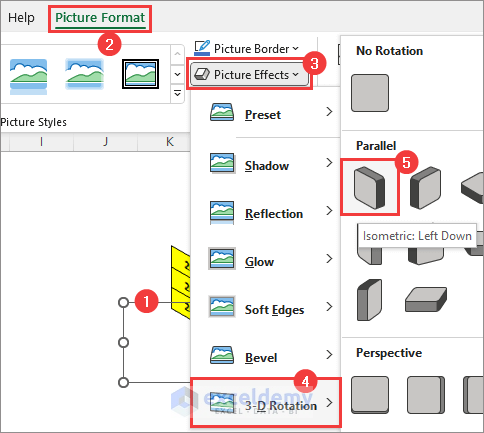
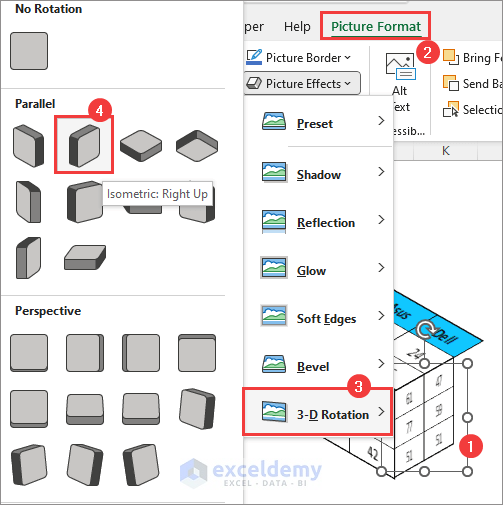
- Select the picture and go to Picture Format >> Picture Effects >> 3D-Rotation >> Parallel >> Isometric: Left Down.
- Copy the second table with headers and paste it as Linked Picture (I).
- Drag it above the first picture.
- Select it and go to Picture Format >> Picture Effects >> 3D-Rotation >> Parallel >> Isometric: Bottom Down.

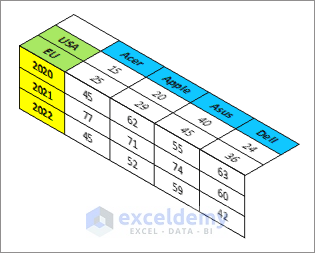
- Drag and align these two pictures as follows.
- Copy the third table without the header rows and columns and paste it as Linked Picture (I).
- Select it and go to Picture Format >> Picture Effects >> 3D-Rotation >> Parallel >> Isometric: Right Up.
- Align this picture with the other two.
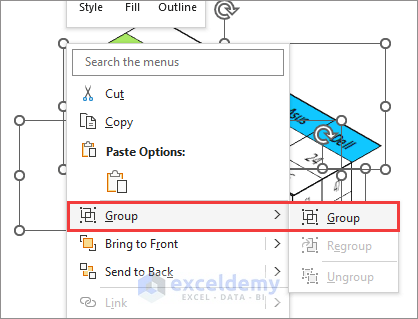
- Hold Ctrl and select all three images, right-click, and select Group.
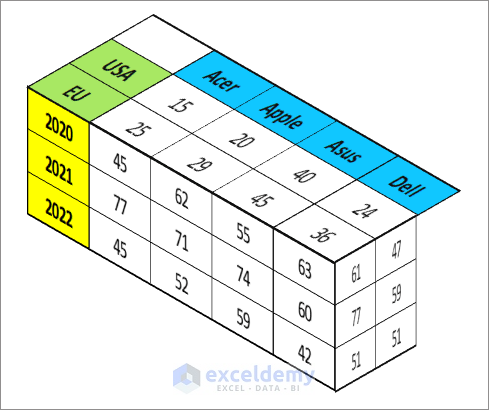
- You will get the following 3D table.
Read More: How to Create Table from Another Table in Excel
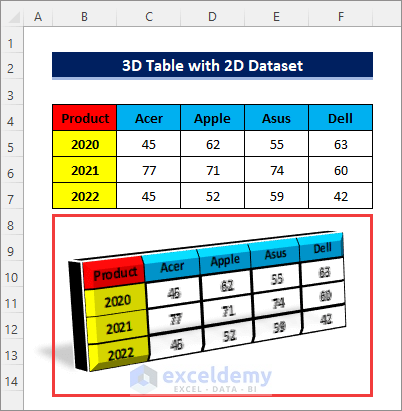
Method 2 – Create a 3D Table with a 2D Dataset
Consider the following table with 2 variables.

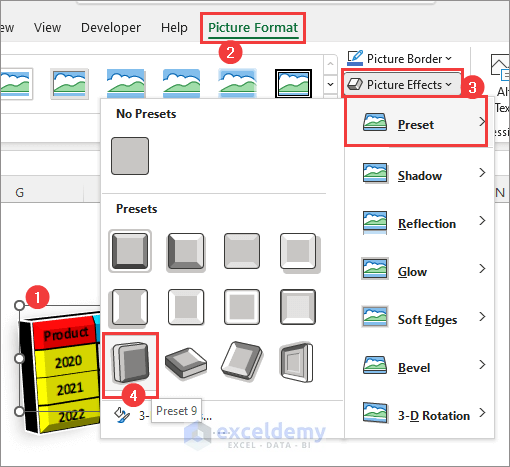
- Copy the entire table including the headers and paste it as Linked Picture (I).
- Select it and go to Picture Format >> Picture Effects >> Preset >> Preset 9.
- You will get the following 3D table.
Read More: How to Create a Lookup Table in Excel
Things to Remember
- Reverse the headers when needed. Otherwise, the data in the 3D table won’t match the data in the actual data tables.
Download the Practice Workbook
Related Articles
- How to Create Table from Another Table with Criteria in Excel
- How to Mirror Table on Another Sheet in Excel
- How to Create Table from Multiple Sheets in Excel
- How to Make a Decision Table in Excel
- How to Create a League Table in Excel
- How to Make a Table Bigger in Excel
<< Go Back to Excel Table | Learn Excel
Get FREE Advanced Excel Exercises with Solutions!

This is really not a 3-d table, it’s just some writings on the surface of a parallelopiped. It’s fun-looking, though, thanks for the samples!
What I really need is a table of vectors. That is, in each cell is a 1-dimensional matrix, representing the Z-axis. Then to do manipulations on this… And finally we could harharhar perform CFD inside Excel… but not really… So yes, I want to create a 3-D scalar field.
Going back to Octave.
Hello Джон,
It sounds like you’re looking for something more advanced, like a true 3D vector table rather than just a visual effect. A table of vectors where each cell represents a 1D matrix along the Z-axis is a neat idea!
Excel’s limitations make it tough to perform complex manipulations like CFD directly, but Octave or other specialized software could certainly handle that. It’s fascinating how you’re thinking of expanding beyond Excel’s typical use cases!
Regards
ExcelDemy