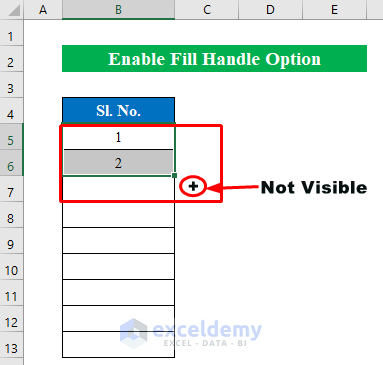
Solution 1 – Enable the Fill Handle Option
When working with a dataset in Excel, you might encounter situations where the fill handle is not visible, preventing you from using it. To resolve this, follow these steps:
- Click the File option in your worksheet.
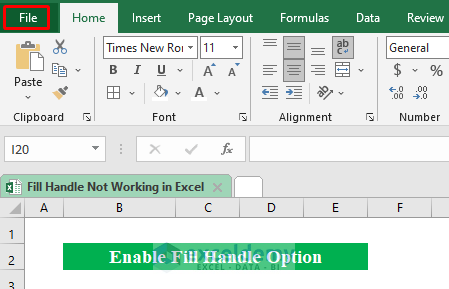
- Choose Options from the menu.

- In the Excel Options window, select Advanced.
- Check the box next to Enable fill handle and cell-drag-and-drop.
- Press OK to apply the changes.

When you select cells from your dataset, the fill handle icon should now be visible.
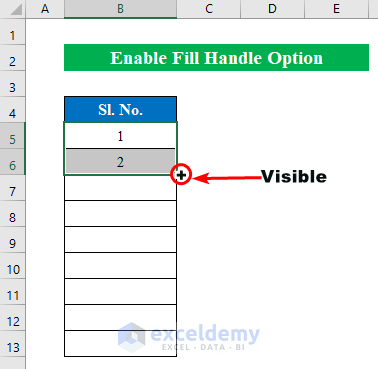
You can drag it down to fill the column with values.
Read More: How to Enable Drag Formula in Excel
Solution 2 – Select the Proper Sequence of Data
Make sure to select the appropriate sequence from your dataset. Common issues include:
- Selecting only one cell and dragging it, which duplicates the same value across other cells.
- Accidentally including an extra blank cell, leading to an unwanted gap in the sequence.
For example, if I select a single cell (B6) and drag it downwards to fill other cells, I might not get the desired sequence.
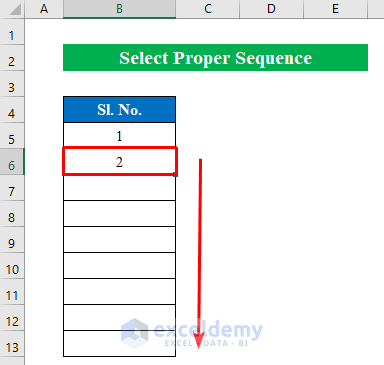
Instead, the entire column gets filled with the value from the initially chosen cell.

I end up with an unnecessary blank cell between the sequence.
To avoid these problems:
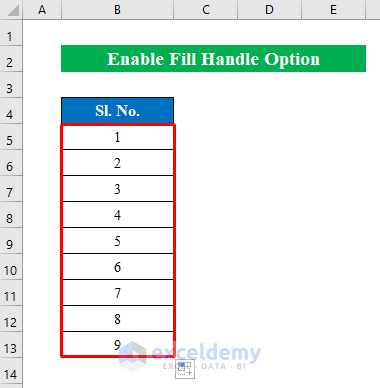
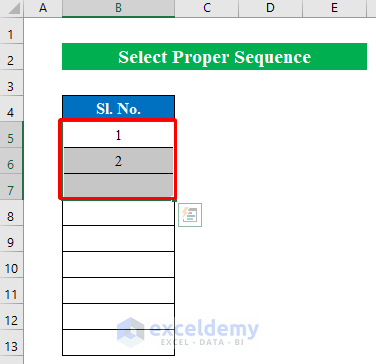
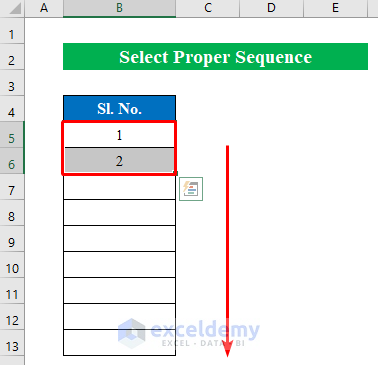
- Choose cells where the proper sequence appears (e.g., B5:B6).
- Drag the fill handle down to maintain the desired sequence.
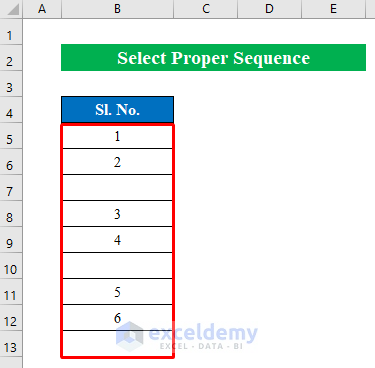
- We will get our proper sequence in the column.

Read More: How to Use Fill Handle to Copy Formula in Excel
Solution 3 – Check Calculation Options
The fill handle serves different purposes. You can adjust its behavior using the Calculation Options:
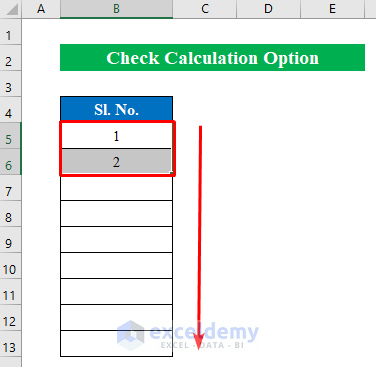
- Select cells (B5:B6) that you want to fill.
- Drag down the fill handle icon.
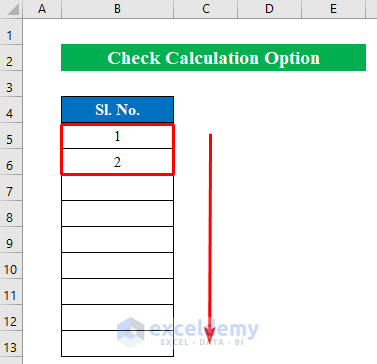
- You will see, after dragging down the fill handle that the cells are filled with the same data from those two cells which we don’t want to see in our filled columns.
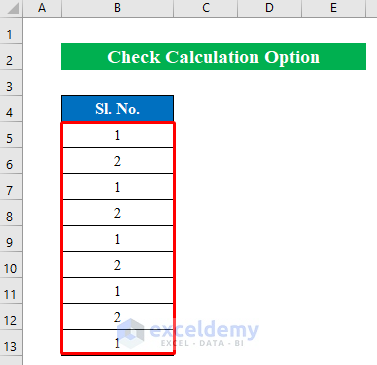
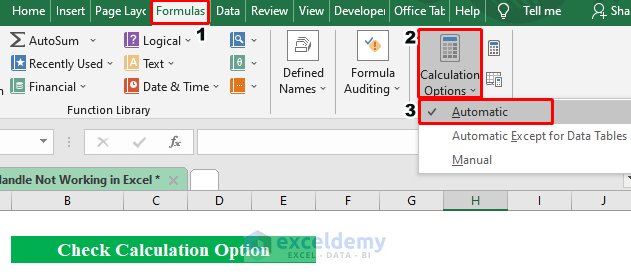
- If the cells are filled with unwanted data, go to Formulas, select Calculation Options and click on Automatic.
- Now drag the fill handle again to get the correct sequence.

Solution 4 – Use Keyboard Shortcut
This method is the quickest solution to solve the fill handle not working problem. Just by pressing the F4 key several times, you will get your desired result.
- Choose cells from the workbook (e.g., B5:B6).
- Press the F4 key three times.

- Drag the fill handle down to populate the cells (e.g., B5:B13).

- You will get your required output in the cells (B5:B13).

Read More: How to Drag Formula in Excel with Keyboard
Solution 5 – Clearing Filters from a Data Table
In this solution, we’ll demonstrate an essential technique you’ll encounter when working with a fill handle in a filtered data table.
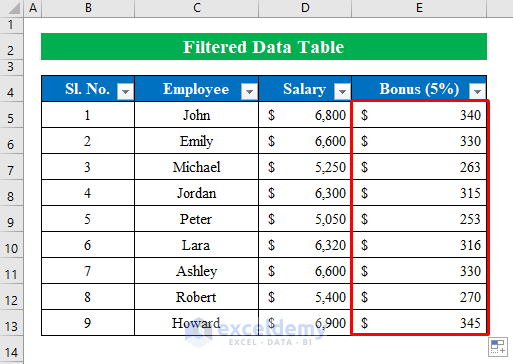
Let’s assume we have a filtered table containing data on employees, their salaries, and bonus amounts in a workbook.

Problem:
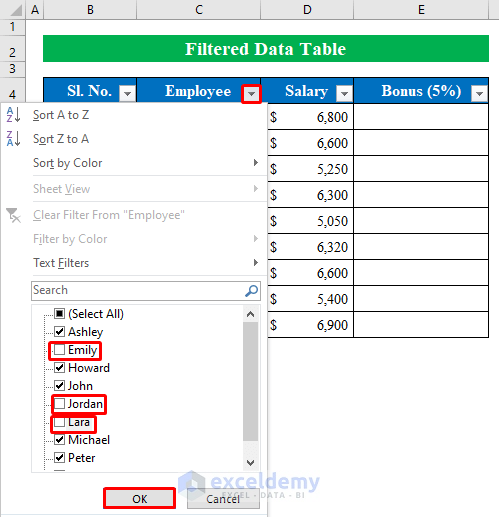
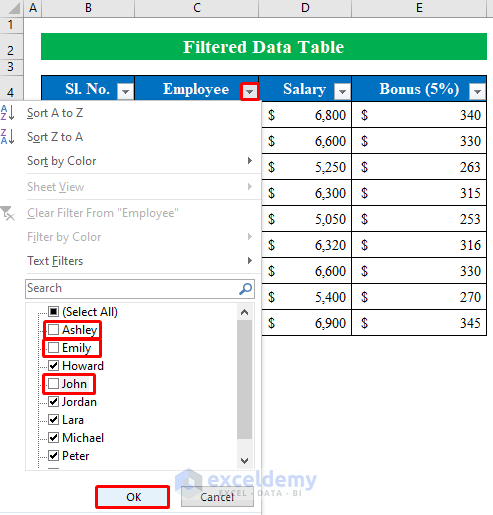
- Filter the employee names from the dataset.
- Click the filter option and uncheck some names from the list.
- Press OK.
- After filtering, hidden rows will appear.

- Now let’s calculate the bonus amount using the formula:
- Apply the formula in the cell E5:
=D5*0.05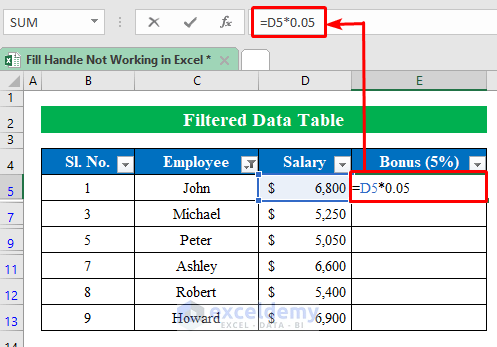
- Press Enter to get the result.
- Drag down the Fill Handle to apply the formula to all cells in the column.
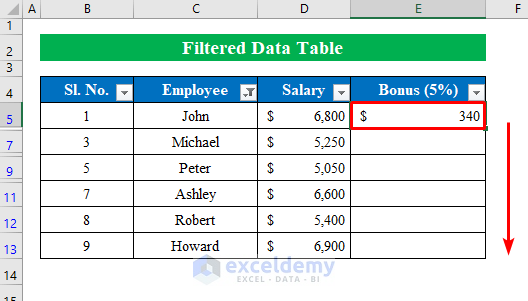
- We have our calculated bonus amount in the column.

Issue:
- Clearing the filter (Clear Filter From Employee) causes the formula not to work for the previously hidden rows.

- We’ve learned that the fill handle doesn’t function correctly with hidden rows.

Solution:
- Apply the formula to the entire dataset before filtering.
- Select a cell (e.g., E5).
- Enter the formula:
=D5*0.05
-
- Press Enter.
- Pull the Fill Handle to populate the formula in all cells.
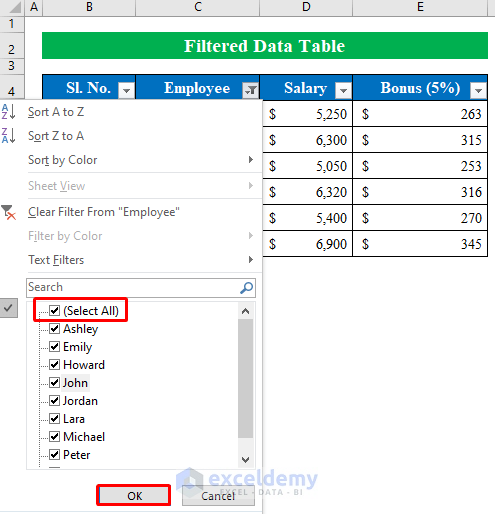
- Now filter the dataset by clicking the filter option in the employee column.
- Uncheck some names and click OK.
- You’ll see hidden rows, but this time the formula will work correctly because we applied it before filtering.

- Click Select All to get all the data in the table.

Read More: How to Use Fill Handle in Excel
Things to Remember
- In Method 4, pressing F4 after selecting cells repeats the last action (e.g., filling data, formatting). However, it doesn’t always solve the Fill Handle issue.
Download Practice Workbook
You can download the practice workbook from here:
Related Articles
- Excel Fill Down to Next Value
- How to Fill Formula Down to Specific Row in Excel
- How to Drag Formula and Ignore Hidden Cells in Excel
- How to Drag Formula Horizontally with Vertical Reference in Excel
<< Go Back to Fill Handle in Excel | Learn Excel
Get FREE Advanced Excel Exercises with Solutions!
