When you work with a large set of data, your data may disperse in several sheets of your Excel file. A dynamic drop-down list can help you to accumulate that data when you need it. Subsequently, your drop-down list will also be updated once you change your dataset in a given range. How will you accomplish the task? No problem! This article will demonstrate how to create a dynamic drop-down list from another sheet in Excel.
Dynamic Drop Down List from Another Sheet in Excel: 3 Steps to Create
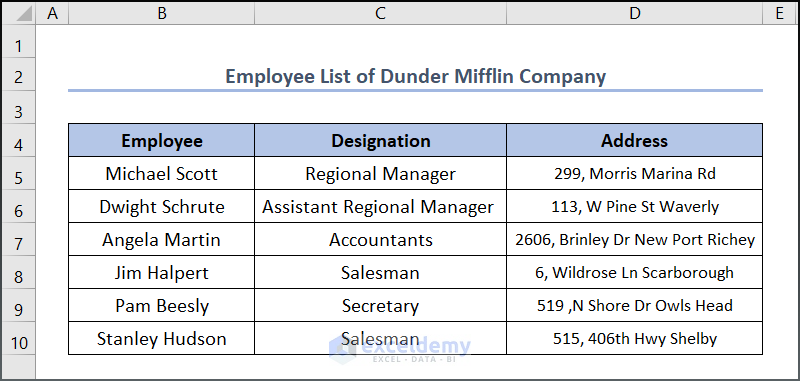
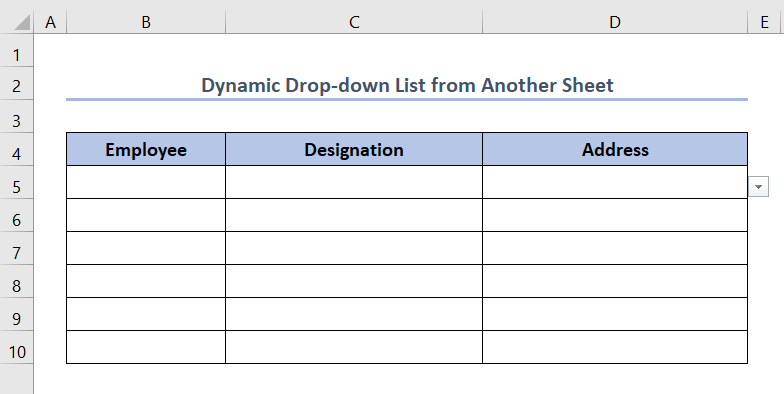
Let’s assume we have a dataset, namely “Employee List of Dunder Mifflin Company”. You can use any dataset suitable for you.
Here, we have used the Microsoft Excel 365 version; you may use any other version according to your convenience.
Step 01: Data Preprocessing Using Unique Function
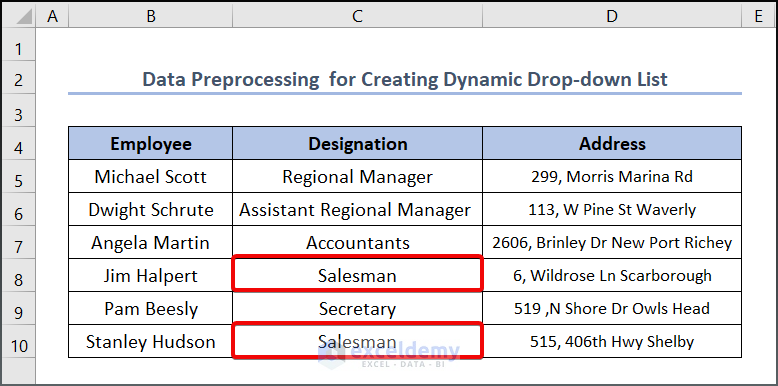
Before going to construct the drop-down list, we need to preprocess our dataset. Look at the image we have attached below. Here in the C column, we have “Salesman” data in multiple columns. We want to avoid those repetitive options in our drop-down list; thus, we will incorporate the UNIQUE function to have one data among them.
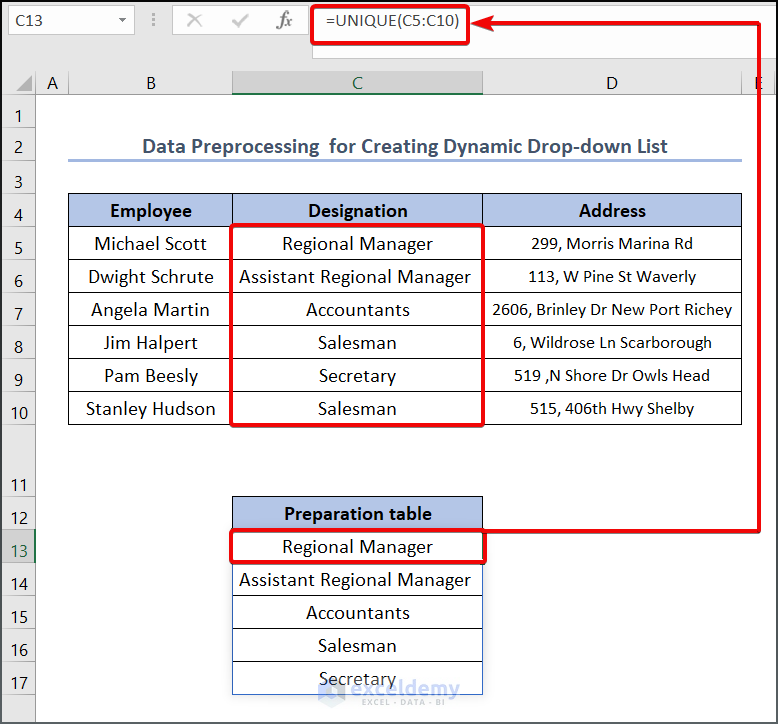
- To begin with this, enter the following formula into the C13
=UNIQUE(C5:C10)- Subsequently, see the output as given below.
Step 02: Create a Master List from Name Manager
Now we will tag our list of data with some specific names. When we generate the drop-down list, we will refer to those names. We can use the Name Manager to do this task.
So, follow the below steps.
- First go to Formulas > Name Manager.
- Thus, a dialog box named Name Manager will appear.
- Click on the New button from the Name Manager

- Subsequently, another dialog box will appear. In the Name box, type Employee then move to the Upward Arrow.
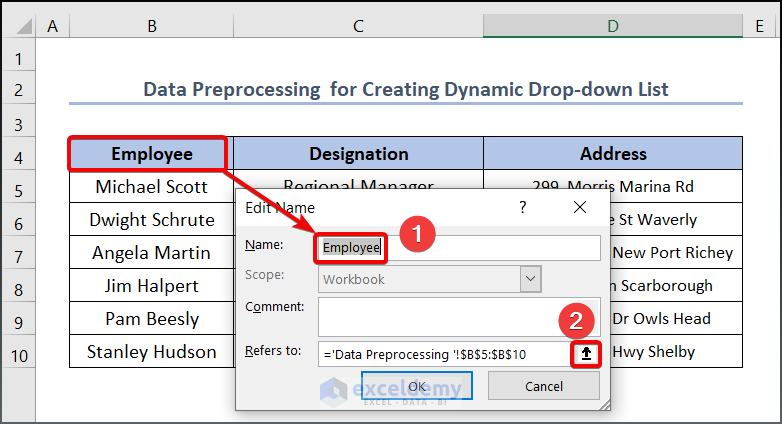
- Select B5:B10 cells of data from another sheet named Data Preprocessing, then click on the Downward Arrow.
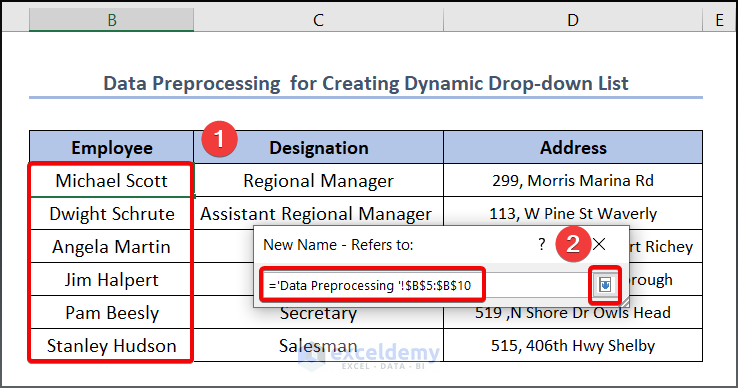
- Click on OK afterward.

- Now a list of data will appear on the Name Manager dialog box.
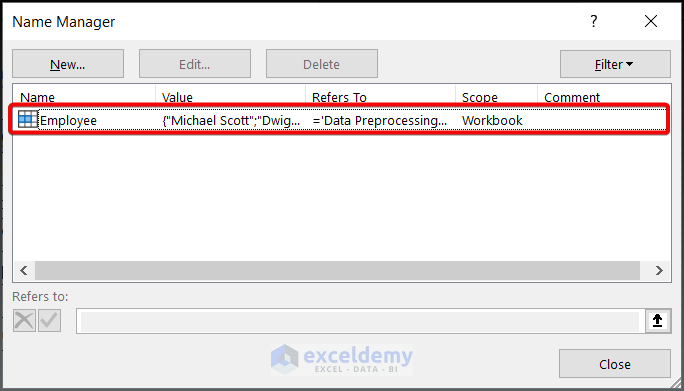
- Do the same process to add the other value to the Name Manager.
- An image has been attached below for your better understanding.

Read More: How to Create Dynamic Drop Down List Using Excel OFFSET
Step 03: Generate the Dynamic Drop-down List
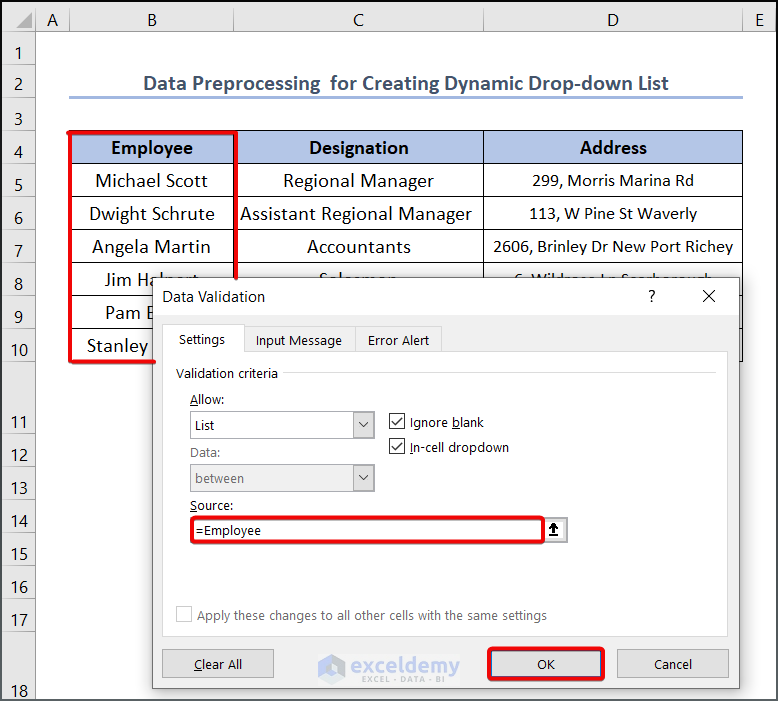
So far, so good; now we will do the last part of our discussion. In this step, we will use the Data Validation feature to make our intended drop-down list.
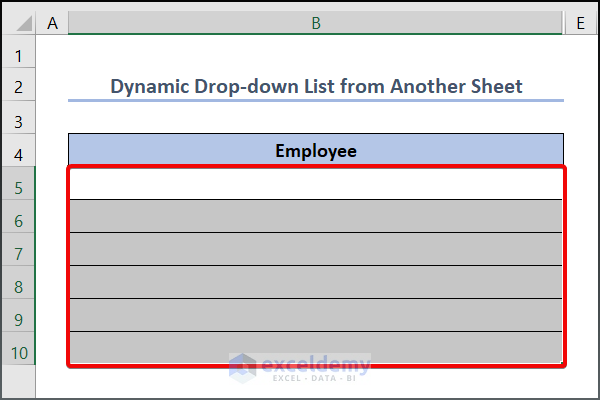
- Select B5:B10 cells first.
- Then select Data > Data Validation from your ribbon.
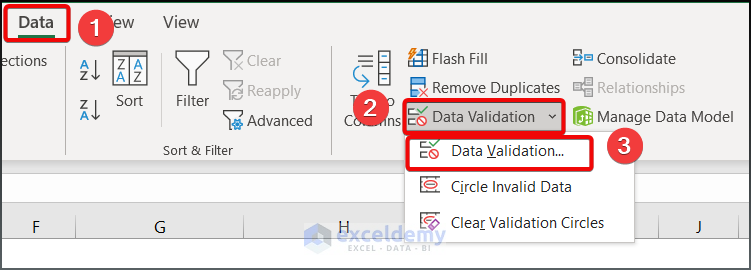
- Subsequently, a dialog box will appear.
- From the Settings tab, click on the Down Arrow and select the List option.
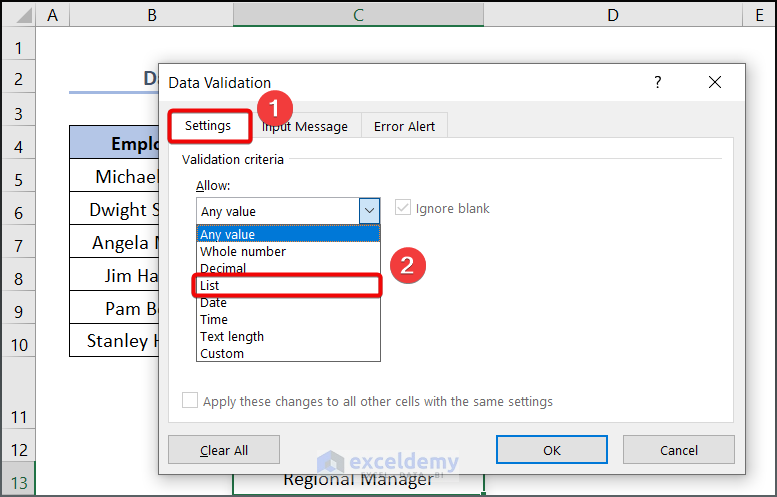
- Now in the Source box, write =Employee which contains the list of employee names in it.
- Press the OK button afterward.
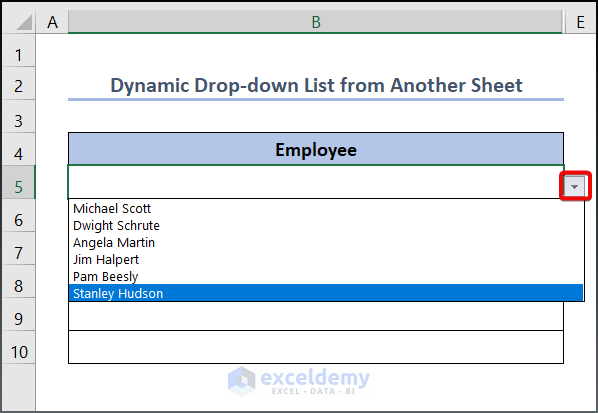
Now see the output as given below.
- To get the list of data from the drop-down list, don’t forget to click on the Downward Arrow as depicted below.
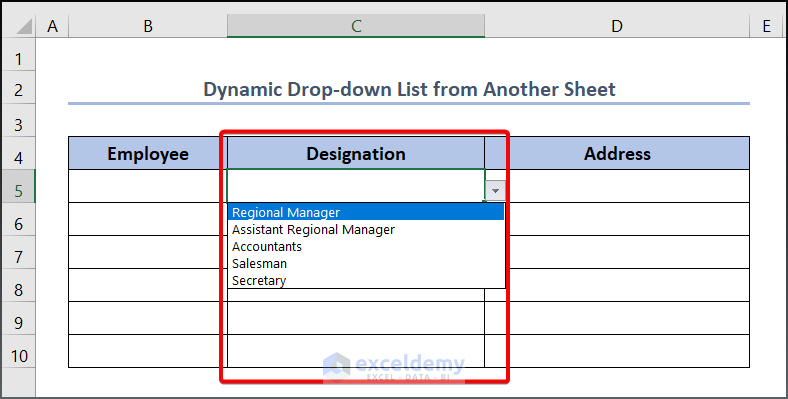
- To add the drop-down list in the C column, follow the same process that we have done in our previous steps. However, you may avoid creating the master list as we did in step 2. Instead, we can simply drag down C7 to C17 to input data in the source box.
See the image attached below to get an idea of it.

As you can see in the below image, we have generated the same drop-down list as we did previously by avoiding step 2.
- Follow the same process to create the other drop-down list. However, a complete picture of the output has been given below.
One thing we need to mention, this is a dynamic drop-down list, as we said earlier. This means that if you change the value of your data set or the range from which you get your data, your drop-down list will be updated automatically.
Read More: How to Create Dynamic List From Table in Excel
Things to Remember
- It is worth mentioning that Name Manager will not let you have any space other than syntax in between the letters, so avoid having any space in the New Name dialogue box.

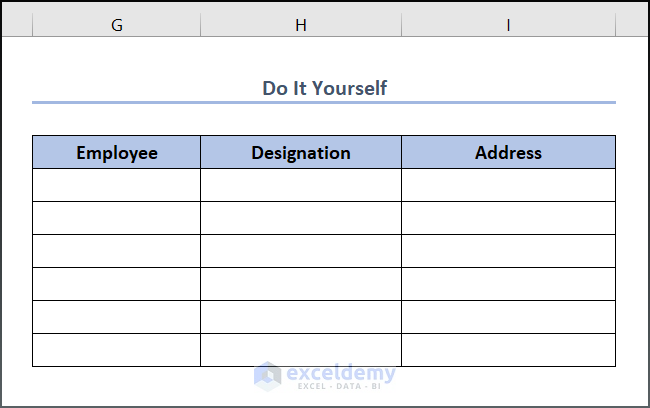
Practice Section
We have provided a Practice section on the right side of each sheet so that you can practice yourself. Please make sure to do it yourself.
Download Practice Workbook
You can download and practice the dataset that we have used to prepare this article.
Conclusion
In this article, we have discussed how to create a dynamic drop-down list from another sheet in Excel. As you have already understood, this is an easy task that everybody should know about. Further, if you have any queries, feel free to comment below, and we will get back to you soon.
Related Articles
<< Go Back to Dynamic List Excel | Excel Drop-Down List | Data Validation in Excel | Learn Excel
Get FREE Advanced Excel Exercises with Solutions!
