Sometimes, due to many unavoidable circumstances, our Excel file may shut down suddenly. This results in the loss of the changes made in the Excel file if we forget to save the file. In this regard, it is easier to use the AutoSave feature with a set time. Now, you can change the AutoSave time using this feature too. In this article, I will show you step-by-step guidelines to change the AutoSave time in Excel.
What Is AutoSave?
AutoSave is a feature in Excel that enables saving your file automatically at a certain time interval. So, if this feature is turned on, your Excel file will be automatically saved at a fixed time interval to a fixed directory.
How to Change Autosave Time in Excel: Step-by-Step Procedures
You can use the Excel Options dialogue box to change the AutoSave time in Excel. Follow the step-by-step guidelines below to do this. 👇
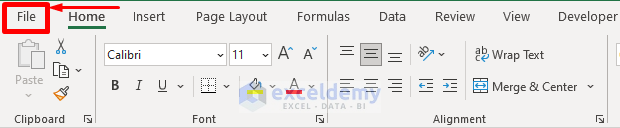
📌 Step 1: Access to Excel File Tab
- First, go to the File tab.
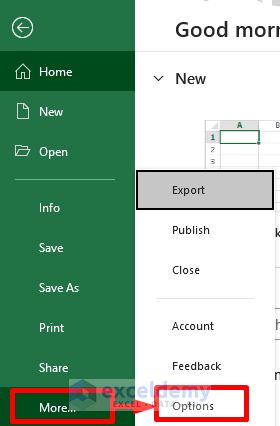
📌 Step 2: Access to Excel Options
- Next, click on More… from the expanded File tab.
- Subsequently, click on Options from the appeared list.
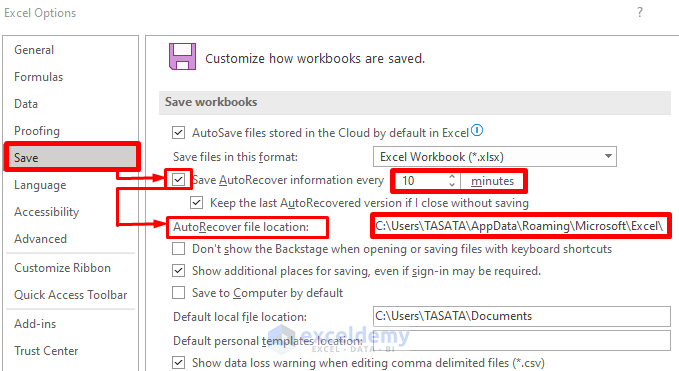
📌 Step 3: Change AutoSave Time
As a result, the Excel Options window will appear.
- Click on the Save tab from the left side tab list.
- Subsequently, put a tick mark on the ‘Save AutoRecover information every’ text and fix the time interval as you desire with up and down arrows beside the text.
- Besides, you can choose the saved file location from the AutoRecover file location option.
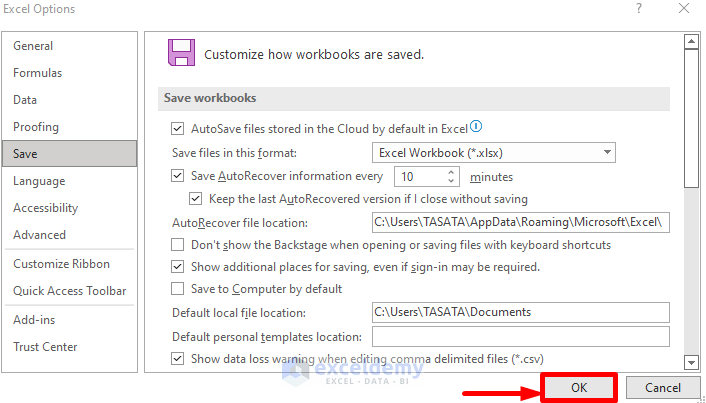
📌 Step 4: Confirm the Changes
- Finally, click on the OK button.
Thus, you can accomplish your desired task.
Conclusion
So, in this brief article, I have shown you how to change AutoSave time in Excel. I hope you find this article helpful and informative. If you have any further queries or recommendations, please feel free to contact me. Thank you!
Related Articles
- How to See Where Excel Autosave Files Are Stored
- How to Turn Off Autosave in Excel
- How to Turn On Autosave in Excel
- Why Does Excel Autosave Keep Turning Off
<< Go Back to Excel Autosave | Excel Files | Learn Excel
Get FREE Advanced Excel Exercises with Solutions!
