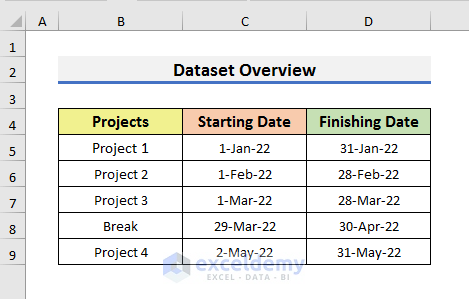
We will use a workbook that contains some information about the projects of a company. Using the workbook, we will try to see where Excel AutoSave files are stored.
Method 1 – Go to OneDrive to See Autosaved Files in Excel
Steps:
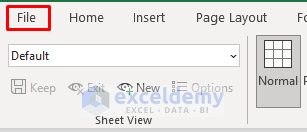
- Click on the File tab.
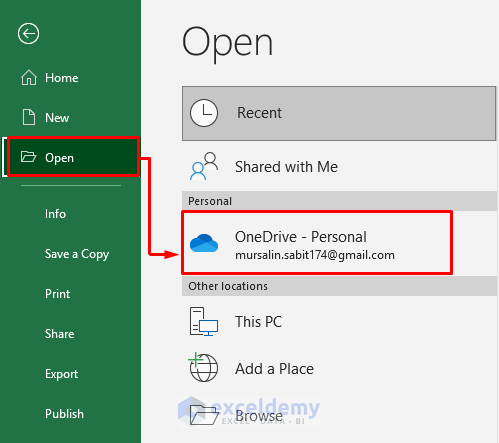
- Select Open.
- Double-click on OneDrive – Personal.
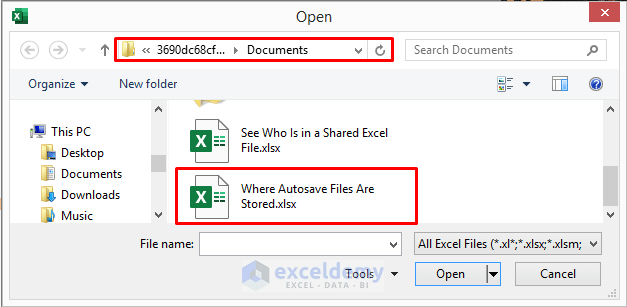
- You will see where autosaved files are stored.
- You can find the file location and the saved file in the Open window.
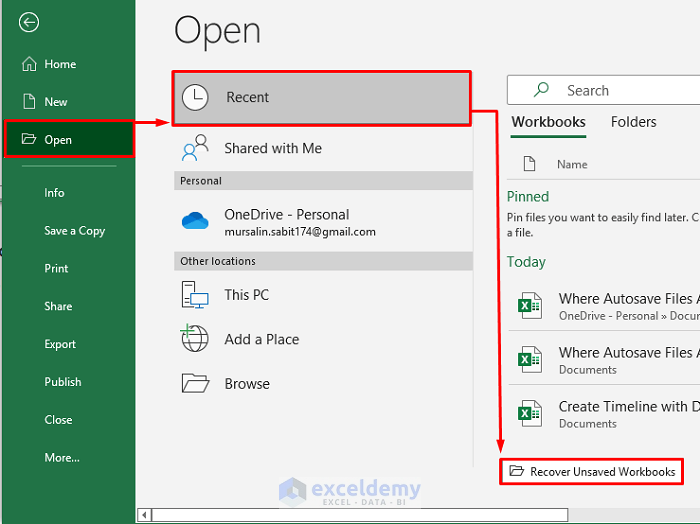
Method 2 – Use Excel ‘Recover Unsaved Workbooks’ Option to See Stored Files
Steps:
- Create a new workbook.
- Go to the File tab.
- Select Open from the menu and select the Recent option.
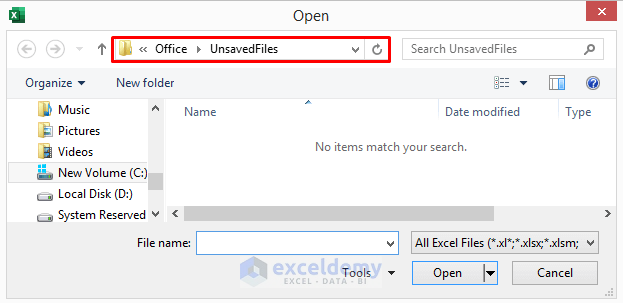
- Click on the Recover Unsaved Workbooks folder.
- It will open a window that will contain the unsaved files. As we didn’t face any power failure or crash of the program, the folder is showing no items.
- If you open the Excel application after a power failure or program crash, you will see the Document Recovery option on the left side of the screen. You can emulate this by leaving Excel open and then plugging out the PC.
- You can recover your file from the Document Recovery section.

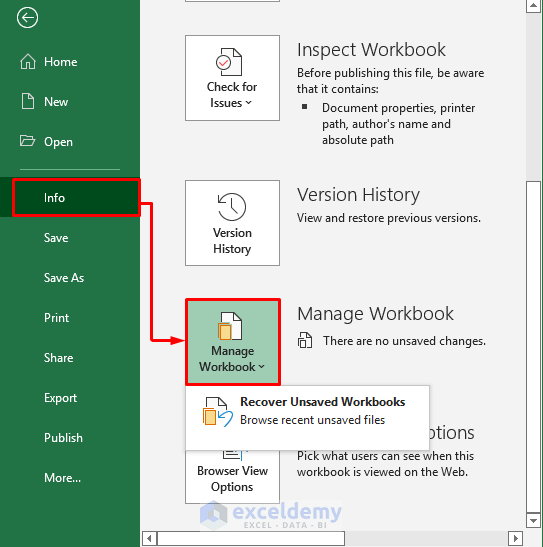
Method 3 – See Stored Files in Excel with ‘Manage Workbook’ Feature
Steps:
- Open Excel.
- Go to the ribbon and select the File tab.
- Click on Info from the menu and select Manage Workbook.
- Select Recover Unsaved Workbooks.
- It will also open a window where you can find unsaved files. As we didn’t face any power failure or crash of the program, the folder is showing no items.
- If you open the Excel application after a power failure or program crash, you will see the Document Recovery option on the left side of the screen.
- You can recover your file from the Document Recovery section.
Method 4 – Go to Version History to Find Where Autosave Files Are Stored
Steps:
- Open Excel.
- Click on the File tab.
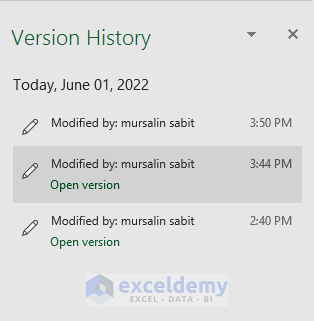
- Select Info and click on the Version History icon.
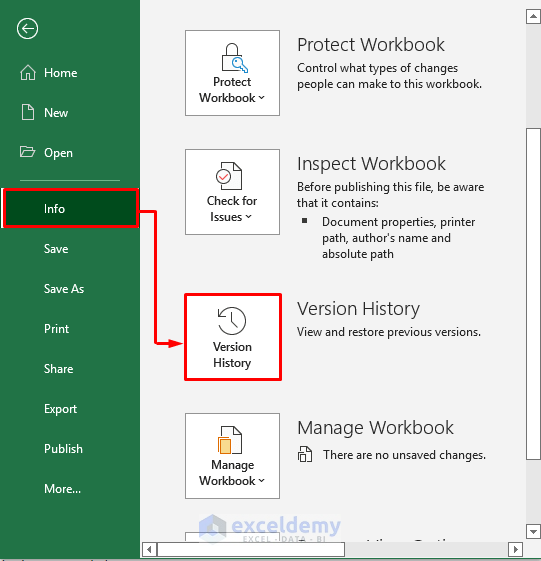
- You will see the Version History section on the right side of the sheet.
- You will have different versions of the same file.
- Select your desired one.
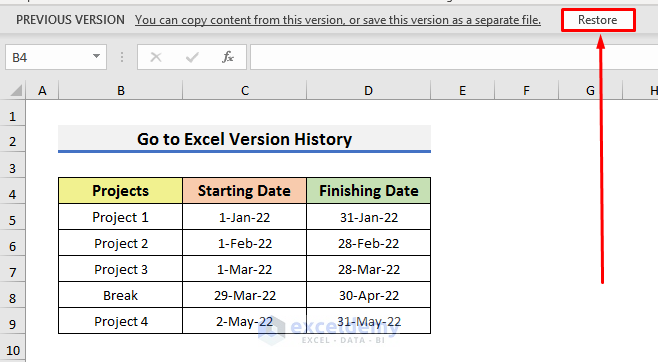
- The selected version will appear as a new workbook.
- You can click on the Restore button to copy content from this version or save this version as a separate file.
Method 5 – Discover Autosaved Excel Files Using Windows Search Bar
Steps:
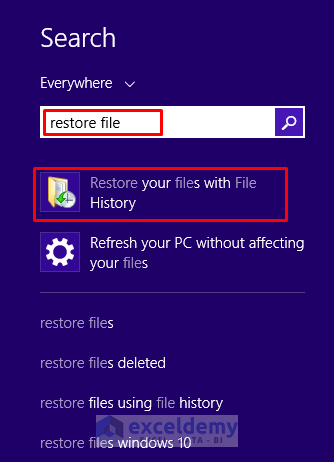
- Go to the Search Bar on your PC.
- Type restore file.
- You will see Restore your files with File History option.
- Click on that and discover the autosaved Excel files.
How to Disable AutoSave Option in Excel
Note: Not recommended since it disables recovery.
Steps:
- Click on the File tab.

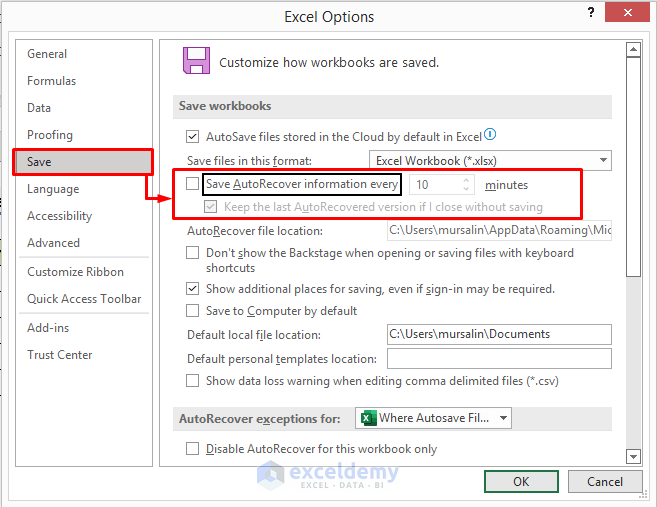
- Select Options from the bottom left side of the screen. It will open the Excel Options window.

- In the Excel Options window, click on Save and deselect the ‘Save AutoRecover information’ option.
- Click OK to proceed.
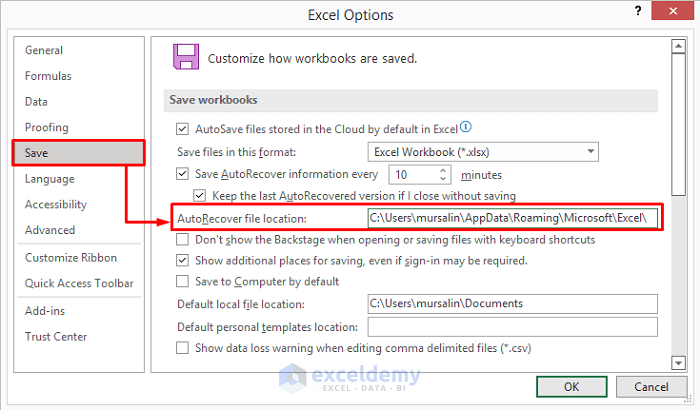
How to Change AutoSave Location in Excel
Steps:
- Click on the File tab and select Options.
- In the Excel Options window, select Save.
- Change the file location from the ‘AutoRecover file location’ section.
- Click OK to close the Excel Options window.
Download Practice Book
Download the practice book here.
Related Articles
- How to Change Autosave Time in Excel
- How to Turn Off Autosave in Excel
- Why Does Excel Autosave Keep Turning Off
<< Go Back to Excel Autosave | Excel Files | Learn Excel
Get FREE Advanced Excel Exercises with Solutions!
