In Microsoft Excel, we make worksheets and save files that you may need to look good. For this, you can use different fonts and colors but at times, they may not make a good combination. MS Excel has a bunch of good-looking built-in themes and other features for you, and we would suggest you apply such a theme so that the workbook becomes more attractive and eye-soothing.
So, in this article, I will show you how to apply a theme to a workbook in Excel step-by-step.
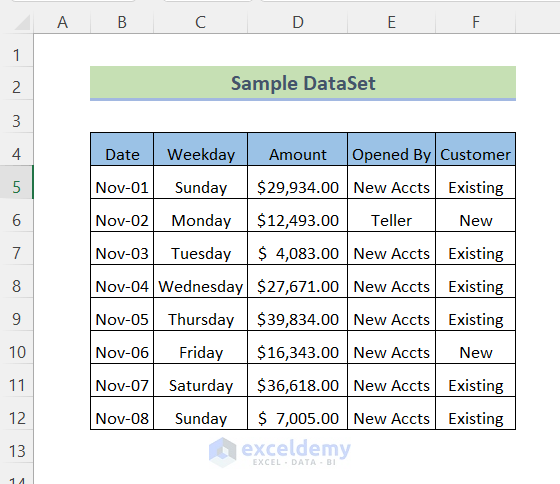
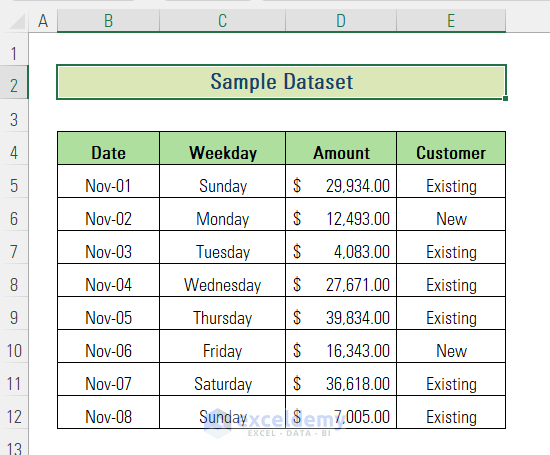
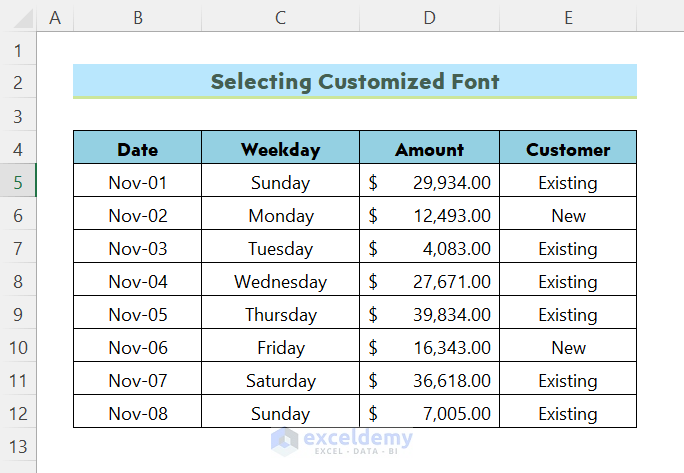
Suppose, you have a dataset of 5 Columns and 9 Rows. You have applied colors as your own. But, when you have more tables, you will need to apply the same pattern to all manually. For this reason, using a theme in a workbook will be a solution. The theme will apply the same colors, fonts, and effects to all cells and tables. So learn all the techniques described here and apply them to your Workbook.
1. Applying Any Available Themes from Excel Page Layout Tab
As we have already said, first we will try the ready-made themes of Microsoft Excel. Microsoft Excel has some themes already generated for you to use for free.
📌 STEPS:
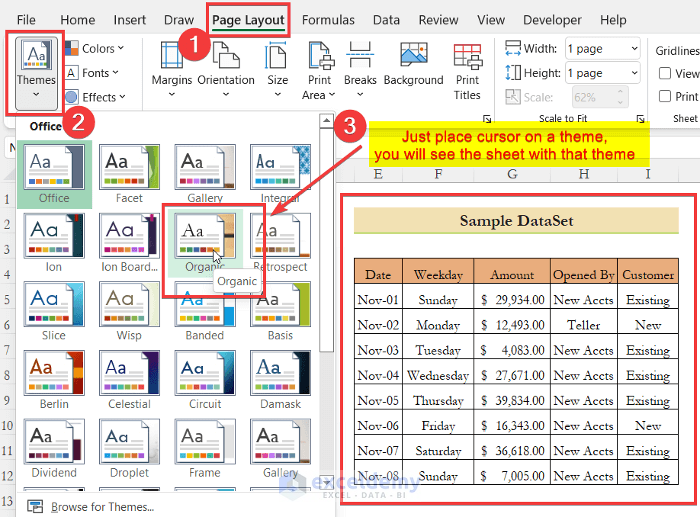
- At first, open the file and go to the top ribbon.
- After that, select the Page Layout tab and press on the Themes option.
- Then, you will see the available themes of Microsoft Excel.
- In this situation, you can use the mouse cursor to preview the themes. Then, select and apply any of these themes to your worksheet.
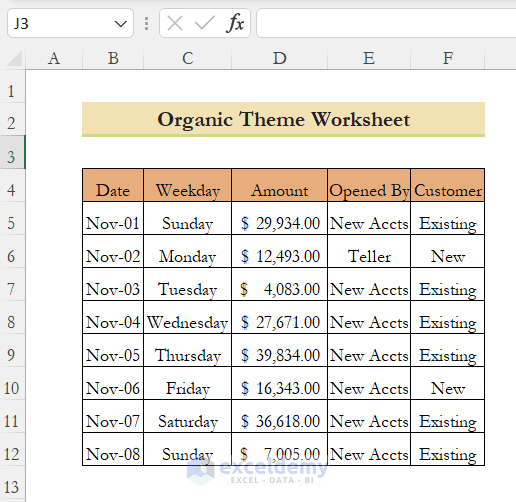
- Here, if you choose “Organic Theme”, you will see a similar worksheet as shown in the screenshot below.
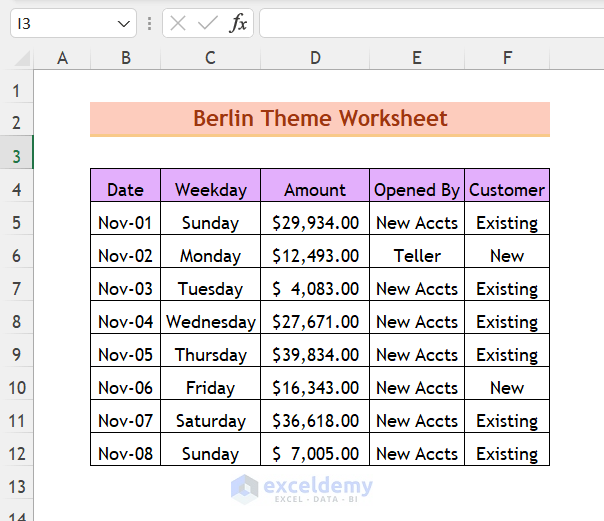
- And, if you choose “Berlin Theme”, you will see a similar worksheet as shown in the screenshot below.
Apply Downloaded Themes:
Besides, you also add themes from other files. You can download from WEB any free or paid themes and apply them to your workbook.
- For this, go to the Page Layout > Themes > Browse for Themes.
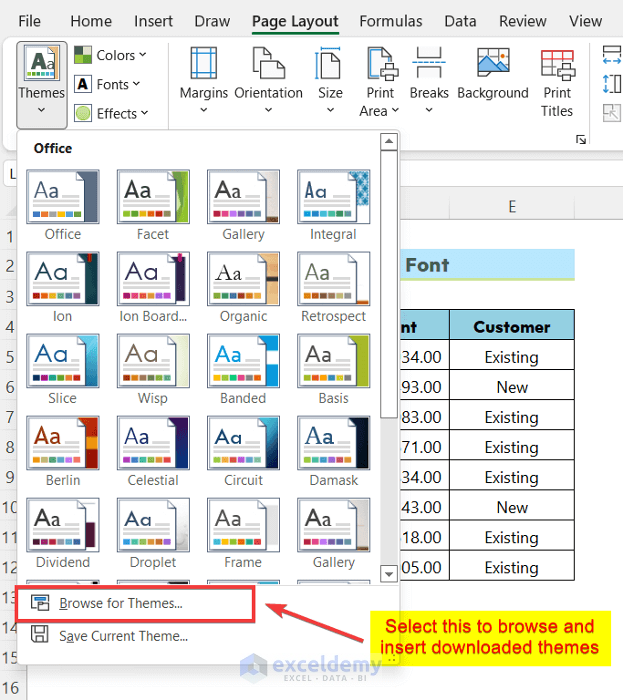
- Then, go to the location of the stored theme and select it. Finally, press the OK button.

- Then, you will see that the new theme is applied to the workbook.
2. Setting Colors, Fonts & Effects Manually to Make a Theme in Excel
Alternatively, without selecting the theme or also after selecting the theme, you can modify colors, fonts, and effects and apply them to the workbook. So, you can make your workbook more elegant and good-looking.
2.1 Applying a Suitable Color Palette
You can choose any color palette for your workbook with your choice. It becomes easy to select colors in Excel theme if someone has a knowledge of good color combinations in Excel. Here, I am showing you the steps to apply a color pallet to your theme.
📌 STEPS:
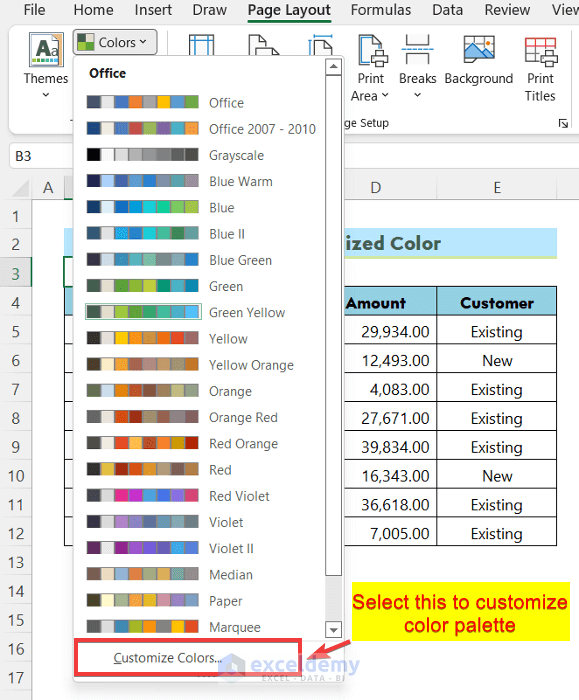
- Like before, after opening this file go to Page Layout then select Colors.
- Then, you will a list of color combinations will open.
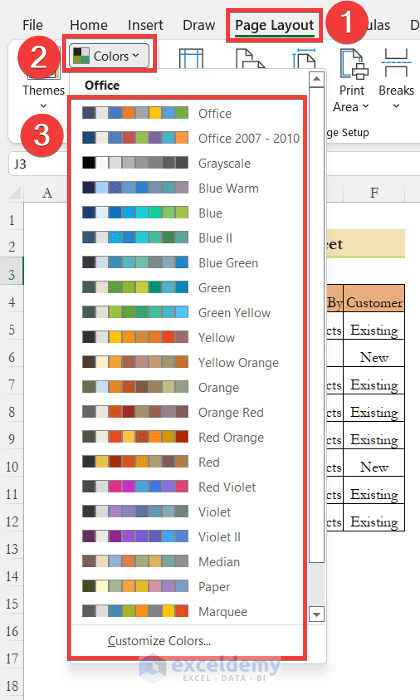
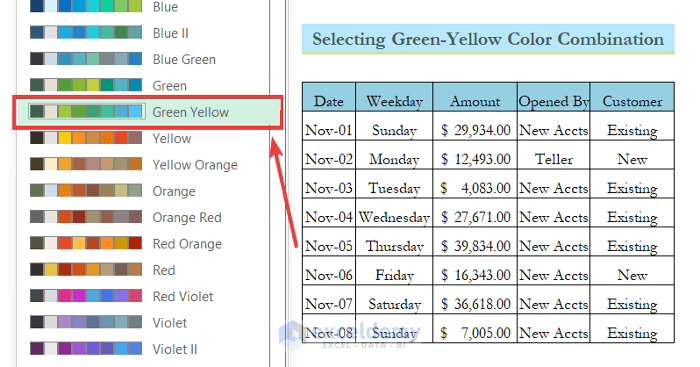
- Here, when you put your mouse cursor on any of these options, you can see the preview in the worksheet of applying that color pallet. Then, you can select any of them to apply to your worksheet.
Customize the Color Pallet
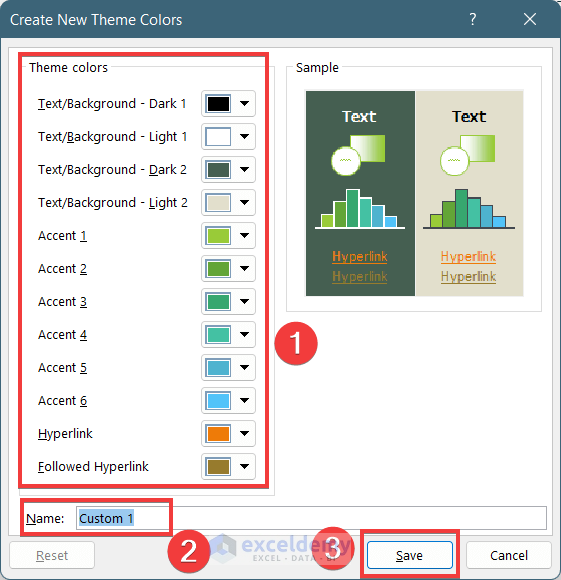
- Apart from this, you also can customize the color palette in Excel theme. For this, select the Customize Colors option from the bottom of the drop-down menu.
- Then, there will open a window named “Create New Theme Colors”. Now, choose the colors for specific conditions. Here, you can also see the preview in the sample portion. After selecting the colors, give a suitable name, and finally, press OK.
2.2 Selecting Suitable Font for Your Theme
Similarly, you can also change the theme fonts for your worksheet. It will help to make a similar pattern through your full worksheet. To select the font for your theme, follow these steps:
📌 STEPS:
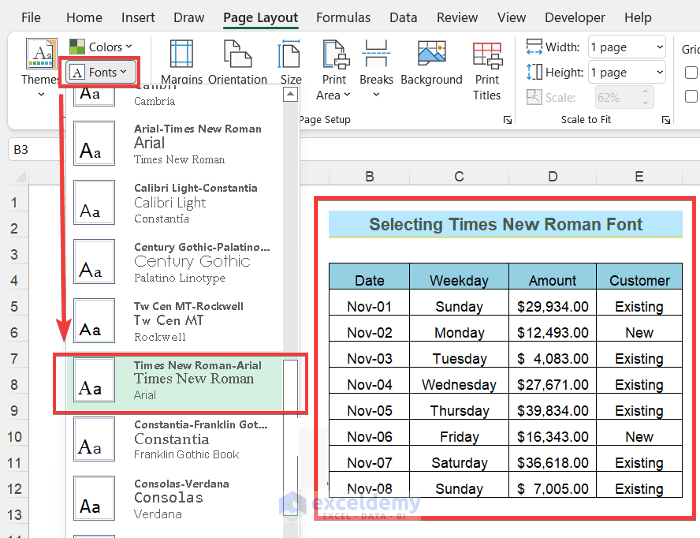
- Just like before, after opening this file go to Page Layout then select Fonts.
- Then, you will see lots of available fonts, put your mouse cursor on any of them to preview the fonts in the worksheet.
- Then, select any of them. As a result, it will apply this font to all the cells of the worksheet.
Customize Your Font:
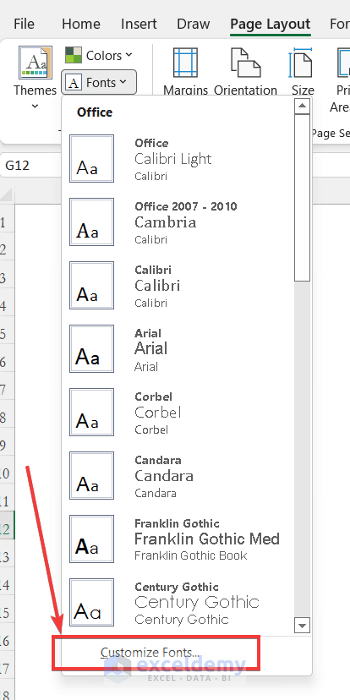
In addition to this, there is an option to customize the font as per your need. Because selecting fonts by the previous method will apply a similar font to all the cells of the worksheet. But, you may want to apply one type of font to the header cells of the table and another type of font to normal cells.
- For this, select the Customize Fonts option from the bottom of the drop-down menu.
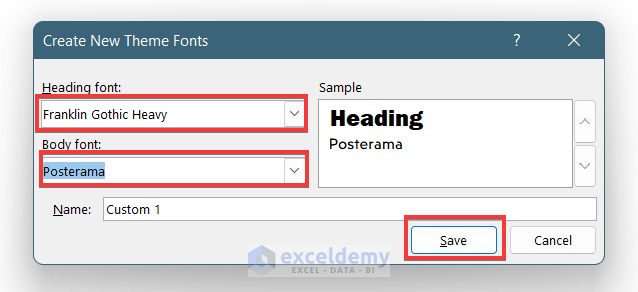
- Then, you will see that a window will open named “Create New Theme Fonts”
- In this window, select the fonts for the Heading font and Body font option.
- Similarly, you will see the preview of the font in the Sample portion.
- Finally, give a proper name and press Save to close the window.
- As a result, you will the cells of this workbook are in the selected fonts.
Related Article: How to Apply Retrospect Theme in Excel
2.3 Applying Effects in Your Theme
Applying changes in the workbook will change the look of objects. It applies some Visual Effects in the tables and cells. To apply effects in the workbook, follow these steps below:
📌 STEPS
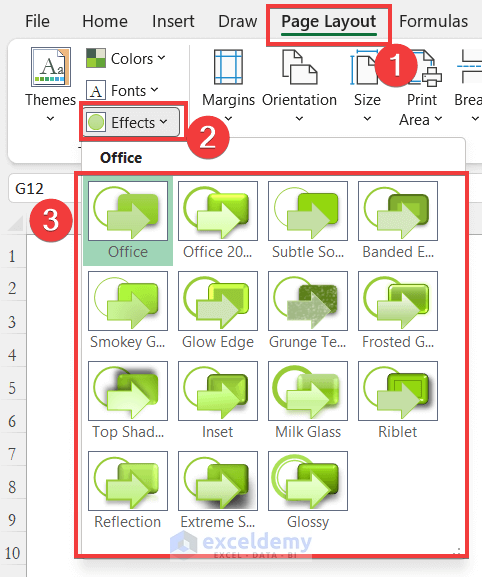
- Alike before, after opening this file go to Page Layout but select Effects.
- Then, you will see some options of available effects and select any of them to apply them in the worksheet.
Related Article: How to Apply Slice Theme in Excel
Things to Remember
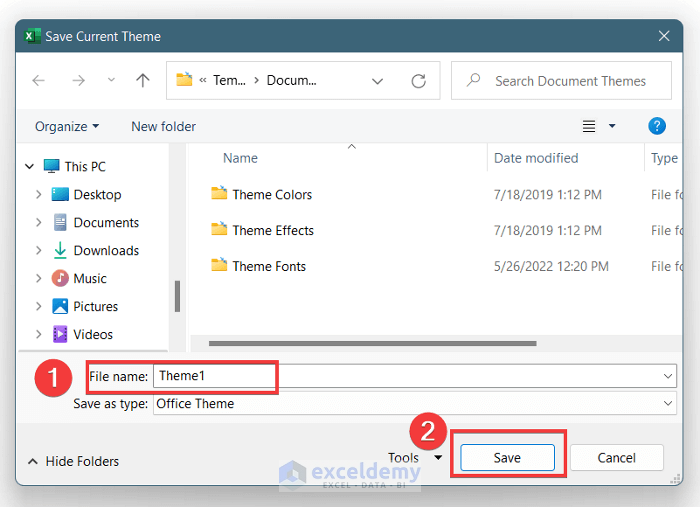
- You can use this theme further in other workbooks also that you have made on your choice. For this, just go to Page Layout > Themes > Save Current Theme
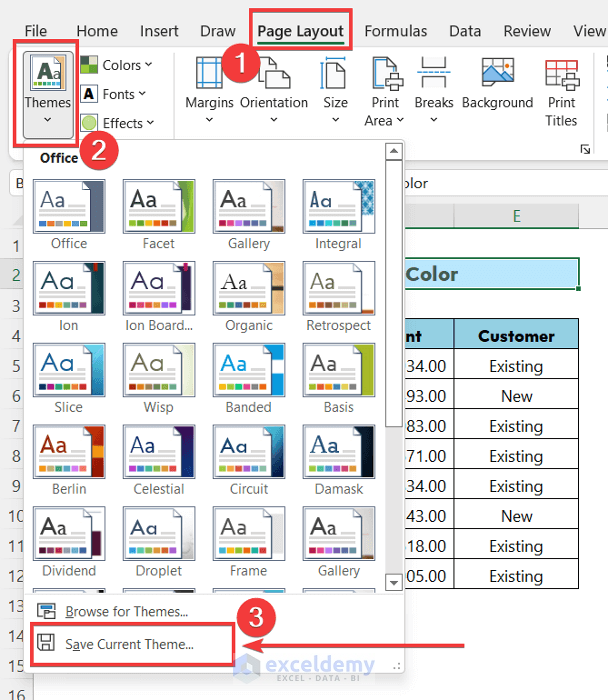
- Then, a window will appear named “Save Current Theme”. After that, select a suitable location, give the file a name, then finally press
- To open the theme in a new workbook, follow the steps mentions before in ‘Browsing for Themes”.
- The available themes are already with certain colors, fonts, and effects. You can also change them after selecting the theme.
Download Practice Workbook
You can download the practice workbook from here:
Conclusion
In this article, I have tried to show you how to apply a theme to a workbook in Excel. Follow the steps and practice yourself. I hope you found this article helpful. Please, drop comments, suggestions, or queries if you have any in the comment section below.
Related Articles
- How to Add Excel Feathered Theme
- [Solved!] Excel Feathered Theme Missing
- How to Apply Parallax Theme in Excel
- [Solved!] Excel Themes Option Is Not Working
- How to Change Theme Colors in Excel
- How to Change Excel Theme to Black
- How to Make Good Excel Color Combinations
- How to Modify Theme Color, Font, & Effects & Create Custom Excel Theme
- How to Change Theme Font in Excel
- How to Create an Excel Theme
<< Go Back to Excel Theme | Learn Excel
Get FREE Advanced Excel Exercises with Solutions!
