The sample dataset contains 5 rows without headings.

Method 1 – Selecting Multiple Rows and Insert an Equal Blank Rows in Excel
Steps:
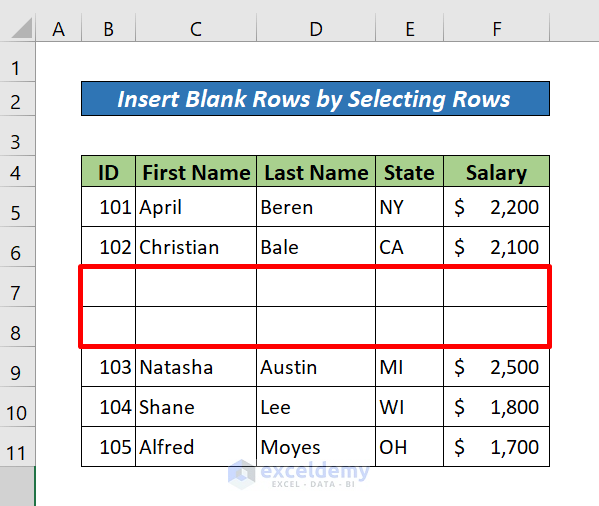
- Select the 7th and 8th rows.
- Right-click and choose the Insert option from the menu.
Two blank rows are returned.
Read More: How to Insert Multiple Rows After Every Other Row in Excel
Method 2 – Using Name Box to Insert Multiple Blank Rows in Excel
Steps:
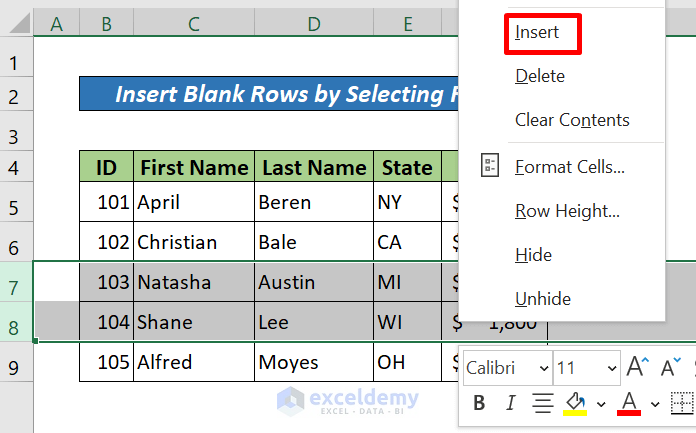
- Go to the Name Box.
- In the Name box, type the values in the format “Initial row: Final row”. In this example, type 6:8.
- This selects the rows 6th to 8th inclusive.

- Right-click on the selected rows and choose Insert.
![]()
Three blanks rows are returned between 6 and 8.
![]()
Read More: How to Insert Multiple Rows in Excel
Method 3 – Inserting Multiple Blank Rows in Excel Using Keyboard shortcuts.
There are two keyboard shortcut options.
Steps:
- Using row numbers on the left, select the number of rows equal to the number of blank rows to be inserted.
- In this example, the 6th to 8th rows are selected.
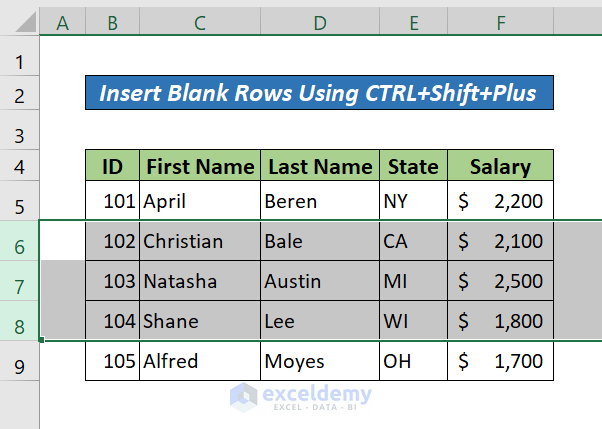
- Press CTRL+SHIFT+Plus.
- 3 blank rows will be inserted below the 5th row.
![]()
Steps:
- Select the number of rows on the left equal to the number of total blank rows to insert.
- PIn this example, the 6th to 8th rows are selected below the 5th row.
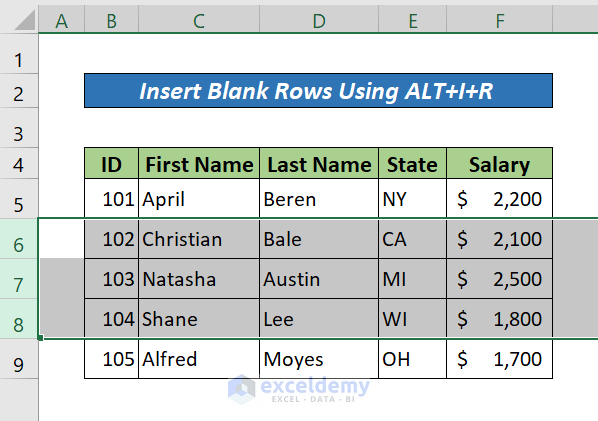
- Press ALT+I+R.
- 3 blank rows will be inserted below the 5th row.
![]()
Method 4 – Applying VBA Macro to Insert Blank Rows
When dealing with a large dataset, automating row insertion using VBA may be preferable.
Steps:
- Go to Developer tab > Visual Basic > Insert > Module. A Module window will open up.
If you don’t have the Developer tab, you can also get to the Visual Basic window by pressing the ALT+F11 keys.
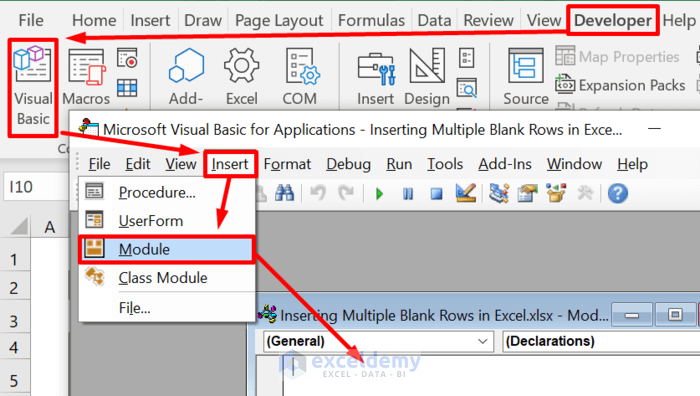
- Enter the following code in the Module window.
Sub InsertBlankRowsAtCursor()
Answer = InputBox("Input the number of rows to insert (Do not exceed 200)")
NumberofLines = Int(Val(Answer))
    If NumberofLines > 200 Then
NumberofLines = 200
End If
    If NumberofLines = 0 Then
GoTo EndInsertLines
End If
    Do
Selection.EntireRow.Insert
Count = Count + 1
Loop While Count < NumberofLines
EndInsertLines:
End Sub![]()
- Exit the Code window.
- Go to Developer > Macros or press ALT+F8. Select the Macro and click on Options.
- In the shortcut key box, use CTRL+SHIFT+H.
- Press OK.
![]()
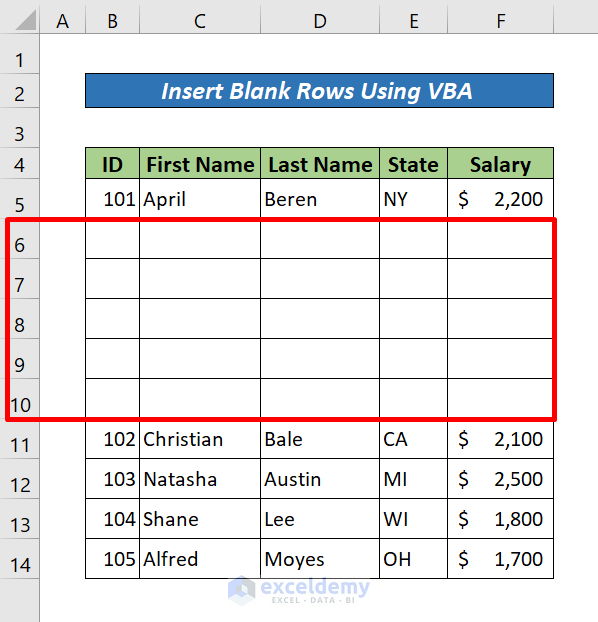
- Go back to the worksheet and select a cell (Cell B6) to insert blank rows under it.
- Press the shortcut key (CTRL+SHIFT+H), and a pop-up window requests the number of rows to be inserted.
- In this example, type 5 and press ENTER.
![]()
5 blank rows are returned.
Download Practice Workbook
Related Articles
- How to Insert Blank Row After Every Nth Row in Excel
- Excel Formula to Insert Rows Between Data
- How to Insert Rows in Excel Automatically
- Excel Fix: Insert Row Option Greyed Out in Excel
- Cannot Insert Row in Excel
<< Go Back to Insert Rows | Rows in Excel | Learn Excel
Get FREE Advanced Excel Exercises with Solutions!
