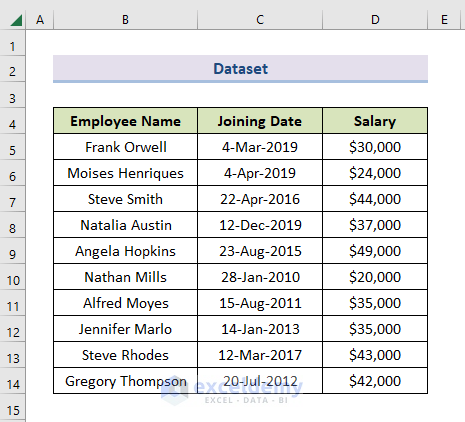
We have a data set with the Names, Joining Dates, and Salaries of some employees. We’ll insert new rows into the dataset.
Method 1 – Using the Insert Option from the Context Menu
Steps:
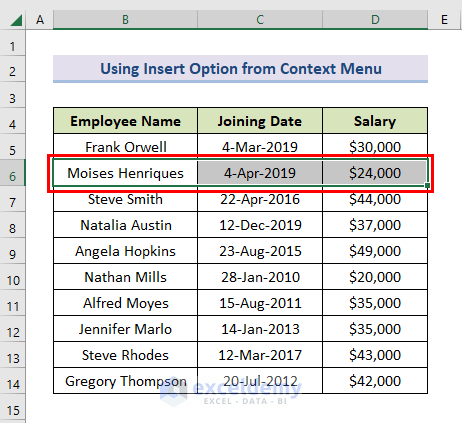
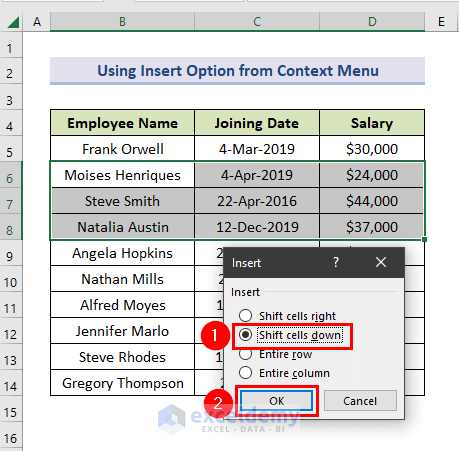
- Select the row you want to insert the values in front of. We have selected the second row because we want to insert rows in front of the second row.
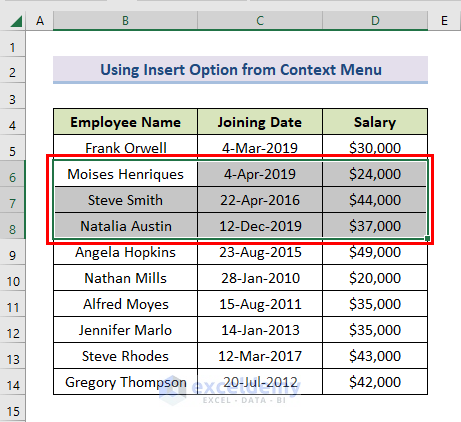
- Click and drag down to select the number of rows equal to the number of blank rows you want to include. We chose three rows.
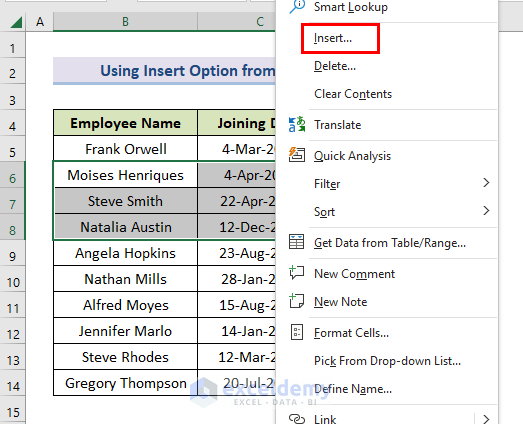
- Right-click on the selection and choose Insert.
- Select the Shift Cells Down option to add the rows above the selected rows.
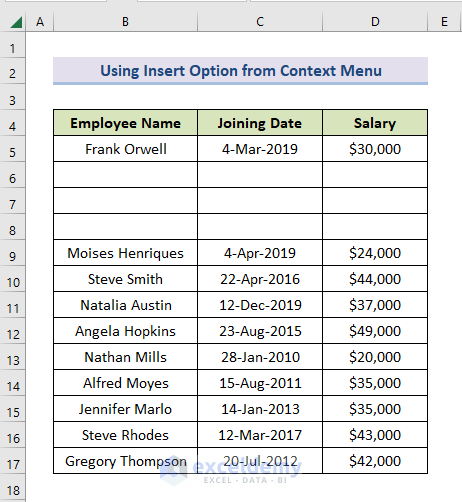
- You will get the number of blank rows inserted equal to the number of selected rows.
Read More: How to Insert a Total Row in Excel
Method 2 – Applying the Insert Option from the Excel Toolbar
Steps:
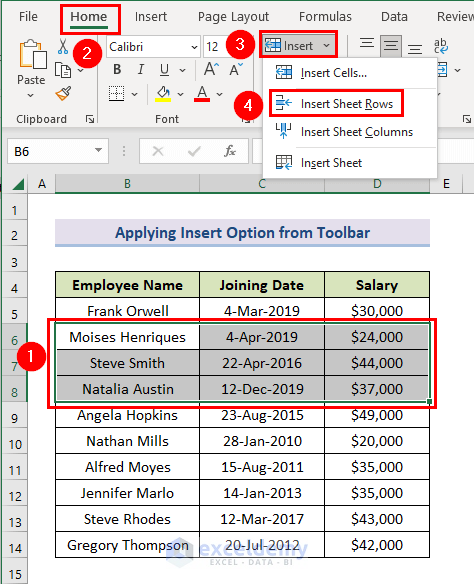
- Select the rows as in Method 1.
- Go to the Home tab, select Insert, and choose Insert Sheet Rows in the Excel toolbar in the section called Cells.
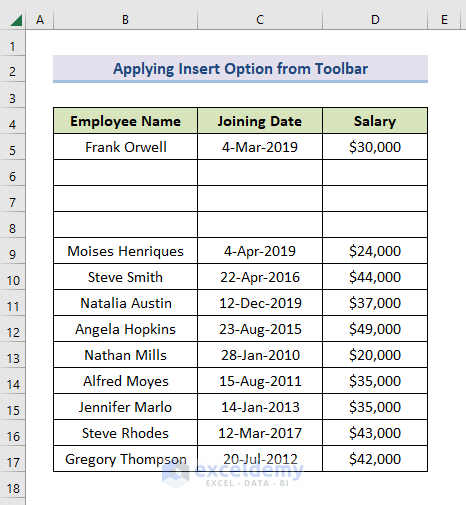
- You will get the number of blank rows inserted equal to your desired number (3 in this example).
Method 3 – Using a Keyboard Shortcut to Insert Multiple Rows After Every Other Row
Steps:
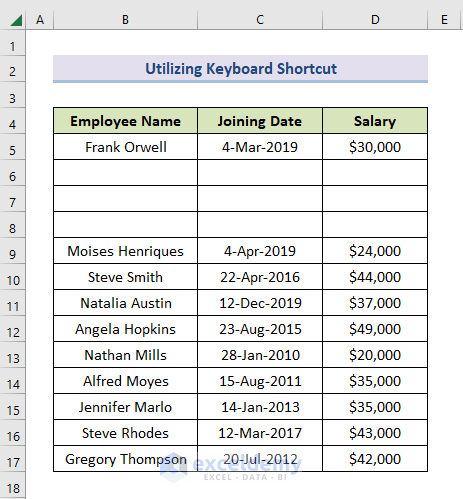
- Select the row where you want to insert and as many rows as you need to insert.
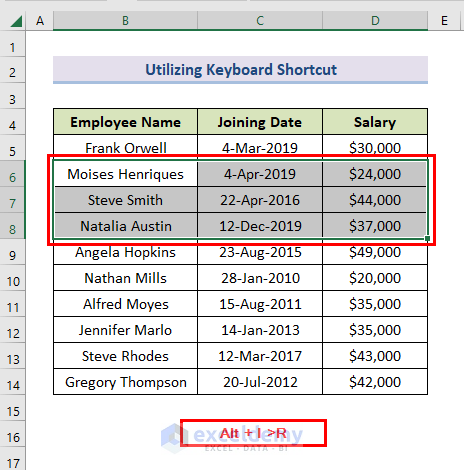
- Press Alt + I, then press R. You will get the number of blank rows inserted equal to your desired number (3 in this example).
Method 4 – Incorporating VBA to Insert Multiple Rows After Every Other Row in Excel
Steps:
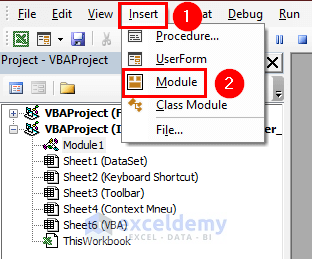
- Open a new VBA window by pressing the keyboard shortcut Alt + F11, then open a new module by going to Insert and selecting Module.
- Paste the following code into the module:
Code:
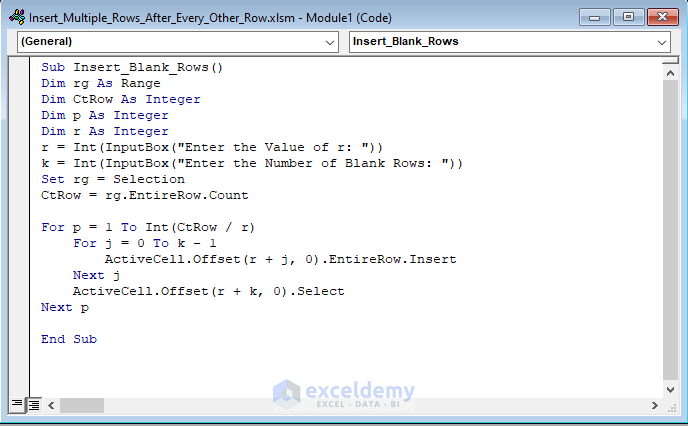
Sub Insert_Blank_Rows()
Dim rg As Range
Dim CtRow As Integer
Dim p As Integer
Dim r As Integer
r = Int(InputBox("Enter the Value of r: "))
k = Int(InputBox("Enter the Number of Blank Rows: "))
Set rg = Selection
CtRow = rg.EntireRow.Count
For p = 1 To Int(CtRow / r)
For j = 0 To k - 1
ActiveCell.Offset(r + j, 0).EntireRow.Insert
Next j
ActiveCell.Offset(r + k, 0).Select
Next p
End Sub- This produces a Macro called Insert_Blank_Rows.
Code Breakdown
- We created a subprocedure named Insert_Blank_Rows.
Dim rg As Range
Dim CtRow As Integer
Dim p As Integer
Dim r As Integer
In these parts, we declared some variables.
- Afterward,
r = Int(InputBox("Enter the Value of r: "))
k = Int(InputBox("Enter the Number of Blank Rows: "))
these parts take the necessary inputs.
Set rg = Selection
CtRow = rg.EntireRow.Count
For p = 1 To Int(CtRow / r)
For j = 0 To k - 1
ActiveCell.Offset(r + j, 0).EntireRow.Insert
Next j
ActiveCell.Offset(r + k, 0).Select
Next p
these parts create empty rows.
- Return to your worksheet.
- Select the whole data set (Without the Column Headers).
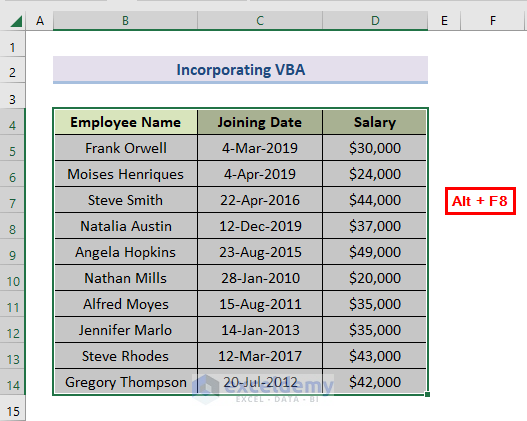
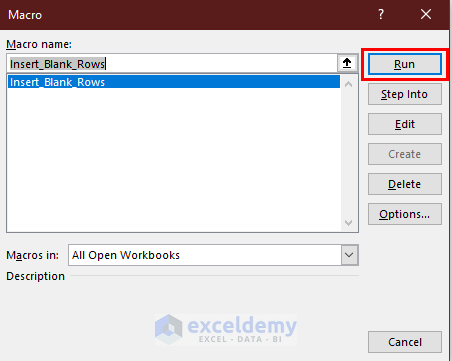
- Press Alt + F8 and run the macro.
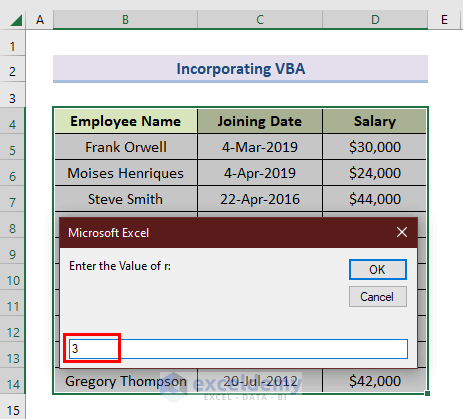
- You will get a Message Box asking you to provide the value of r. Here, r is the value of the interval of rows after between which you want to insert the blank rows.
- We have entered r as 3.
- Click OK.
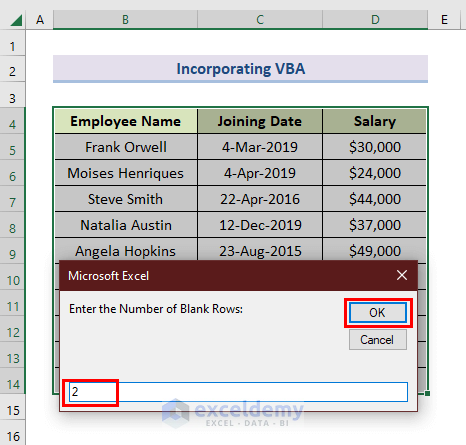
- You will get another Message Box asking you to enter the number of blank rows. We have entered 2 which means that we’ll insert two rows after every third row in the dataset.
- Click OK.
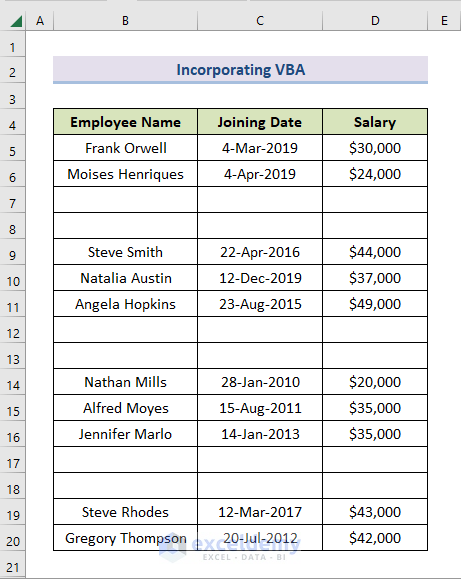
- Here’s the result.
Read More: Insert Blank Row After Every Nth Row in Excel
Download the Practice Workbook
Related Articles
- How to Insert Rows in Excel Automatically
- Cannot Insert Row in Excel
- Excel Fix: Insert Row Option Greyed Out in Excel
- Excel Formula to Insert Rows Between Data
- How to Insert Row Below in Excel
<< Go Back to Insert Rows | Rows in Excel | Learn Excel
Get FREE Advanced Excel Exercises with Solutions!
