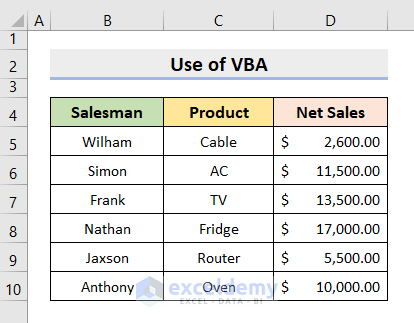
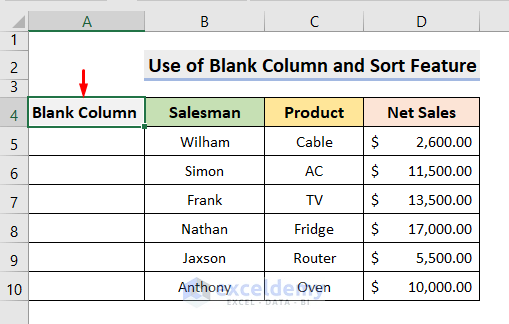
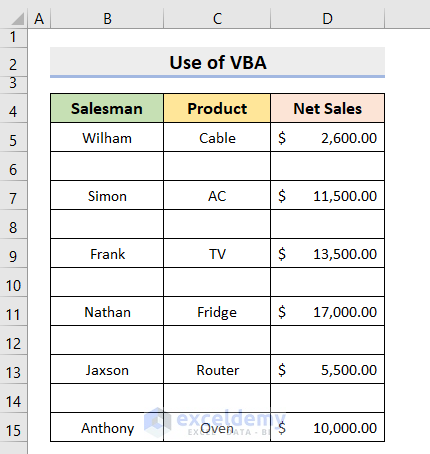
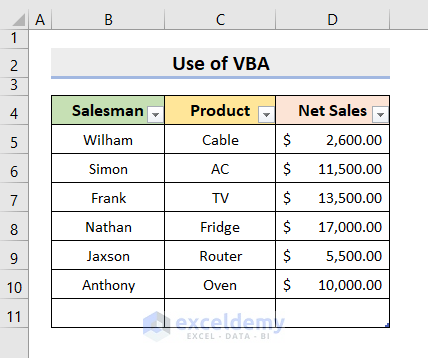
Below is a dataset representing Salesman, Product, and Net Sales.
Method 1 – Inserting a Row Below Using Excel VBA
STEPS:
- Select the Visual Basic feature under the Developer tab.

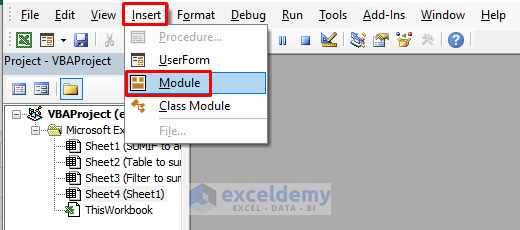
- Select Module under the Insert tab.
- A window will pop out.
- Enter the following formula into the Module window:
Sub PlaceRowBelow()
Dim rnge As Range
Application.ScreenUpdating = False
Set rnge = ActiveCell.Offset(1, 0)
rnge.EntireRow.Select
Selection.Insert Shift:=xlDown
Selection.ClearFormats
Application.ScreenUpdating = True
End Sub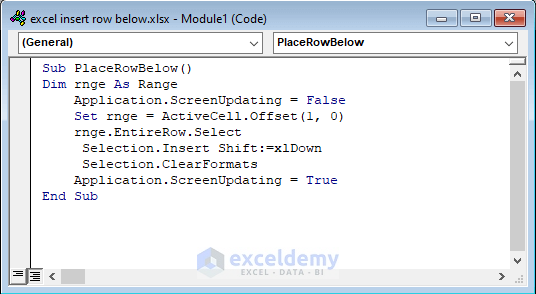
- Close the Visual Basic window.
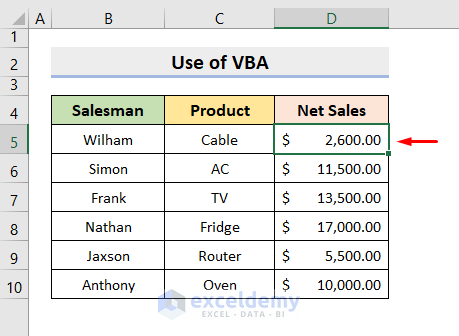
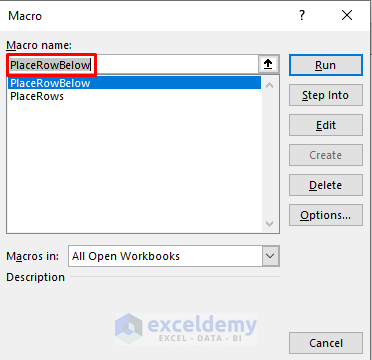
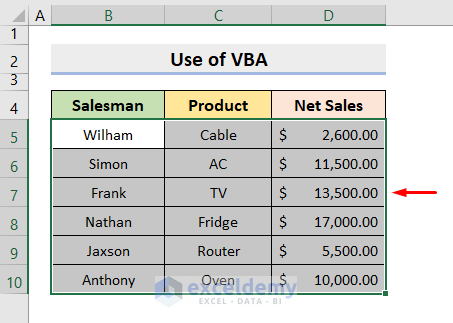
- Select cell D5.
- Select Macros under the Developer tab.

- Select the Macro name ‘PlaceRowBelow’.
- Press Run.
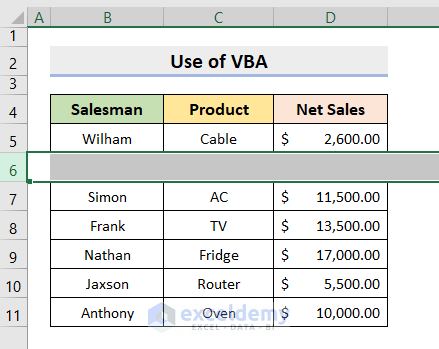
- A row will be added below the selected cell.
Read More: Shortcuts to Insert New Row in Excel
Method 2 – Inserting a Row After Every Other Row in Excel
2.1. Excel Blank Column and Sort Feature to Insert Row
STEPS:
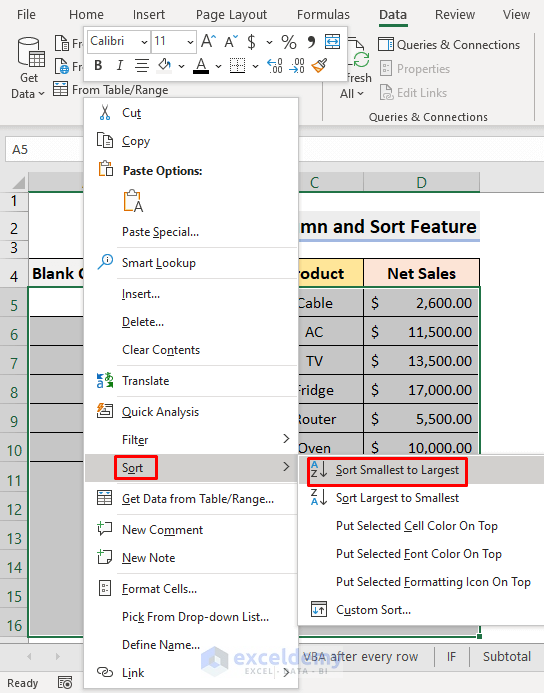
- Select the leftmost column.
- Right-click on the mouse and select the Insert option.
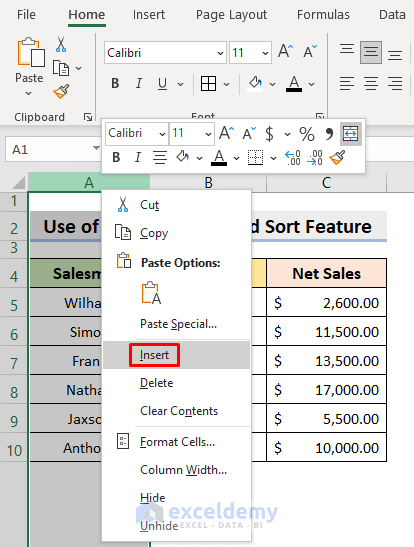
- It’ll add a column on the left.
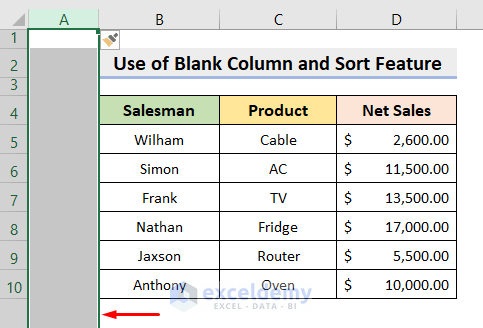
- Select cell A4.
- Type Blank Column.
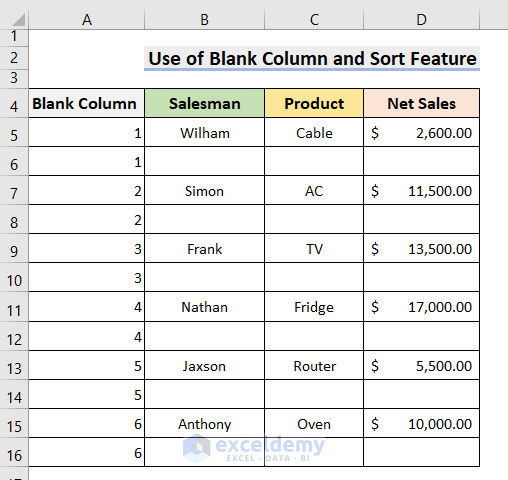
- Fill up the Column serially until the end of the data, as shown in the image below.
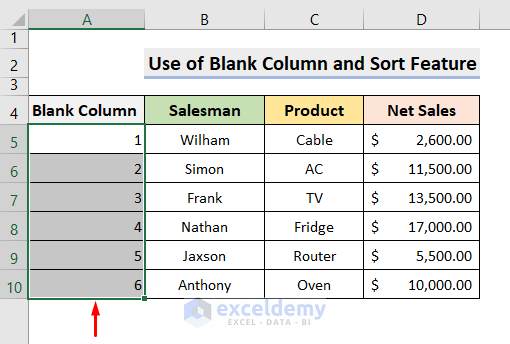
- Fill up the column serially, as shown in the image below.
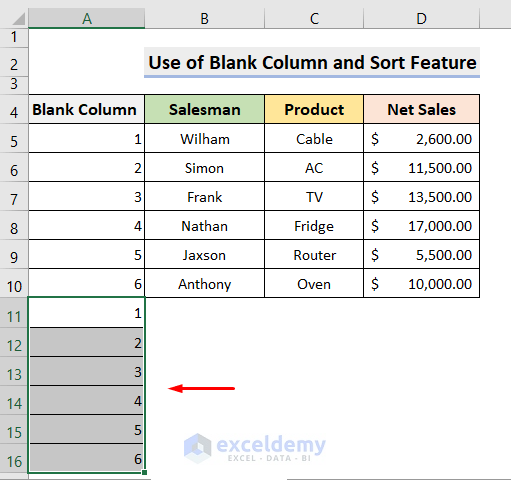
- Select the range of cells except the header.
- Right-click on the mouse.
- Select Sort Smallest to Largest from the Sort options.
- You’ll see that your dataset is rearranged.
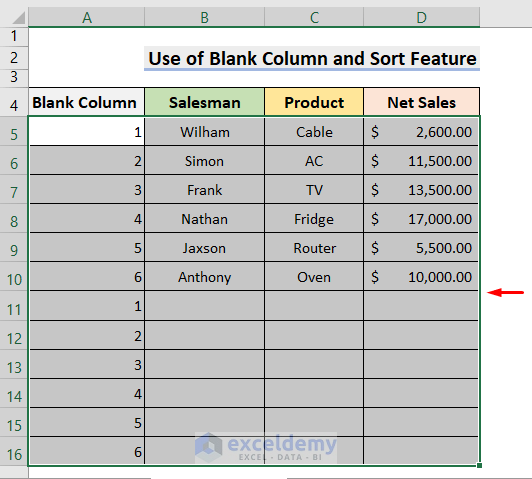
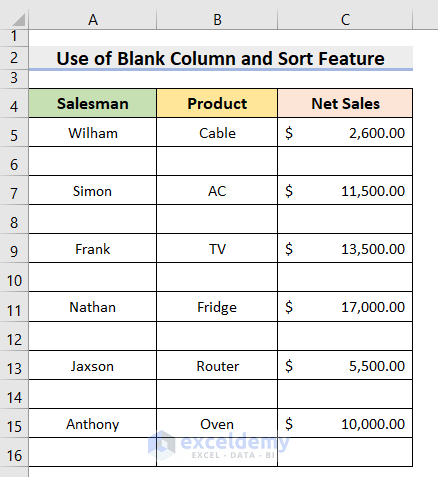
- Delete the Blank Column and you’ll get your desired output.
Read More: Insert Multiple Rows After Every Other Row in Excel
2.2. Inserting a Row with Excel VBA Code
STEPS:
- Select the range of cells you want to work with.
- Select the Visual Basic feature under the Developer tab.

- Select Module under the Insert tab.

- A window will pop out.
- Enter the following formula into the Module window.
Sub PlaceRows()
Dim rnge As Range
Dim RowNumber As Integer
Dim x As Integer
Set rnge = Selection
RowNumber = rnge.EntireRow.Count
For x = 1 To RowNumber
ActiveCell.Offset(1, 0).EntireRow.Insert
ActiveCell.Offset(2, 0).Select
Next x
End Sub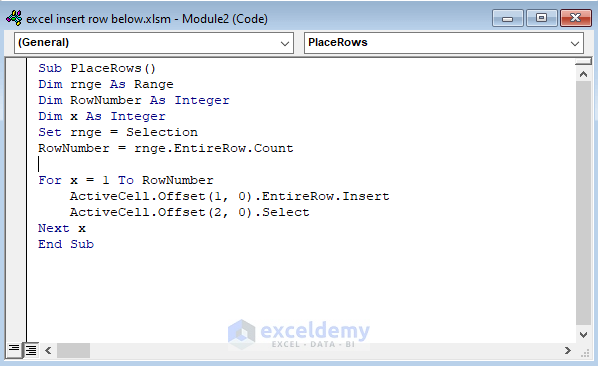
- Close the Visual Basic window and select Macros under the Developer tab.

- Select PlaceRows in the Macro name and press Run.

- You’ll see empty rows, one after every other row.
Read More: How to Insert Rows in Excel Automatically
Method 3 – Entering a Row Below the Blank Cell in Excel
STEPS:
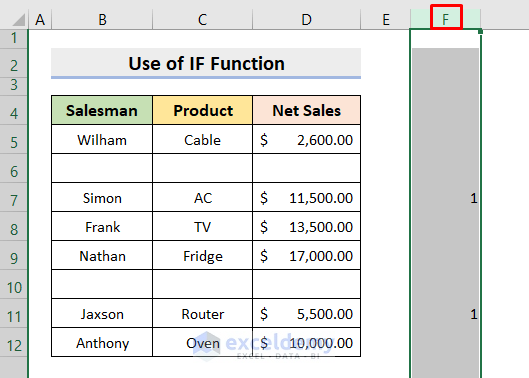
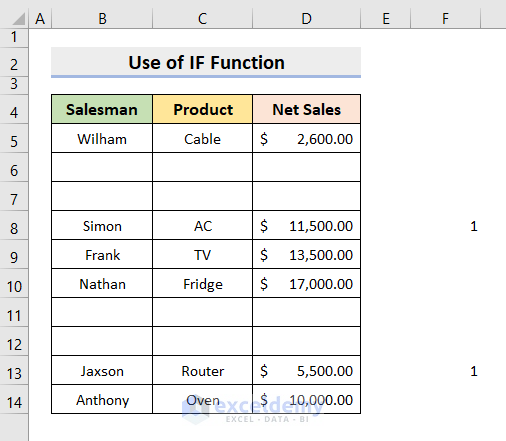
- Select cell F5 and type the formula:
=IF(B4<>"","",1)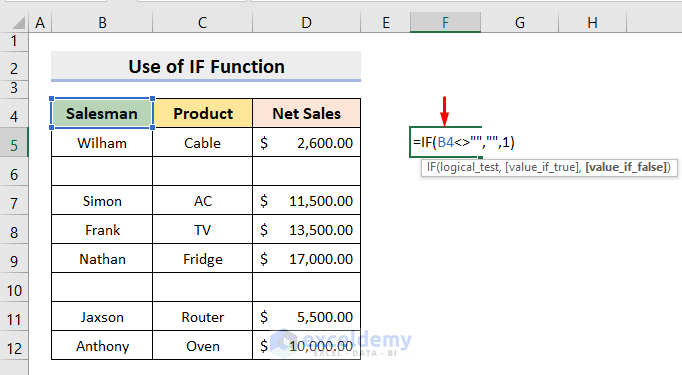
- Press Enter and drag it to the last row of your dataset.
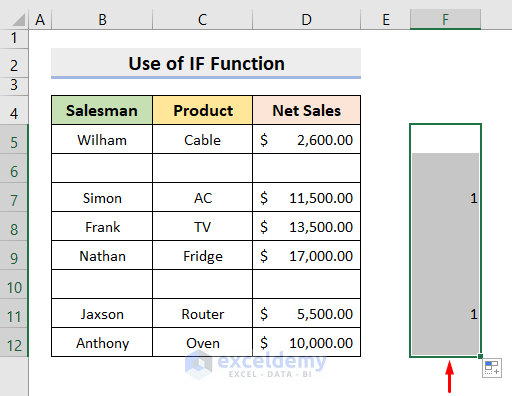
- Select the entire Column F.
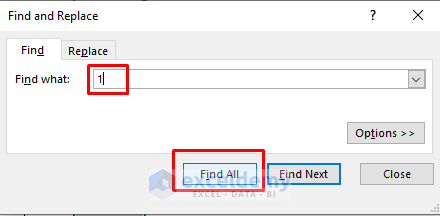
- Select Find from the Find & Select options in the Editing group under the Home tab.

- A dialogue box will pop out.
- Type 1 in Find what.
- Press Find All.
- The dialogue will expand, as shown in the image below.
- Select the rows with Value 1 and press Close.
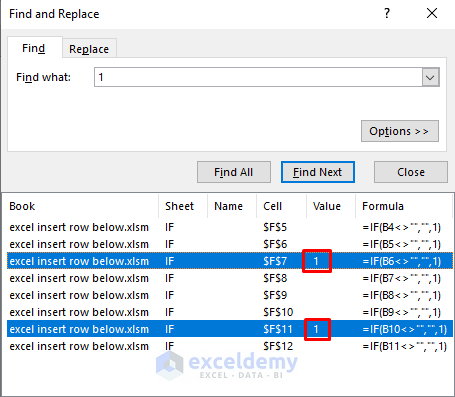
- You’ll see that the cells with value 1 are being selected automatically.
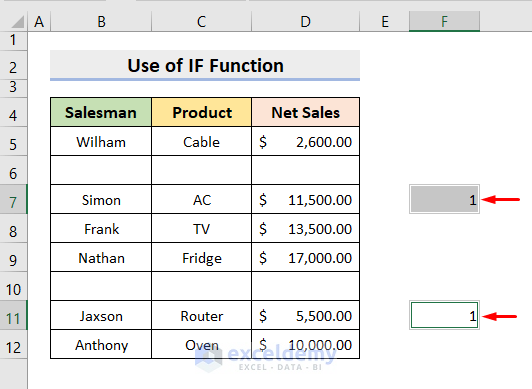
- Press the keys ‘Ctrl’ and ‘+’ together.
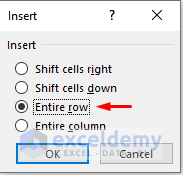
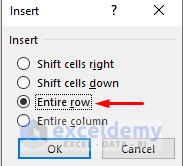
- Select the Entire row option from the pop-up dialogue box and press OK.
- You’ll get to see your expected outcome, as shown in the image below.
Read More: Excel Formula to Insert Rows Between Data
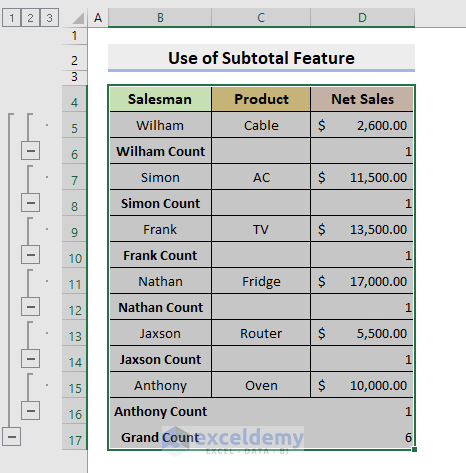
Method 4 – Using the Subtotal Feature to Insert a Row
STEPS:
- Select the range of cells you want to work with.
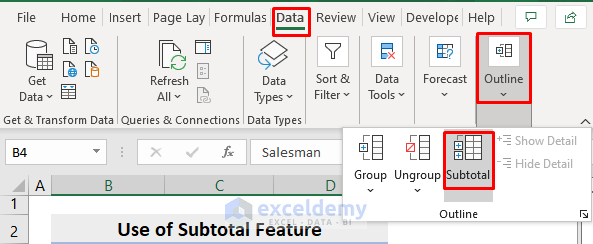
- Select the Subtotal feature from the Outline group under the Data tab.
- A dialogue box will pop out.
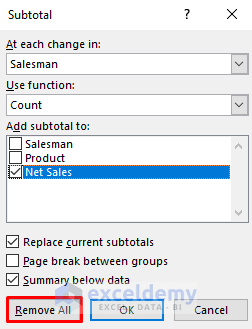
- Select Salesman from the ‘At each change in’ list, Count from the ‘Use function’ list, check Net Sales in ‘Add subtotal to’ and keep the rest as it is.
- Press OK.

- You’ll get to see your dataset, just like the image below.
- Select Go To Special from the Find & Select options in the Editing group under the Home tab.
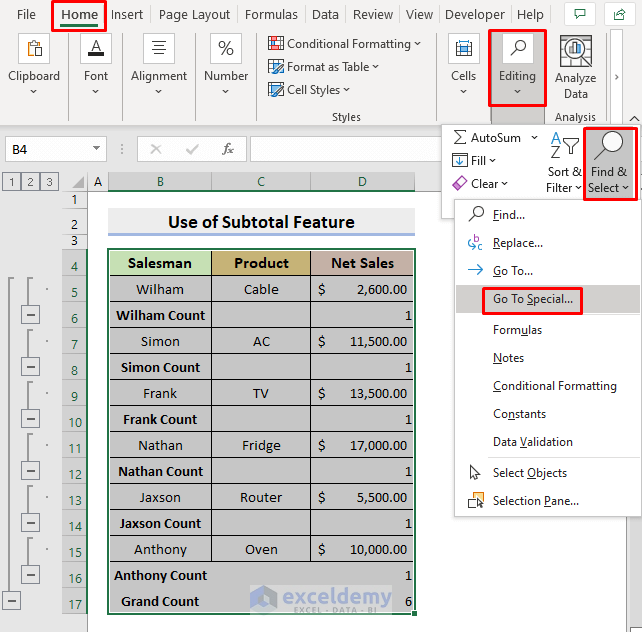
- A dialogue box will pop out.
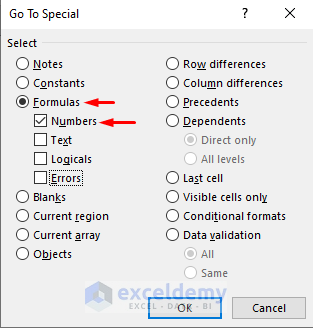
- Check only the Numbers option in Formulas and press OK.
- You’ll see that all the count numbers are being selected.
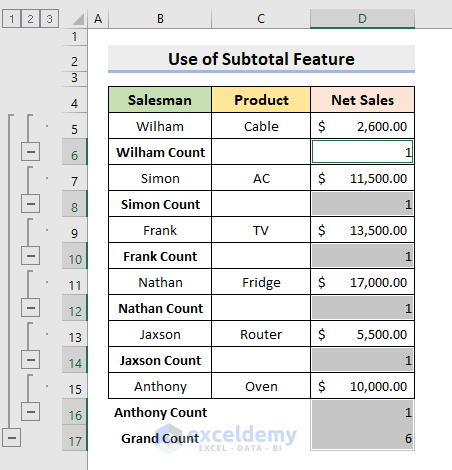
- Press the ‘Ctrl’ and ‘+’ keys together.
- Select the Entire row in the pop-up dialogue box and press OK.
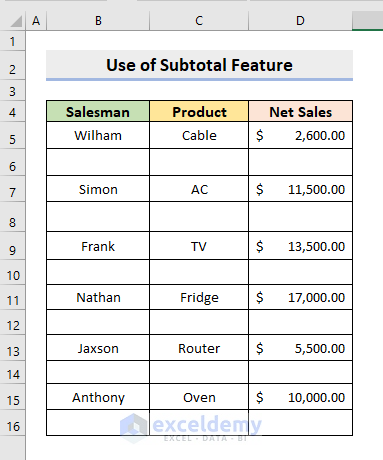
- A blank row will be inserted after every Salesman’s name.

- Select the range of cells.

- Select Subtotal from the Outline group under the Data tab.
- Press Remove all in the pop-up dialogue box.
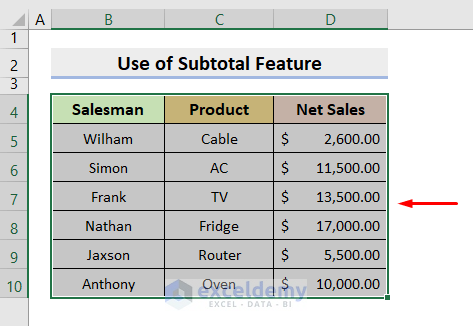
- You’ll see the desired result.
Read More: How to Insert Multiple Blank Rows in Excel
Method 5 – Applying Excel VBA to Place a Row at the Bottom of the Table
STEPS:
- Select the Visual Basic feature under the Developer tab.

- A window will pop out.
- Select Module under the Insert tab.

- Another window will pop out.
- Enter the following formula into the Module window:
Sub PlaceRowUnderTable()
Dim sheet As Worksheet
Set sheet = ActiveSheet
Table_Title = InputBox("Table Title: ")
Dim list As ListObject
Set list = sheet.ListObjects(Table_Title)
list.ListRows.Add
End Sub
- Close the Visual Basic window.
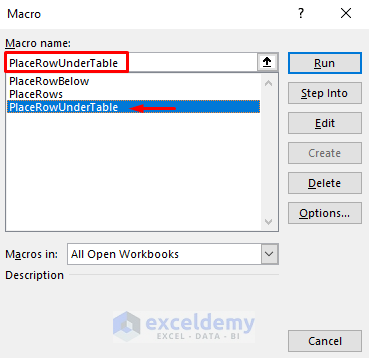
- Select Macros under the Developer tab.

- Select PlaceRowUnderTable in Macro name and press Run.
- A dialogue box will pop out.
- Type Table1 and press OK.

- You’ll get to see an empty row under the Table.
Download the Practice Workbook
Download the following workbook to practice.
Related Articles
- How to Insert Multiple Rows in Excel
- How to Insert Blank Row After Every Nth Row in Excel
- Cannot Insert Row in Excel
- How to Insert a Total Row in Excel
- Excel Fix: Insert Row Option Greyed Out in Excel
<< Go Back to Insert Rows | Rows in Excel | Learn Excel
Get FREE Advanced Excel Exercises with Solutions!
