Footer is often used in our professional life. Some people use their organization’s name as a signature mark while some use their own name. Sometimes it is required to insert the date in the footer. Because it can help us to define the editing or printing time of that data and keep the spreadsheet intact. In this article, we will demonstrate to you, how to insert a date in the footer in Excel.
How to Insert Date in Footer in Excel: 3 Easy Methods
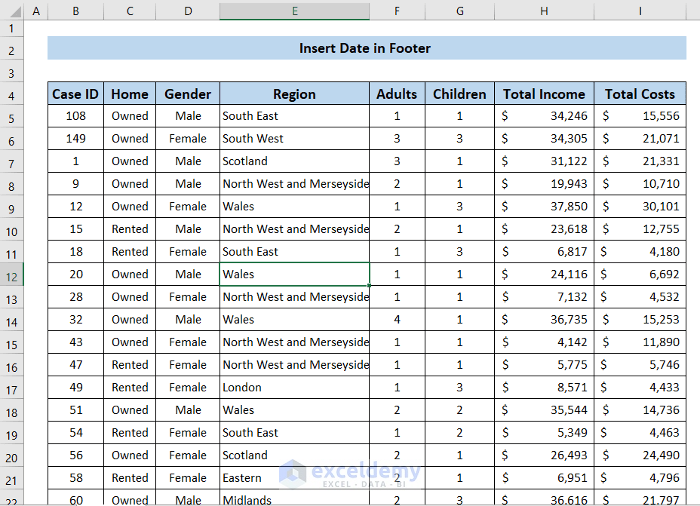
For describing the methods, we are considering a datasheet of 34 city dwellers’ information. Their dome type, location, number of family members, and their income and expenditure details in the range of cells B4:I38. We will show 3 distinct processes to insert the footer at the bottom of the page.
1. Using Insert Tab in Excel
In this process, we will insert the date in the footer of our spreadsheet using the ribbon options of Excel. The steps of this process are given as follows:
📌 Steps:
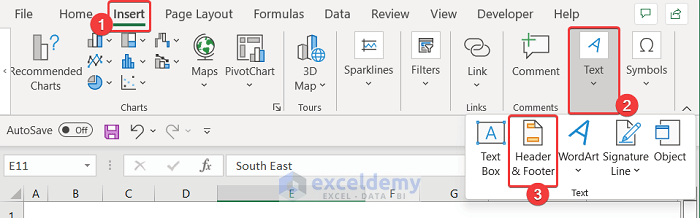
- First of all, select the Insert tab from the Toolbar.
- Go to the Text group.
- Click on the Header & Footer.
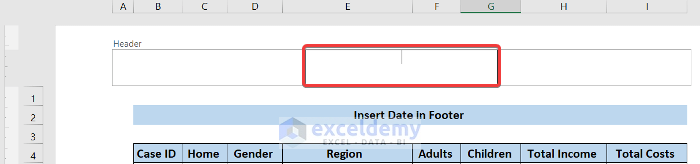
- The cursor will be in the center header by default. Now, click on any empty white area on the Excel sheet.
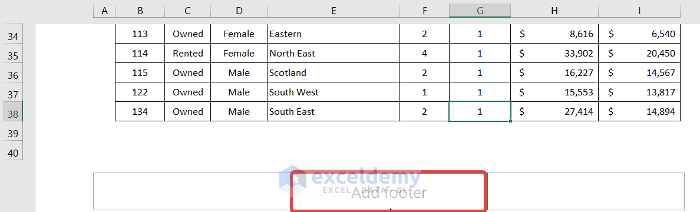
- Scroll down by your mouse and you will see the Add Footer option.
- There will be three separate alignments. Left, Center, and Right. We chose the left alignment to insert the date.
- After that, in the Header & Footer tab, select Current Date. Or you can write down the following formula.
&[Date]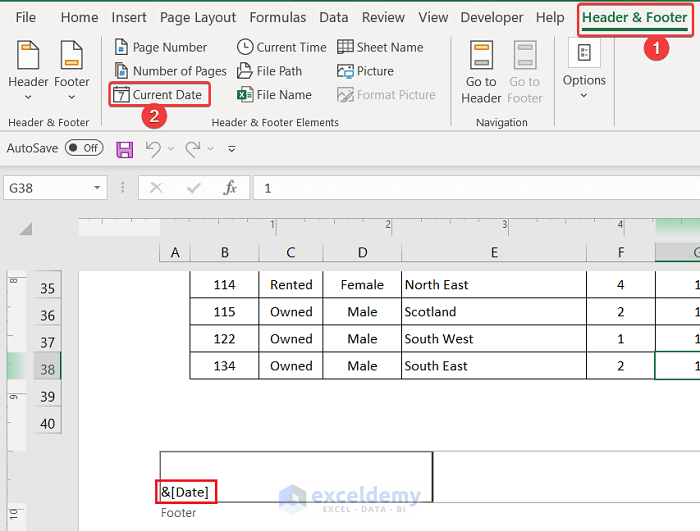
- Click on any empty white area to insert the date.
- You will find the date will be placed at our desired place.

So, we can say that our method worked perfectly.
Read More: How to Insert Static Date in Excel
2. Page Setup Option to Insert Date in Footer
In this method, we are going to insert the date in the footer using the Page Setup option. It is an amazing feature, to insert the footer on every printed page of your datasheet. The procedure is explained below step by step:
📌 Steps:
- First, in the Page Layout tab, select Page Setup Dialog Box Launcher.
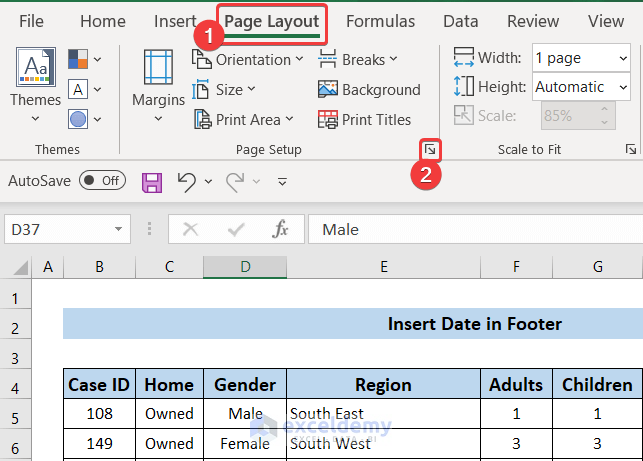
- You can also get the Page Setup option from the Print feature. For that, press ‘Ctrl+P’ on your keyboard.
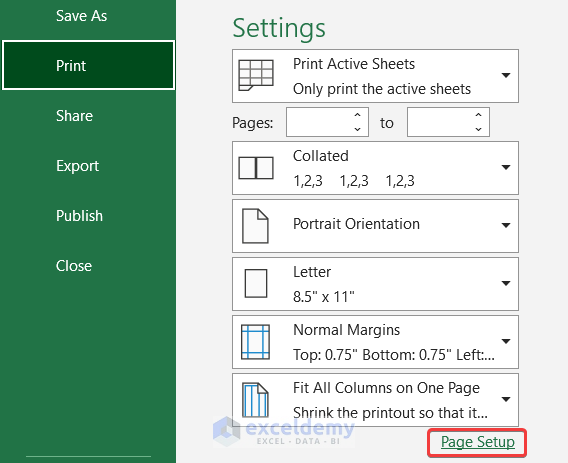
- Now, in the Page Setup dialog box, select Header/Footer > Custom Footer.
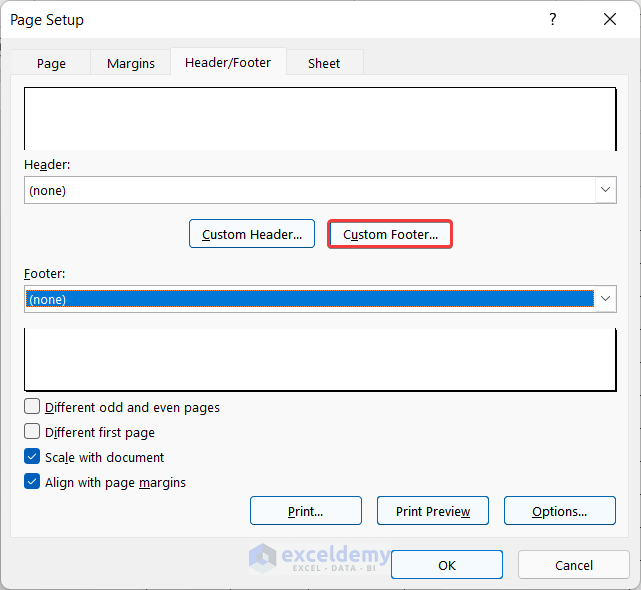
- A new dialog box entitled Footer will appear.
- In this dialog box, you will see 3 different sections to insert the footer. Choose anyone. In our case, we choose the Left Section.

- Above the footer alignment section, you will see some other option icons. Now, move your mouse cursor slowly on these icons and it will show you their feature like the image.
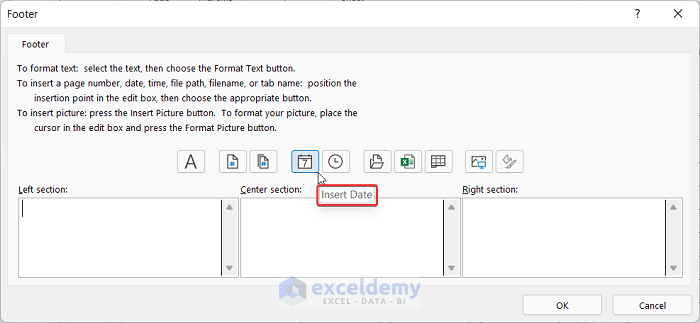
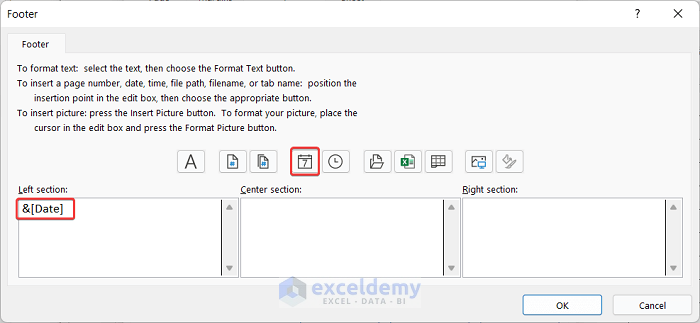
- Then, click the Insert Date or you can simply write the following formula into your desired section.
&[Date]- Click OK to close the Footer dialog box.
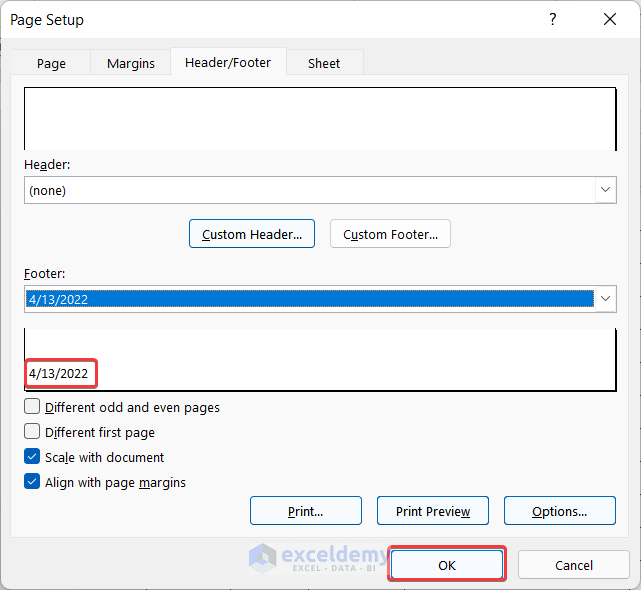
- You will see a preview of your footer in the Footer section of the Page Setup dialog box.
- Again, click OK if you are satisfied with your footer.
- After that, in the View tab, select the Page Layout option.
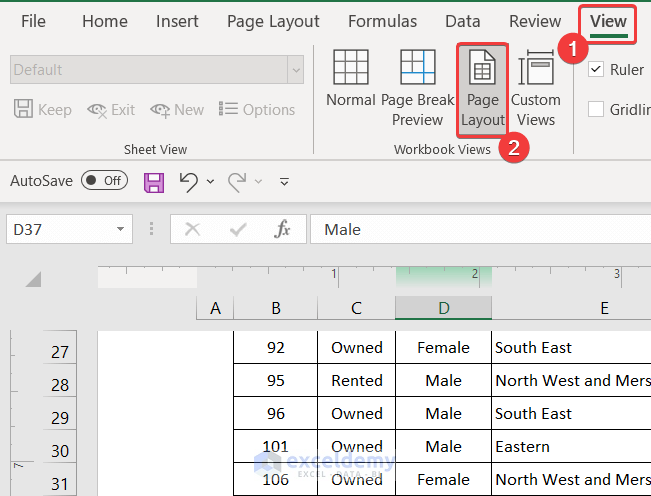
- You will see the footer in the bottom left corner of that page.
Thus, we can say that our process worked effectively.
Read More: How to Remove Time from Date in Excel
3. Embedding VBA Code to Insert Footer
Writing a VBA code can also help you to insert the date in the footer. To show this method, we are using the same datasheet which we have already used. Our dataset is in the range of cells B4:I38. The steps of this process are given as follows:
📌 Steps:
- To start the approach, go to the Developer tab and click on Visual Basic. If you don’t have that, you have to enable the Developer tab. You can also press ‘Alt+F11’ to open the Visual Basic Editor.

- A dialog box will appear.
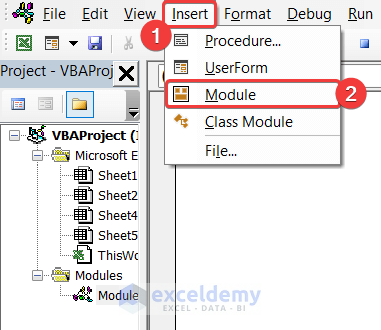
- Now, in the Insert tab on that box, click Module.
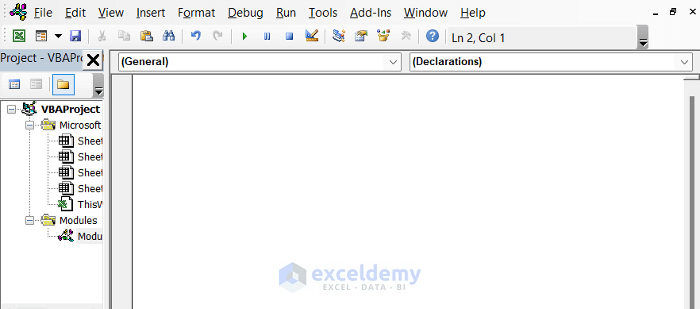
- Then, write down the following visual code in that empty editor box.
Sub Insert_Date_in_Footer()
Dim Footer As String
On Error Resume Next
Footer = ActiveWorkbook.BuiltinDocumentProperties("Last Saved date")
If Err = 440 Then
   Err = 0
   Footer = ActiveWorkbook.BuiltinDocumentProperties("Date of Creation")
   If Err = 440 Then
      Err = 0
      Footer = "Not Set"
   End If
End If
Footer = Left(Footer, 8)
ActiveSheet.PageSetup.LeftFooter = Footer
End Sub- Close the Editor Now, from the View ribbon, click on Macros > View Macros.
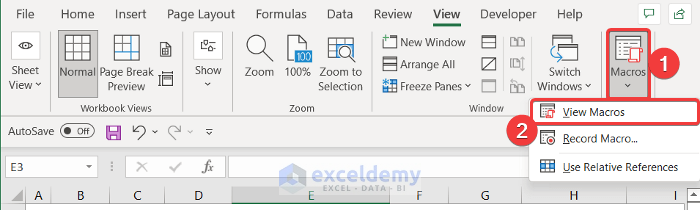
- A new dialog box called Macro will appear. Select Insert_Date_in_Footer.
- Click on the Run button to run this code.

- Then, from the View tab, select the Page Layout option.
- At last, you will see the footer at the bottom of that page.
Finally, we can say that our visual code worked successfully and we can insert the date in the footer section.
Read More: Formula for Weekly Dates in Excel
Download Practice Workbook
Download this practice workbook for practice while you are reading this article.
Conclusion
That’s the end of today’s article. I hope that this will be helpful for you and that you will be able to insert the date in the footer in Excel. If you have any further queries or recommendations, please share them with us in the comments section below.
Keep learning new methods and keep growing!
Related Articles
- How to Display Day of Week from Date in Excel
- How to Insert Last Saved Date in Excel
- How to Insert Drop Down Calendar in Excel
<< Go Back to Insert Date | Date-Time in Excel | Learn Excel
Get FREE Advanced Excel Exercises with Solutions!
