CSV, short for Comma Separated Values, is a widely used file format used to store delimited records in plain text. It is often used to transfer data between different applications due it’s small file size and simplicity, especially for large datasets. Let’s examine some easy ways to create CSV files from Excel.
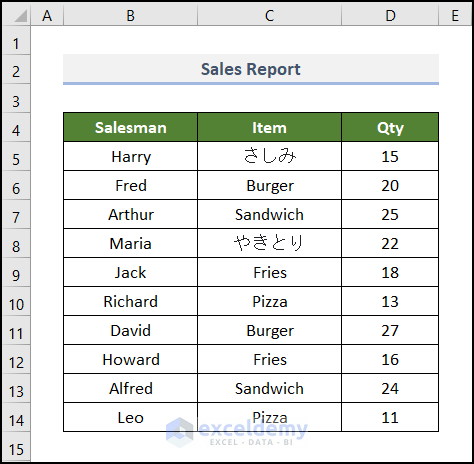
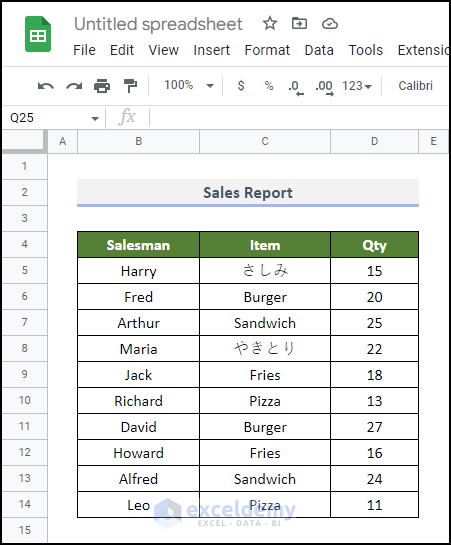
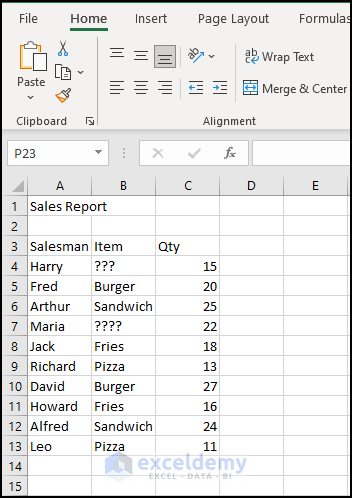
To illustrate, we’ll use the following source file as our dataset. It’s a daily Sales Report of a particular fast food store, and contains data about the Salesman, Item, and Qty in columns B, C, and D respectively.
Here, we have used Microsoft Excel 365 version, however you may use any other version of Excel instead.
Method 1 – Using Save As Command
The easiest method for creating a CSV file in Excel is using the Save As command.
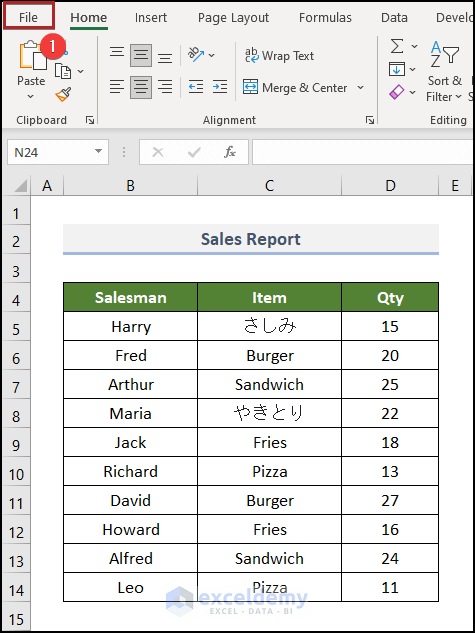
- Go to the File tab.
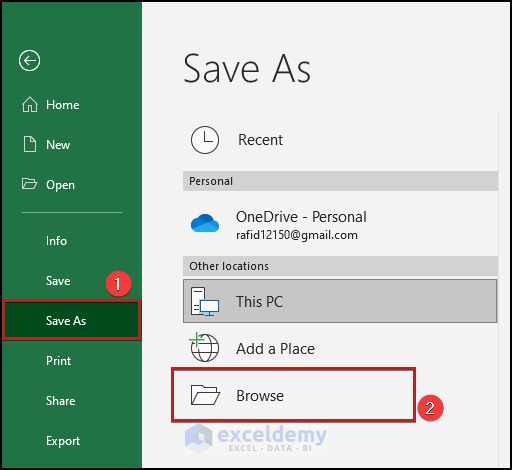
- Click on Save As from the menu.
- In the Save As section, select the Browse option.
The Save As dialog box appears.
- Select CSV (Comma delimited) format in the Save as type box.
- Click on the Save button.

Note: After pressing the Save button, you’ll get a warning dialog box reminding you that only the active worksheet will get converted to a CSV file. Perform the above steps for each additional worksheet you want to save.
A CSV file with the same name will be created in the specified location on your PC.
- Navigate to the file and right-click on it.
- From the context menu, tap on Open with.
- Select Notepad from the sub-menu.
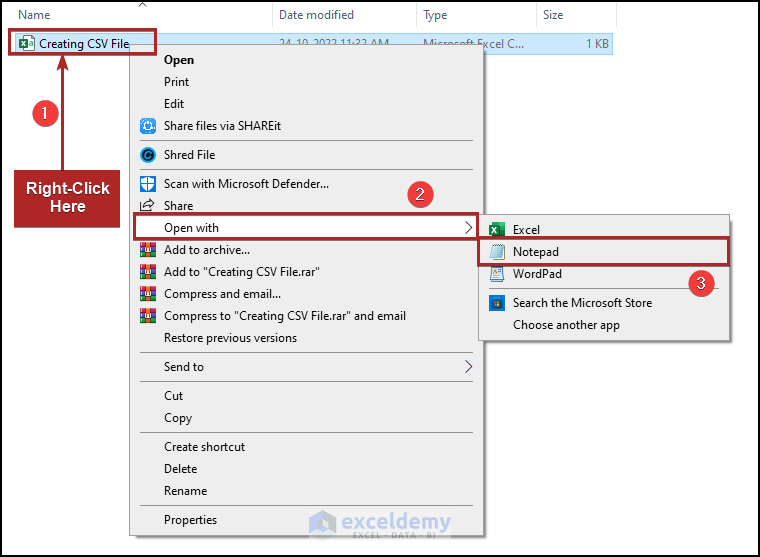
The file opens in the Notepad app.
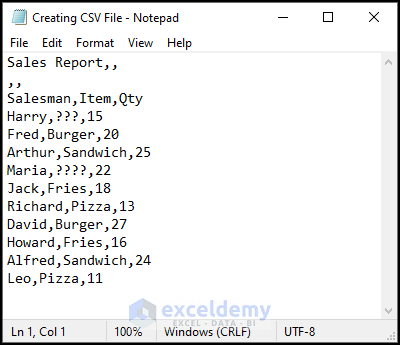
You can also open the same file with Excel. But it won’t look like before. It’ll show the data without any type of formatting.

Read More: How to Convert Excel File to Text File with Comma Delimited
Method 2 – Utilizing CSV UTF-8 to Create CSV File Keeping Special Characters
The above method is simple, but it has a drawback. It can’t transform the special characters (Non-ASCII characters). However it is possible to create a CSV file without destroying special characters.
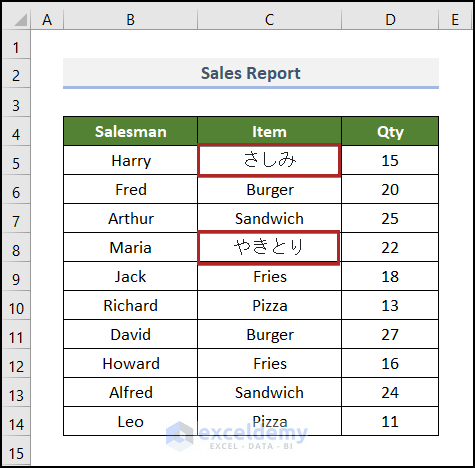
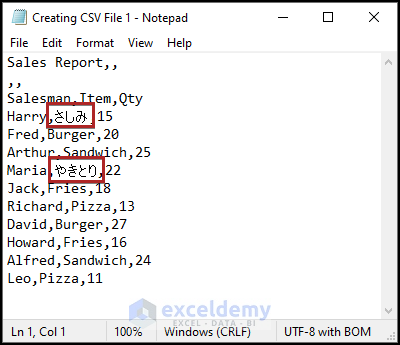
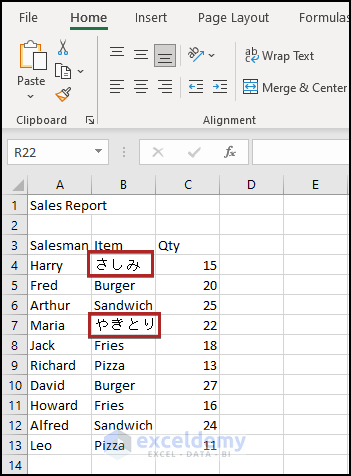
In the following dataset, we have two item names written in Japanese.
Steps:
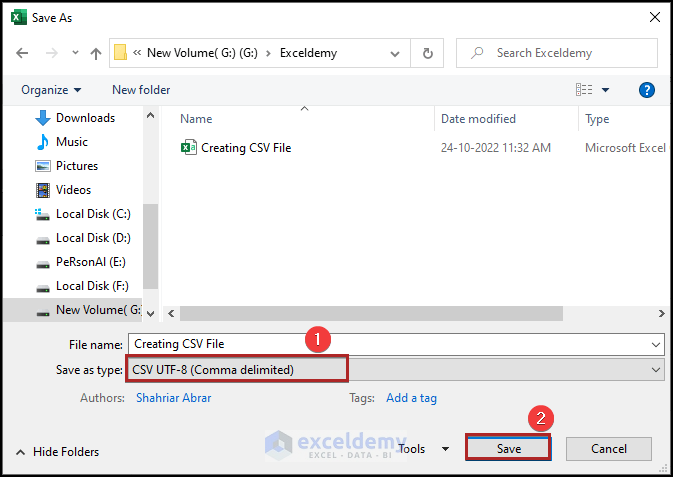
- Open the Save As dialog box like in Method 1.
- Select CSV UTF-8 (Comma delimited) format in the Save as type box.
- Click on Save.
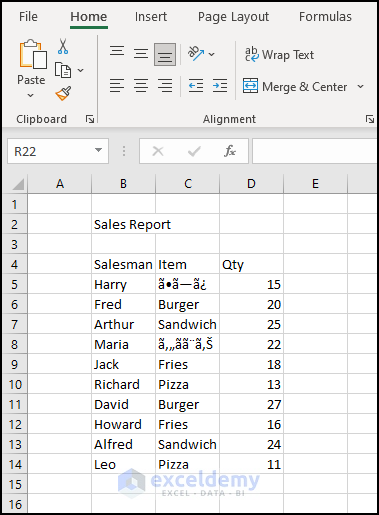
A CSV file of the current sheet will be created. If you open the file in Excel, you can see that the special characters, which were displayed as ??? (question marks) in Method 1, now display correctly in the CSV file too.
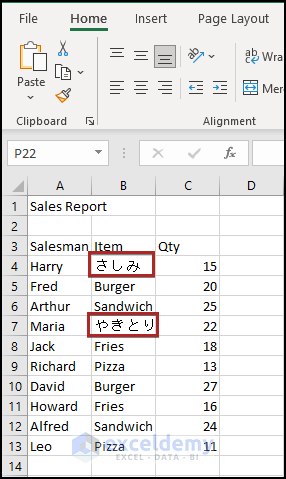
- Open the file in Notepad and observe the same result.
Read More: Convert Excel to Comma Delimited CSV File
Method 3 – Applying UTF-16 Encoding
Here’s a different method to create a CSV file with special characters from Excel.
Steps:
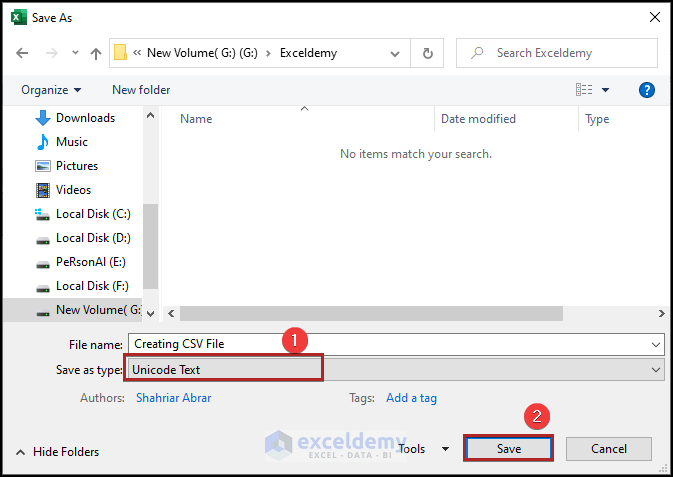
- Like before, open the Save As dialog box.
- Select Unicode Text format in Save as type.
- Tap the Save button.
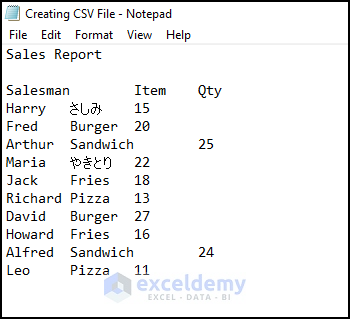
A text file will be created with the .txt extension.
- Open it in Notepad.
- Click on the File tab.
- Select Save As from the options (Press CTRL + SHIFT + S as the keyboard shortcut).
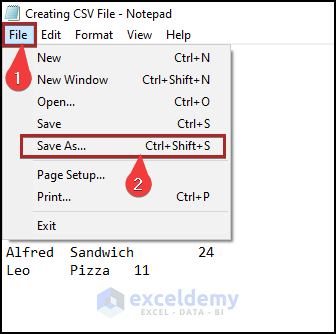
The Save As dialog box of the Notepad app will open.
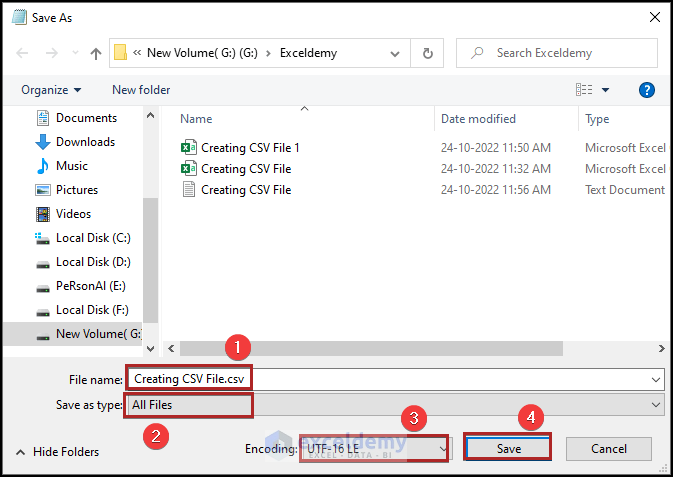
- In the File name box, add a .csv extension after the file name.
- Select All Files in the Save as type box.
- Select UTF-16 LE in the Encoding box.
- Click the Save button.
A CSV file that contains the special characters correctly is created.
Read More: How to Save Excel File as CSV with Commas
Method 4 – Employing Google Sheets
We can use Google Sheets for the creation of a CSV file from Excel.
Steps:
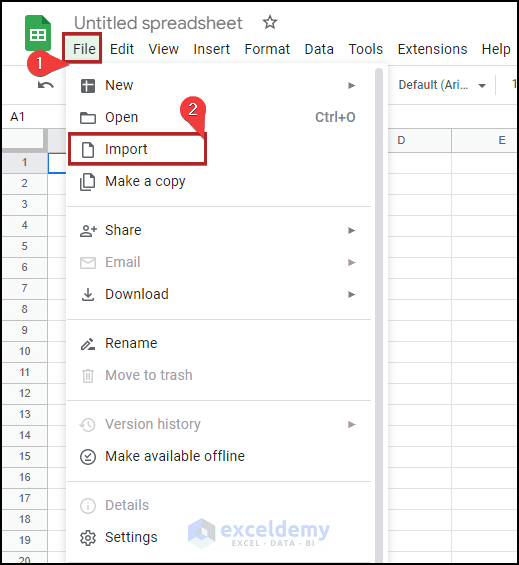
- Open a blank spreadsheet in Google Sheets.
- Jump to the File tab.
- Click on Import from the available options.
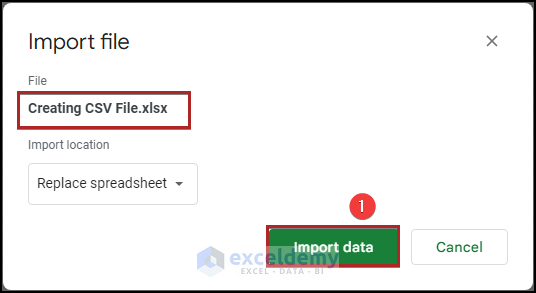
- Select the preferred Excel workbook.
- Click on Import data.
The file will open in the spreadsheet.
- Proceed again to the File tab.
- Click on Download.
- Select Comma Separated Values (.csv) from the options.
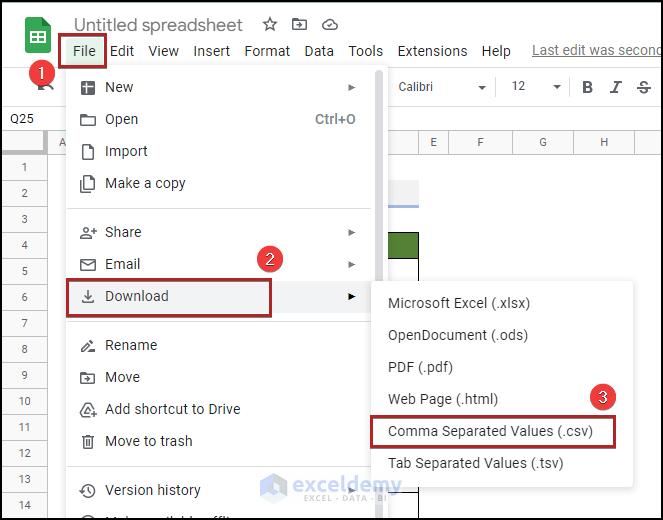
- Open the downloaded file.
You’ll get a new CSV file as shown in the following picture:
Read More: How to Convert Excel Files to CSV Automatically
Method 5 – Implementing VBA Code
You can automate the prior method entirely with the help of VBA.
Steps:
- Go to the Developer tab.
- Click on Visual Basic in the Code group.
- Alternatively, press ALT + F11.
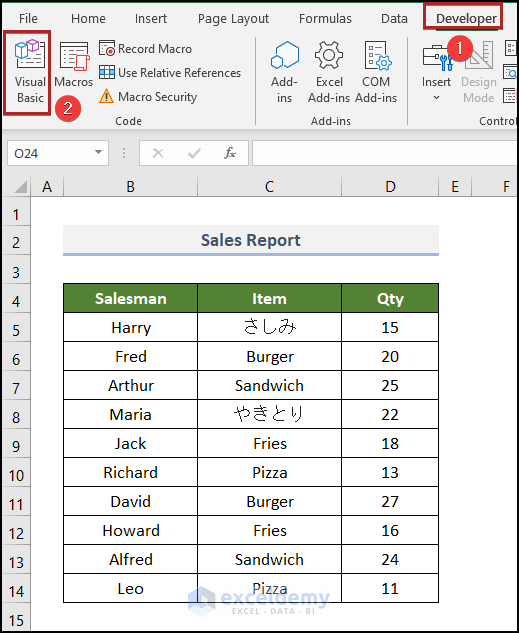
The Microsoft Visual Basic for Applications window appears.
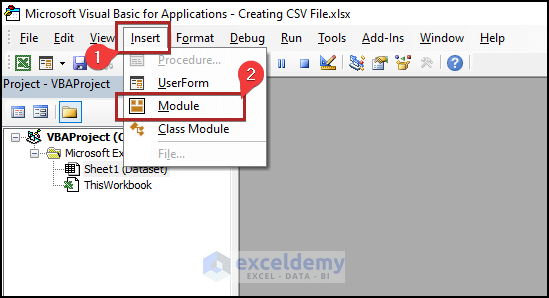
- Go to the Insert tab.
- Select Module.
- Paste the following code into the module:
Sub create_csv_from_excel()
Dim wst As Worksheet
Dim path_x As String
Application.ScreenUpdating = False
path_x = ActiveWorkbook.Path & " " & Left(ActiveWorkbook.Name, _
InStr(ActiveWorkbook.Name, ".") - 1)
For Each wst In Worksheets
wst.Copy
ActiveWorkbook.SaveAs Filename:=path_x & "" & wst.Name & ".csv", _
FileFormat:=xlCSV, CreateBackup:=False
ActiveWorkbook.Close False
Next
Application.ScreenUpdating = True
End Sub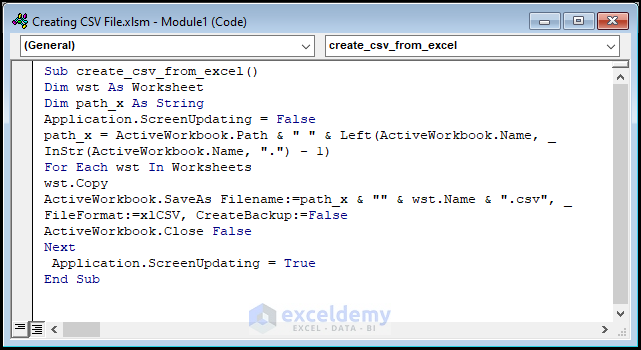
- Run the code.
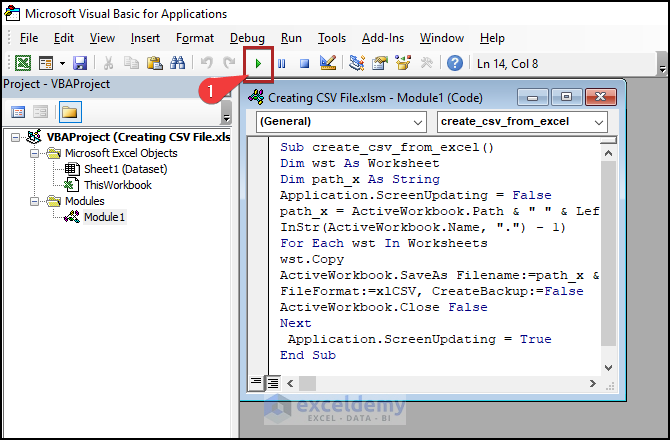
It’ll create a separate CSV file.
- Open the file.

Read More: How to Convert Excel to CSV without Opening
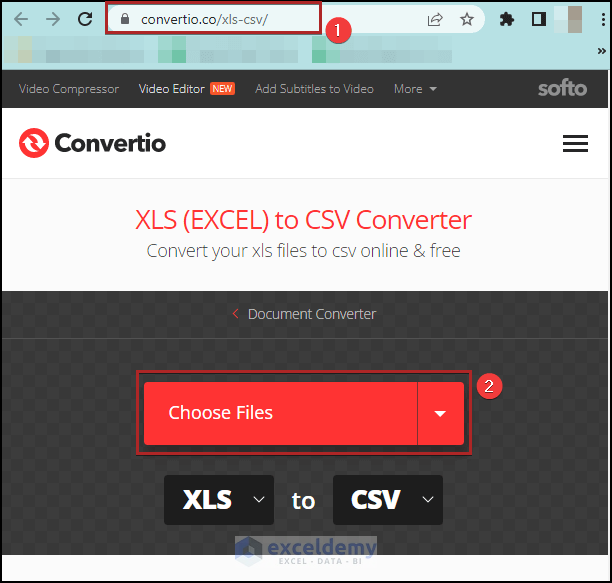
Method 6 – Using an Online Converter
We can also create a CSV file without even opening our Excel file, by means of an online file converter.
Steps:
- Go to the link https://convertio.co/xls-csv/.
- Click on Choose Files.
- Select the Excel workbook you want to convert.
- Select CSV as the conversion option.
- Click on the Convert button.
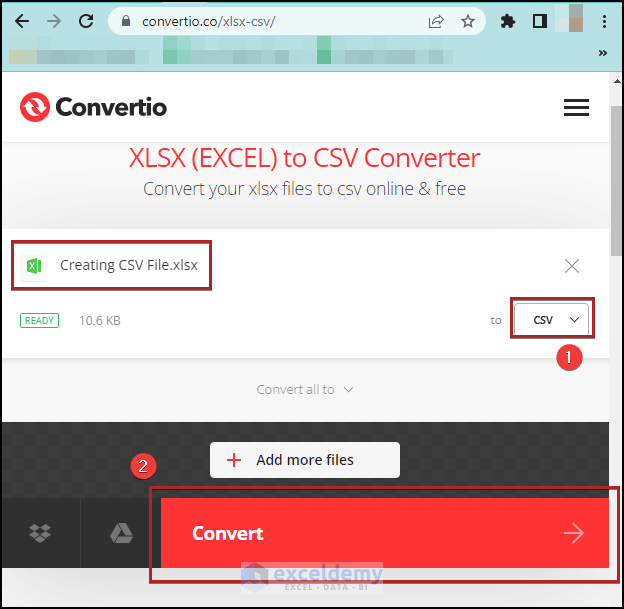
- Click on the Download button to download the converted CSV file to your PC.
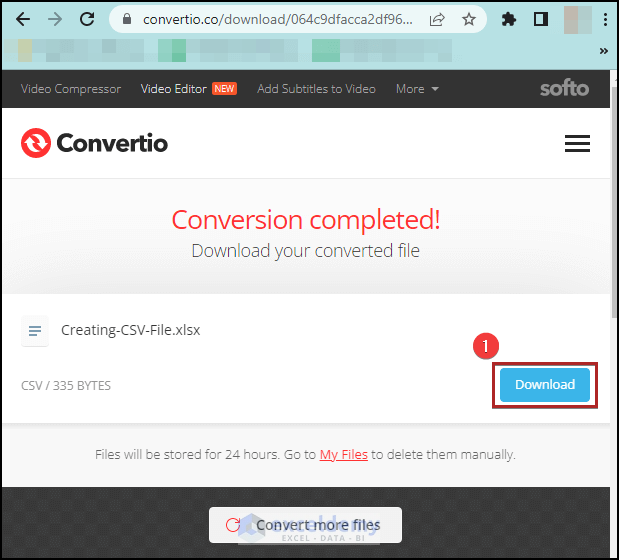
- Similarly to above, open the file in Notepad or Excel.
Read More: How to Convert Multiple Excel Files to CSV
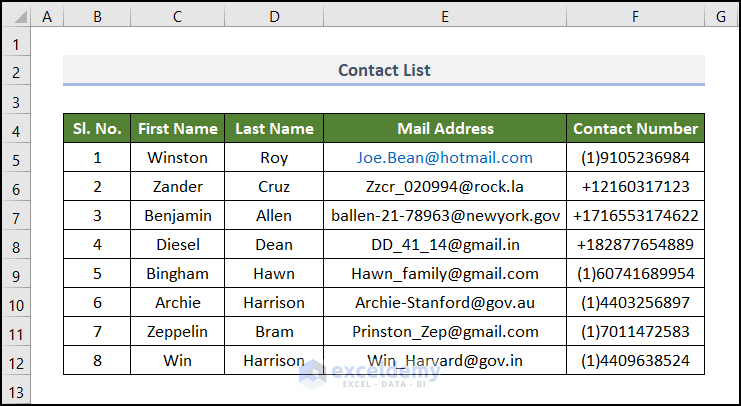
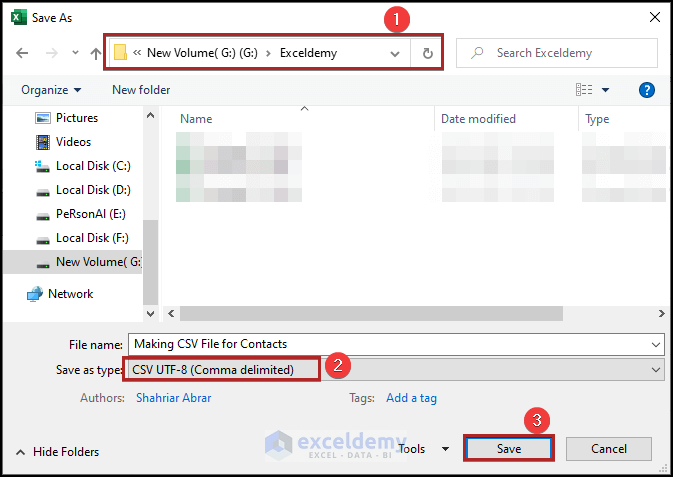
How to Make a CSV File for Contacts
Here, we have a Contact List as an Excel workbook. Let’s make a CSV file from this dataset.
Steps:
- Open the Save As dialog box like before.
- Select the location to save your new CSV file.
- Select CSV UTF-8 (Comma delimited) format in the Save as type box.
- Click on Save.
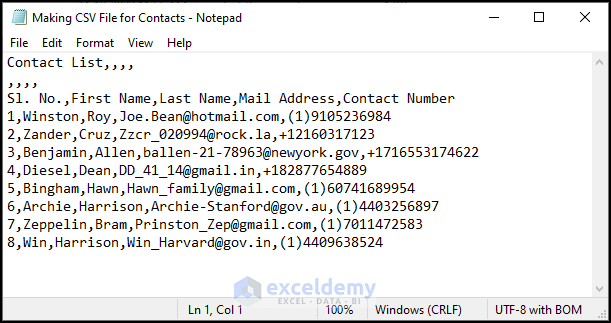
- Open the new file in Notepad.
Related Articles
- Set Comma Instead of Semicolon as Delimiter in Excel CSV
- Save Excel as CSV with Double Quotes
- [Fixed!] Excel Not Saving CSV with Commas
<< Go Back to Export Excel to CSV | Export Data from Excel | Learn Excel
Get FREE Advanced Excel Exercises with Solutions!
