This is an overview:
Download Practice Workbook
Download the Excel files.
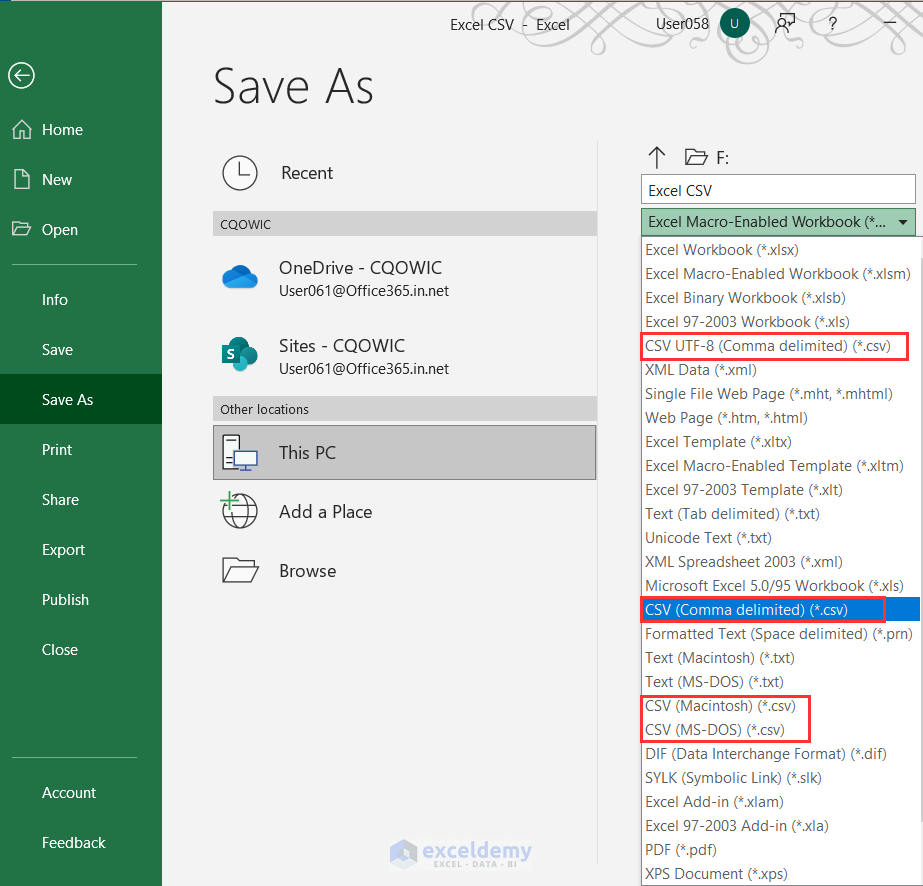
CSV File Formats Supported in Excel
The names, extensions, and details of the CSV file formats supported in Excel are shown below.
| Name | Extension | Details |
|---|---|---|
| CSV (Comma delimited) | .csv | Enables the usage of a workbook by saving it as a comma-delimited text file. Doesn’t allow special characters. |
| CSV UTF-8 (Comma delimited) | .csv | Is the same as CSV (Comma delimited) but allows special characters. Available in Excel 2016 and later versions. |
| CSV (Macintosh) | .csv | Is the same as CSV (Comma delimited) but works on the Macintosh operating system. |
| CSV (MS-DOS) | .csv | Is the same as CSV (Comma delimited) but works on the MS-DOS operating system. |
How to Export an Excel File to a CSV File
Method 1 – Exporting the Active Sheet Only Using the Save As Command
- Go to the File tab.
- Select This PC in Save As.
- Name the file. Here, “Excel CSV”.
- Choose CSV (Comma delimited) (*.csv) as the file type and click Save.
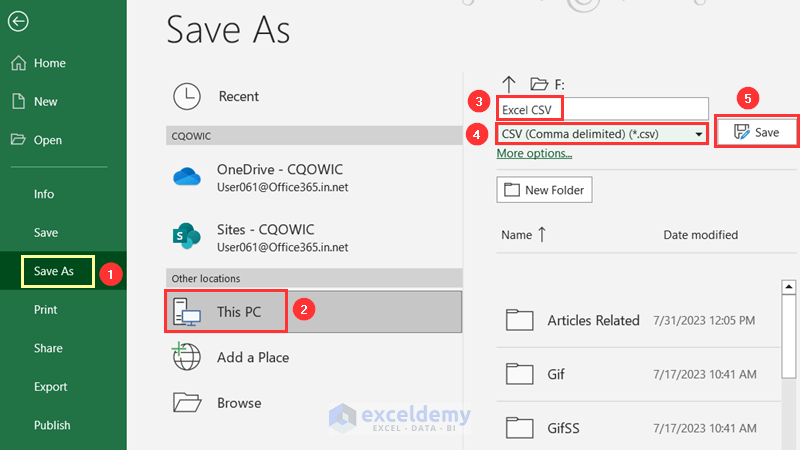
- A warning will be displayed: only this sheet will be saved in CSV format.
- Click OK.

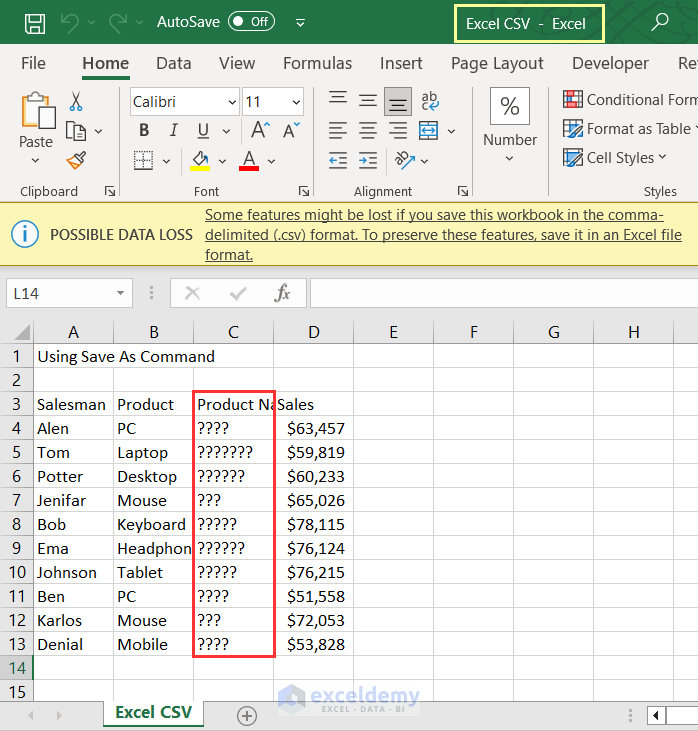
The Excel sheet will be saved as a CSV formatted file.
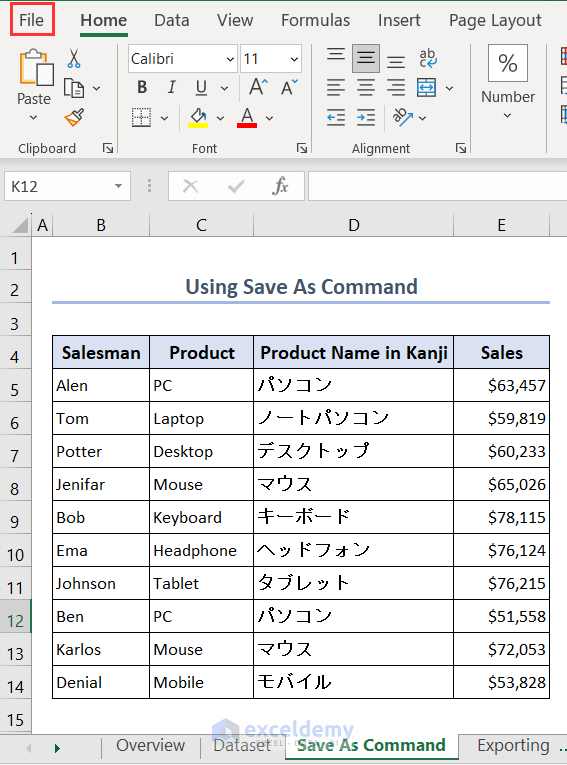
There were Japanese Kanji characters in column C of the original Excel file. Here, question marks are displayed instead.
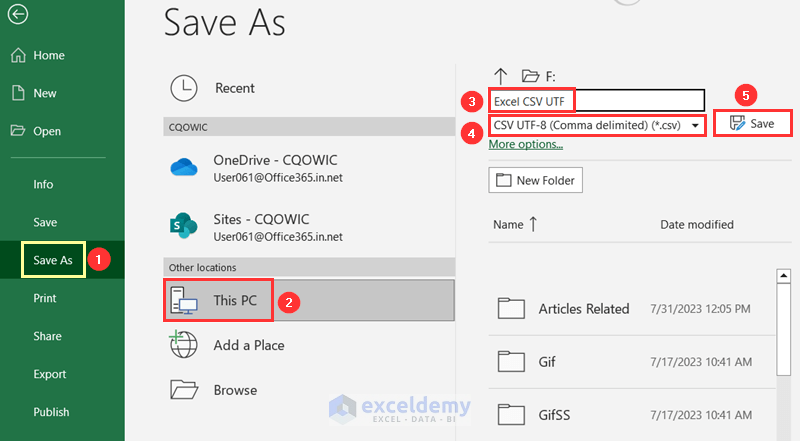
Method 2 – Exporting in CSV UTF-8 Format to Preserve Special Characters
- Open the File tab.
- In Save As, choose This PC.
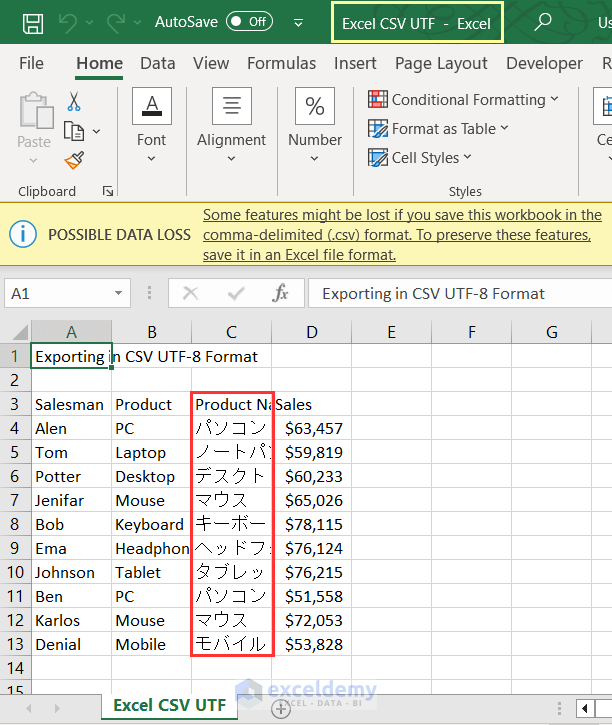
- Name the file. Here, “Excel CSV UTF”.
- Select CSV UTF-8 (Comma delimited) (*.csv) and click Save.

- A warning will be displayed: only this sheet will be saved in this format.
- Click OK.

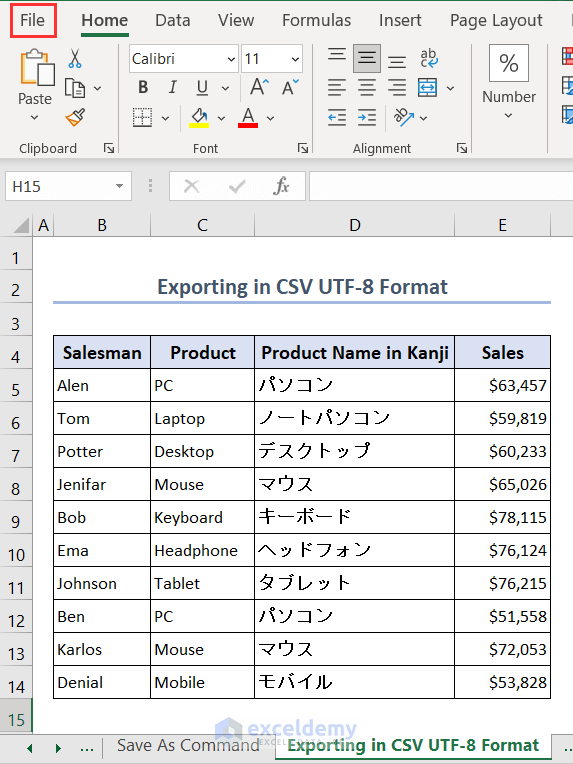
The Japanese Kanji characters in column C are visible.
Method 3 – Exporting Multiple Sheets Using VBA
- Go to Developer > Visual Basic.
- Or press Alt + F11 to open the Visual Basic window.
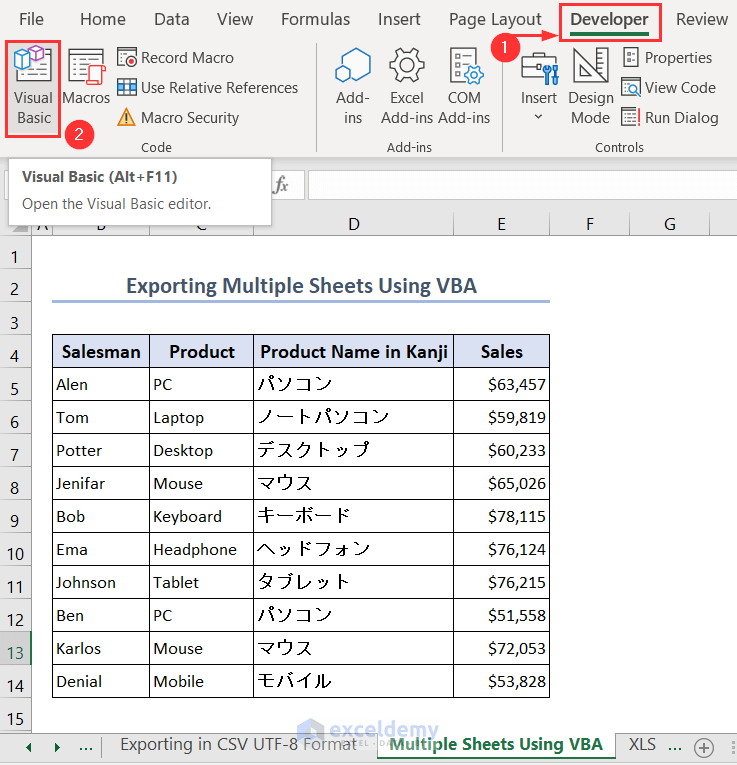
- Select Module in Insert to open a new Module.
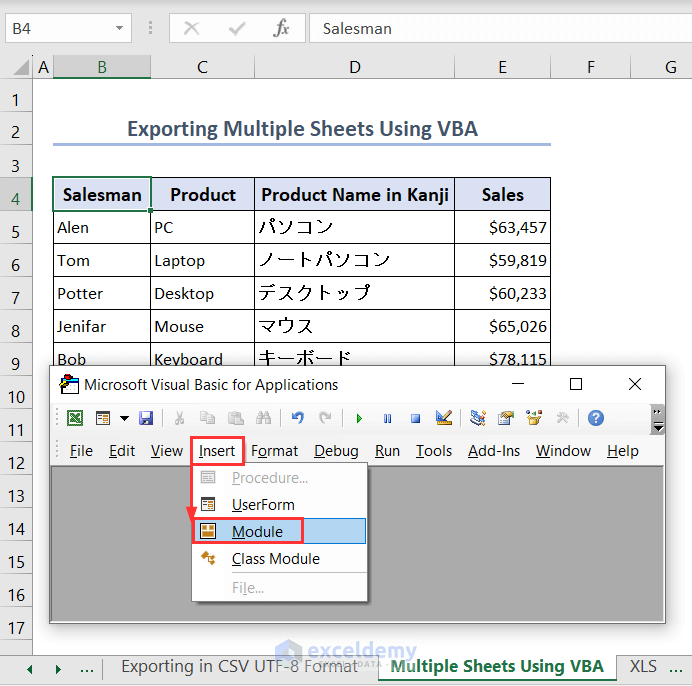
- Enter the following code in the Module and click Run or press F5.
Sub Exporting_Multiple_Sheets()
Application.ScreenUpdating = False
path = ActiveWorkbook.path & "\" & _
Left(ActiveWorkbook.Name, InStr(ActiveWorkbook.Name, ".") - 1)
For Each ws In Worksheets
ws.Copy
ActiveWorkbook.SaveAs Filename:=path _
& "_" & ws.Name & ".csv", FileFormat:=xlCSVUTF8, _
CreateBackup:=False
ActiveWorkbook.Close False
Next
Application.ScreenUpdating = True
End Sub
This VBA code automates the process of exporting each worksheet in the active workbook to separate CSV files with names based on the original workbook’s name and the individual worksheet names.

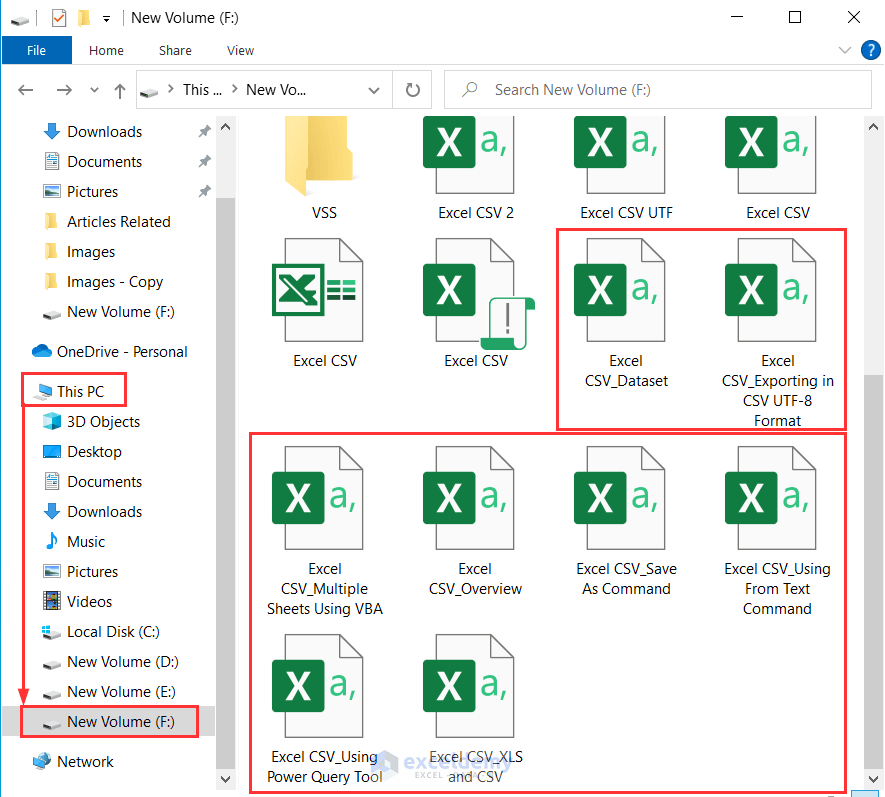
The CSV files will be placed in the original location of the excel file.
Each sheet in the Excel file will be converted to a separate CSV file.
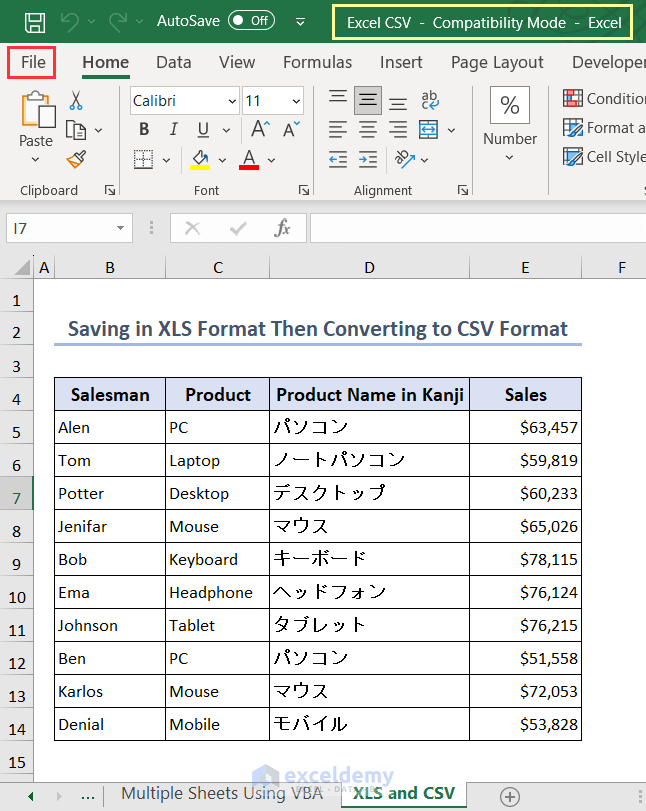
Method 4 – Saving in XLS Format and Then Converting to CSV Format
- To save your Excel file in XLS format, open the File tab.
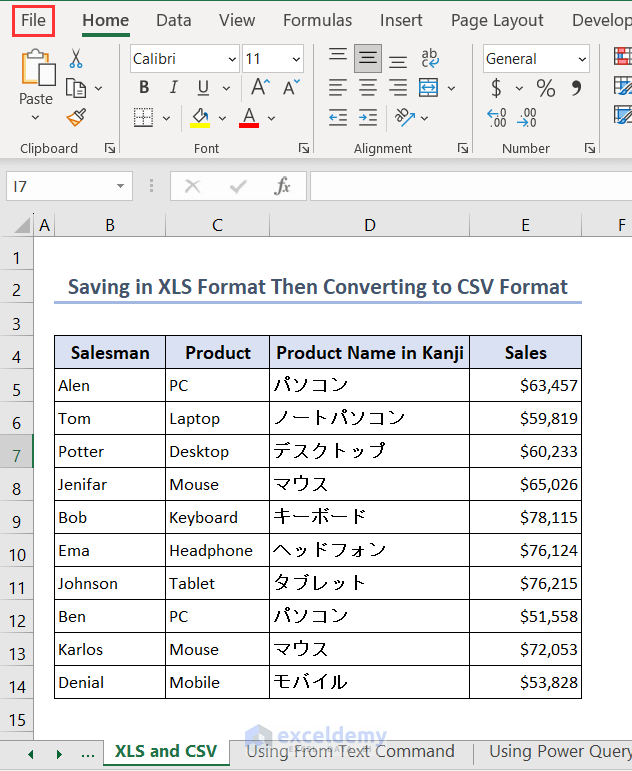
- Select This PC in Save As.
- Name the file. Here, “Excel CSV”.
- To save the file in XLS format, select Excel 97-2003 Workbook (*.xls) and click Save.

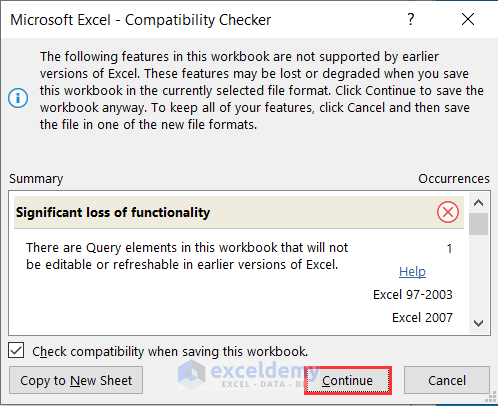
As the original workbook was saved in the latest version of Excel, you’ll see a Compatibility Checker window with a warning.
- Click Continue.
The file is saved in XLS format.
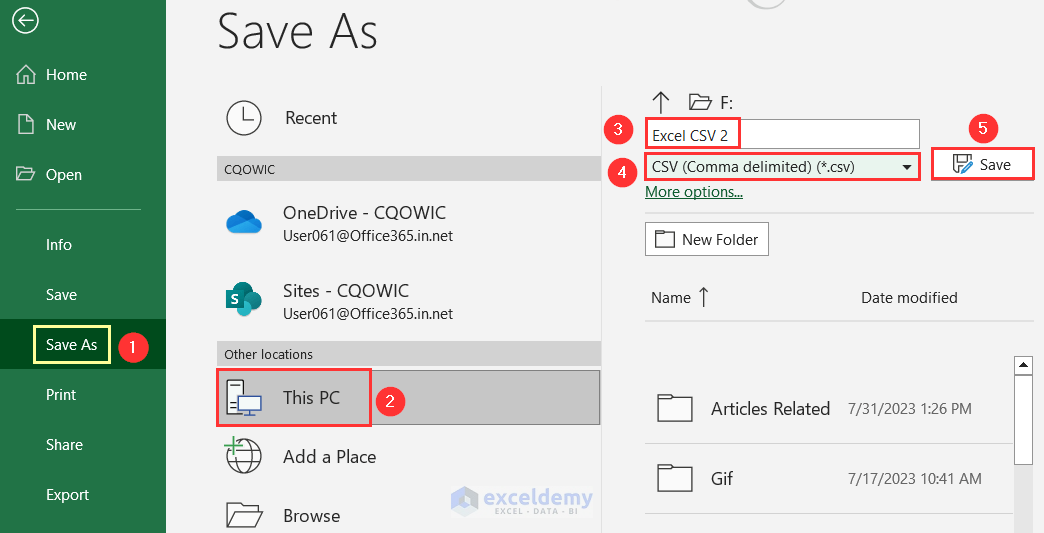
- Convert it to CSV format: open the File tab.
- Choose This PC in Save As.
- Name the file. Here, “Excel CSV 2”.
- Choose CSV (Comma delimited) (*.csv) and click Save.
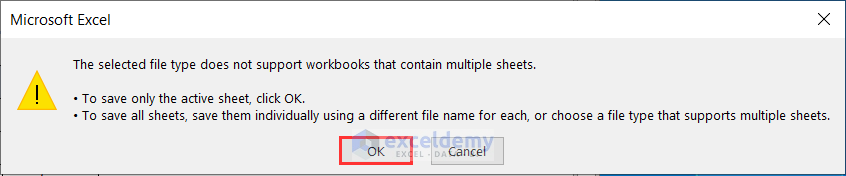
A warning will be displayed: only this sheet will be saved in CSV format.
- Click OK.
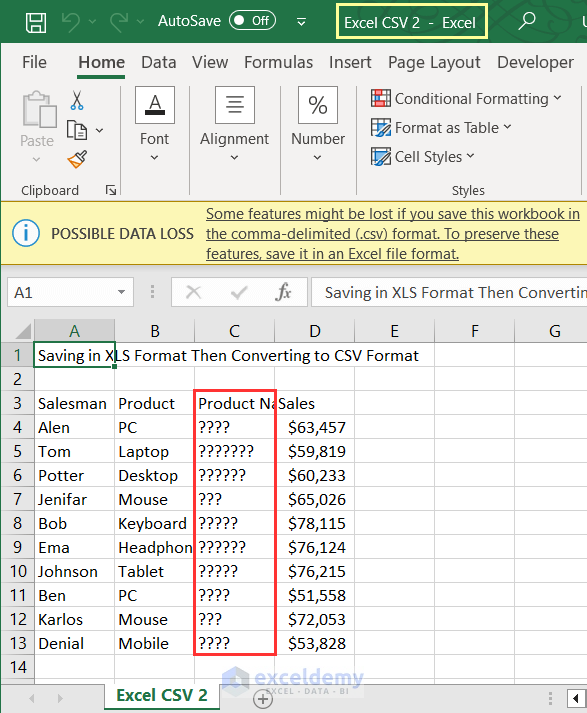
The active sheet will be saved in CSV format.
Column C displays question marks instead of special characters.
- Save the file in CSV UTF-8 format to recognize special characters.
Things to Remember
- When you use VBA, remember to save your file in XLSM format.
Export Excel to CSV: Knowledge Hub
- Convert Excel File to CSV Format
- Create CSV File from Excel
- Convert Excel File to Text File with Comma Delimited
- Convert Excel to Comma Delimited CSV File
- Make a CSV File in Excel for Contacts
- Convert Excel Files to CSV Automatically
- Convert Excel to CSV without Opening
- Convert Multiple Excel Files to CSV
- Save Excel File as CSV with Commas
- Set Comma Instead of Semicolon as Delimiter in Excel CSV
- Save Excel as CSV with Double Quotes
- [Fixed!] Excel Not Saving CSV with Commas
<< Go Back to Export Data from Excel | Learn Excel
Get FREE Advanced Excel Exercises with Solutions!
