Here’s an overview of exporting a chart as an image in Excel.
Download the Practice Workbook
How to Save an Excel Spreadsheet File as an Image
Method 1 – Use the Copy as Picture Command
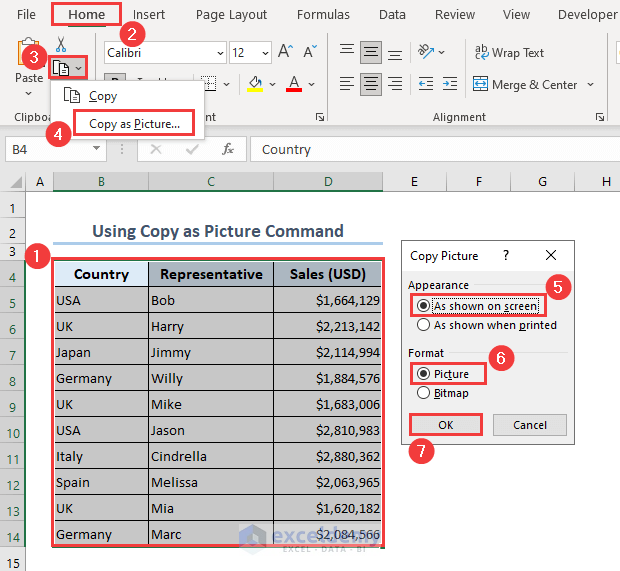
- Select the B4:D14 range.
- Go to the Home tab.
- Expand the Copy command.
- Select Copy as Picture.
- The Copy Picture dialog appears.
- Select As shown on screen from the Appearance section.
- Select Picture from the Format section and hit the OK button.
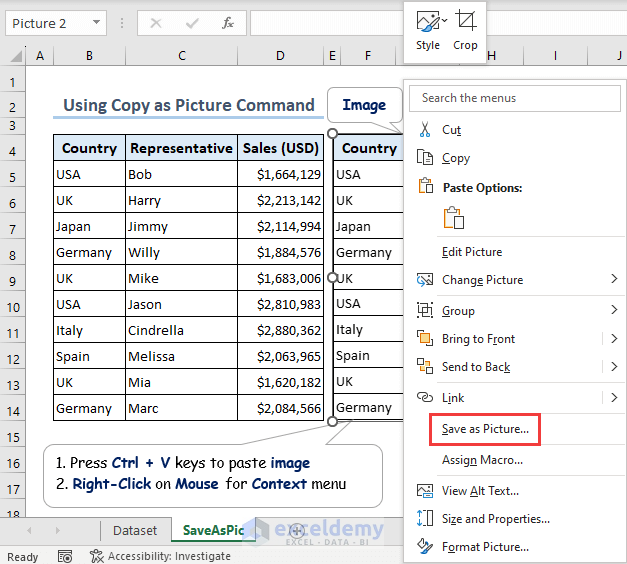
- Press Ctrl + V keys to paste the range as an image.
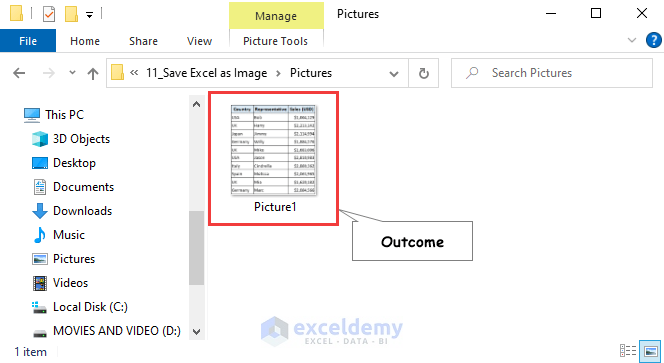
- Right-click on the destination and select the Save as Picture option from the Context menu.
- The Save as Picture dialog appears.
- Edit the File name and select the JPEG File Interchange Format option from the Save as type field.
- Hit the Save command.
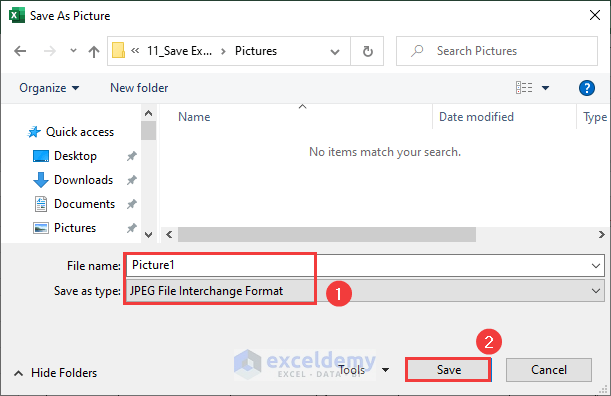
- We get the Excel range as a JPEG file format with the Picture1 file name.
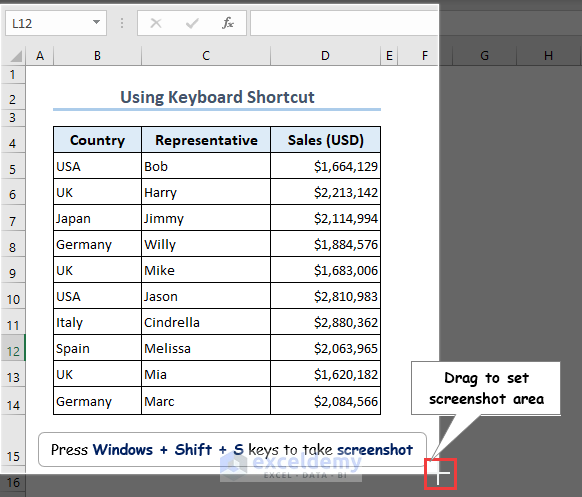
Method 2 – Apply a Keyboard Shortcut
Screenshot options depend based on the hardware. For instance, an HP laptop uses Fn + Print Screen keys for screenshots, while some computers work with Windows + Print Screen keys. You may also use Shift + Windows + S keys to take screenshots.
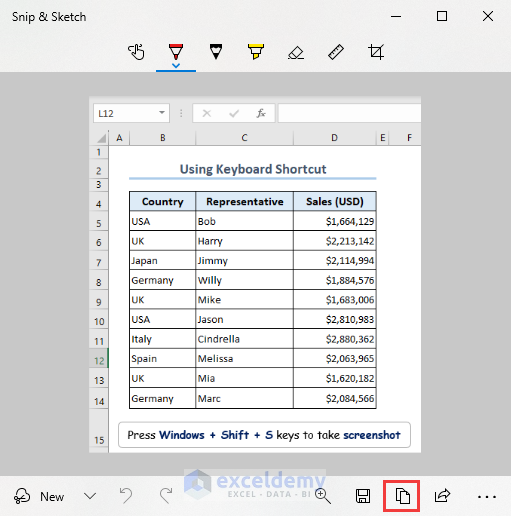
- Take a screenshot and open the Snip & Sketch tool.
- The captured screenshot opens with a default Image editor.
- Click on the Save As command from the Snip & Sketch dialog.
- We saved the Excel spreadsheet as an image by capturing a screenshot.
Note: The Fn + Prt Sc keys captures the entire window (1366×768) and opens it with a default image editor.
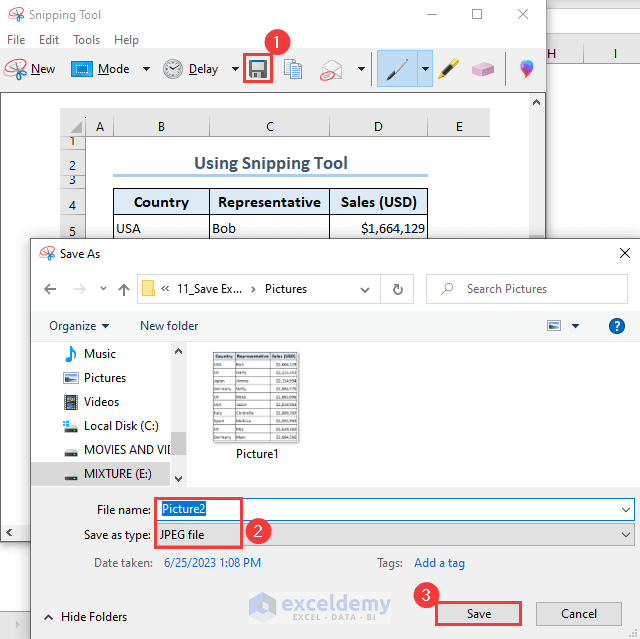
Method 3 – Open with Snipping Tool
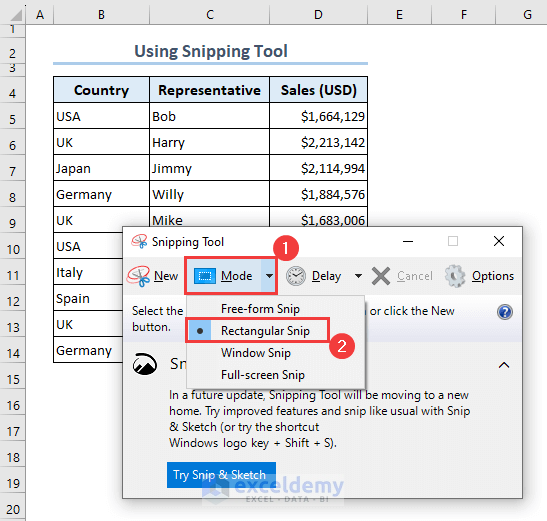
- Open the Spinning Tool application.
- Expand the Mode command.
- Select the Rectangular Snip option from the list.
- The captured screenshot opens with the Snipping Tool dialog.
- Click on the Save command.
- Enter the File name and select JPEG from the Save as type field.
- Hit the Save command.
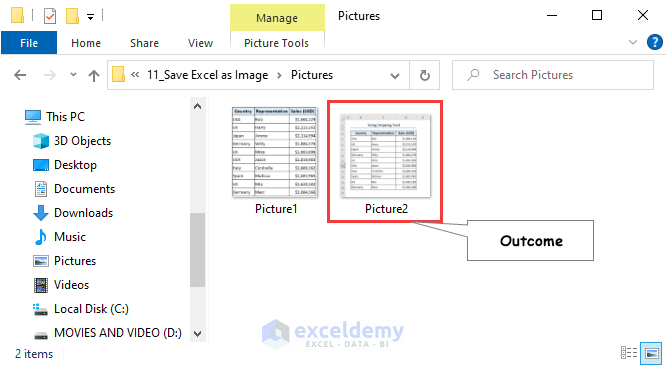
- We get the Excel spreadsheet as an image in the selected location.
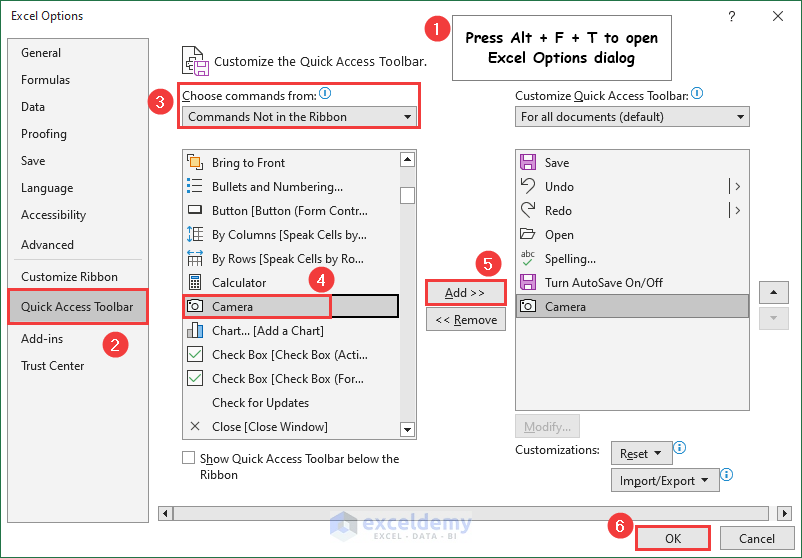
Method 4 – Use the Camera Feature
- Press Alt + F + T to open the Excel Options dialog.
- Go to the Quick Access Toolbar menu.
- Select Commands Not in the Ribbon from the Choose commands from field.
- Select Camera and click on the Add command.
- Hit the OK command.
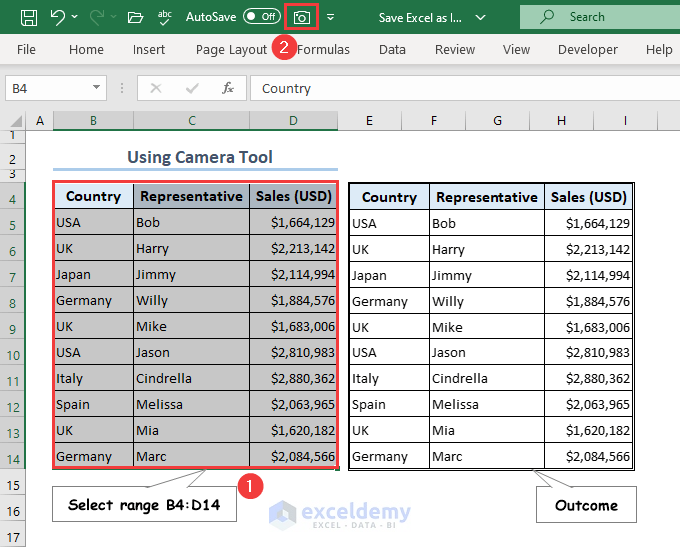
- Select the B4:D14 range.
- Click on the Camera command from the Excel dialog bar.
- Select a suitable cell on Excel to place it as an image.
- You can save images in .png/.jpg format by using the Save as Picture command from the Context menu.
How to Save an Excel Chart as an Image
Method 1 – Use the Save as Picture Tool
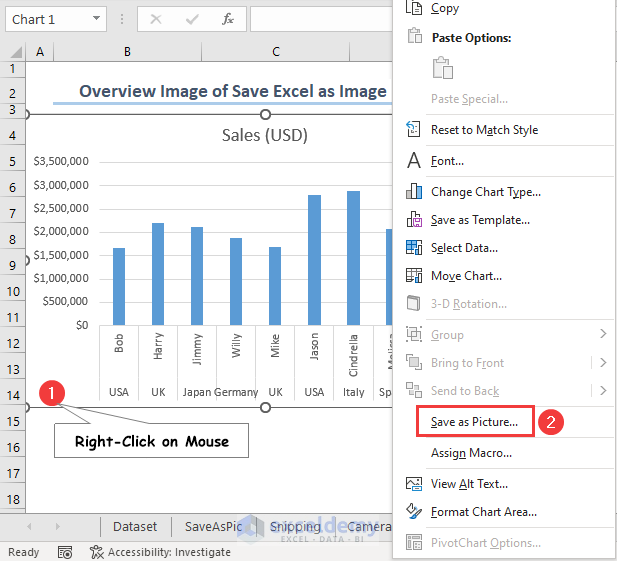
- Right-Click on the Excel chart.
- Click on the Save as Picture option from the Context menu.
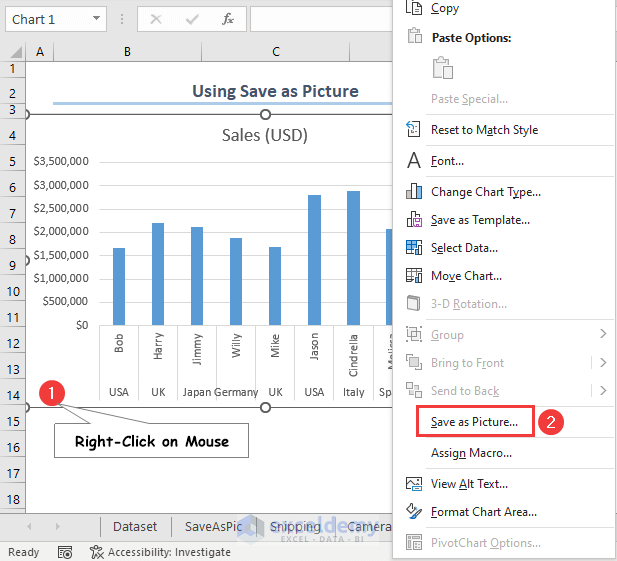
- The Save as Picture dialog appears.
- Edit the File name and select the JPEG File Interchange Format option from the Save as type field.
- Click the Save button.
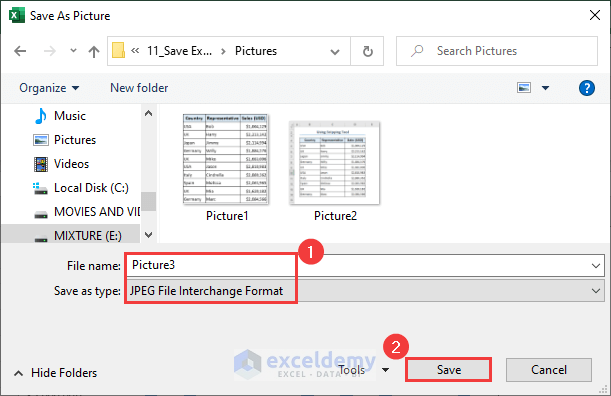
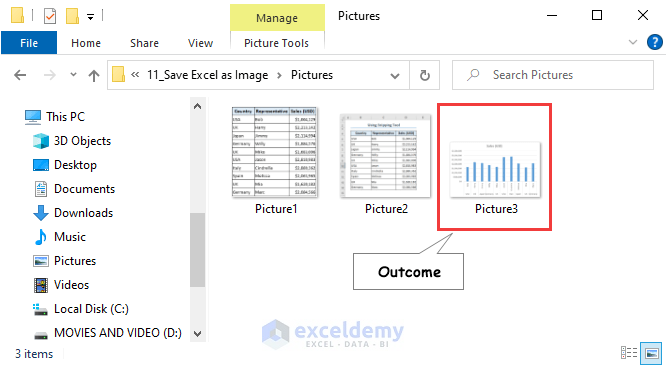
- We saved the Excel chart as a JPEG image.
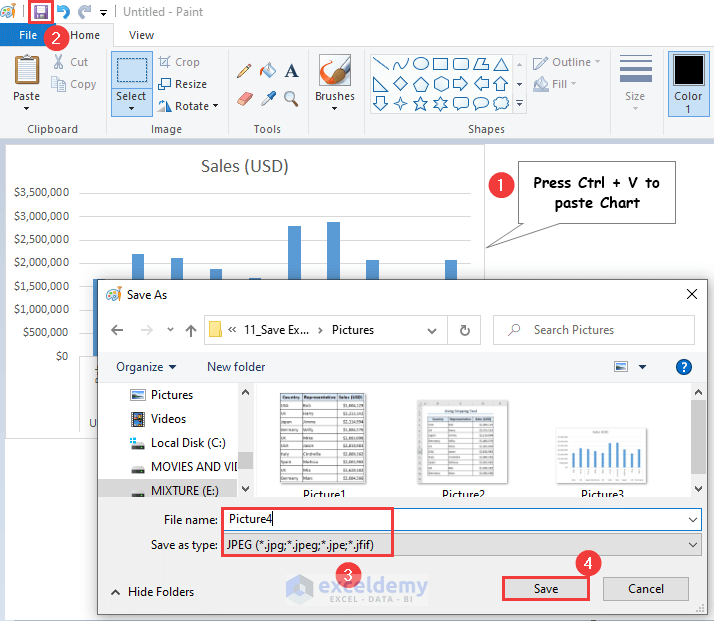
Method 2 – Export with MS Paint
- Copy the chart by pressing Ctrl + C keys from the Excel file while selecting it.
- Open the MS Paint application.
- Press Ctrl + V to paste the chart.
- Click on the Save command.
- Type in the File name and select JPEG from the Save as type field.
- Hit the Save command.
Method 3 – Open with MS PowerPoint
- Copy the chart by pressing Ctrl + C keys from the Excel file while selecting it.
- Open MS PowerPoint.
- Press Ctrl + V to paste the chart.
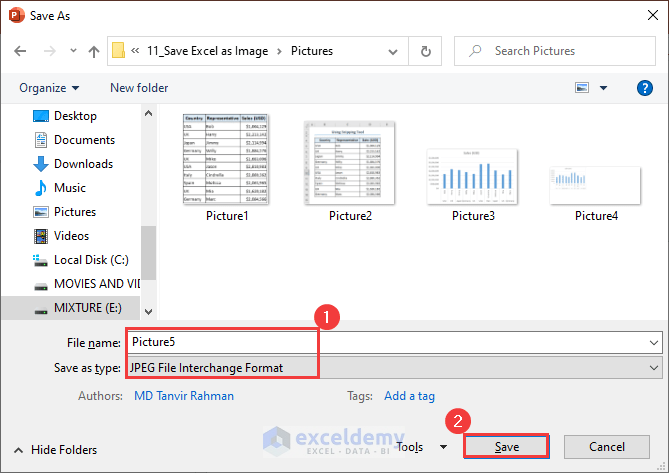
- Press Ctrl + Shift + S keys to open the Save As dialog.
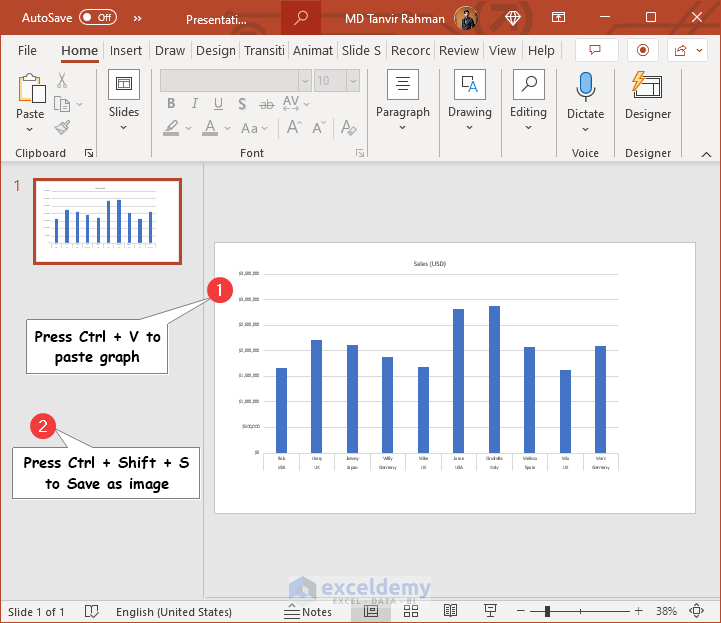
- The Save As dialog appears.
- Rename the File name and select the JPEG File Interchange Format option from the Save as type field.
- Hit the Save command.
Method 4 – Use Excel VBA Macro
- Insert the following VBA code into a VBA module and click on the Run icon or press the F5 key.
Sub Save_Chart_As_Image()
Dim my_Chrt As ChartObject
Dim f_Path As String
    ' Setting the file location to save the chart as image
f_Path = "E:\Exceldemy\chart.png"
    ' Picking up chart from the Export worksheet
Set my_Chrt = Worksheets("Export").ChartObjects("Chart 1")
    ' Save the chart as PNG in the defined location
my_Chrt.Chart.Export f_Path, "PNG"
    ' Display message if the execution is successful
    MsgBox "Chart saved successfully to: " & f_Path
End Sub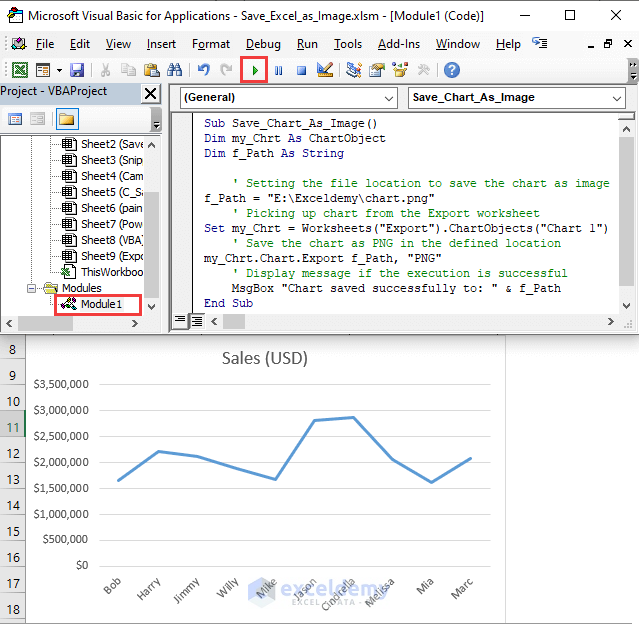
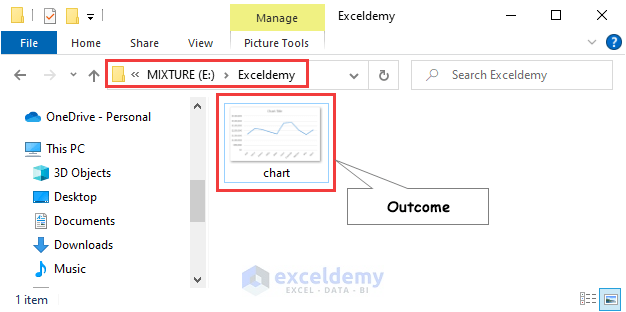
- We obtained the image of the Excel chart named chart in the E:\Exceldemy\ directory.
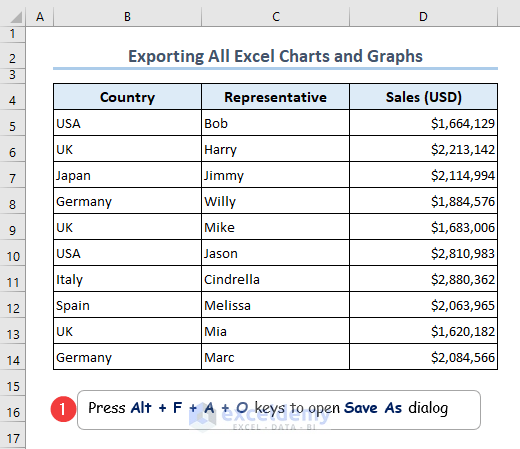
How to Export All Excel Charts and Graphs as an Image
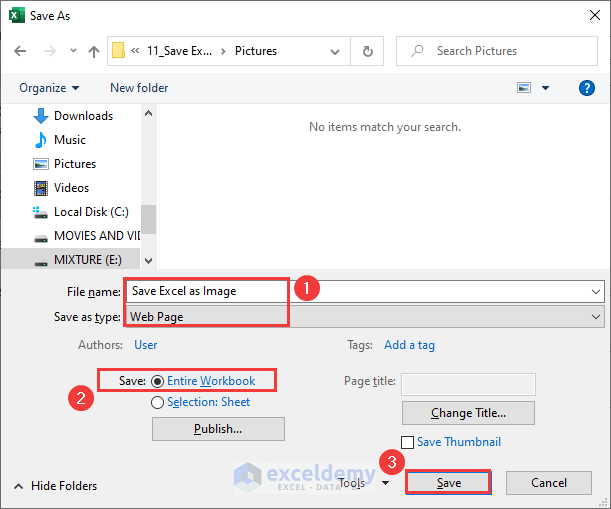
- Press Alt + F + A + O keys to open the Save As dialog.
- The Save As dialog appears.
- Rename the file.
- Select Web Page from the Save as type field.
- Select the Entire Workbook option from the Save field.
- Hit the Save command.
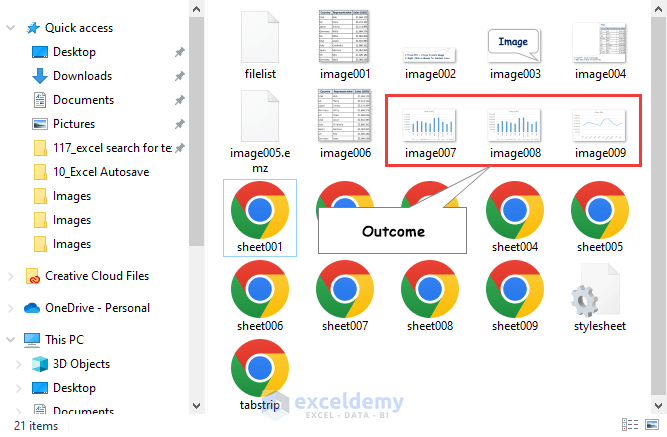
- We get the outcome as images of charts.
How to Save an Excel Table as an Image
- Select the B4:D14 range.
- Click on the Camera command in the Quick Access Toolbar (after putting it in the toolbar, see Method 4 of Section 1).
- Click on a suitable cell to the table as an image.
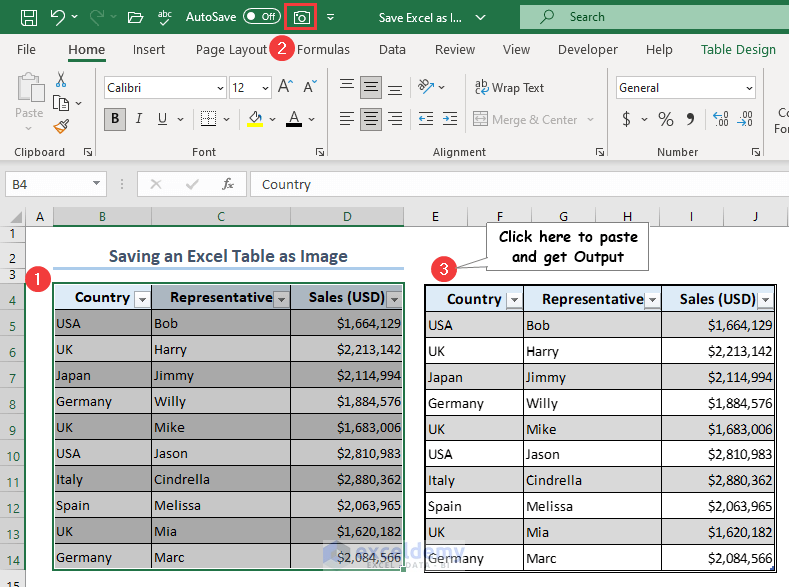
- You will be able to export as a picture by using the Save as Picture option from the Context menu.
Note: Converting Excel tables as JPEG, JPG, and PNG are similar to converting a range.
Frequently Asked Questions
Will I lose formatting when I save Excel as JPG?
You can save an Excel file as JPG using the static spreadsheet without changing its formatting. However, the dynamic spreadsheet may lead changing in its formatting while converting as JPG or PNG images.
How do I save an Excel table as a high-resolution image?
- Select the range.
- Click on the Camera command.
- Select a cell to insert the table as an image.
- Right-Click on the image.
- Click on the Save as Picture option from the Context menu list.
- Edit the File name and select the JPEG File Interchange Format option from the Save as Type field from the Save As dialog.
- Hit the Save command.
You can go through the Save Excel Table as Image with High Resolution article for better understanding.
How can I save images from Excel?
- Right-click on the image.
- Click on the Save as Picture option from the Context menu.
- Edit the File name and select the JPEG File Interchange Format option from the Save as Type field from the Save As dialog.
- Click the Save button.
You can go through the Save Pictures from Excel article.
Save Excel as Image: Knowledge Hub
- Save Picture to Folder
- Save Image as JPG
- Save Table as Image High Resolution
- Save Chart as Image High Resolution
- VBA to Save Chart as Image
<< Go Back to Export Data from Excel | Learn Excel
Get FREE Advanced Excel Exercises with Solutions!
