What Is a CSV File?
You will unavoidably come across a comma-separated values file, or CSV, if you work with spreadsheet programs like Microsoft Excel. A CSV file is a plain text file. This file can be opened in various programs, including the Notepad app and any program that supports plain text.
A CSV file commonly uses commas to denote informational separations. It’s a method for applications that can’t necessarily communicate directly with one another to share structured data, such as the contents of a spreadsheet. We can transfer data between two programs as long as they can both open CSV files. For instance, you can export contact data from Microsoft Excel as a CSV file and import it into Outlook’s address book.
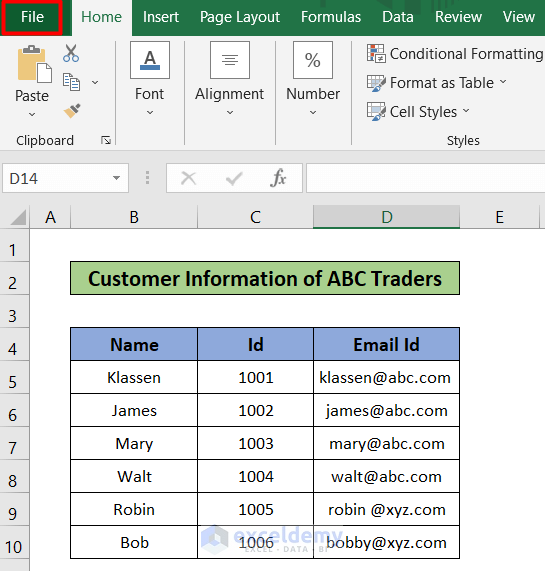
Step 1: Create a dataset
- I have added a dataset of Customer information for ABC Traders.
- The dataset has three columns, B, C, and D, called Name, ID, and Email ID.
- The dataset ranges from the B5 cell to the D10.

Read More: How to Create CSV File from Excel
Step 2: Go to Save As Option
- Go to the file option in your toolbar.
- You can see the home tab on the left side of the window.
- Find the Save As option there.
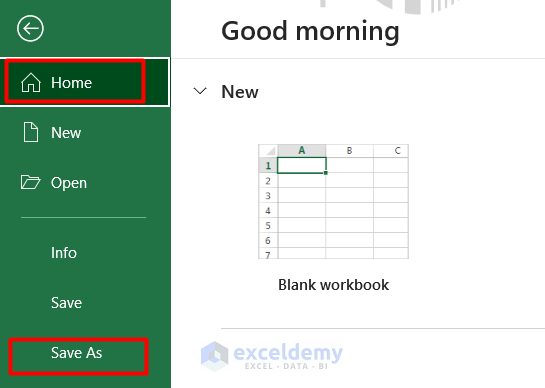
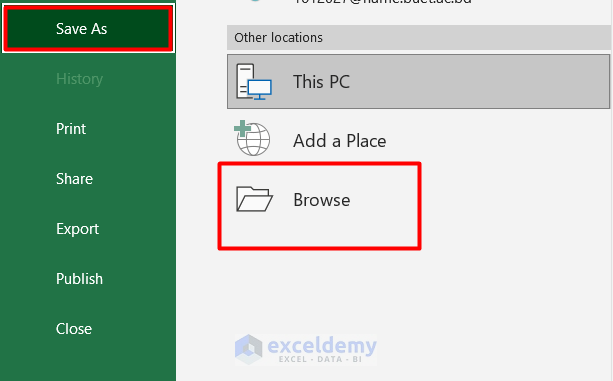
- Select the Save As option.
- Click on the Browse option.
Read More: How to Convert Excel File to Text File with Comma Delimited
Step 3: Select CSV Option
- After selecting the browse option, select a file where you will save it.
- Rename the file.
- You will find the Save As type option. Select the arrow at the right side of the option.
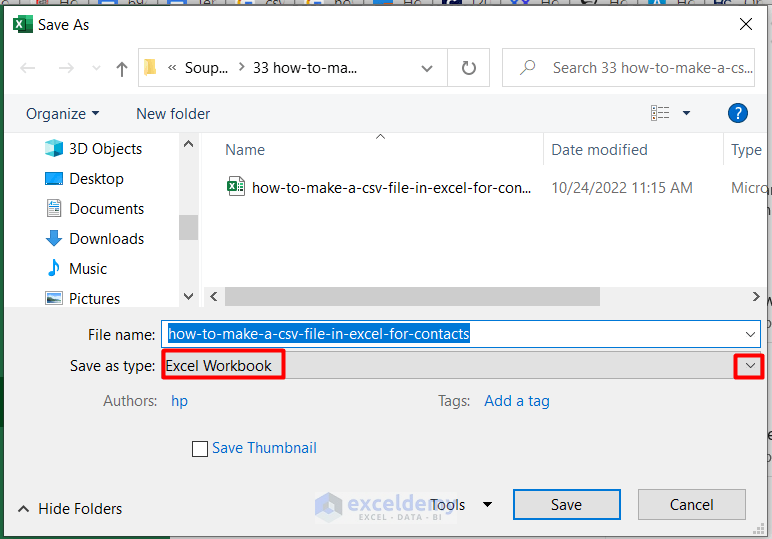
- Find the CSV option from the list of options.
- Select it.
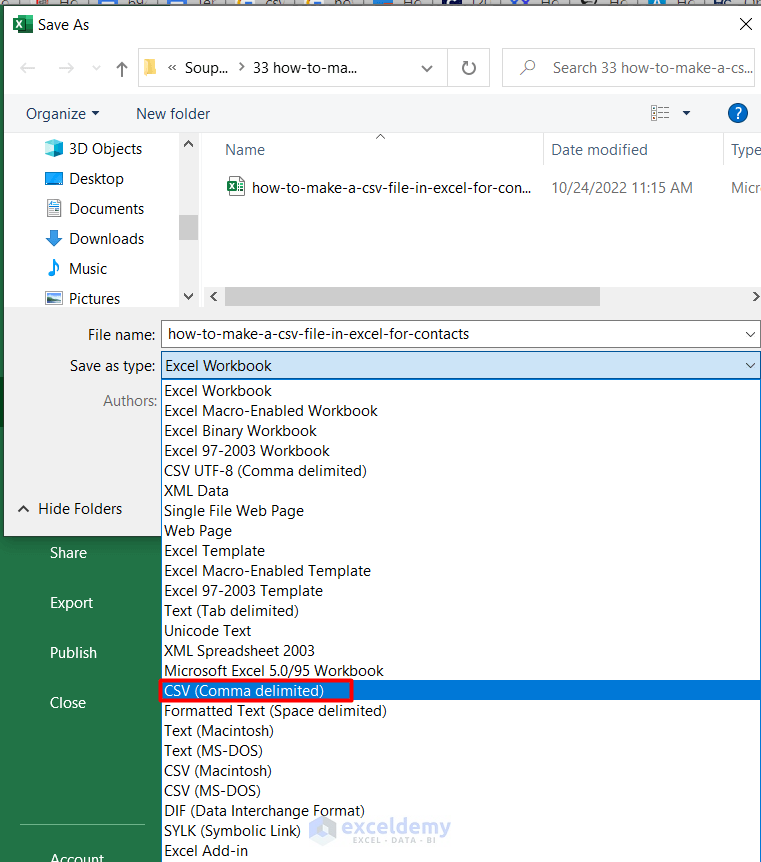
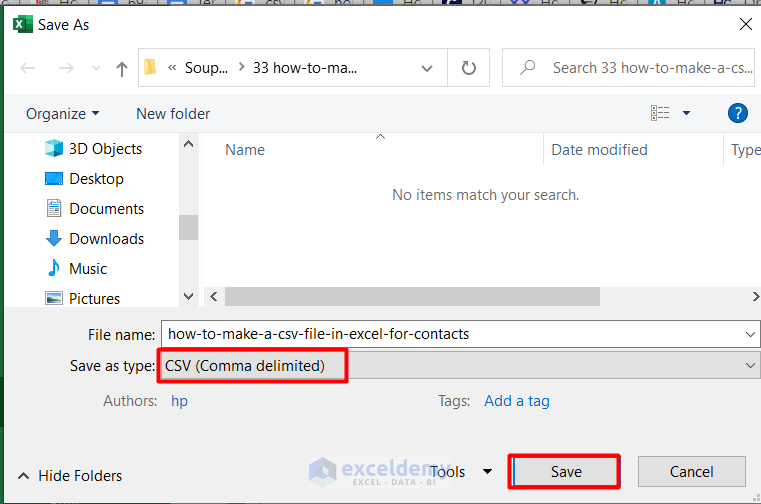
- You will see the CSV option in the Save As type box.
- Select the Save option.
Read More: Convert Excel to Comma Delimited CSV File
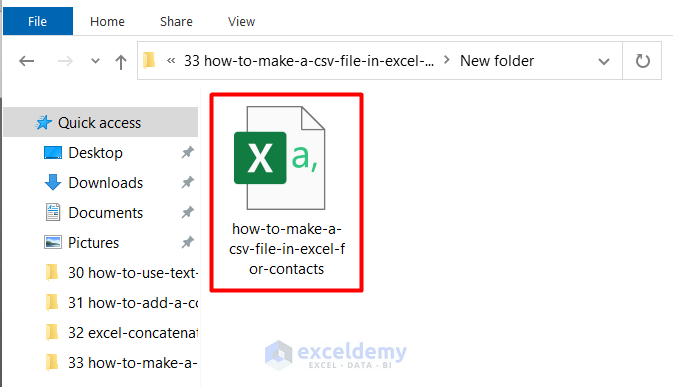
Step 4: Final Result
As a result, you will find the file in CSV format.
Read More: How to Convert Excel Files to CSV Automatically
Things to Remember
- Please remember that this process is applicable only to Excel 2016 and the upper version of Excel.
Download the Practice Workbook
Related Articles
- How to Convert Excel to CSV without Opening
- How to Convert Multiple Excel Files to CSV
- How to Save Excel File as CSV with Commas
- Set Comma Instead of Semicolon as Delimiter in Excel CSV
- Save Excel as CSV with Double Quotes
- [Fixed!] Excel Not Saving CSV with Commas
<< Go Back to Export Excel to CSV | Export Data from Excel | Learn Excel
Get FREE Advanced Excel Exercises with Solutions!
