Method 1 – Changing Separator When Saving CSV
Steps:
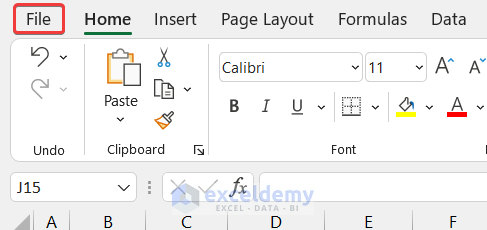
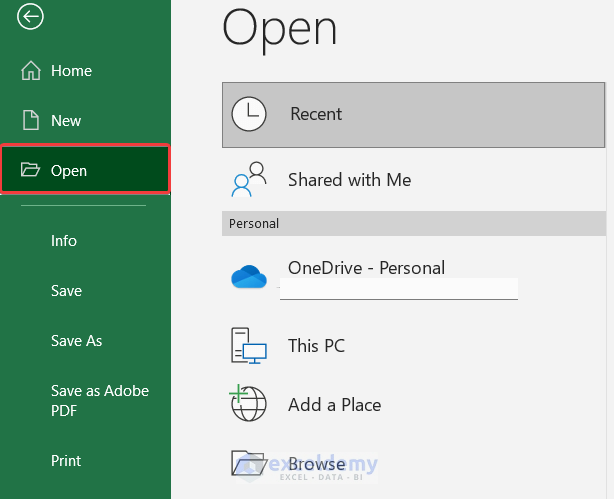
- Select the File tab from the ribbon.
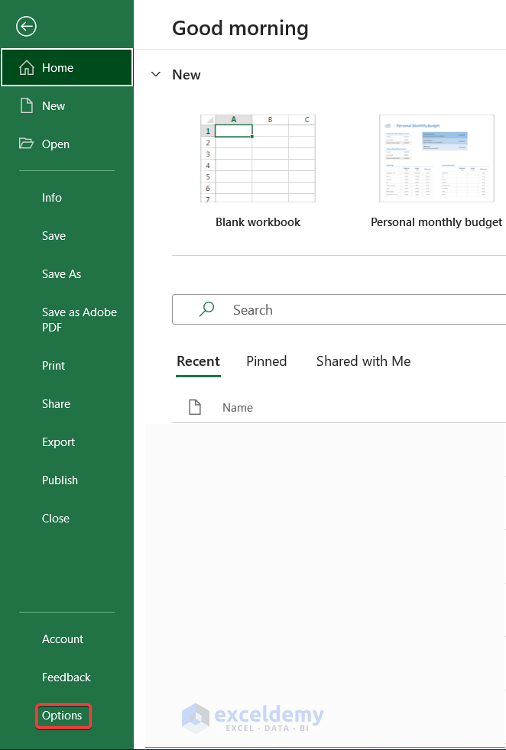
- Go to Options.
- A dialog box titled Excel Options will appear.
- Select the Advanced option.
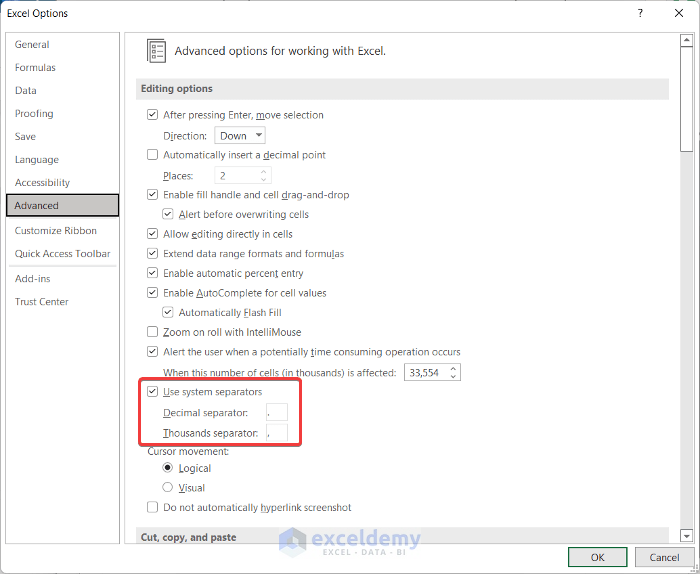
- Under the Editing Options, uncheck the Use system separator to edit. Set the Decimal separator as the Dot (.) and the Thousand separator as the Comma (,).
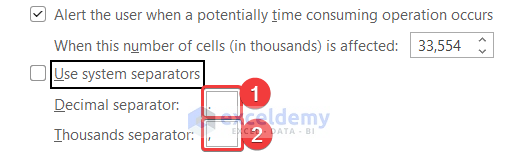
- Check the Use system separator to prevent further change and click OK.
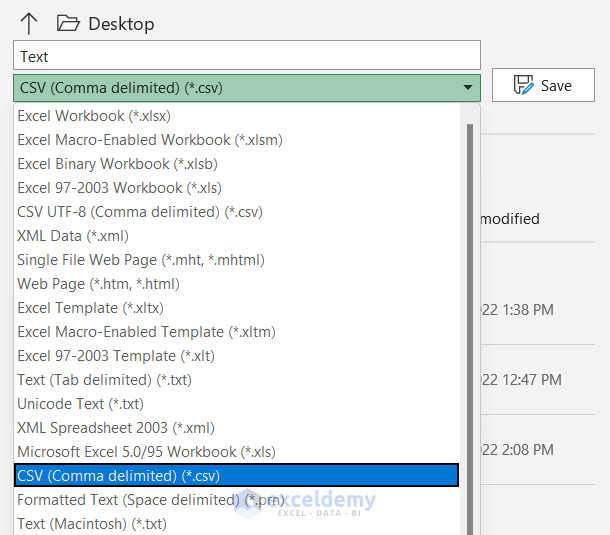
- Select File > Save As.
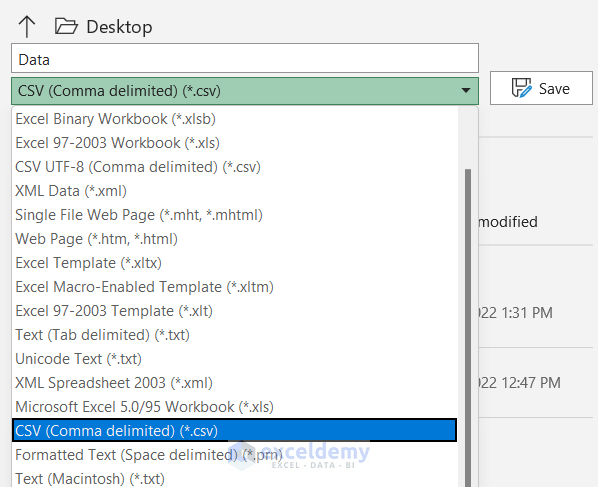
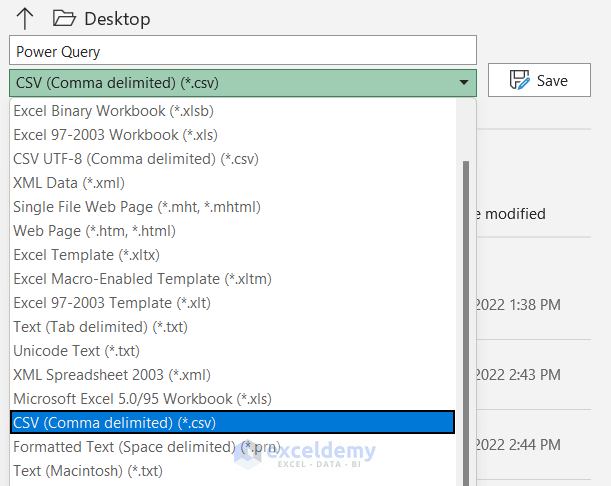
- Choose a suitable location to save your file and write down a name for it. In the file format option, choose CSV(comma-delimited) (*.csv) and click Save.
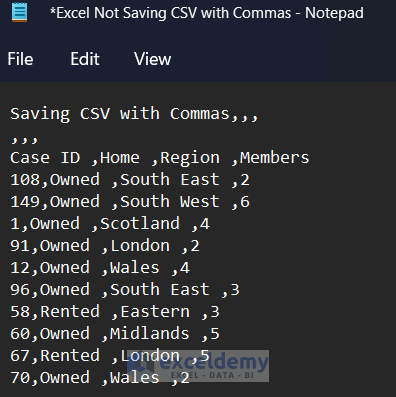
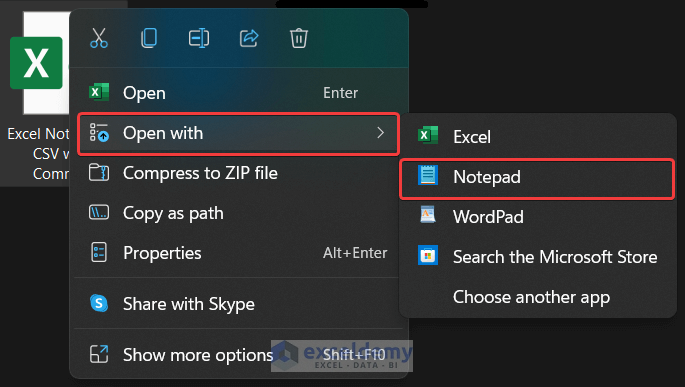
- Close the file and right-click on your mouse on the file, and choose Open with > Notepad.

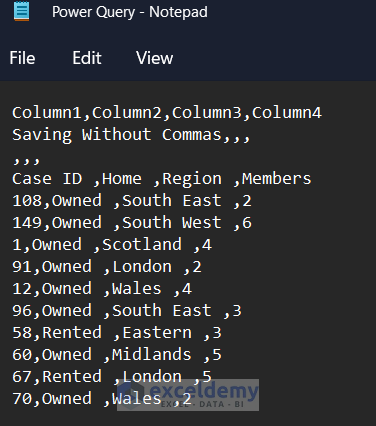
- The file will open in Notepad and you will get all the text separated with commas.
The process worked perfectly, and we were able to fix the issue of Excel not saving CSV with commas.
Method 2 – Open CSV in a Text Editor
You have to open a CSV file with a Text Editor to see the content inside of it. Use the Notepad text editor. When you open the file here, you can manually make any kind of modification in this file. If your dataset contains a vast amount of data, don’t make any changes here. It may manipulate your dataset, and your original data may get lost.
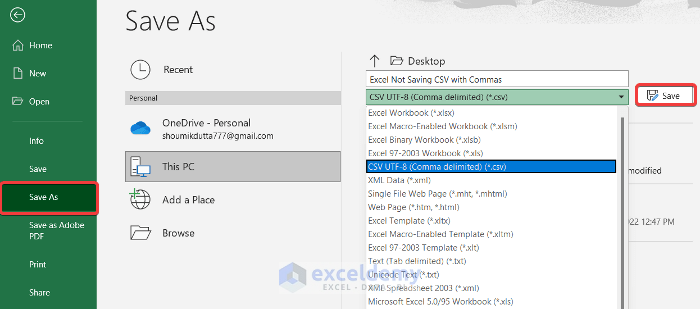
Method 3 – Save Your Excel File as ‘CSV UTF-8 (Comma Delimited)’
Steps:
- Select the File on the left side of the Home tab.
- Select the Save As option.
- After that, define your file with a suitable name, and choose your desired location to save the file. In the file format box, select the file extension CSV UTF-8 (Comma Delimited) (*csv).
- Click Save to complete the process.

- Close the Excel file and right-click on your mouse on the file, and choose Open with > Notepad.
- The file will open in Notepad and you will get all the text separated with commas.
Method 4 – Indicate Your Separator Directly
Steps:
- Open the Notepad app and write down the following text.
- Declare the separator as ‘sep=,’.
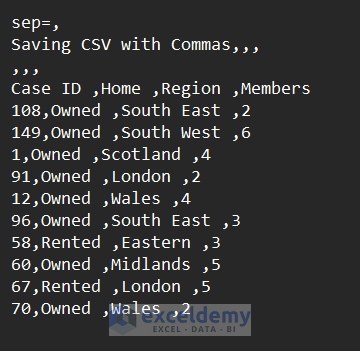
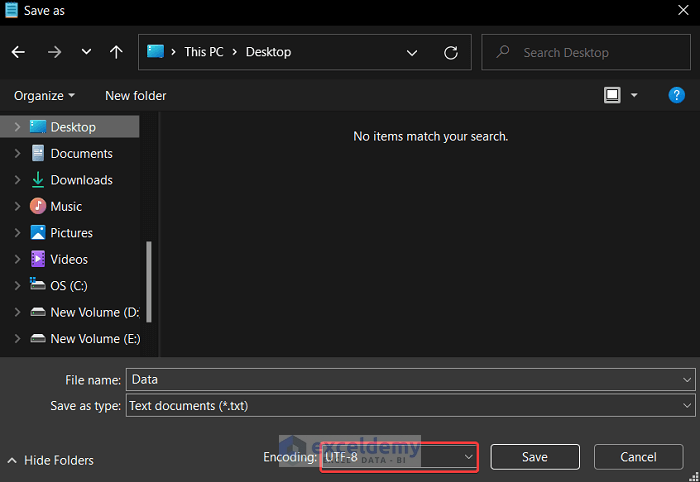
- The file with a name according to your desire with the file extension .txt. Keep the Encoding as UTF-8. We set Data as our file name. Click the Save button and close the text file.
- Launch Microsoft Excel on your computer and select File > Open.
- Or press the ‘Ctrl+O’ keyboard shortcut to open a file with Excel.
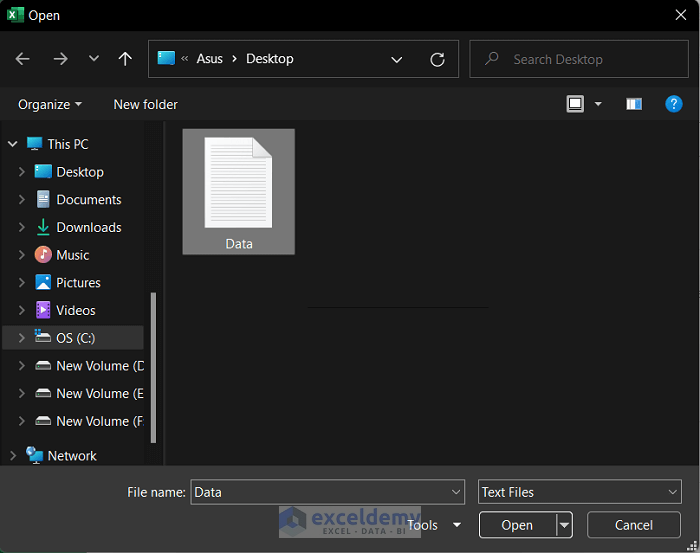
- Select the text file.
- Excel might give you a warning; ignore it and click Yes.

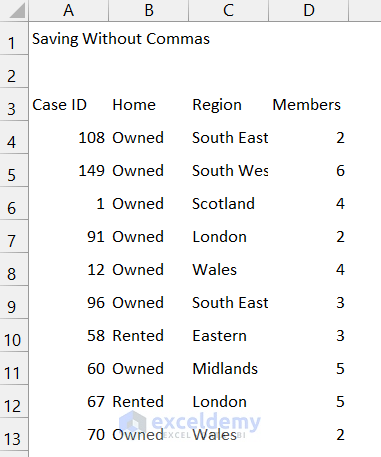
- See all the data sets in the worksheet pretty nicely.
- Save the file with the file format CSV(Comma delimited) (*.csv) and click Save.
- Open the new file with Notepad, you will see that our dataset is saved in the CSV format.

Method 5 – Choose Delimiter from Text Import Wizard
Steps:
- In the recent version of Excel, the Text Import Wizard is not available in the ribbon of Excel. You have to enable it from the Options.
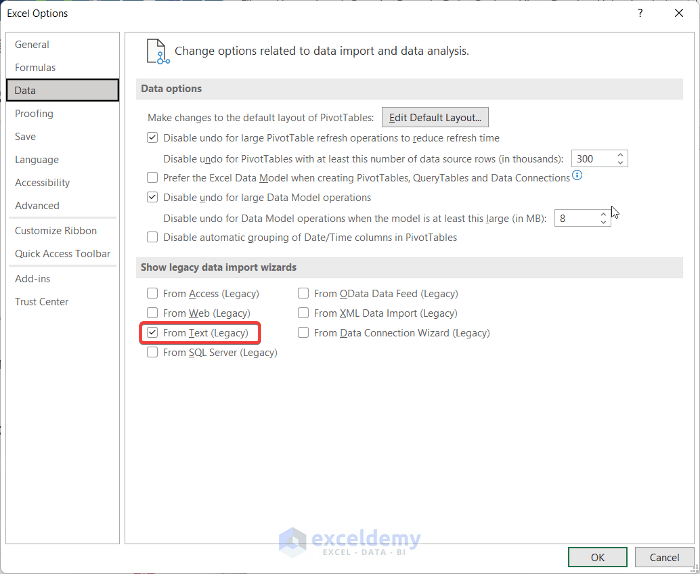
- To enable Text Import Wizard, select File > Options.
- The Excel Options dialog box will appear.
- In this box, select Data.
- Under Show legacy data import wizards, check From Text (Legacy) and click OK.
- Press ‘Ctrl+O’ on your keyboard to open a file.
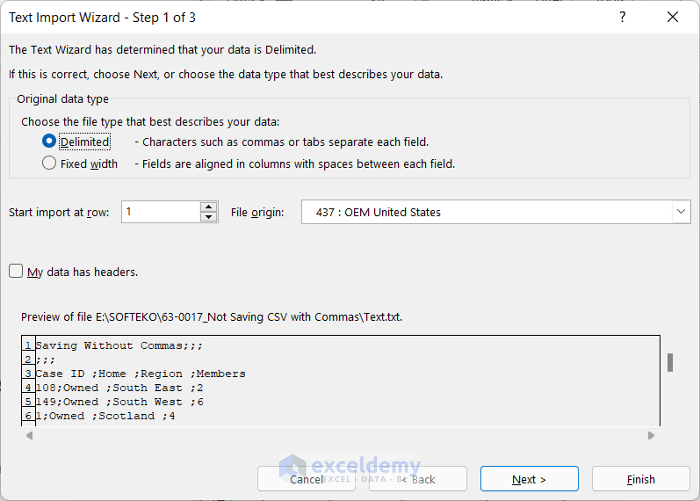
- Select the file titled Text.txt and click Open.
- A dialog box called Text Import Wizard will appear. Choose the Delimited and click Next.
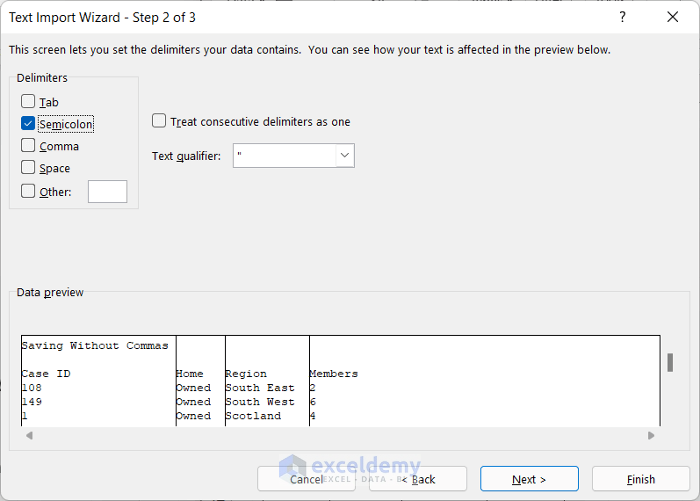
- In the second step, select the Delimiters as Semicolon and again click Next.
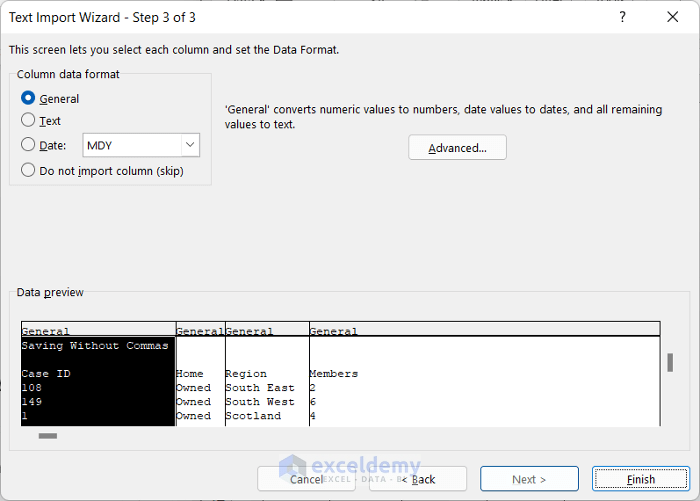
- Keep the Column data format in General and finally click Finish.
- A new Excel file titled Text will open.
- Select File > Save As.
- Choose the suitable location to save your file and write down a name for your file, In the file format option, choose CSV(Comma delimited) (*.csv) and click Save.
- Close the Excel file and right-click on your mouse on the file, and choose Open with > Notepad.
- See all the text separated with commas, and the file is saved in CSV format.

Method 6 – Using Power Query
Steps:
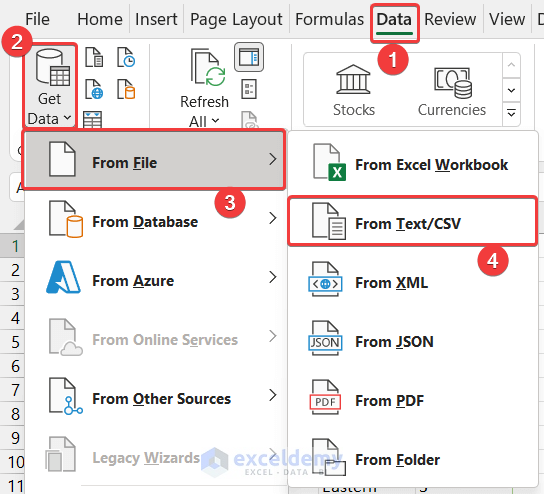
- In the Data tab, select Get Data > From File.
- Choose the From Text/CSV option.
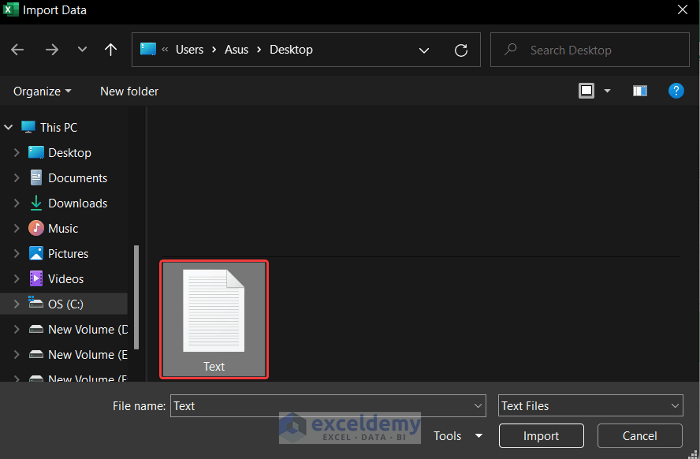
- A dialog box called Import Data will appear.
- Select the file titled Text and click Import.
- Another dialog box entitled Text.txt will appear.
- Keep the Delimiter as Semicolon and click Load.
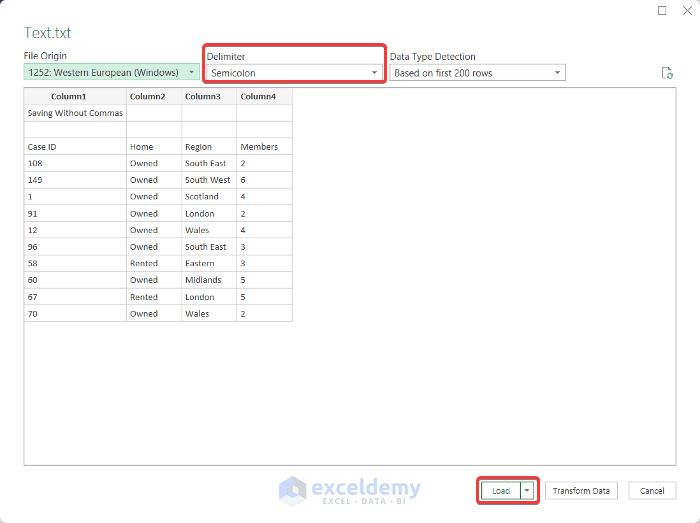
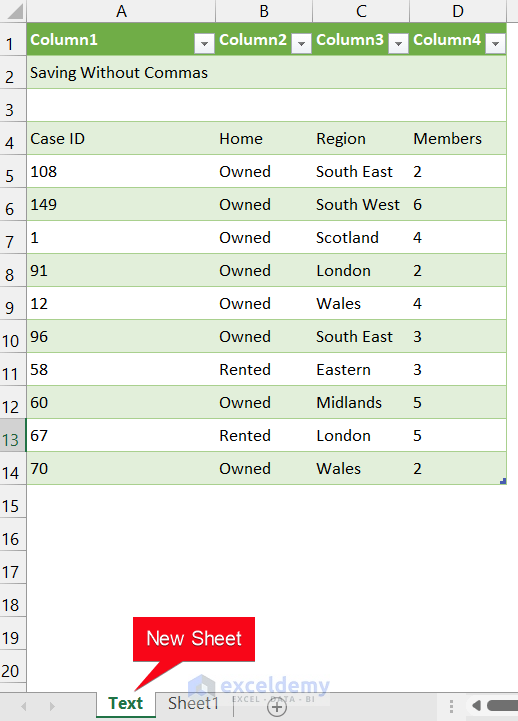
- A new sheet titled Text will be created automatically, and the data will be imported as a table.
- Select File > Save As.
- Choose the suitable location to save your file and write down a name for your file, In the file format option, choose CSV(Comma delimited) (*.csv) and click Save.
- Close the Excel file and right-click on your mouse on the file, and choose Open with > Notepad.
- See all the text separated with commas, and the file is saved in CSV format.
Method 7 – Modifying Regional List Separator
Steps:
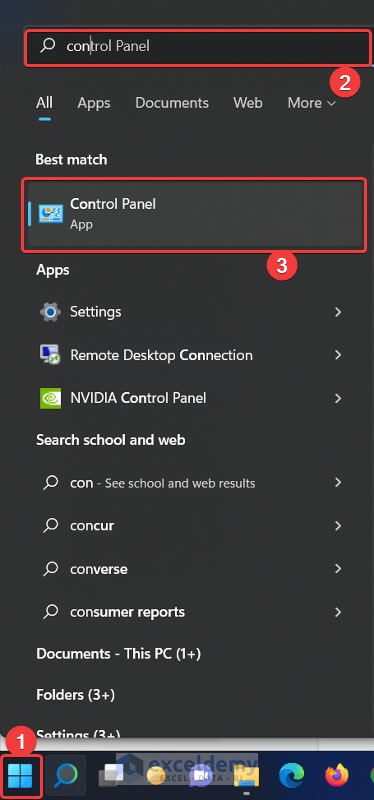
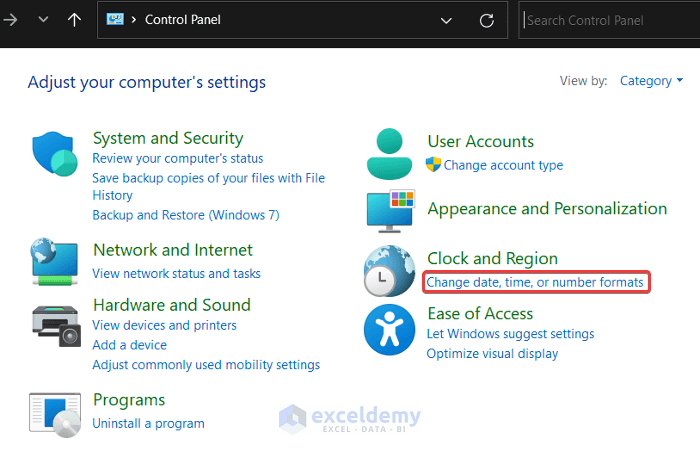
- Select the Start menu of your computer.
- Write down Control Panel in the Search bar and select the Control Panel app.
- Select the Change date, time, or number format from the Clock and Region option.
- A new dialog box will appear, entitled Region.
- Select the Additional settings option.
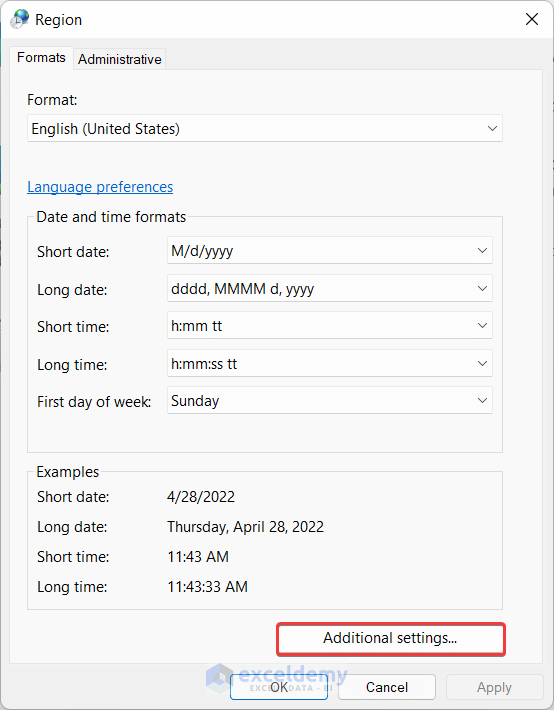
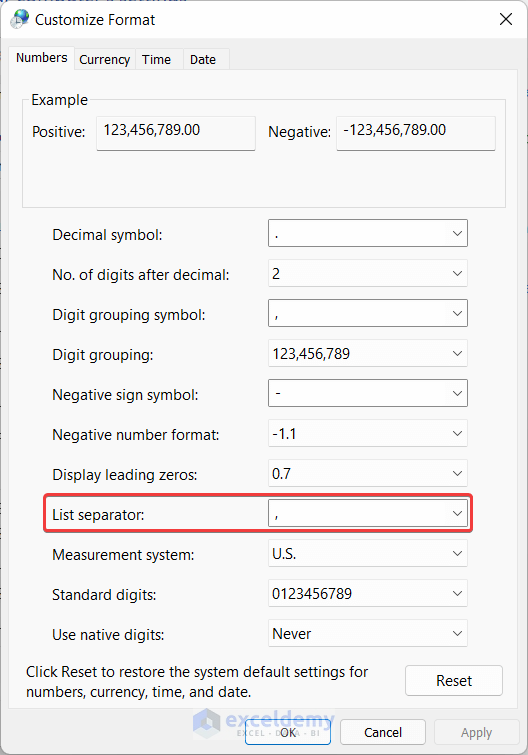
- Another dialog box called Customize Format will appear.
- Change the List separator to comma (,) and click OK.
- Click OK to close the Region dialog box.
- Click the Close button on the right corner of the Control Panel.
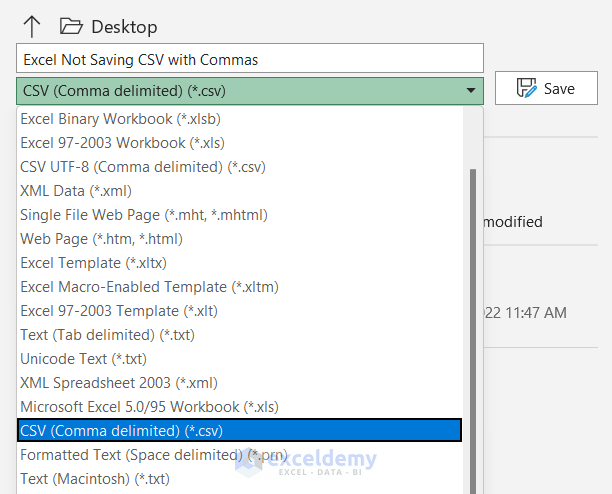
- In the Excel worksheet, go to File > Save As.
- Write down a suitable name for your file; in the file format option, choose CSV(Comma delimited) (*.csv) and click Save.
- Close the file, and right-click on your mouse on the file, and choose Open with > Notepad.
- The file will open in Notepad and you will get all the text separated with commas.
Download Practice Workbook
Related Articles
- How to Create CSV File from Excel
- How to Make a CSV File in Excel for Contacts
- How to Convert Excel File to Text File with Comma Delimited
- Convert Excel to Comma Delimited CSV File
<< Go Back to Export Excel to CSV | Export Data from Excel | Learn Excel
Get FREE Advanced Excel Exercises with Solutions!

Method 1 doesn’t word. The .txt opened in notebook is tab delimited.
Hello Jkeej,
If Method 1 results in a tab-delimited .txt file when opened in Notepad, it’s likely because Excel defaulted to saving in a tab-delimited format (like .txt or CSV (MS-DOS)). To ensure commas are used as delimiters, make sure to:
Save the file explicitly as CSV UTF-8 (Comma delimited) (*.csv).
Check your system’s list separator setting (Control Panel > Region > Formats > Additional settings > List separator). It should be set to a comma (,), not a tab.
Try updating the list separator and saving again, this should fix the delimiter issue. Let me know if it helps!
Regards
ExcelDemy