Saving CSV files with double quotes is necessary to avoid any misrepresentation. For example, consider the row of data USD,25,000,Model1. Here, the comma delimiter is a little confusing. Instead, USD,“25,000”,Model1 is easier to decipher. We’ll save the Excel file with values in double quotes so it can be ported to different applications easier.
Save Excel as CSV with Double Quotes: 3 Quickest Ways
Method 1 – Use the Custom Format to Save Excel File as CSV with Double Quotes
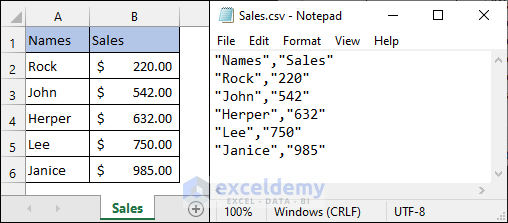
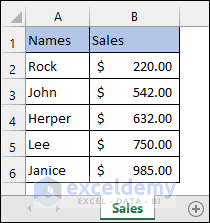
Consider the following dataset. You want to save it as a CSV file with cell values wrapped in double-quotes.
Steps
- Select the entire range (A1:B6) of the dataset.
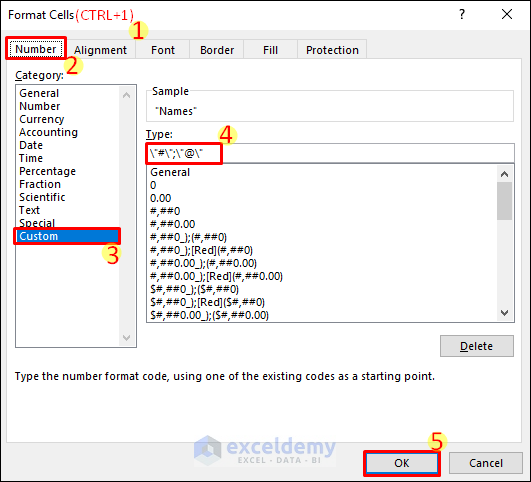
- Press Ctrl + 1 to open the Format Cells window.
- Select the Custom format from the Number tab.
- Enter \“#\”;\“@\” in the Type field.
- Press OK.
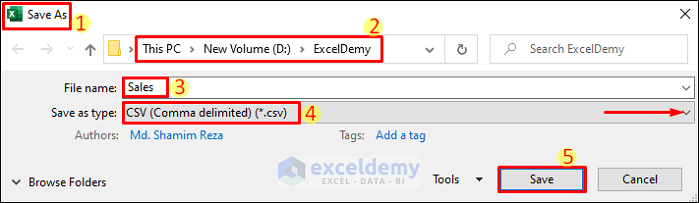
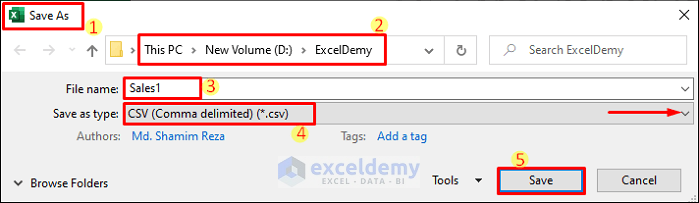
- Select File and choose Save As. Browse the desired location to save the file.
- Enter a file name.
- Choose CSV (Comma delimited) (*.csv) as the file type using the dropdown arrow.
- Click on the Save button.
- Go to the file’s location and open the CSV file with a text editor (such as Notepad).
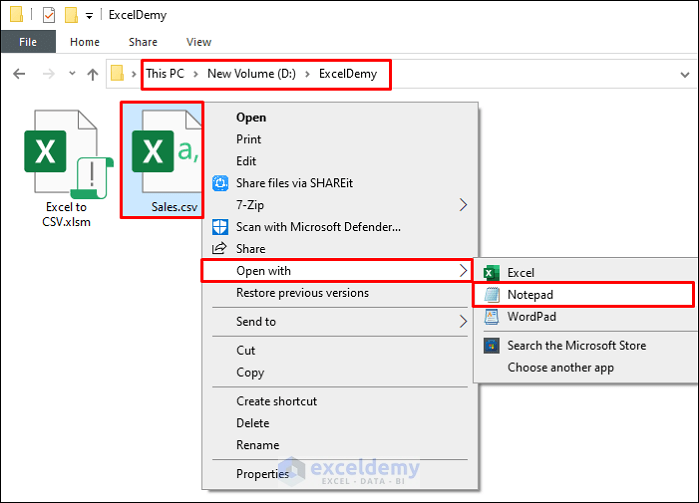
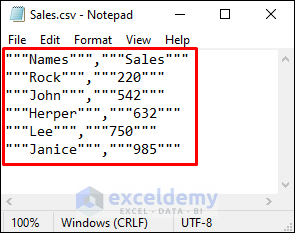
- You will see the following result containing some extra double-quotes.
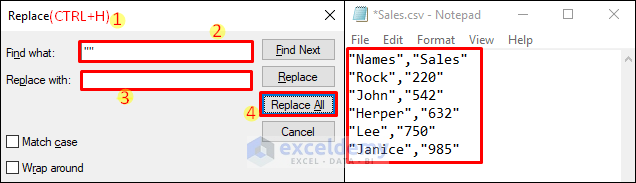
- Press Ctrl + H to open the Replace window.
- Enter a double quote in the Find what field without any space in between them.
- Keep the Replace with field empty and select Replace All.
- You will get the desired result as follows.
Read More: How to Save Excel File as CSV with Commas
Method 2 – Use Windows PowerShell
Steps
- Go to the worksheet that you want to save as a CSV file.
- Select File and choose Save As.
- Save the file with CSV (Comma delimited) (*.csv) as the file type using the dropdown arrow.
- Click on the Save button.
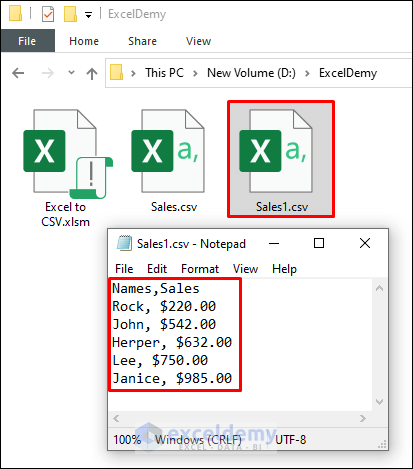
- You will get the following result.
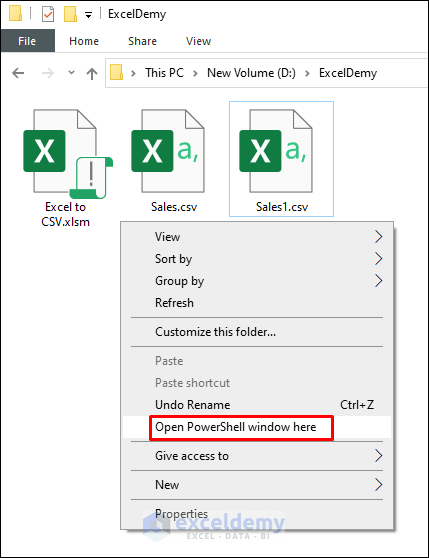
- Hold the Shift key and right-click on any blank space in the location of the CSV file without double-quotes.
- Click on Open PowerShell window here.
- Copy the following command. You need to change the file names (Sales1.csv and Sales2.csv) based on your files.
import-csv Sales1.csv | export-csv Sales2.csv -NoTypeInformation -Encoding UTF8- Paste the copied code into the PowerShell window and press Enter.

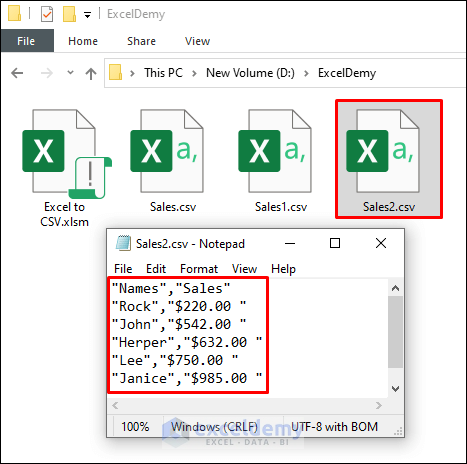
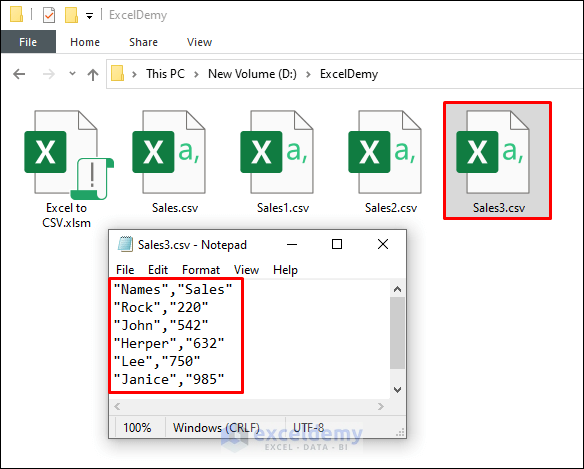
- You will get the desired result as shown in the picture below.
Read More: Set Comma Instead of Semicolon as Delimiter in Excel CSV
Method 3 – Apply VBA Code for a CSV File with Double Quotes
Steps
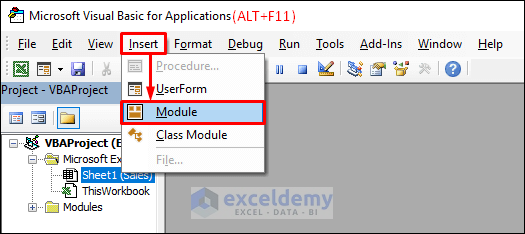
- Press Alt + F11 to open the VBA window.
- Select Insert and pick Module from the ribbon. This will create a new module.
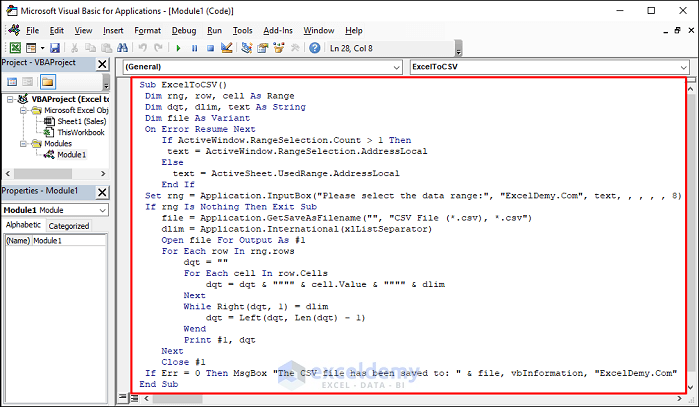
- Copy the code below:
Sub ExcelToCSV()
Dim rng, row, cell As Range
Dim dqt, dlim, text As String
Dim file As Variant
On Error Resume Next
If ActiveWindow.RangeSelection.Count > 1 Then
text = ActiveWindow.RangeSelection.AddressLocal
Else
text = ActiveSheet.UsedRange.AddressLocal
End If
Set rng = Application.InputBox("Please select the data range:", "ExcelDemy.Com", text, , , , , 8)
If rng Is Nothing Then Exit Sub
file = Application.GetSaveAsFilename("", "CSV File (*.csv), *.csv")
dlim = Application.International(xlListSeparator)
Open file For Output As #1
For Each row In rng.rows
dqt = ""
For Each cell In row.Cells
dqt = dqt & """" & cell.Value & """" & dlim
Next
While Right(dqt, 1) = dlim
dqt = Left(dqt, Len(dqt) - 1)
Wend
Print #1, dqt
Next
Close #1
If Err = 0 Then MsgBox "The CSV file has been saved to: " & file, vbInformation, "ExcelDemy.Com"
End Sub- Paste the copied code onto the module.
- Press F5 to run the code.
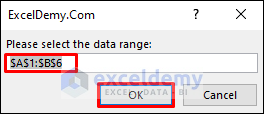
- This will ask for your desired range. Toggle back to the worksheet and select the range.
- Press OK. This will take you directly to the Save As window.
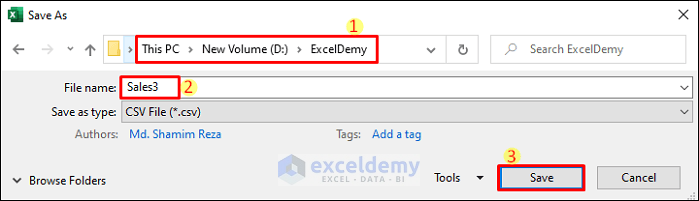
- Browse the location for the file and enter a name. Click on Save.
- Excel will show the following message. Press OK.
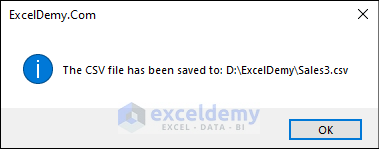
- You can check the file.
Explanation of the VBA Code
Sub ExcelToCSV()
We will write the code inside this subject procedure.
Dim rng, row, cell As Range
Dim dqt, dlim, text As String
Dim file As Variant
Declaring necessary variables.
On Error Resume Next
Neglects any errors.
If ActiveWindow.RangeSelection.Count > 1 Then
text = ActiveWindow.RangeSelection.AddressLocal
Else
text = ActiveSheet.UsedRange.AddressLocal
End If
Automatically detects the data to select.
Set rng = Application.InputBox(“Please select the data range:”, “ExcelDemy.Com”, text, , , , , 8)
Asks for the data range.
If rng Is Nothing Then Exit Sub
Exits operation for no input.
file = Application.GetSaveAsFilename(“”, “CSV File (*.csv), *.csv”)
Sets the format of the new file.
dlim = Application.International(xlListSeparator)
Specifies comma as the delimiter.
Open file For Output As #1
Creates a new file.
For Each row In rng.rows
dqt = “”
For Each cell In row.Cells
dqt = dqt & “””” & cell.Value & “””” & dlim
Next
While Right(dqt, 1) = dlim
dqt = Left(dqt, Len(dqt) – 1)
Wend
Print #1, dqt
Next
Close #1
Wraps the cell values with double quotes and populates the new file with them.
If Err = 0 Then MsgBox “The CSV file has been saved to: ” & file, vbInformation, “ExcelDemy.Com”
Confirms saving the CSV file.
Read More: How to Convert Multiple Excel Files to CSV
Things to Remember
- You need to give the proper file path in the PowerShell command in case you open it from other locations.
- You need to change the file names based on your files.
Download Practice Workbook
Related Articles
- How to Create CSV File from Excel
- How to Convert Excel File to Text File with Comma Delimited
- Convert Excel to Comma Delimited CSV File
- How to Convert Excel to CSV without Opening
- [Fixed!] Excel Not Saving CSV with Commas
<< Go Back to Export Excel to CSV | Export Data from Excel | Learn Excel
Get FREE Advanced Excel Exercises with Solutions!

God bless you!
The 3rd way (using VBA) is just PERFECT.
Saved me a lot of time.
Thank you very much.
Dear Anitelleth,
You are most welcome.
Regards
ExcelDemy
Thank you very much! Saved me a lot of time, I used the VBA code like a charm.
Dear Anitelleth,
You are most welcome.
Regards
ExcelDemy
Tried the 1st way but the numbers became integer, how can I keep the decimals places?
Also, can I make the double quotes not visible in each cell when open in Excel but they’re there only when open in notepad?
Thank you.
Hey there, Mr. Connie!
Glad that you have shared you problem here.
You can keep the decimal places with the number by using the format below.
“#,##0.00”;“@” (Copy and Paste this)
But this will add double quotes at each cells of the dataset in Excel.
You have to use VBA macros to make the double quotes not visible in each cell when open in Excel but they’re there only when open in notepad.
Regards
ExcelDemy Team
Hello, is this possible to do with selected cells only?
Hello TERRY,
Thank you for your comment. Yes, this is possible to do with selected cells only. To do this, you can use the third method, which is using a VBA code.
First, you have to select the cells. Then go to the Developer tab >> Visual Basic.
Then, run the VBA code that is provided in method 3.
A dialog box will appear, showing the selected cell range. Now, save the file by following the given instructions in method 3.
Open the file with Notepad or Wordpad, and you will see, the selected cells are only saved with double quotes.
Regards
Mahfuza Anika Era
ExcelDemy
what would I have to change to make the quotes only apply to certain columns,
the sheet I want to use this for needs quotes around characters in a,b,d,e,f, and i rows 3 to 319.
Hello Luke
Thanks for sharing your problem with such clarity. Based on your requirements, you can use the following Excel VBA Sub-procedure to fulfil your goal.
Excel VBA Sub-procedure:
Hopefully, the sub-procedure will be helpful. Stay blessed.
Regards
Lutfor Rahman Shimanto
Excel & VBA Developer
ExcelDemy
I have a sheet I want to generate a comma delimited .txt file from, I figured out how to change the file extension, what i’m hoping you can tell me how to change is instead of quotes on everything, i want to override the existing quotes in the excel document so the text file outputs
“sample”,”lab number”,1,
instead of what it currently does generating a csv by saving
“””sample”””,”””lab number”””,1,
Hello Luke
Thanks for reaching out and sharing an exciting problem.
You want to generate a comma-delimited (.txt) file from an Excel sheet. When saving as CSV, you want to remove the double quotes that Excel automatically adds. The text file should have each data point separated by commas, without any quotes surrounding the text.
Don’t worry! I have developed an Excel VBA code to help you overcome your situation. Please check the following:
Excel VBA Sub-procedure:
I hope you have found the solution you were looking for. I have attached the solution workbook. Good luck.
DOWNLOAD SOLUTION WORKBOOK
Regards
Lutfor Rahman Shimanto
Excel & VBA Developer
ExcelDemy