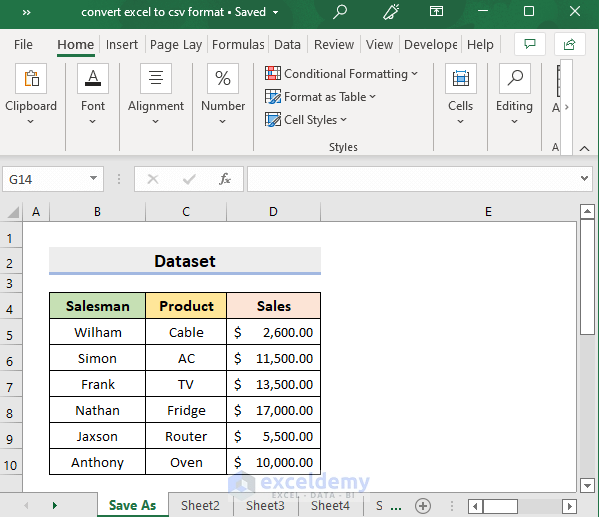
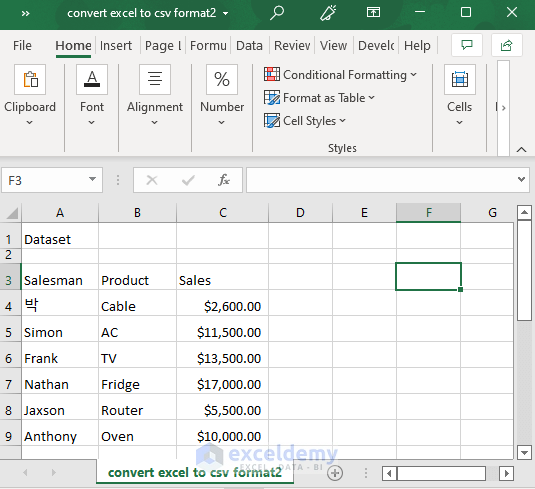
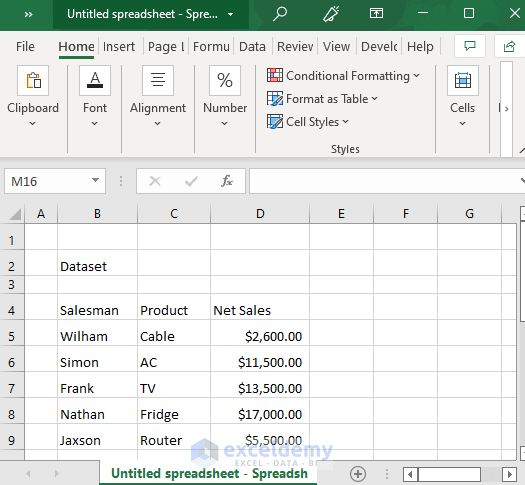
We’ll use the following Excel file as our source, which contains a sales report of a company. We’ll transform Excel worksheets into separate CSV files.
Method 1 – Convert Excel to CSV Format Through Save As
Steps:
- Open the Excel workbook and the desired sheet.
- Click on File.
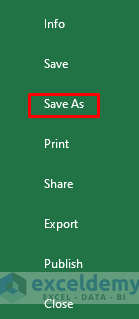
- Select Save As.
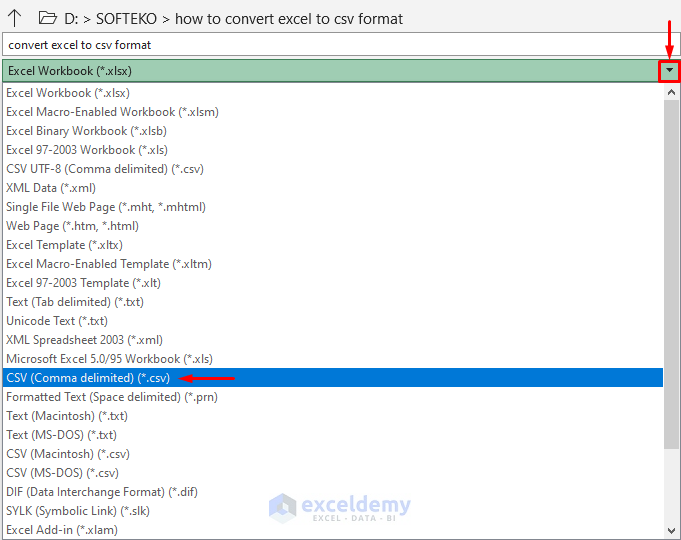
- In the Save As window, click the drop-down icon as shown below and choose the CSV (Comma delimited) option.
- Press Save.
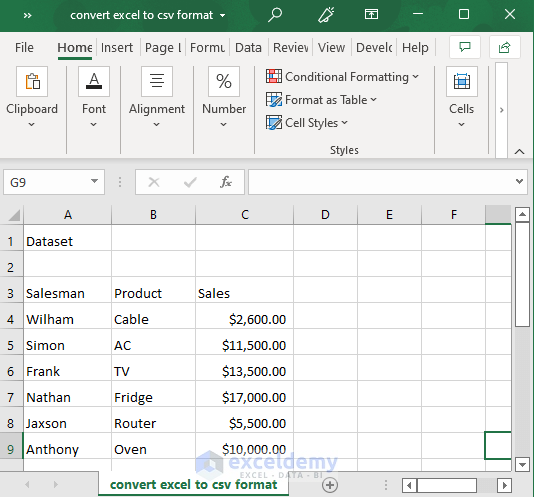
- This will create a CSV file, which is shown in the following picture.
- To get all the sheets in the CSV format, repeat the process for each worksheet.
NOTE: After pressing Save, you’ll get a warning dialog box. It reminds you that only the active worksheet will get converted to a CSV file.
Method 2 – Transform Excel to CSV UTF-8 without Destroying Special Characters
Steps:
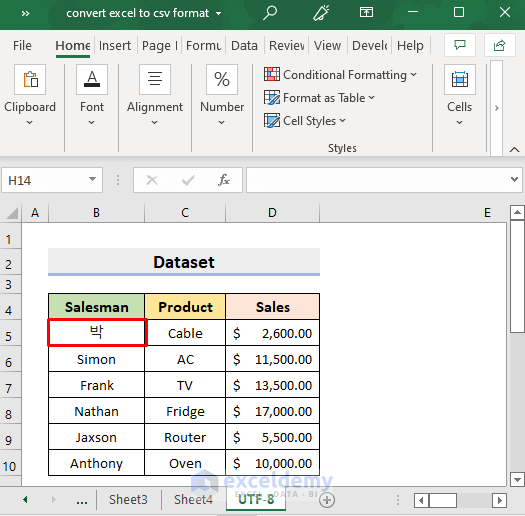
- We have a Salesman’s name in Korean. This won’t be saved in the CSV file.
- Go to File.
- Select Save As.
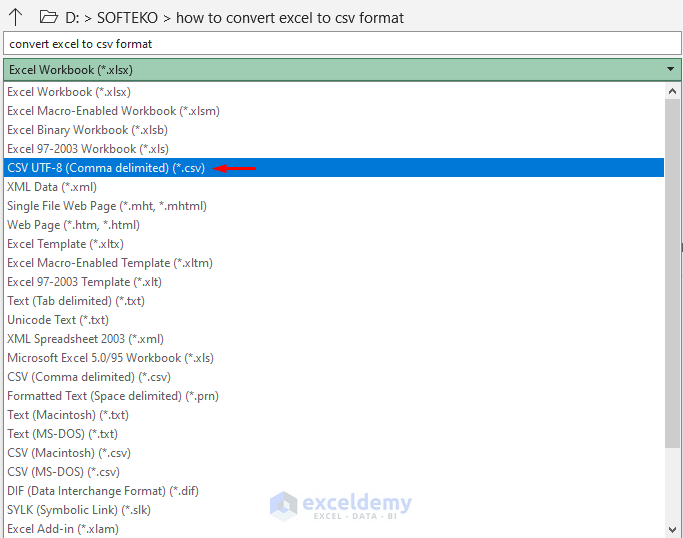
- In the Save As window, select CSV UTF-8 from the drop-down options.
- Press Save.
- Excel will create a new CSV file for the desired sheet, and you’ll see the special character in that CSV file.
Method 3 – Excel File to CSV UTF-16 Conversion
Steps:
- Open the Excel worksheet.
- Press Save As in the File window.
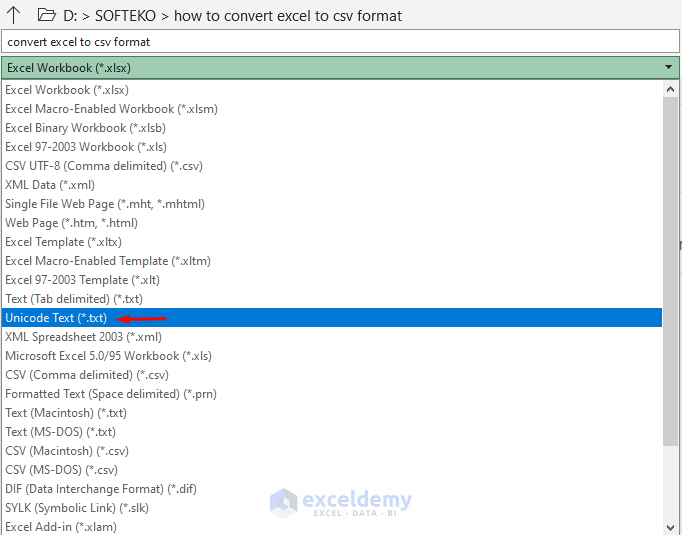
- Select Unicode Text from the drop-down list.
- Press Save. You’ll get a .txt file.
- Open the text file and click Save As.
- A dialog box will pop out.
- Type .csv at the end of the file name and choose All Files in the Save as type.
- Select UTF-16 LE in the Encoding field and press Save.

- You’ll get a CSV file that contains the special characters correctly.
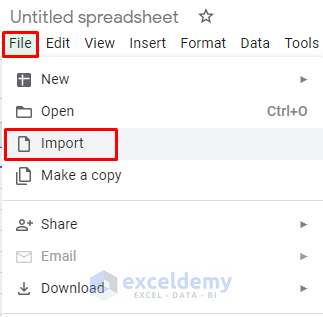
Method 4 – Use Google Spreadsheets for Turning Excel Files into CSV
STEPS:
- Open a blank Google Spreadsheet.
- Select Import from the File option.
- Select the Excel workbook and press Import data.
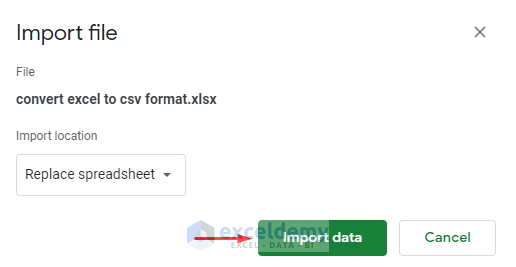
- You’ll get the file in the spreadsheet.
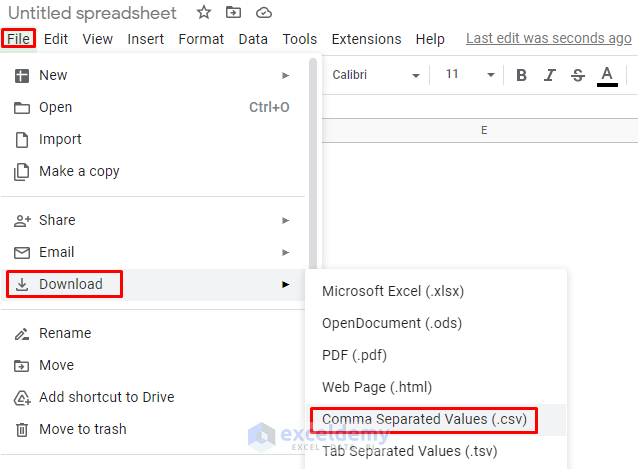
- Select File, then choose Download and pick Comma Separated Values (.csv).
- Open the downloaded file.
- You’ll get a new CSV file.
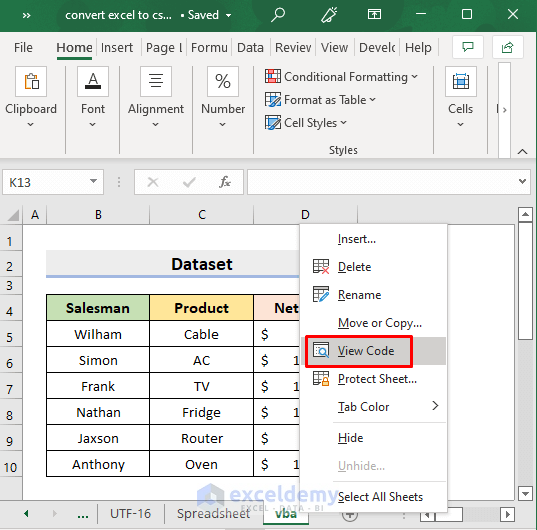
Method 5 – Apply VBA to Change Multiple Excel Sheets to the CSV Format
Steps:
- Select any sheet and right-click on the sheet name at the bottom.
- Select View Code.
- The VBA window will emerge and a code box will appear.
- Copy the below code and paste it into the code box.
Sub MultipleSheetsCSV()
Dim st As Worksheet
Dim path As String
Application.ScreenUpdating = False
path = ActiveWorkbook.path & "\" & Left(ActiveWorkbook.Name, InStr(ActiveWorkbook.Name, ".") - 1)
For Each st In Worksheets
st.Copy
ActiveWorkbook.SaveAs Filename:=path & "_" & st.Name & ".csv", FileFormat:=xlCSV, CreateBackup:=False
ActiveWorkbook.Close False
Next
Application.ScreenUpdating = True
End Sub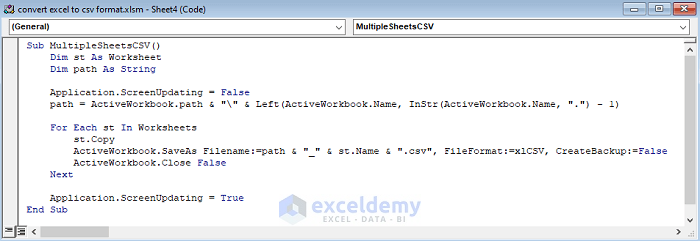
- Save the file.
- Press F5.
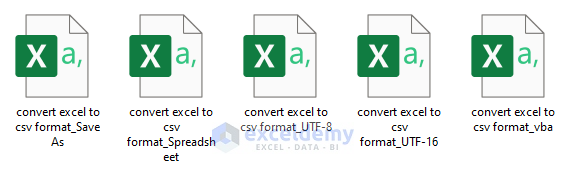
- The code will create separate CSV files for each worksheet in that workbook.
Download the Practice Workbook
<< Go Back to Export Excel to CSV | Export Data from Excel | Learn Excel
Get FREE Advanced Excel Exercises with Solutions!

Thank you for your help.
Hello Norm,
You are most welcome. Thanks for your feedback. Keep exploring Excel with ExcelDemy!
Regards
ExcelDemy