Method 1 – Convert an Excel Worksheet
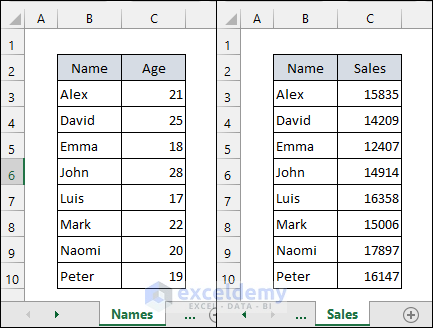
- Open the Excel workbook containing the worksheets you want to convert (e.g., Names and Sales).
- Navigate to the worksheet you wish to convert.
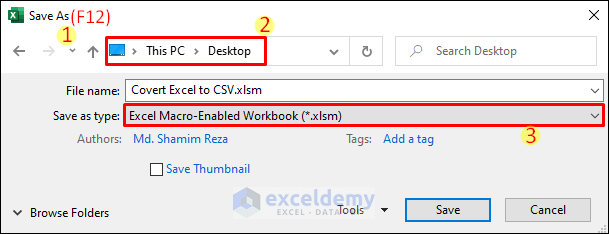
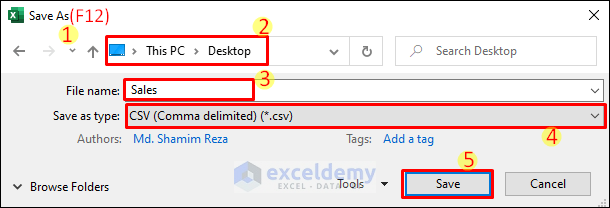
- Press F12 to open the Save As window. Alternatively, you can select File and click on Save As.
- Choose the preferred location to save the converted file and optionally modify the file name.
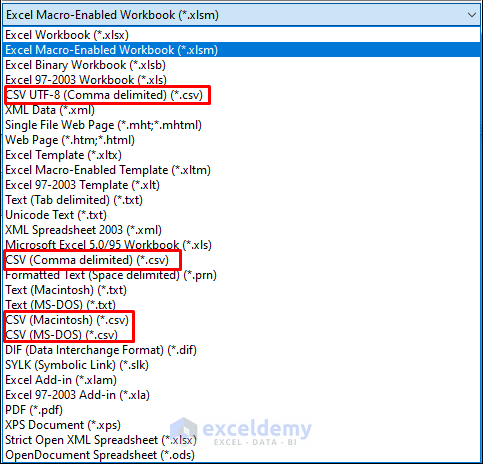
- Click the dropdown box for the Save as type option.
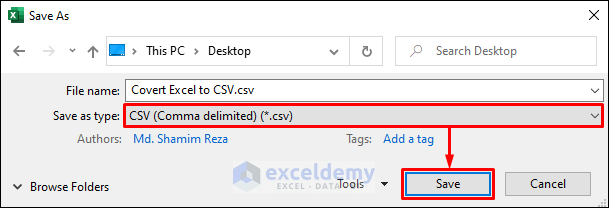
- Select CSV (Comma delimited) (*.csv) for standard characters. If your dataset includes foreign characters, choose CSV UTF-8 (Comma delimited) (*.csv).
- Confirm your selection and click Save.
- If your workbook has multiple worksheets, Excel will display a warning. Click OK to convert only the active worksheet.

- The active worksheet will be converted to a CSV file. Note that the worksheet name in the original workbook will change to match the CSV file name.
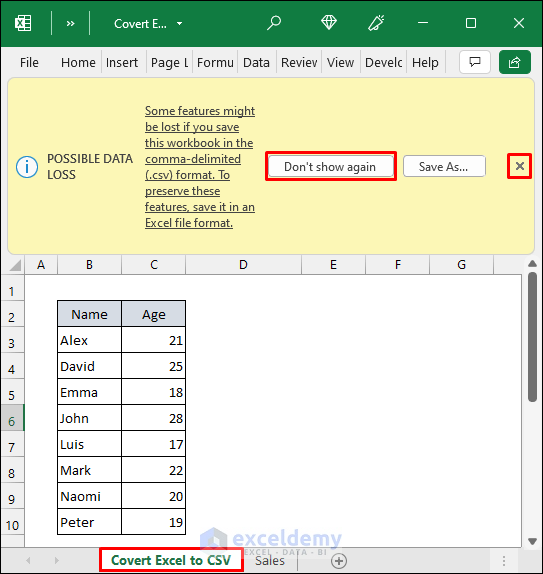
- Ignore any warnings about potential data loss and close the workbook without saving it.
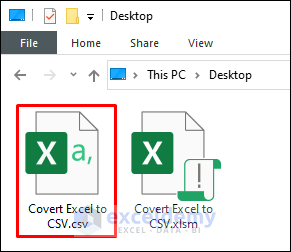
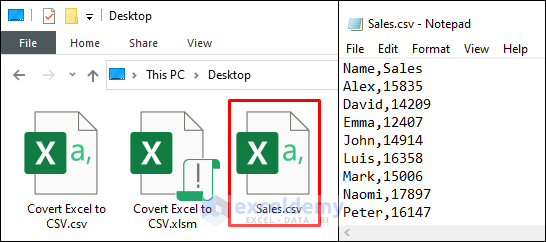
- Locate the converted CSV file at the specified file path.
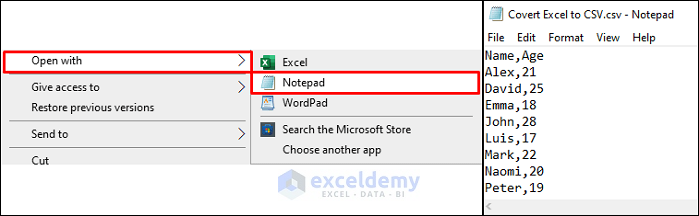
- Open the file with Notepad or any text editor to view the results.
- Repeat the procedure for other worksheets, using the respective worksheet names as file names.
Read More: How to Create CSV File from Excel
Method 2 – Convert an Excel Workbook Using Excel VBA
- Press ALT+F11 to open the VBA window.
- Select Insert and choose Module to create a new blank module window.
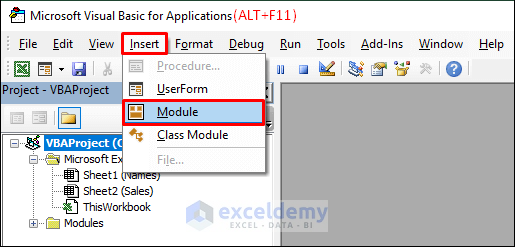
- Copy the following code using the copy button:
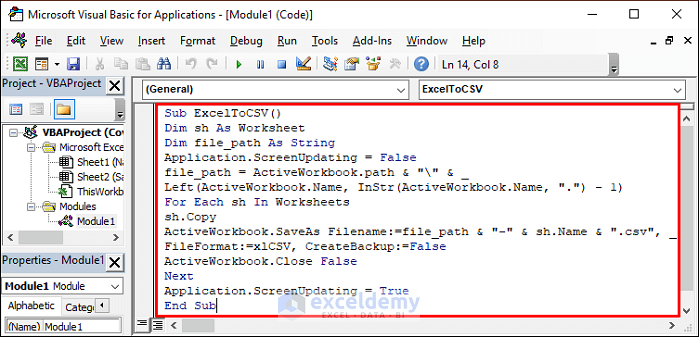
Sub ExcelToCSV()
Dim sh As Worksheet
Dim file_path As String
Application.ScreenUpdating = False
file_path = ActiveWorkbook.path & "\" & _
Left(ActiveWorkbook.Name, InStr(ActiveWorkbook.Name, ".") - 1)
For Each sh In Worksheets
sh.Copy
ActiveWorkbook.SaveAs Filename:=file_path & "-" & sh.Name & ".csv", _
FileFormat:=xlCSV, CreateBackup:=False
ActiveWorkbook.Close False
Next
Application.ScreenUpdating = True
End Sub- Paste the copied code into the module window.
- Press F5 to run the code.
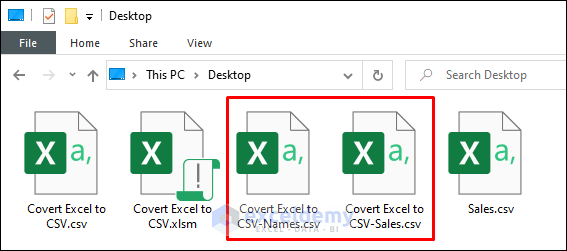
- Navigate to the location of your workbook. You’ll find that all worksheets have been converted to individual CSV files.
- To preserve the code, save the workbook as a macro-enabled workbook.
Explanation of the VBA Code
Sub ExcelToCSV(): This is the main procedure where we’ll write our code.
Dim sh As Worksheet: We declare the necessary variable sh to represent a worksheet.
Dim file_path As String: Another variable, file_path, stores the path where the converted CSV files will be saved.
Application.ScreenUpdating = False: By setting this property to False, VBA works in the background, improving code execution speed.
file_path = ActiveWorkbook.path & “\” & _
Left(ActiveWorkbook.Name, InStr(ActiveWorkbook.Name, “.”) – 1): This line defines the value of file_path. It extracts the file name (excluding the extension) from the active workbook.
For Each sh In Worksheets: The loop iterates through each worksheet in the workbook.
sh.Copy: This line copies the current worksheet.
ActiveWorkbook.SaveAs Filename:=file_path & “-” & sh.Name & “.csv”, _
FileFormat:=xlCSV, CreateBackup:=False: It saves the copied worksheet as a CSV file with the specified name and format. The – character separates the original workbook name and the worksheet name.
ActiveWorkbook.Close False: Prevents VBA from closing the source workbook.
Application.ScreenUpdating = True: Restores the default screen updating behavior.
Read More: How to Convert Excel File to Text File with Comma Delimited
Convert Excel to CSV Files with a Different Delimiter (Pipe, Semicolon, Slash, etc.)
While we’ve covered converting to CSV with a comma delimiter, you can use other delimiters (such as pipe, semicolon, or slash) by adjusting Windows settings:
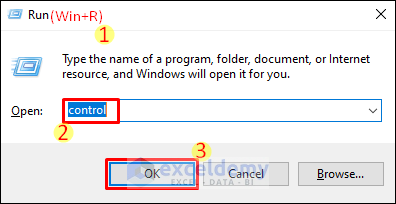
- Press Win+R to open the Run dialog.
- Type control and click OK to access the Control Panel.
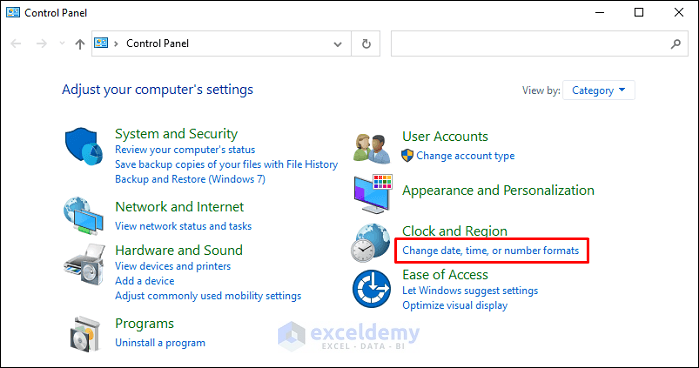
- Navigate to Clock and Region settings and select Change date, time, or number formats.
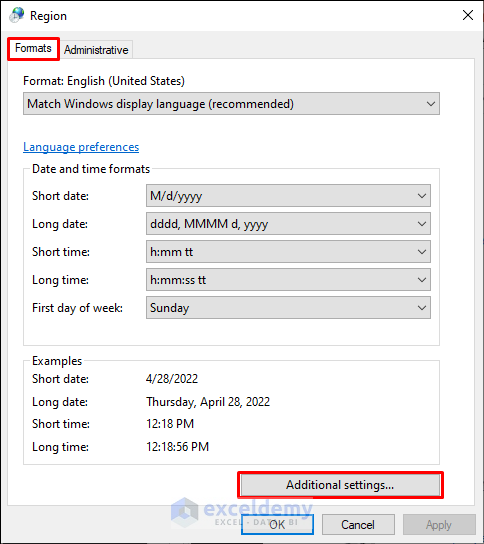
- Click Additional settings in the Formats tab.
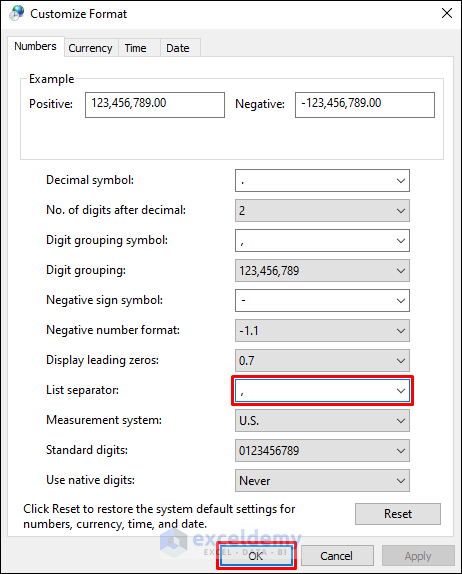
- In the Customize Format dialog, modify the List separator to your desired delimiter.
- Whenever you save a worksheet as a CSV file, the values will be separated accordingly.
Note:
To insert a pipe delimiter, press SHIFT+Backslash(\).
Read More: How to Make a CSV File in Excel for Contacts
Things to Remember
- Save your workbook before converting worksheets to CSV files.
- Close the workbook without saving it after the conversion.
- The VBA code will always use the delimiter specified by the List separator.
Download Practice Workbook
You can download the practice workbook from here:
Related Articles
- How to Convert Excel to CSV without Opening
- How to Convert Multiple Excel Files to CSV
- How to Save Excel File as CSV with Commas
- Set Comma Instead of Semicolon as Delimiter in Excel CSV
- Save Excel as CSV with Double Quotes
- [Fixed!] Excel Not Saving CSV with Commas
- How to Convert Excel Files to CSV Automatically
<< Go Back to Export Excel to CSV | Export Data from Excel | Learn Excel
Get FREE Advanced Excel Exercises with Solutions!
