Method 1 – Convert Excel Files to CSV Automatically Using Save As Command
Steps:
- Select the spreadsheet you want to convert if there are multiple spreadsheets in your Excel file.
- Click the File tab.

- Click Save As. You can skip the last two steps and just press F12 on your keyboard to open the Save As window.

- In the Save As window, select the location you want to save your file and select CSV (Comma delimited) in Save as type. Put CSV UTF-8 and get the same result.
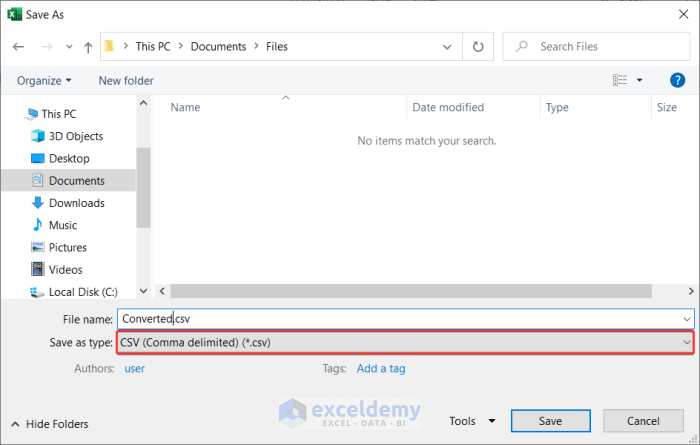
- Click Save.
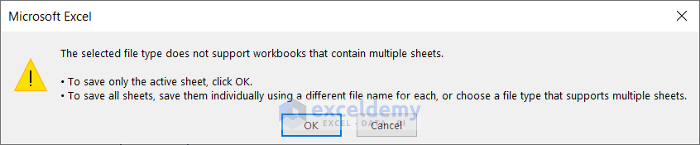
- If a warning window appears warning it will only convert one spreadsheet (it appears if you have more than one spreadsheet in your Excel file), click OK.
It will convert Excel files to CSV automatically.

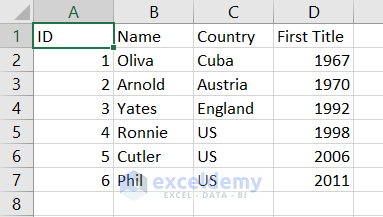
Open it in Excel. It will show something like this removing all the formats.
Method 2 – Convert Excel Files to CSV with Special Characters
2.1 Save as CSV UTF-8
UTF-8 with an ASCII character has the same encoding as an ASCII file. If you don’t have that many Unicode characters to be converted into a CSV file, you should convert them to UTF-8.
To convert Excel files to CSV UTF–8 automatically, follow these steps.
Steps:
- Select the spreadsheet you want to convert to a CSV file if you have more than one spreadsheet in your Excel file.
- Click the File tab from your ribbon.

- Click on Save As. Skip the two methods and press F12 on your keyboard and achieve the same outcome up to this point.

- In the Save As window, select the location where you want to save your file. Select CSV UTF- (Comma Delimited) in Save as type field.
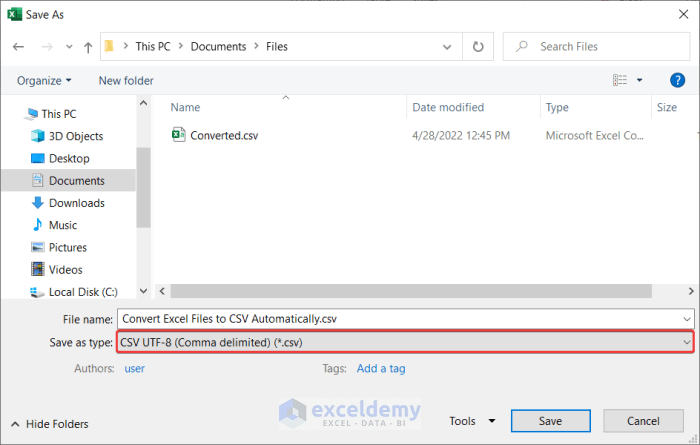
- Click Save.
- If you have more than one spreadsheet in your Excel file, a warning window may appear telling you that only one spreadsheet will be converted. Click OK.

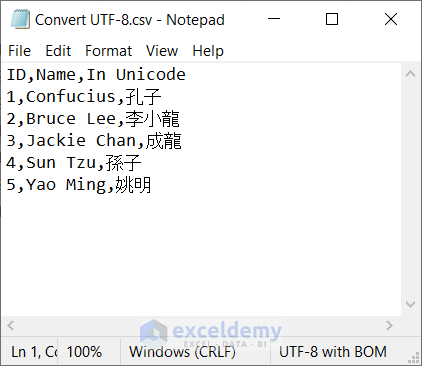
Convert Excel files to CSV automatically with special characters without messing up or distorting the characters.
The CSV file will look something like this, preserving all the data.
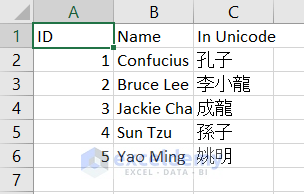
If you open it with Excel it will look something like this.
2.2 Save as CSV UTF-16
For Asian characters like the one used in the dataset, it is recommended to use UTF-16. The downside is that it takes up more bytes than UTF-8 and is not fully compatible with ASCII files.
If you want to convert Excel files automatically to CSV UTF–16 follow the steps below.
Steps:
- Select the spreadsheet you want to convert if you have more than one in your Excel file.
- Go to the File tab on your ribbon.

- Select Save As after that or ignore the last two steps and press F12 on your keyboard.

- In the Save As window, select the location and select Save as type as Unicode Text.
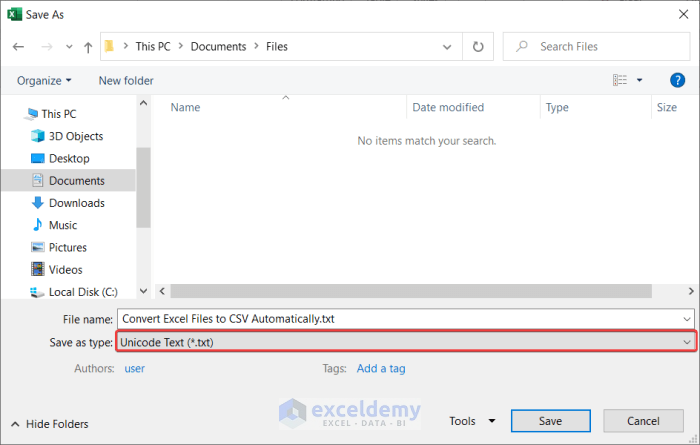
- Click Save.
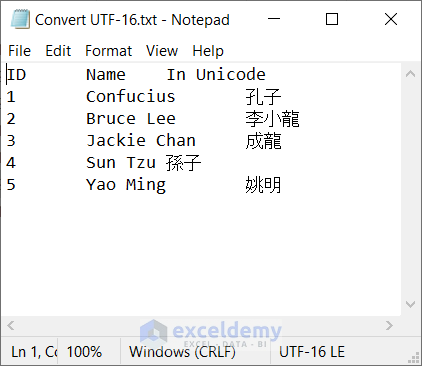
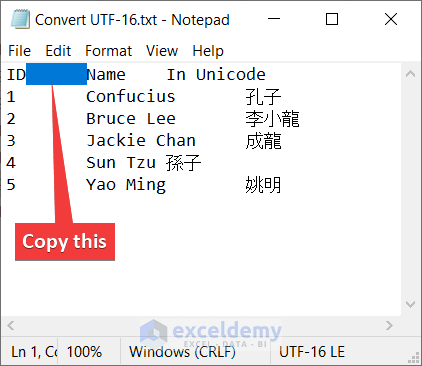
- It will save as a text file. Now open it up with a text editor like Notepad. In the event, you will find it saved with Tabs as the delimiter in between data.
- Copy the tab space from the notepad.
- Open up the Find and Replace box in the notepad by pressing Ctrl+H on your keyboard.
- In the Find what box, paste the tab space.
- Then in the Replace with box, put a comma(,) inside.
- Click Replace All.

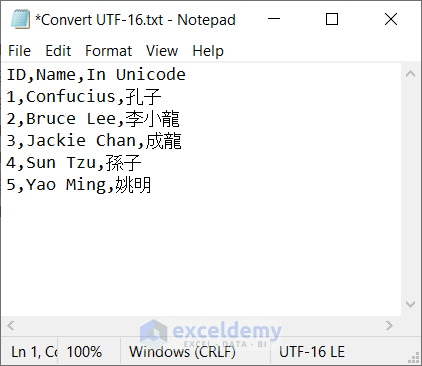
- Replace all the tab space with commas and you will have a text file with comma-separated values.
- Change the extension manually to .csv.
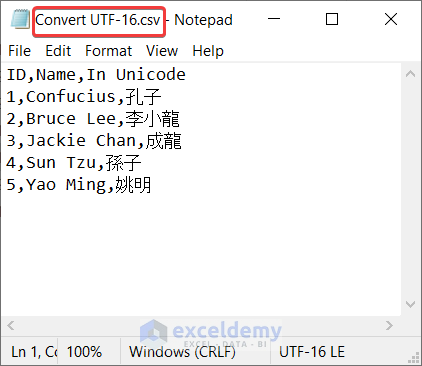
In this way, you can convert Excel files to CSV UTF-16 automatically.
Method 3 – Convert Excel Files to CSV with Multiple Sheets
Steps:
- Go to the Developer tab on your ribbon and select Visual Basic from the Code group.
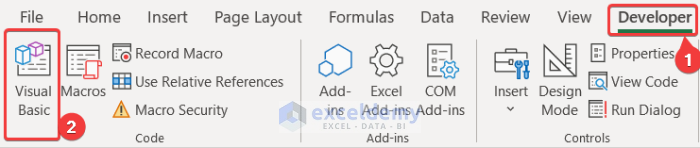
- In the VBA window, select Insert. Select Module from the drop-down menu.
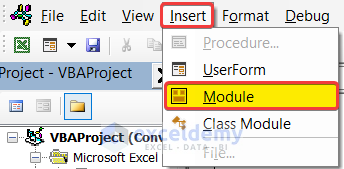
- Inside the module, write down the following code.
Sub Batch_Convert_CSV()

    Dim wsht As Worksheet
    Dim file_path As String

    Application.ScreenUpdating = False
    file_path = ActiveWorkbook.path & "\" & Left(ActiveWorkbook.Name, InStr(ActiveWorkbook.Name, ".") - 1)

    For Each wsht In Worksheets
        wsht.Copy
        ActiveWorkbook.SaveAs Filename:=file_path & "_" & wsht.Name & ".csv", FileFormat:=xlCSV, CreateBackup:=False
        ActiveWorkbook.Close False
    Next
    Application.ScreenUpdating = True

End Sub- Once you have written it in your module, save the file and press F5 on your keyboard to run the code.
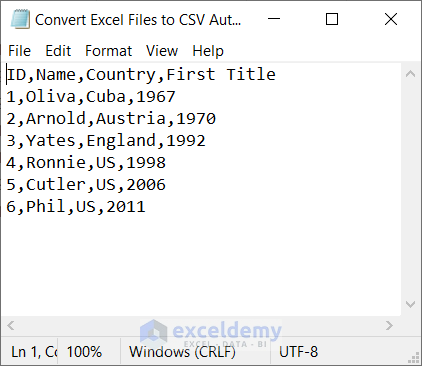
You will have all the spreadsheets converted into different CSV files in the directory of your main Excel file.
This will be the converted CSV file of the first spreadsheet.
This will be the one for the second spreadsheet.
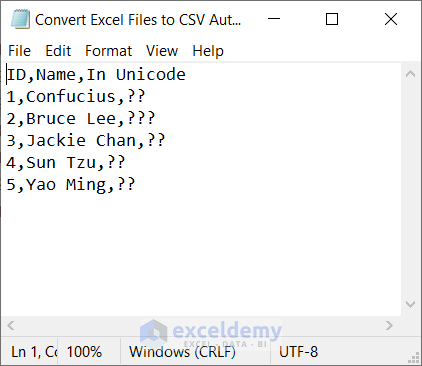
Note that, the batch conversion, too, distorted the Unicode characters as mentioned in the second method. If you have special characters in your dataset follow the second method.
Download Practice Workbook
Related Articles
- Set Comma Instead of Semicolon as Delimiter in Excel CSV
- How to Make a CSV File in Excel for Contacts
- Save Excel as CSV with Double Quotes
- [Fixed!] Excel Not Saving CSV with Commas
- How to Create CSV File from Excel
- How to Convert Excel File to Text File with Comma Delimited
- Convert Excel to Comma Delimited CSV File
<< Go Back to Export Excel to CSV | Export Data from Excel | Learn Excel
Get FREE Advanced Excel Exercises with Solutions!
