Overview of CSV Comma Delimited Files
By default, the delimiter or separator for items in a CSV file can be either semicolon (;) or commas (,). The choice depends on the region where Excel is being used. However, when exporting data from Affinity, commas (,) are used as the default delimiter/separator. This can sometimes lead to difficulties during file uploads or cause all parameter values to be grouped into a single column (usually column A).
In a CSV file, fields are typically separated by commas, while records (rows) are separated by newline characters. When dealing with Excel worksheets containing commas, all fields are enclosed in double quotes (text qualifiers). For instance, if a single cell contains the colors “green, blue, and yellow,” it will be recorded as “green, blue, and, yellow”.
Which Separator Is Used in CSV File?
Microsoft Excel uses the list separator specified in the Windows Regional Settings to handle CSV files.
In North America and several other regions, commas serve as the standard list separator, resulting in comma-delimited CSV files.
However, in most European countries, people use commas as decimal signs and semicolons to separate items in a list. Consequently, the output is semicolon-delimited CSV files.
To obtain a dataset with a different field delimiter, consider implementing one of the methods outlined below.
Method 1 – Using Excel Advanced Editing Options
- Open your Excel worksheet.
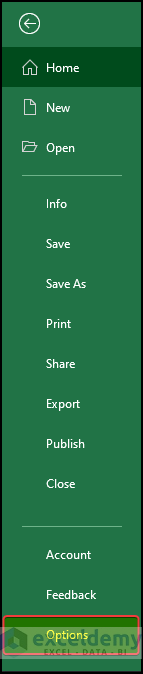
- Click on File.
- From the menu, select Options.
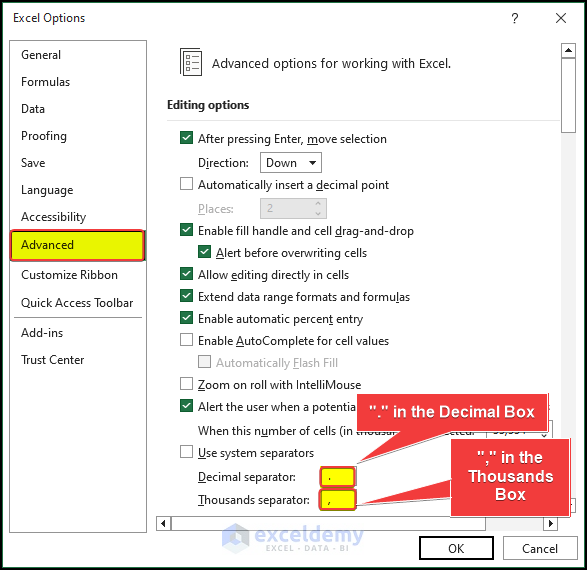
- In the Excel Options window, click on Advanced.
- Uncheck the Use system separators box.
- Set the Decimal separator to a period (“.”) and the Thousands separator to a comma (“,”).
- Click OK.
- Now your CSV file will have the designated comma delimiter.
Read More: How to Convert Multiple Excel Files to CSV
Method 2 – Setting Comma As Delimiter While Opening or Importing CSV FIle
- You can automatically set the delimiter while opening or importing a CSV file.
- Use Notepad or other software to open the CSV file and adjust the internal text to display it with commas as delimiters.
Steps
- Edit the CSV File:
- Open the CSV file using Notepad or another text editor.
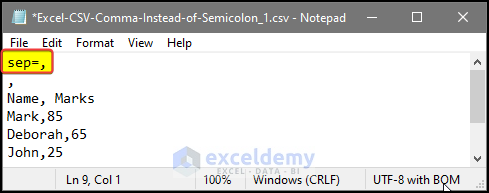
- Add the following line at the top of the file:
sep=,
This line specifies that the delimiter for the CSV file is a comma.
-
- Replace any semicolons (;) in the file with commas (,).
- Save the changes.
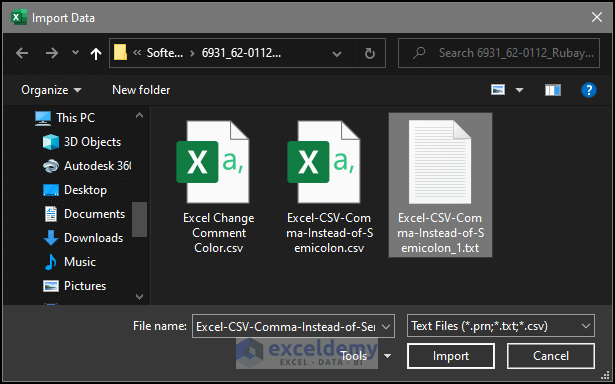
- Import the Text File into Excel:
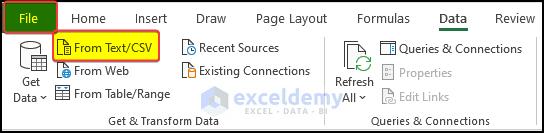
- In Excel, go to the Data tab.
- Click on Get & Transform Data and choose From Text/CSV.
-
- Locate the CSV file on your computer and select it.
- Click Import.
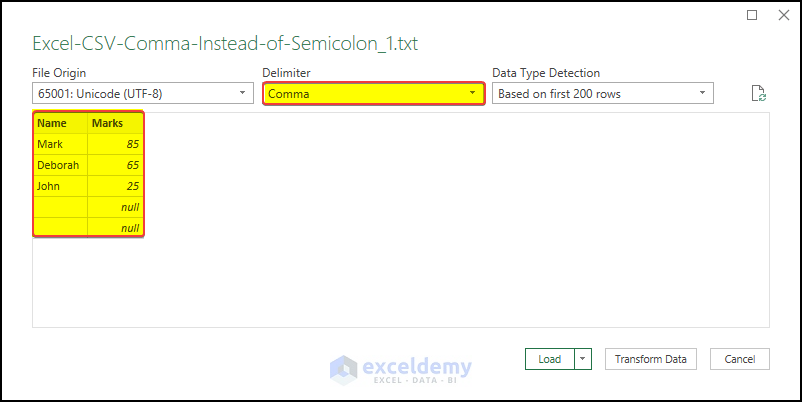
-
- A window will appear with the source data.
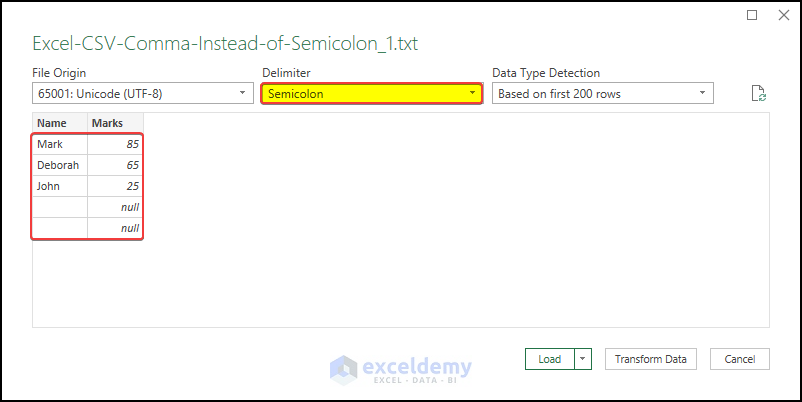
-
- Click the Load button to load the newly formatted data into the worksheet.
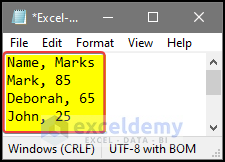
- The file is now formatted as a CSV file with a comma as the delimiter.
- The final form of the CSV file is the image below.
Read More: How to Convert Excel to CSV without Opening
Method 3 – Setting Comma as Delimiter Globally
- Search for Region settings in the Windows search bar.
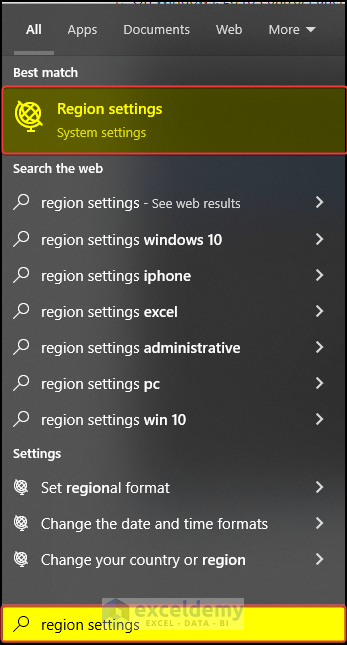
- Click on Settings.
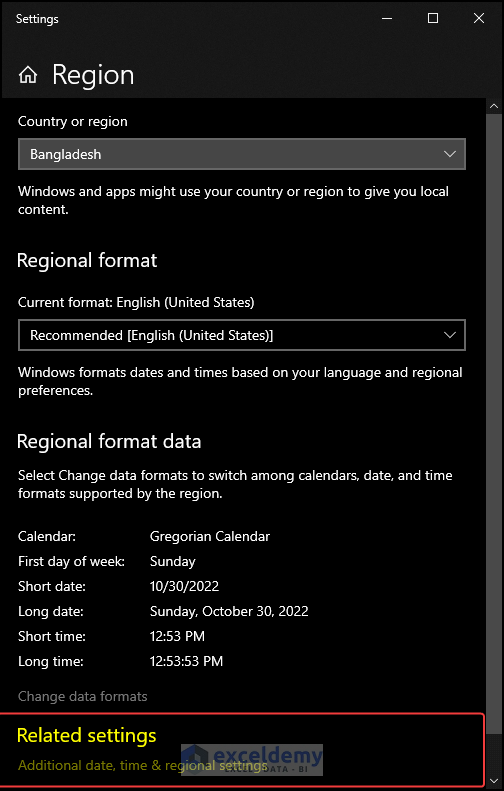
- In the Region settings window, select Additional date, time, & regional settings under Related settings.
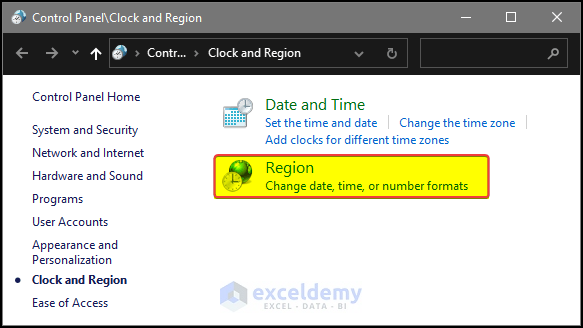
- Click on Region.
- In the new window, click Additional settings.
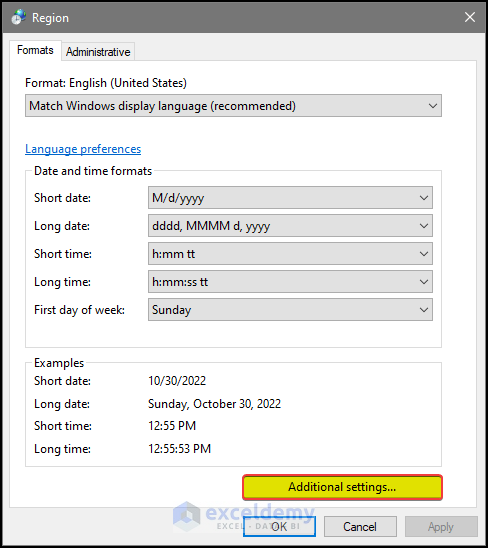
- Set the list separator to a comma.
- Click OK.
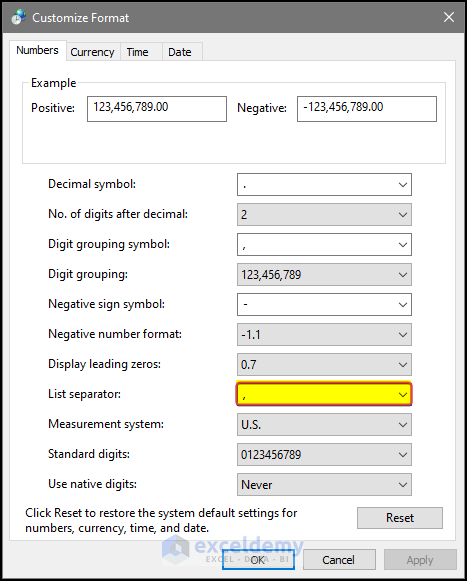
- After clicking OK, the new CSV file will look like the below image.
- Now your CSV files will use commas as delimiters globally.
Read More: How to Convert Excel Files to CSV Automatically
How to Save an Excel CSV File with Commas
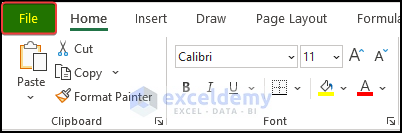
- Click on File in the Excel worksheet.
- From the start menu, select Options.
- In the new window that opens (Excel Options), click on Advanced.
- Ensure that the Use system separators box is unchecked.
- Set the Decimal separator to a period (“.”) and the Thousands separator to a comma (“,”).
- Click OK.
- To save the file as a CSV, go to Export.
- Click on Change File Type.
- From the Other File Type section, select CSV.
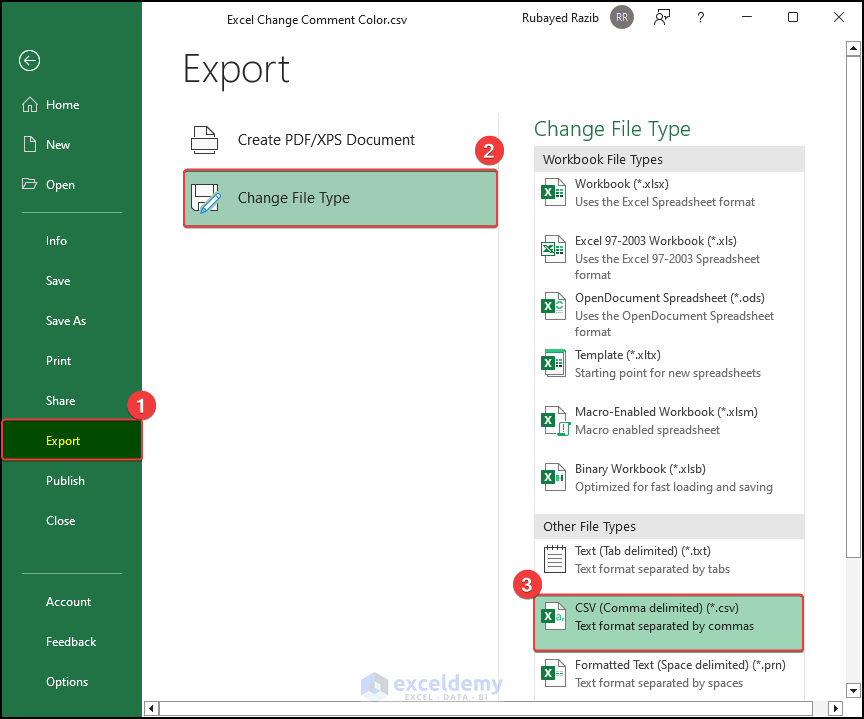
- Navigate to your desired location in the Save as file explorer window and save the file as CSV.
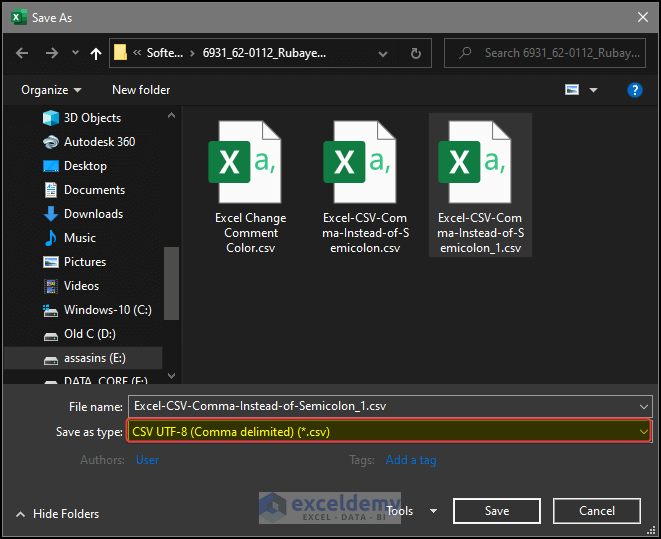
- After clicking Save, you’ll have a CSV file with a comma delimiter instead of a semicolon.
Read More: Save Excel as CSV with Double Quotes
How to Change Delimiter in Excel CSV
- Click on File in the Excel worksheet.
- From the start menu, select Options.
- In the new window named Excel Options, click on Advanced.
- Notice that the Use system separators box is unchecked.
- Change the Decimal separator to a period and the Thousands separator to a comma.
- Click OK.
This way, you can easily adjust the delimiter in your Excel CSV files.
Read More: How to Save Excel File as CSV with Commas
Related Articles
- How to Create CSV File from Excel
- How to Convert Excel File to Text File with Comma Delimited
- Convert Excel to Comma Delimited CSV File
- [Fixed!] Excel Not Saving CSV with Commas
- How to Make a CSV File in Excel for Contacts

