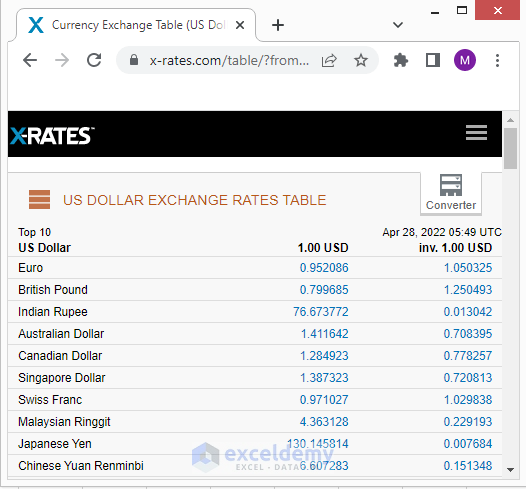
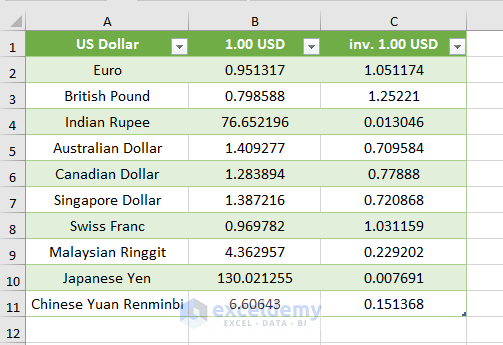
Import a US DOLLAR EXCHANGE RATES TABLE from the website X-RATES.
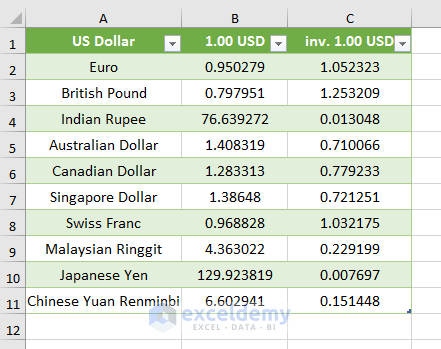
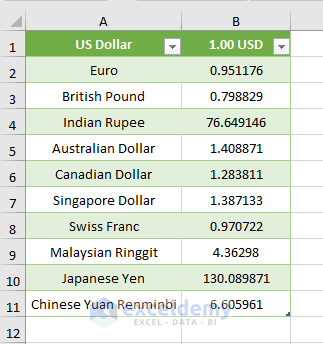
On 28th April, 1 USD was equal to 0.95 Euro and 1 Euro was equal to 1.05 USD.
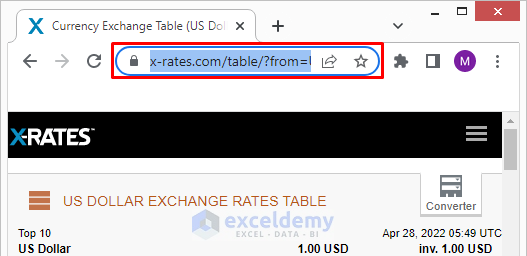
STEP 1 – Copy the Website Link to Import Data
- Open the website and click the address bar.
- Press Ctrl + C.
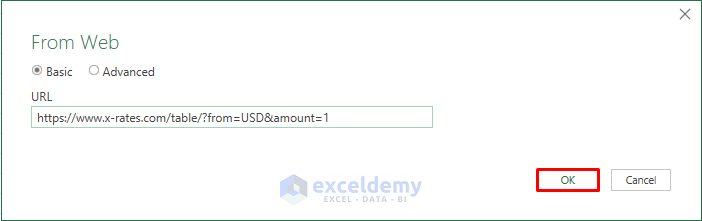
STEP 2 – Paste the Website URL to Extract Data into Excel
- Open the Excel application.
- Go to the Data tab and select From Web.

- Paste the link in URL by pressing Ctrl + V.
- Click OK.
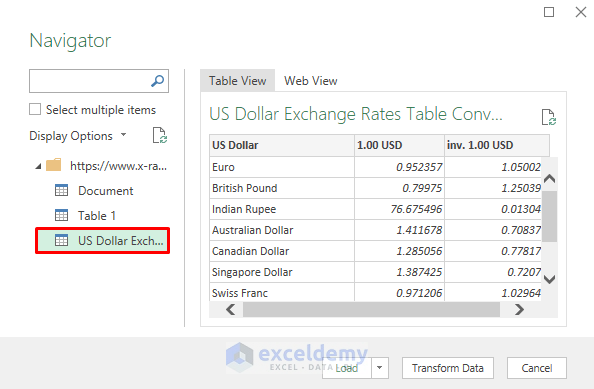
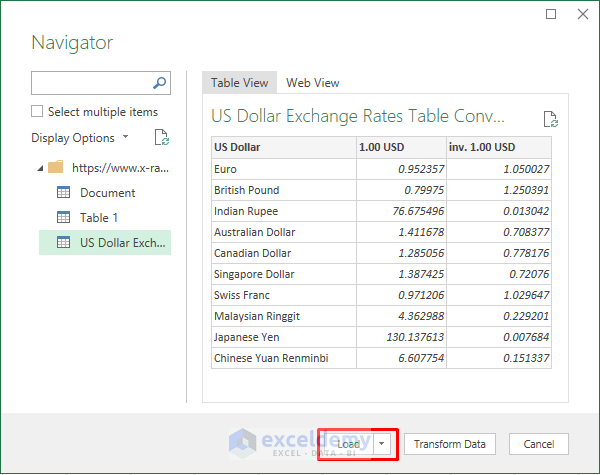
STEP 3 – Select the Data Table
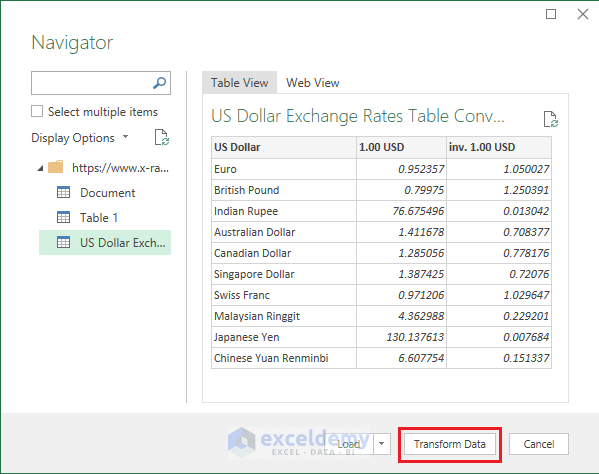
- In the Navigator window, select the data table.
- You can also use Web View to ensure the website is correct.
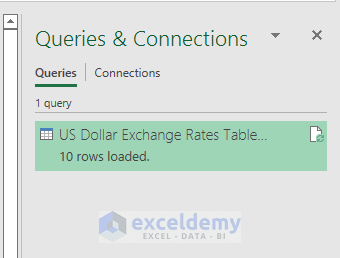
STEP 4 – Import Excel Data
- Select Load in the Navigator window.
You will see the imported data in your Excel workbook.
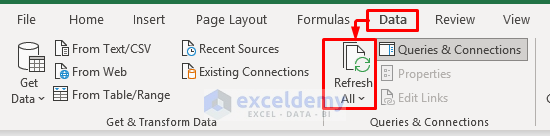
STEP 5 – Refresh the Imported Data
- Suppose you have deleted the 1.00 USD column.
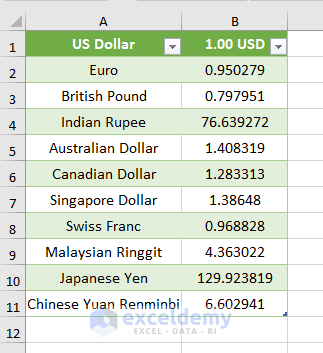
- Go to the Data tab and select Refresh.
You will get the data.
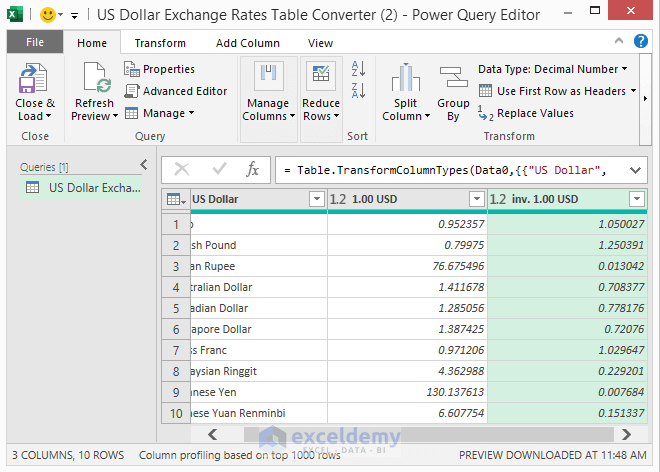
STEP 6 – Transform Excel Data
Delete unnecessary data before uploading it or use the Power Query Editor.
- To delete data permanently, go to Queries & Connections.
- Double-click the table. It will open the Power Query Editor.
- Select the column you want to delete.
- Press Delete.
- Select‘Close & Load’.
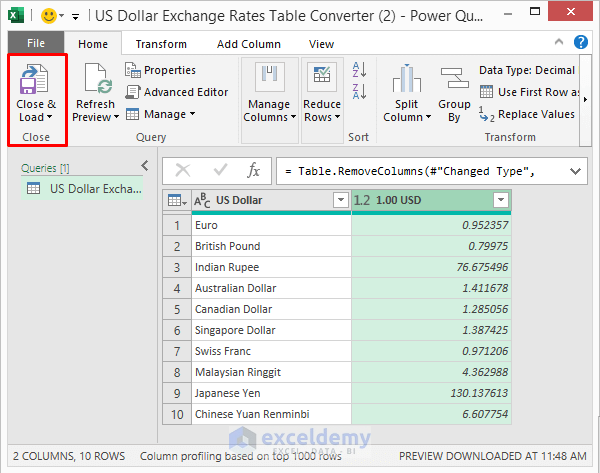
This is the output.
- To delete extra information permanently before loading the dataset, select Transform Data in Navigator. It will open the Power Query Editor.
Download Practice Book
Download the practice book here.
Related Articles
- How to Automate Copy and Paste from Website to Excel
- How to Scrape Data from a Website into Excel
- How to Extract Data from Website to Excel Automatically
- How to Extract Data from Multiple Web Pages into Excel
- How to Import Table from Website to Excel
- How to Import Data into Excel from Web
<< Go Back to Web Scraping in Excel | Importing Data in Excel | Learn Excel
Get FREE Advanced Excel Exercises with Solutions!
