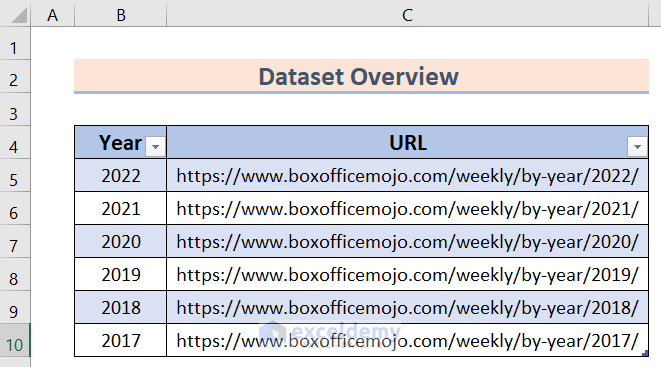
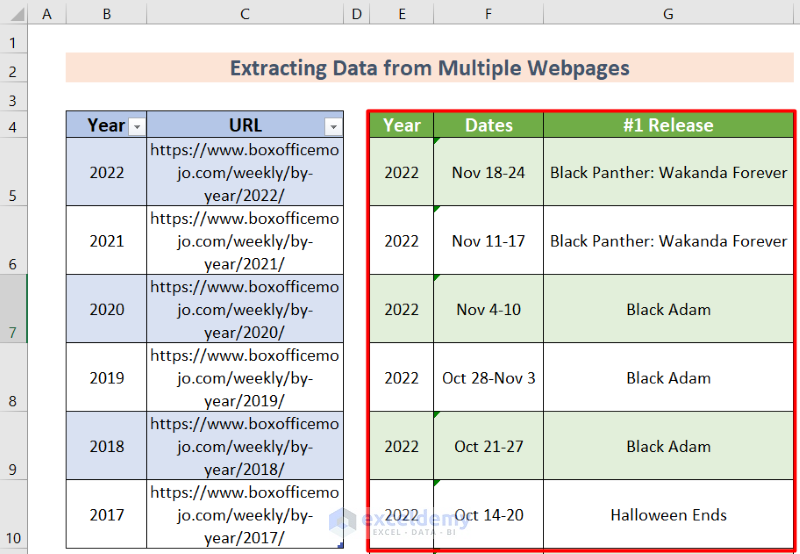
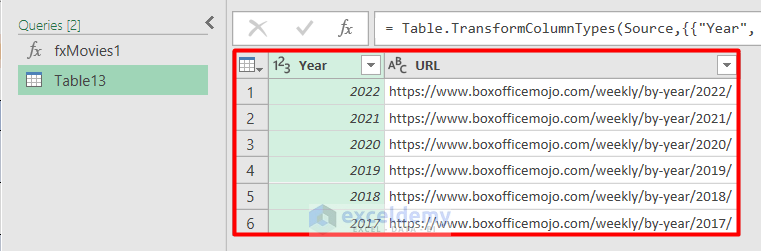
The dataset we will use has two columns called Year and URL, which link to articles of top movies for the respective year. We will use those URLs to extract data from multiple web pages into Excel.
Step 1 – Connect to the Web
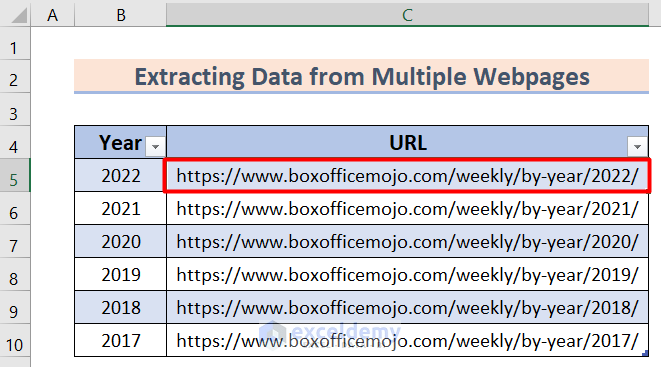
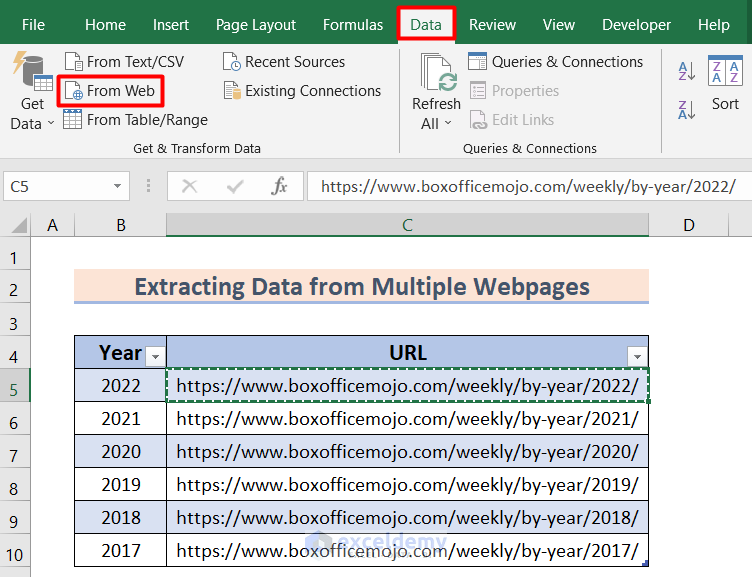
- Select the C5 cell and copy the URL.
- Go to the Data tab in your toolbar.
- Select the From Web option.
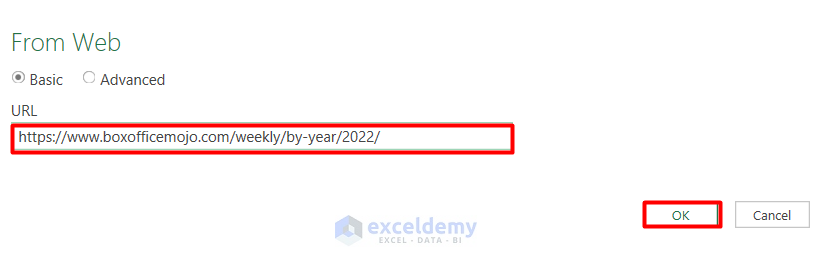
- A window will show up.
- Paste the copied URL and press OK.
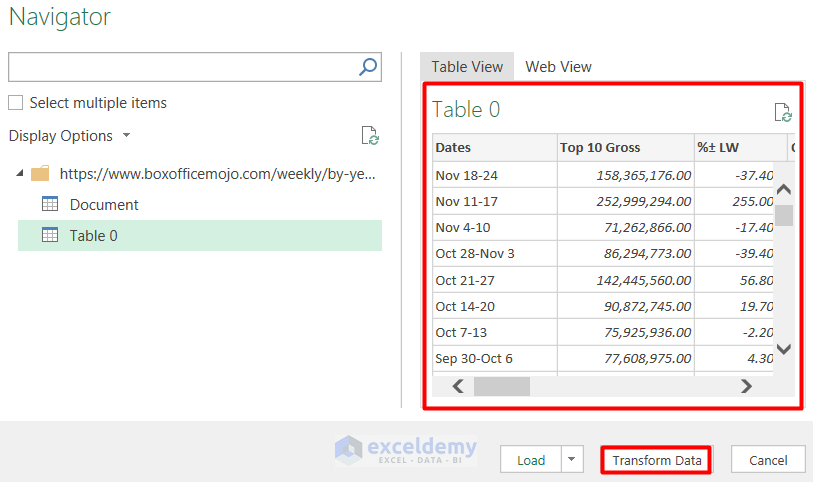
Step 2 – Open the Power Query Editor
- When the Navigator tab is opened, you can preview the table on the right side of the tab.
- Click on the Transform Data option.
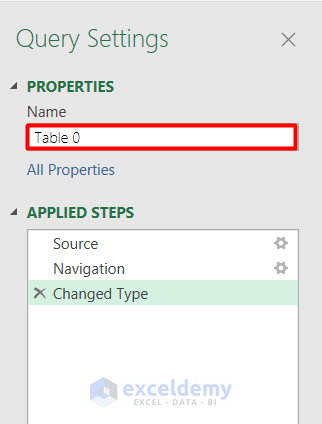
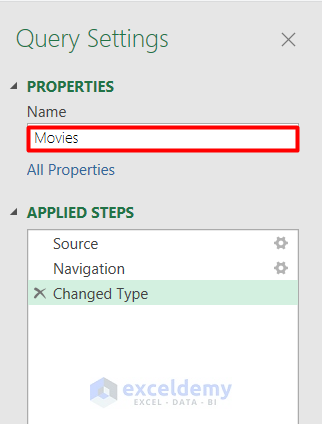
- In the Query Settings bar, select the Name option.
- Change the name to Movies.
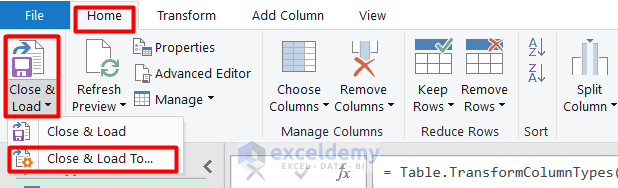
- Go to the Home tab and select the Close and Load option.
- From the drop-down menu, select the Close and Load To option.
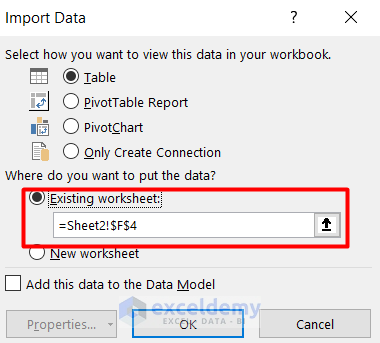
- A window will pop up.
- Select the Existing worksheet option.
- Press OK.
- Excel will show the data table in the E column.
Step 3 – Edit the Query Using the Advanced Editor
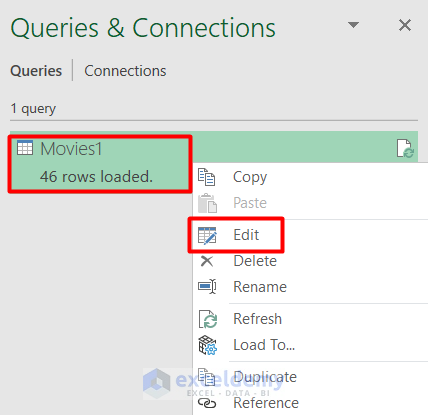
- From the Queries and Connections bar, select the Movies1 option and right-click on it.
- Select the Edit option.
- Select the Advanced Editor option.
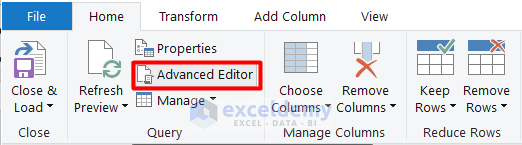
- You will find the following window.

- Replace the code with the following code and click on Done.
(URL) as table =>
let
Source = Web.Page(Web.Contents(URL)),
Data1 = Source{1}[Data],
#"Changed Type" = Table.TransformColumnTypes(Data1,{{"Header", type text}, {"Weight class", type text}, {"", type text}, {"2", type text}, {"3", type text}, {"Method", type text}, {"Round", Int64.Type}, {"Time", type time}, {"Notes", type text}})
in
#"Changed Type"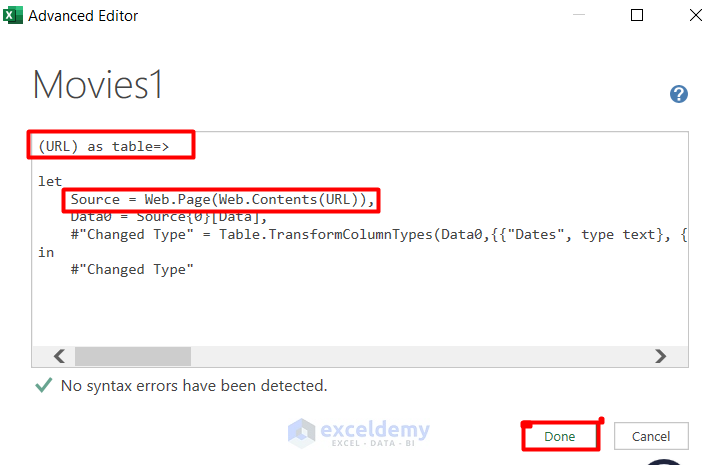
- The following window will appear. We will let the window remain the same.
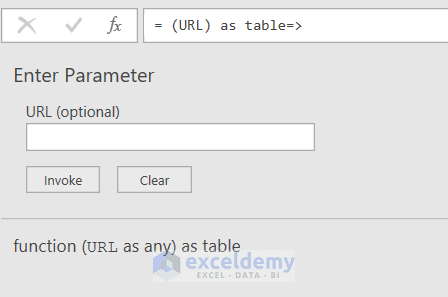
- Change the name of the function to fxMovies1.
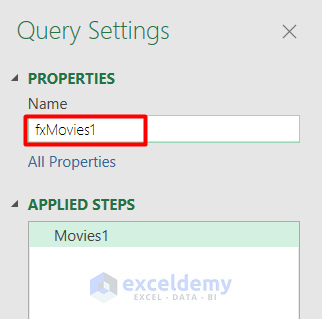
- Click on the Close and Load option.

- You will now find the function fxMovies1.

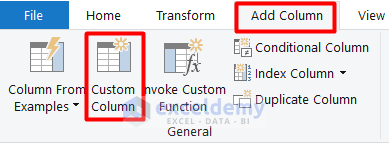
Step 4 – Add a Custom Column
- Select any of the cells of the C cell.
- Go to the Data tab and, under the Get and Transform Data option, select the From Table or Range option.

- Excel will show the following table.
- Go to the Add Column option.
- Select the Custom Column option.
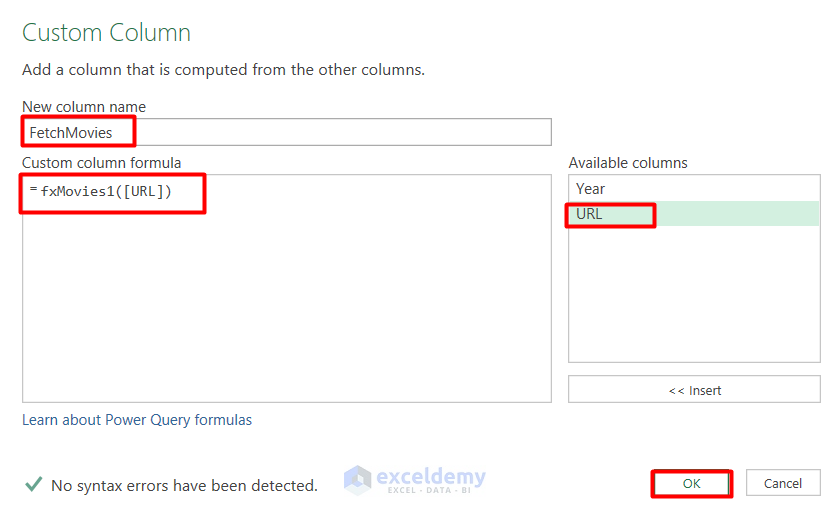
- A window will show up.
- Change the new column name to FetchMovies.
- Use the following custom column formula.
=fxMovies1([URL])- Press OK.
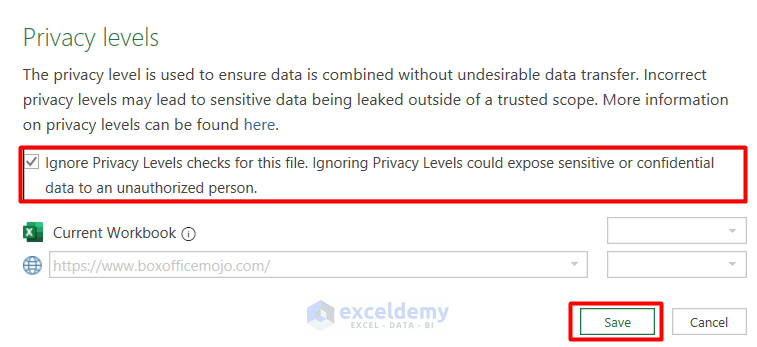
- A new window will show up. Select the Continue button.

- In the Privacy Levels window, select the option shown in the image and save.
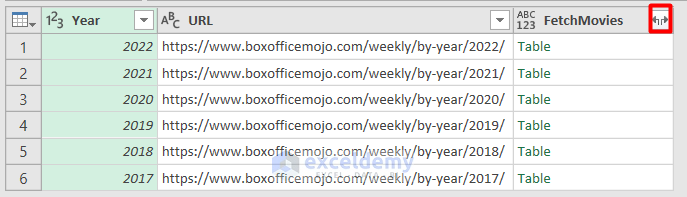
- Excel will show the following table. Click the icon on the top-right next to FetchMovies.
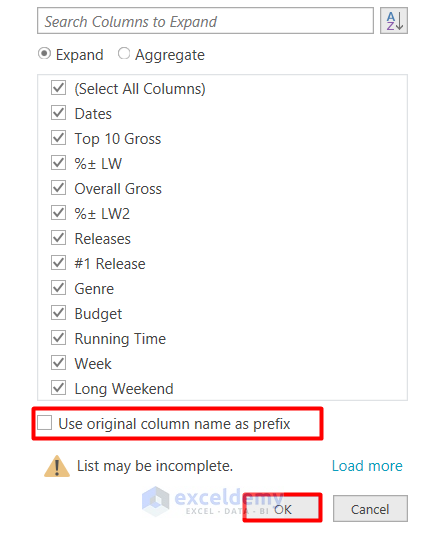
Step 5 – Remove the Prefixes from Extracted Data
- Uncheck the option for the prefix.
- Press the OK option.
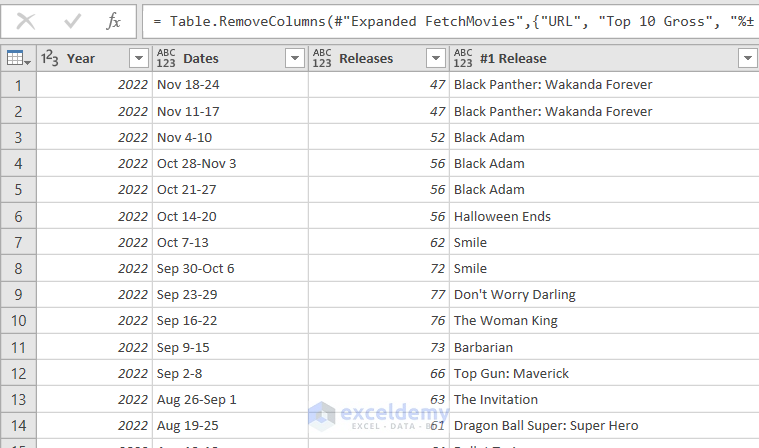
- Excel will show the following table in a preview.
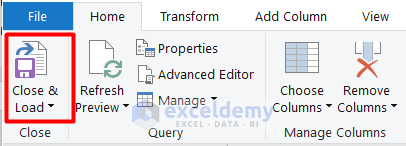
- In the Home tab, select the Close and Load option.
Step 6 – Final Result
- You will see all the movie names. Here’s a segment of the table.

Download the Practice Workbook
Related Articles
- How to Automate Copy and Paste from Website to Excel
- How to Import Data from Secure Website to Excel
- How to Extract Data from Website to Excel Automatically
- How to Import Data into Excel from Web
- How to Import Table from Website to Excel
- How to Scrape Data from a Website into Excel
<< Go Back to Web Scraping in Excel | Importing Data in Excel | Learn Excel


before Step 5, excel is showing this “please specify how to connect- edit credentials”
Dear KUNAR,
Thank you for your comment. It seems that you are encountering an issue with the “Edit Credentials” prompt in Excel. This prompt usually appears when there is a need to specify the connection details or credentials for accessing external data sources. Make sure you have marked the box in the Privacy Levels window.
If you are still experiencing issues or have any further questions, please let me know, and I’ll be happy to assist you further.
Best regards
Al Ikram Amit
Team ExcelDemy