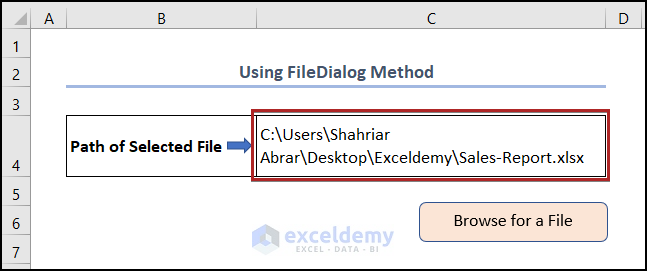
Method 1 – Using FileDialog to Browse for File Path in Excel VBA
Steps:
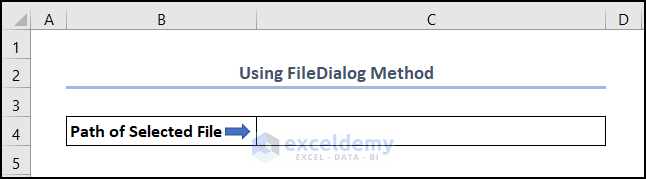
- Select cell C4 where the file path will be saved.
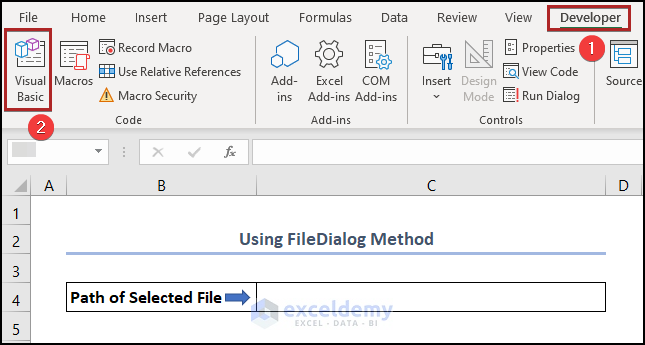
- Go to the Developer tab.
- Select Visual Basic.
- Alternatively, press ALT+F11 to do the same task.
- The Microsoft Visual Basic for Applications will open.
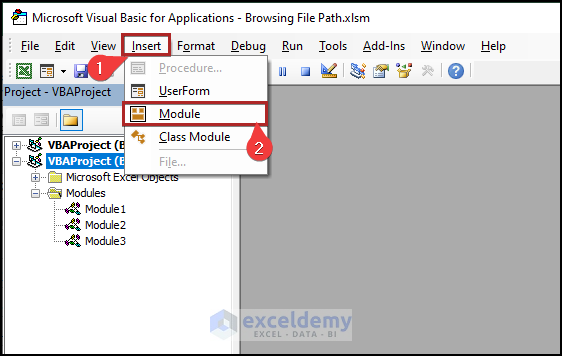
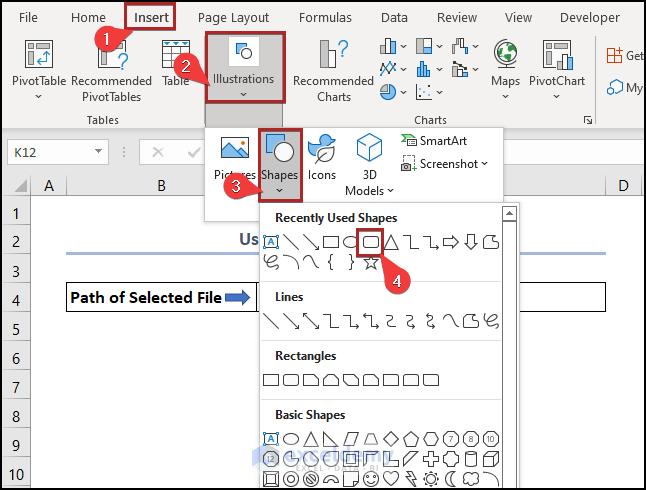
- Select the Insert tab.
- Select Module from the options.
- Enter the following code in the Module.
Sub File_Path()
Dim File_Picker As FileDialog
Dim my_path As String
Set File_Picker = Application.FileDialog(msoFileDialogFilePicker)
File_Picker.Title = "Select a File" & FileType
File_Picker.Filters.Clear
File_Picker.Show
If File_Picker.SelectedItems.Count = 1 Then
my_path = File_Picker.SelectedItems(1)
End If
ActiveSheet.Range("C4").Value = my_path
End Sub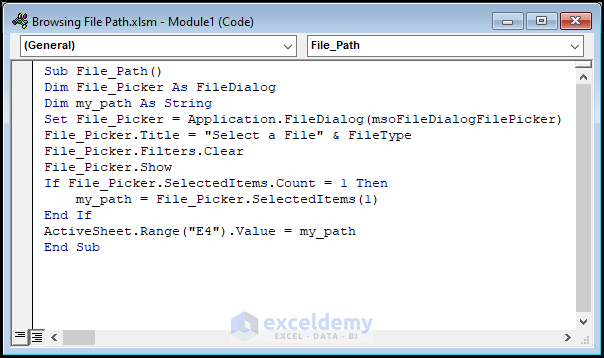
VBA Code Explanation
Sub File_Path()
Dim File_Picker As FileDialog
Dim my_path As String
- Create the macro and give it the name File_Path.
- Define the two variables.
Set File_Picker = Application.FileDialog(msoFileDialogFilePicker)
File_Picker.Title = “Select a File” & FileType
File_Picker.Filters.Clear
File_Picker.Show
- Set the File_Picker variable to use the File Open Dialog box.
- Set the title of the dialog box as Select a File.
- Display the dialog box.
If File_Picker.SelectedItems.Count = 1 Then
my_path = File_Picker.SelectedItems(1)
End If
- VBA will check if we have chosen any file, and when it is true it will assign that file path to our my_path variable.
ActiveSheet.Range(“C4”).Value = my_path
End Sub
- The file path stored in the my_path variable shows in cell C4 in the active worksheet.
- In the worksheet select the Insert tab.
- Click on the Illustrations group icon.
- Select the Shapes option.
- Select Rectangle: Rounded Corners from the available shapes.
- Place the cursor inside the cell area of the worksheet and it will change to a plus (+) sign.
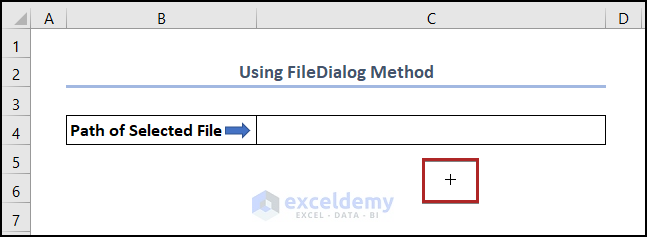
- Expand the plus sign by clicking and holding the mouse to create a rectangle.
- Enter the phrase Browse for a File inside the shape.
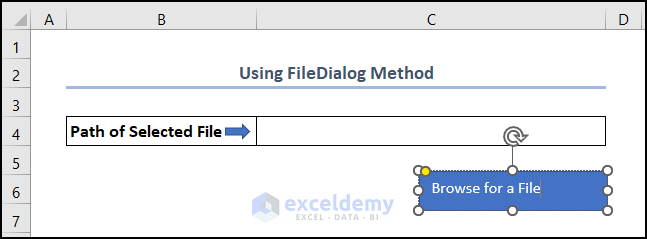
- Change the shape fill color.
- The newly created shape is ready to use as a button.
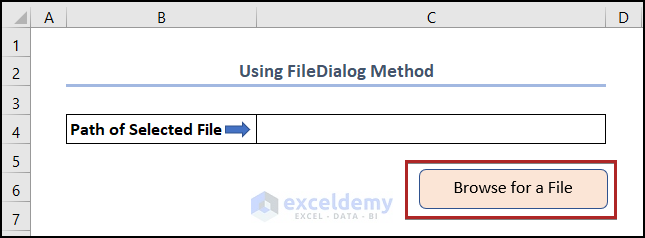
- Right-click on the shape.
- Select Assign Macro from the menu.
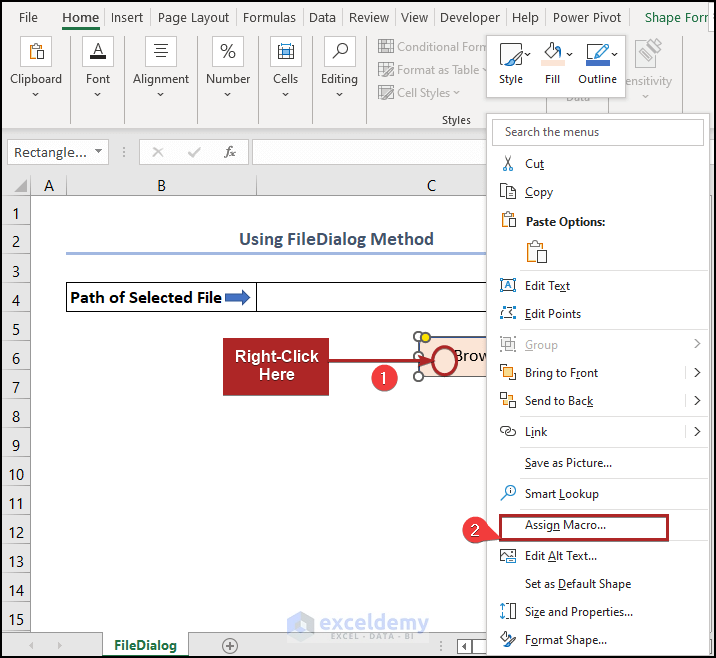
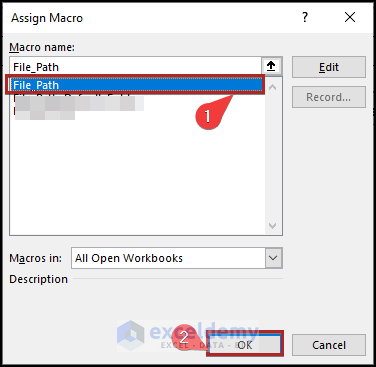
- The Assign Macro dialog box opens.
- Select the macro File_Path.
- Click OK.
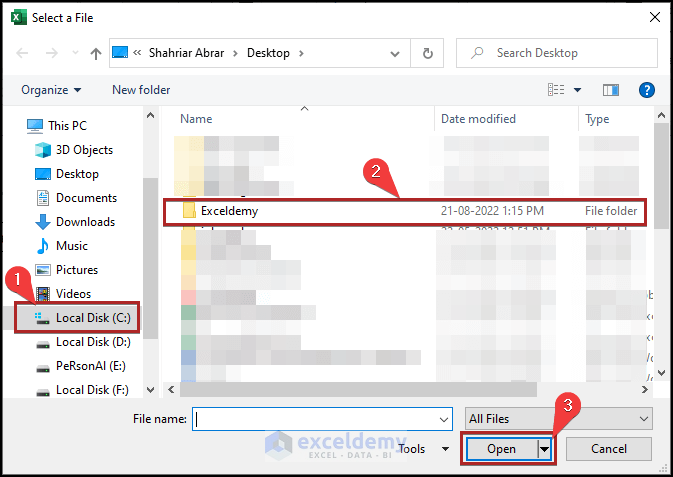
- Click on the Browse for a File button.
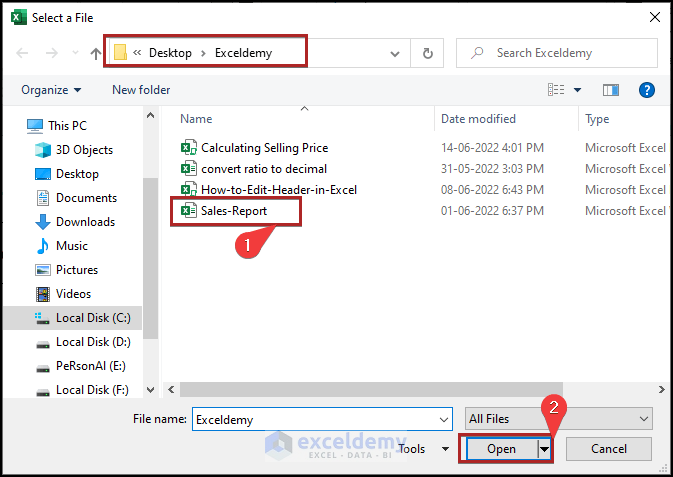
- The Select a File dialog box opens.
- Go to Local Disk (C:).
- Select the folder Exceldemy.
- Click Open.
- Select the file Sales-Report.
- Click Open.
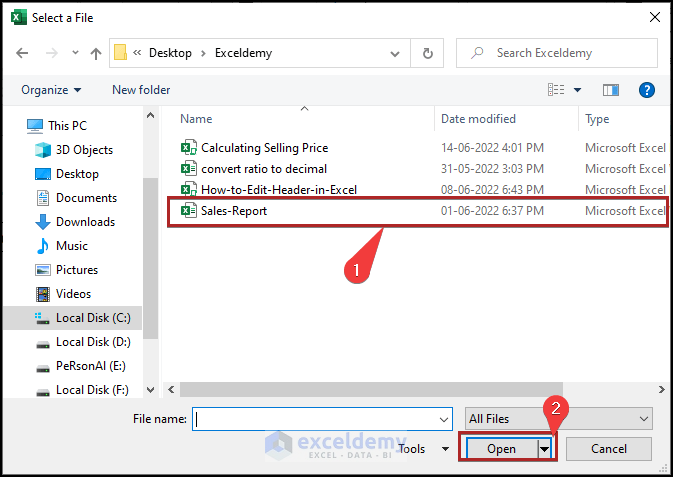
- This stores the file path of the file Sales-Report in cell C4.
Read More: Excel VBA to Open Workbook from Path in Cell
Method 2 – Opening Default File Dialog Folder to Browse for File Path in Excel VBA
Steps:
- Open the Code Module.
- Paste the following code into the Module.
Sub File_Path_Default_Folder()
Dim File_Picker As FileDialog
Dim my_path As String
Set File_Picker = Application.FileDialog(msoFileDialogFilePicker)
File_Picker.Title = "Select a File" & FileType
File_Picker.InitialFileName = "C:\Users\Shahriar Abrar\Desktop\Exceldemy"
File_Picker.Filters.Clear
File_Picker.Show
If File_Picker.SelectedItems.Count = 1 Then
my_path = File_Picker.SelectedItems(1)
End If
ActiveSheet.Range("C4").Value = my_path
End Sub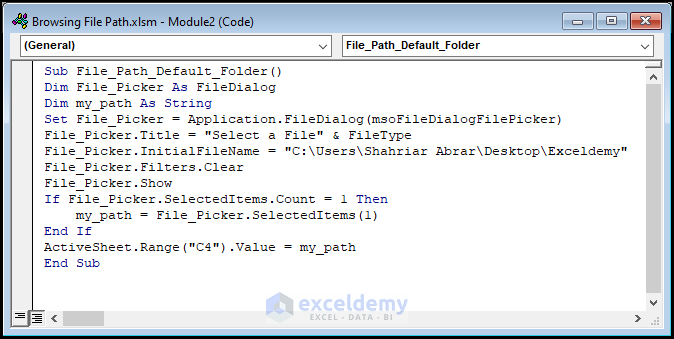
- Assign the macro to the Browse for a File button.
- Click on the button.
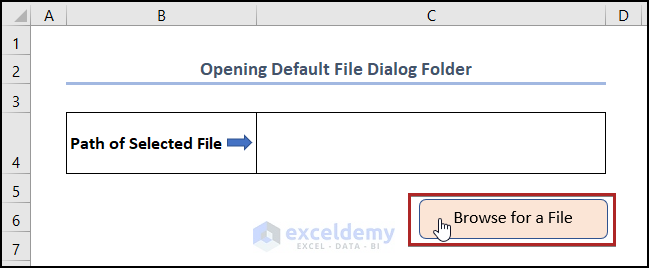
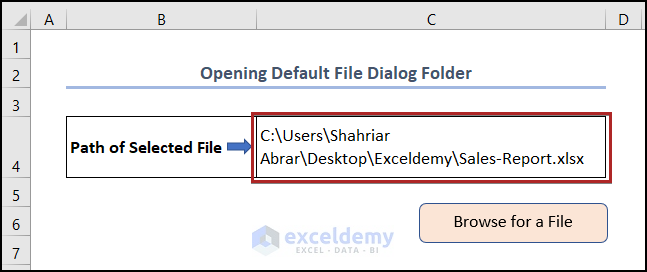
- The Select a File dialog box opens.
- The Exceldemy folder is open as default.
- Select Sales-Report and click Open.
- This stores the file path in cell C4.
Read More: How to Open Workbook from Path Using Excel VBA
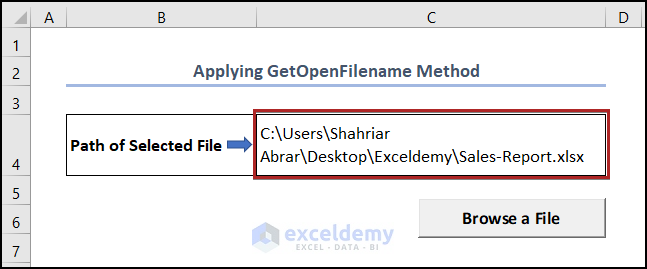
Method 3 – Applying GetOpenFilename Method Browse for File Path in Excel VBA
Steps:
- Select the Developer tab.
- Click on Insert on the Controls group.
- Select Command Button under the ActiveX Controls section.
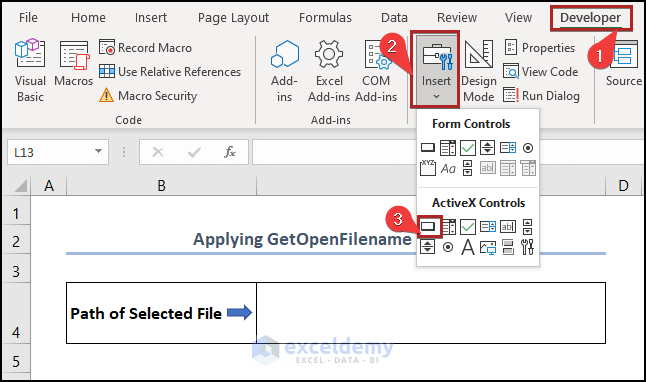
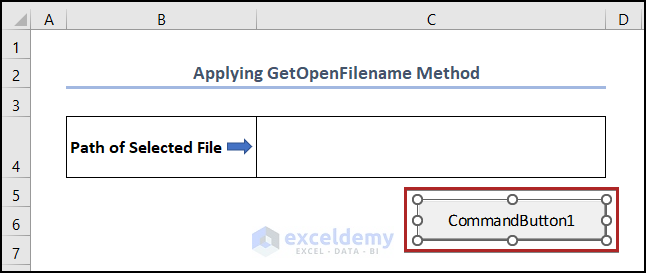
- This inserts CommandButton1 into our worksheet.
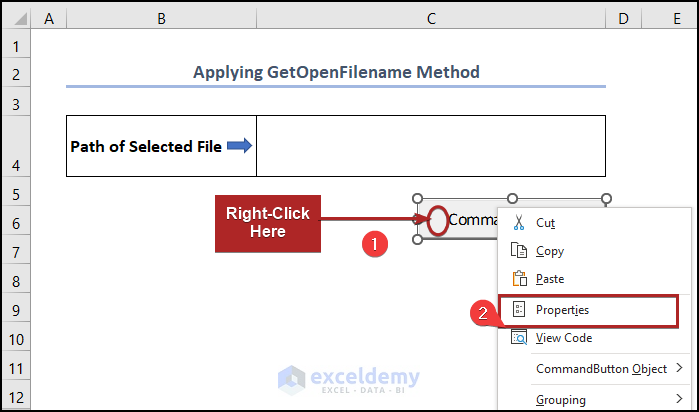
- Right-click on the button.
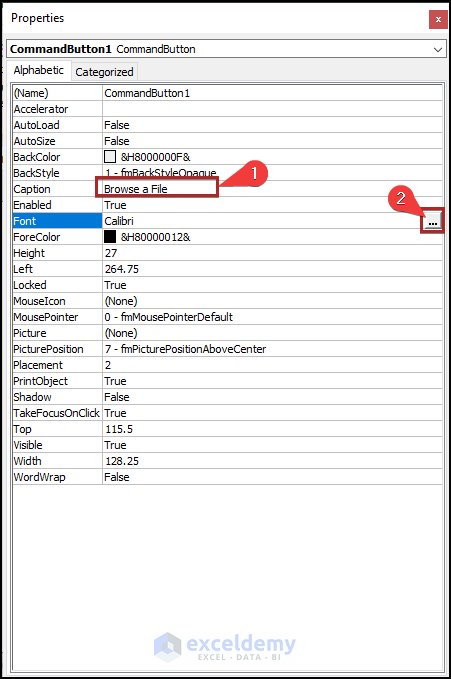
- Select Properties from the context menu.
- Change the Caption to Browse a File.
- Click on the ellipses beside the Font option.
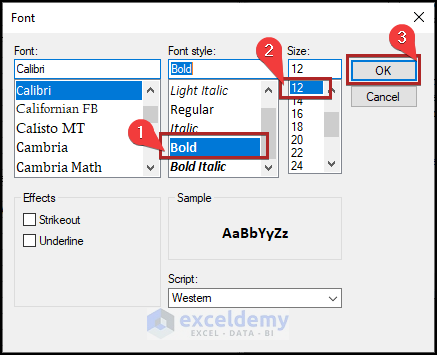
- Select Bold as Font Style.
- Select 12 as the Size.
- Click Ok.
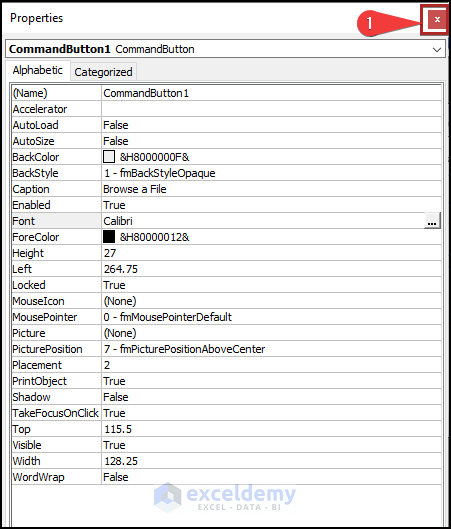
- Close the window.
- Double-click on the Command Button.
- This opens the Code Module with a portion of code written already.
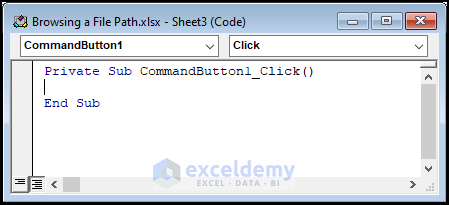
- Enter the following code in the Module.
Private Sub CommandButton1_Click()
Dim my_file As String
my_file = Application.GetOpenFilename()
Worksheets("GetOpenFilename").Range("C4").Value = my_file
End Sub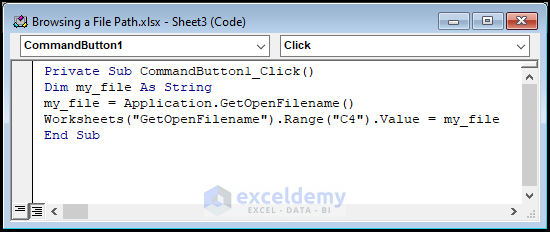
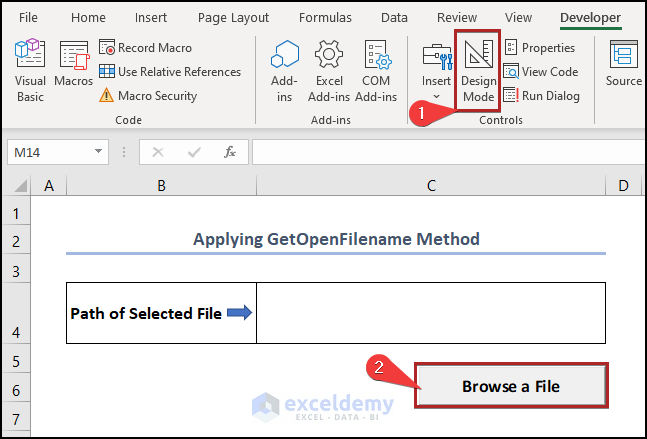
- Return to the worksheet.
- Unselect the Design Mode on the Controls group.
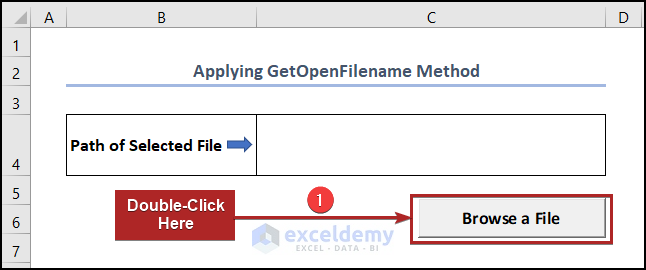
- Click on the Browse a File button.
- Select Sales-Report from the list.
- Click Open.
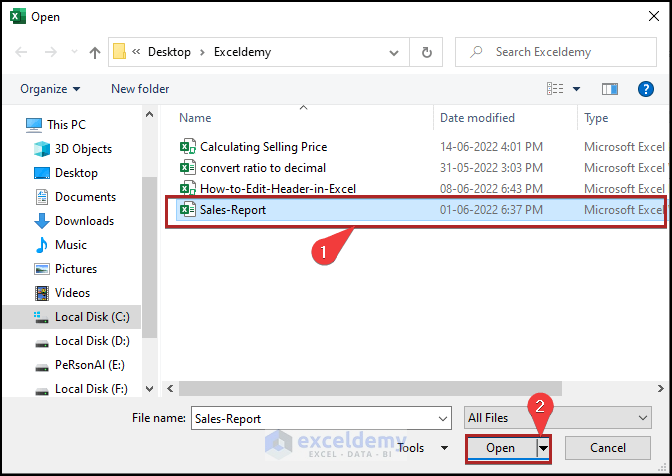
- This enters the file path in cell C4.
Read More: How to Open Folder and Select File Using Excel VBA
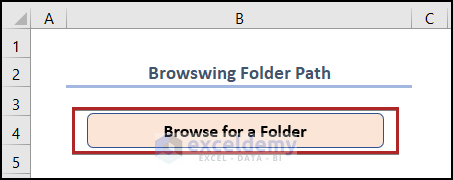
How to Browse for Folder Path Using Excel VBA
Steps:
- Create a button Browse for a Folder as we did in Example 1.
- Open the Code Module as in Example 1.
- Paste the following code into the Module.
Sub Folder_Path()
Dim Pick_Folder As FileDialog
Dim my_folder As String
Set Pick_Folder = Application.FileDialog(msoFileDialogFolderPicker)
With Pick_Folder
.Title = "Select A Folder"
.AllowMultiSelect = False
If .Show <> -1 Then Exit Sub
my_folder = .SelectedItems(1) & "\"
End With
MsgBox "Folder Path is: " & my_folder
End Sub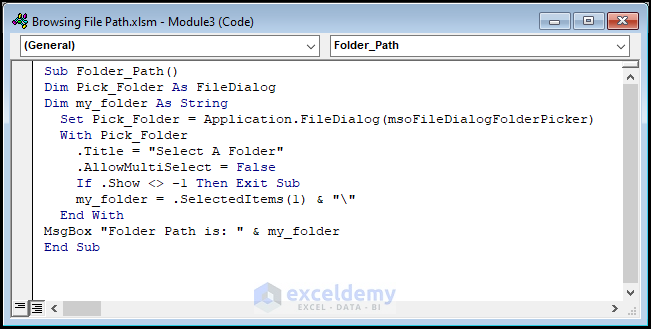
- Assign the macro to the button as in the previous example.
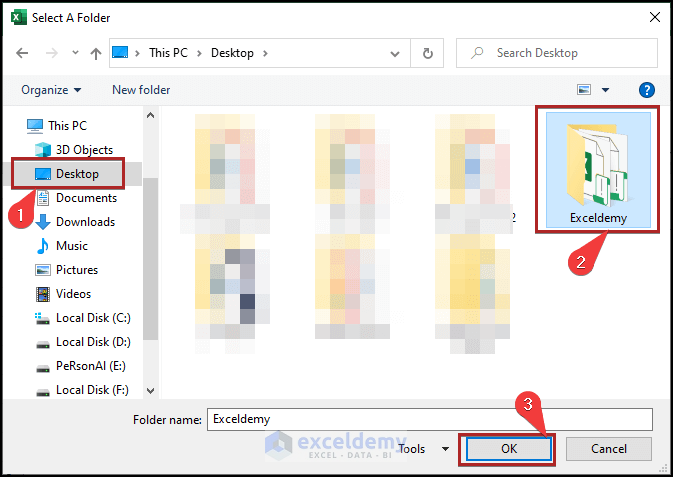
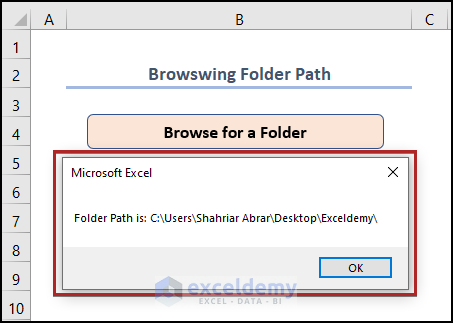
- Select the button Browse for a Folder.

- Select Desktop as location.
- Select the Exceldemy folder.
- Click Ok.
- A message box appears, stating the folder path.
Read More: How to Open File Dialog Default Folder with Excel VBA
Download Practice Workbook
Related Articles
- Excel VBA to Open Workbook in Background
- How to Open Workbook as Read-Only with Excel VBA
- How to Open Workbook with Variable Name with Excel VBA
- How to Open Workbook and Run Macro Using VBA

