Example 1 – Using GetOpenFilename to Open Folder and Select File
Option 1 – Setting Variable as Variant
Steps:
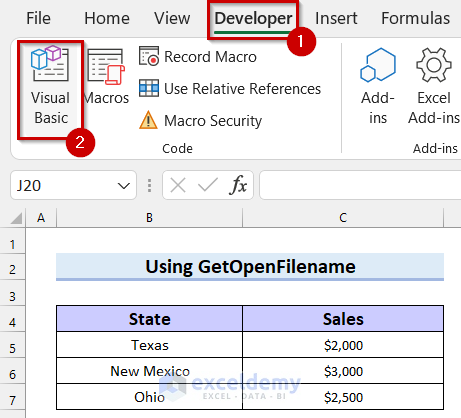
- Go to the Developer tab.
- Select Visual Basic.

The Visual Basic window is open.
- Select the Insert tab.
- Select Module.

A Module will open.
- Insert the following code in the Module.
Sub select_file()
Dim File_text As Variant
File_text = Application.GetOpenFilename("All xlsx files (*.xlsx*), *.xlsx", , "Select Your File")
Workbooks.Open Filename:=File_text
End Sub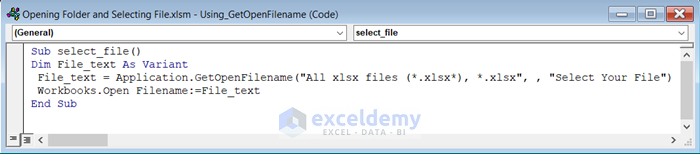
Code Breakdown
- We created a Sub Procedure named select_file.
- The variable is File_text as Variant.
- We’ll apply a built-in method of Application object which is GetOpenFilename. This method will return a dialog box so you can browse and select file.
- Customize the GetOpenFilename, the FileFilter, FilterIndex and Title of the dialog box. Filter Excel files, but you can filter for any other file type. You can use “Select Your File” as your dialog box name.
- Workbooks.Open Filename opens the selected file.
- End the Sub Procedure.
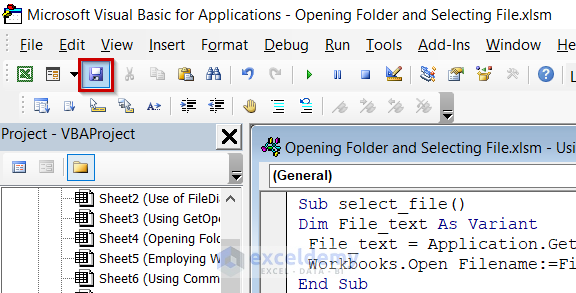
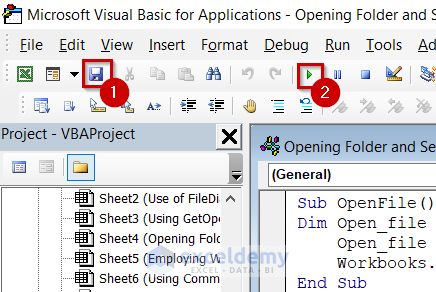
- Save the code.
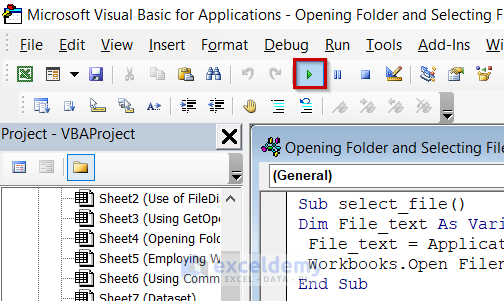
- Run the code.
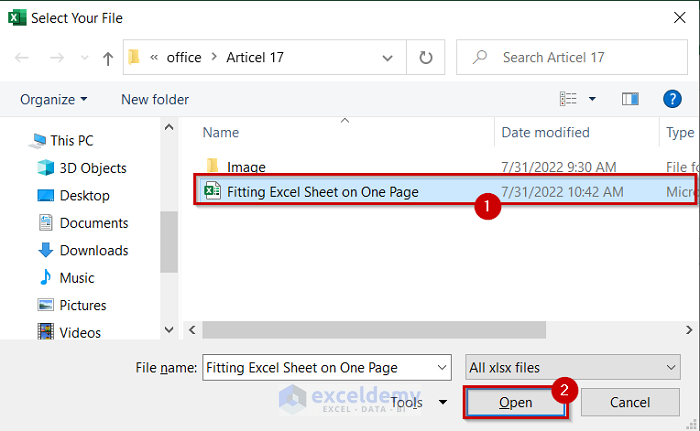
You will see a dialog box with your selected title.
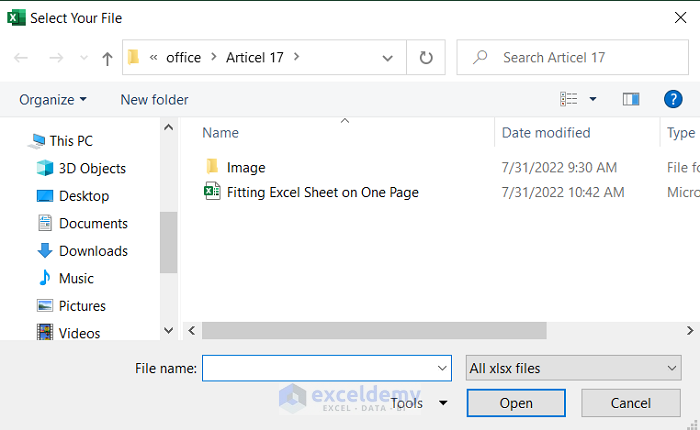
- Browse the folder you want to open.
- Select the file you want to open. We used Fitting Sheet on One Page.
- Open if you want to open the selected file.
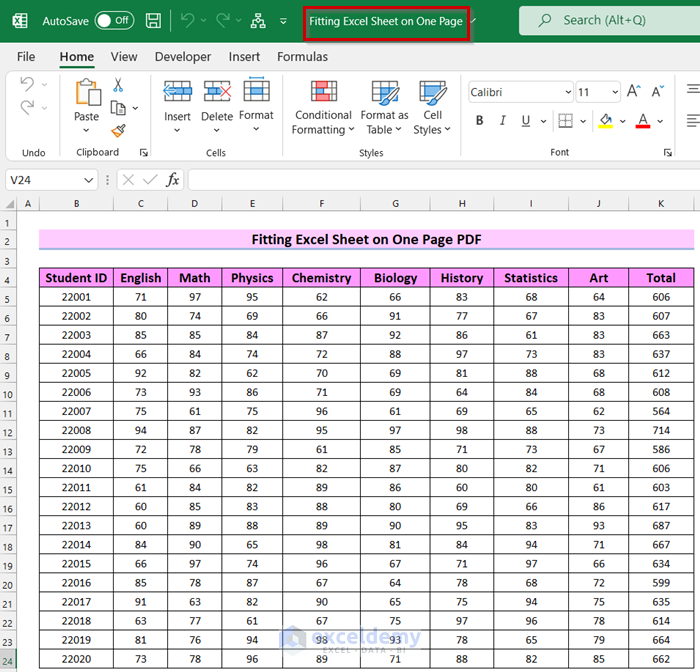
You will see your selected Excel file open.
Option 2 – Setting Variable as String
Steps:
- Go to the Developer tab.
- Select Visual Basic.
The Visual Basic window is open.
- Select the Insert tab.
- Select Module.

A Module will open.
- In that Module insert the following code.
Sub OpenFile()
Dim Open_file As String
Open_file = Application.GetOpenFilename(Title:="Browse & Select File", FileFilter:="All Excel Files (*.xls*), *xls*")
Workbooks.Open Filename:=Open_file
End Sub
Code Breakdown
- We created a Sub Procedure named OpenFile.
- We declared a variable named Open_file as String.
- We’ll use a built-in method of Application object which is GetOpenFilename. This method will return a dialog box so that you can browse and select files.
- In the GetOpenFilename method, we put the Title and FileFilter. The title of the dialog box can be “Browse & Select File”.
- Workbooks.Open Filename opens the selected file.
- End the Sub Procedure.
- Save the code.
- Run the code.
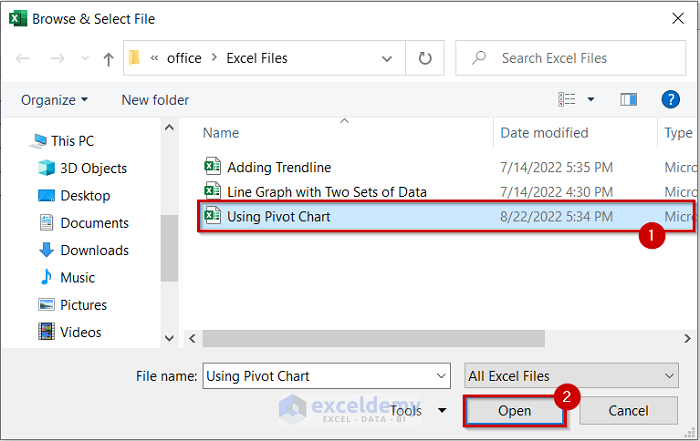
You will see a dialog box.
- Browse the folder you want and select the file. Example: Excel file named Using Pivot Chart.
- You can open your selected file by clicking on OK.
Read More: How to Open File Dialog Default Folder with Excel VBA
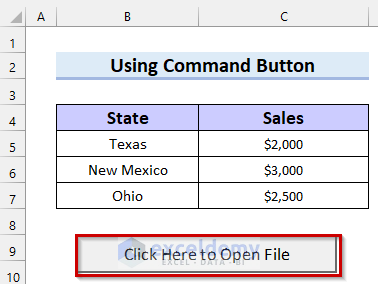
Example 2 – Use of Command Button to Open Folder and Select File
Steps:
- Go to the Developer tab.
- Select Insert.
A drop-down menu will appear.
- Select Command Button from ActiveX Controls.
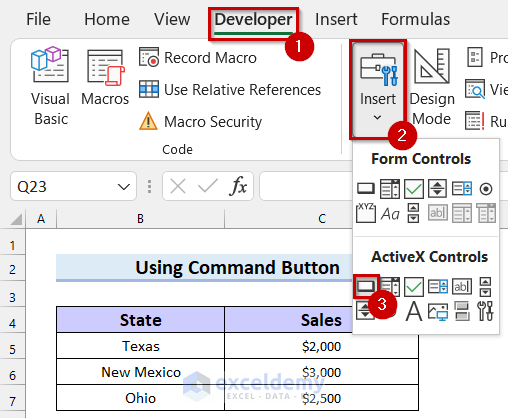
- Click and drag your mouse cursor where you want your Command Button.
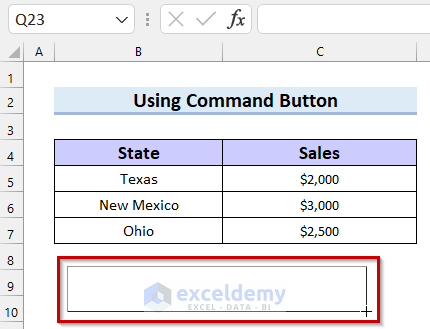
The Command Button will be inserted into your Excel sheet.
- Right-click on the Command Button.
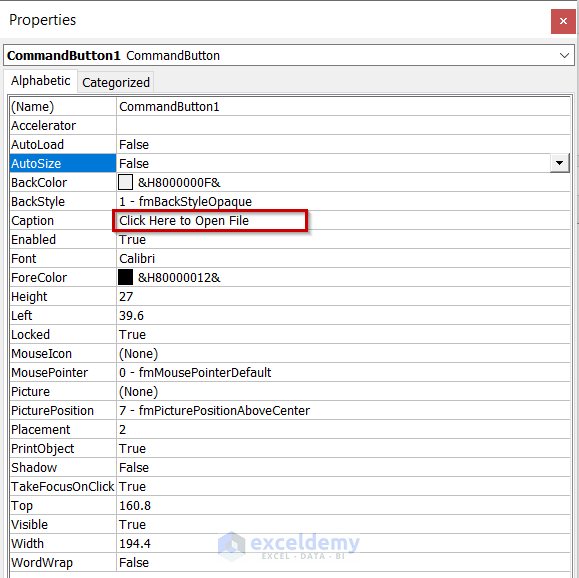
- Select Properties.
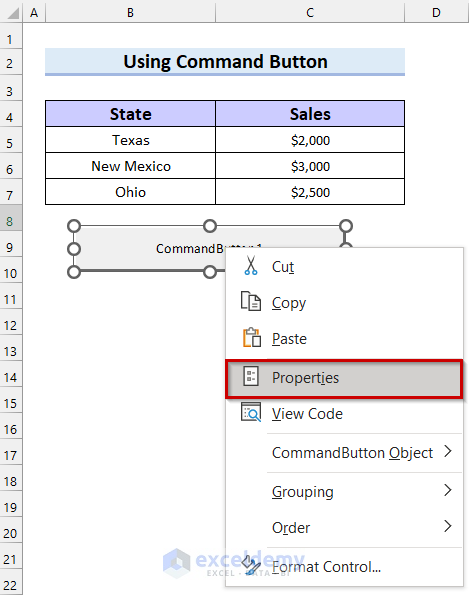
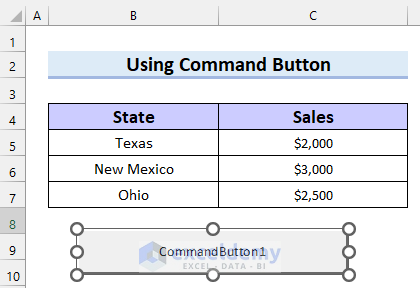
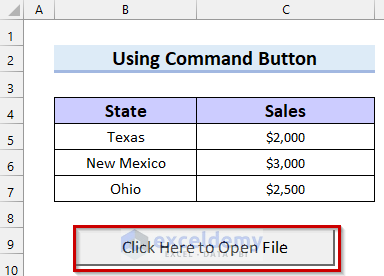
- Change the caption of your Command Button. We put “Click Here to Open File”.
In the following picture, you can see the caption has been updated.
- Double-click on the command button to open a Module.
A Module will open with a Private Sub Procedure named CommandButton1_Click.
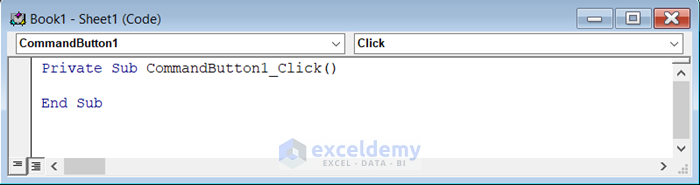
- Insert the following code in the Module.
Private Sub CommandButton1_Click()

Dim file_dialog_box As Office.FileDialog
Set file_dialog_box = Application.FileDialog(msoFileDialogFilePicker)

With file_dialog_box
.Filters.Clear
.Title = "Select Your Excel File"
.Filters.Add "All Excel Files", "*.xlsx?", 1
.AllowMultiSelect = False
.InitialFileName = "E:\office\Excel Files"
Dim selected_file As String

If .Show = True Then
selected_file = .SelectedItems(1)
End If

End With

If selected_file <> "" Then
Workbooks.Open selected_file
End If

End Sub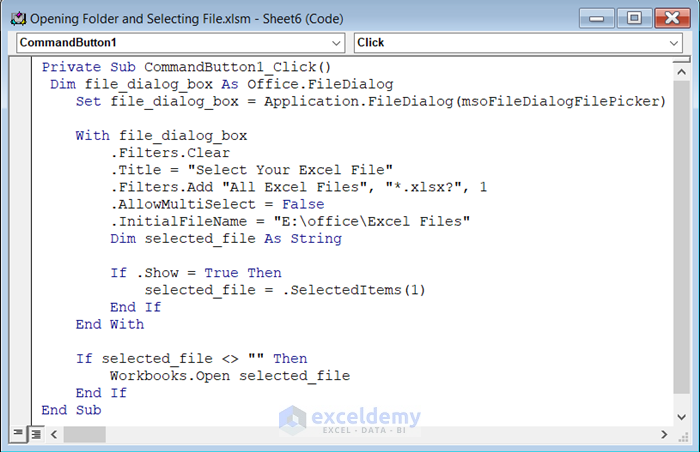
Code Breakdown
- A Private Sub Procedure was already created by the CommandButton. A Private Sub is only applicable for that specific sheet it is on.
- Choose a variable named file_dialog_box as Office.FileDialog.
- Use the Set statement to assign Application.FileDialog method to file_dialog_box.
- In the FileDialog method, select msoFileDialogFilePicker as fileDialogType.
- Use With statement to avoid repeating the same object name. Clear the applied filters on the dialog box using Filters.Clear property.
- Use the Tiltle property to add a title to the dialog box.
- Use Filters.Add property to add filters.
- Use the AllowMultiSelect property to define if you can select one or more than one file. You can set the value as “False” or “True” if you want to select multiple files.
- Use the InitialFilename property to select the initial folder location.
- Choose a variable named selected_file as String.
- Use an IF statement to show the file.
- End With Statement.
- Use another IF statement to open the file. It will check if there is any selected_file and open it using the Workbooks.Open method.
- End the IF statement.
- End the Sub Procedure.
- Save the code and go back to your worksheet.
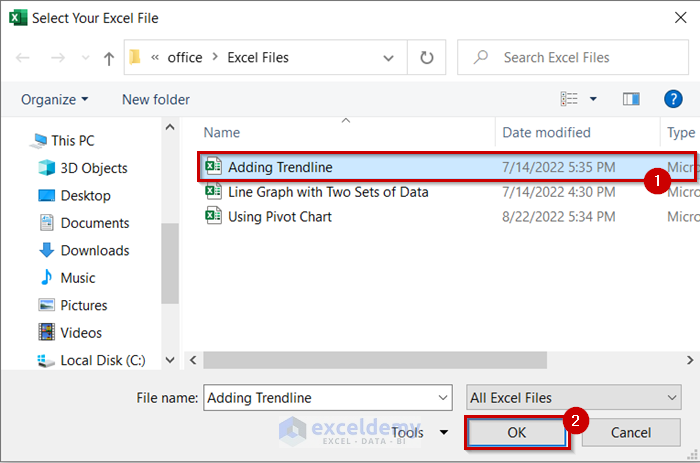
- Select the Command Button to open the folder.
- Select the file you want to open.
- Click OK.
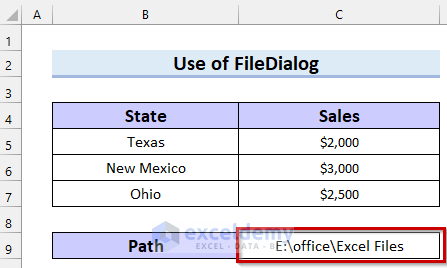
Example 3 – Applying a Cell Reference to Open a Folder and Select a File
In the following picture, we have written a folder path in cell C9.
Steps:
- Go to the Developer tab.
- Select Visual Basic.

The Visual Basic window will open.
- Select the Insert tab.
- Select Module.

A Module will open.
- Insert the following code in the Module.
Sub Select_File_withInitialPath()

Dim file_dialog_box As Office.FileDialog
Dim select_file As String
Dim my_workbook As Workbook
Dim my_worksheet As Worksheet

Set my_workbook = ThisWorkbook
Set my_worksheet = my_workbook.Worksheets("Use of FileDialog")
Set file_dialog_box = Application.FileDialog(msoFileDialogFilePicker)

With file_dialog_box
.Filters.Clear
.Filters.Add "Excel Files", "*.xlsx?", 1
.Title = "Choose Your Excel file"
.AllowMultiSelect = False
.InitialFileName = my_worksheet.Range("C9").Value

If .Show = True Then
select_file = .SelectedItems(1)
End If

End With

If select_file <> "" Then
Workbooks.Open select_file
End If

End Sub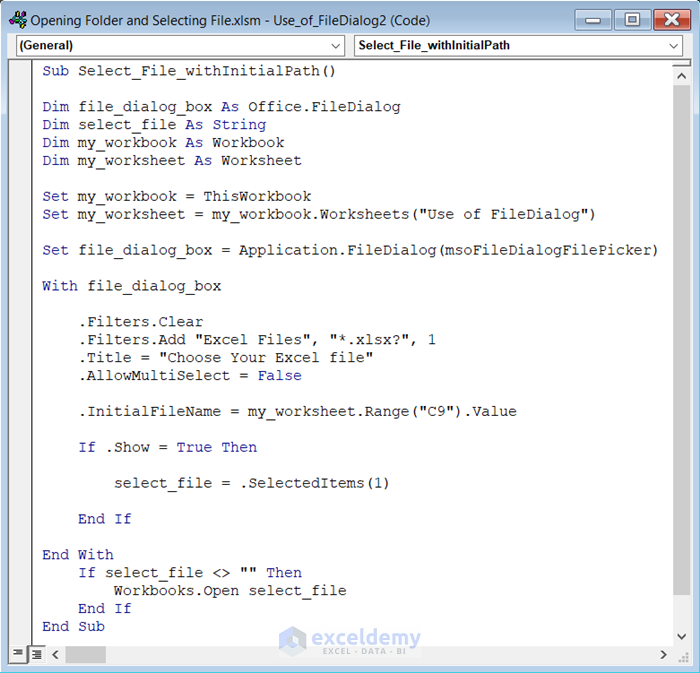
Code Breakdown
- Create a Sub Procedure named Select_File_withInitialPath.
- Choose a variable named file_dialog_box as Office.FileDialog, a 2nd variable named select_file as String, a 3rd variable named my_workbook as Workbook, and another variable named my_worksheet as Worksheet.
- Use a Set statement to assign ThisWorkbook as my_workbook, and another Set statement to assign a worksheet named “Use of FileDialog” as my_worksheet.
- Used the Set statement to assign Application.FileDialog method to file_dialog_box.
- In the FileDialog, select msoFileDialogFilePicker as fileDialogType.
- Used With statement to avoid repeating the same object name.
- Clear the applied filters on the dialog box by using Filters.Clear.
- Use Filters.Add to add filters.
- Use the Tiltle property to add a title to the dialog box.
- Use the AllowMultiSelect property to define if you can select one or more than one file. Set the value as “False” and “True” if you want to select multiple files.
- Use InitialFilename property to select the initial folder location. Apply a cell reference from my_worksheet to give the value.
- Use an IF statement to show the file.
- End With statement.
- Use another IF statement to open the file. It will check if there is any select_file and then open it using Workbooks.Open.
- End the IF statement.
- End the Sub Procedure.
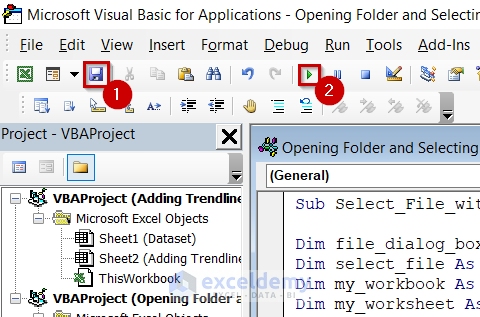
- Save the code.
- Run the code.
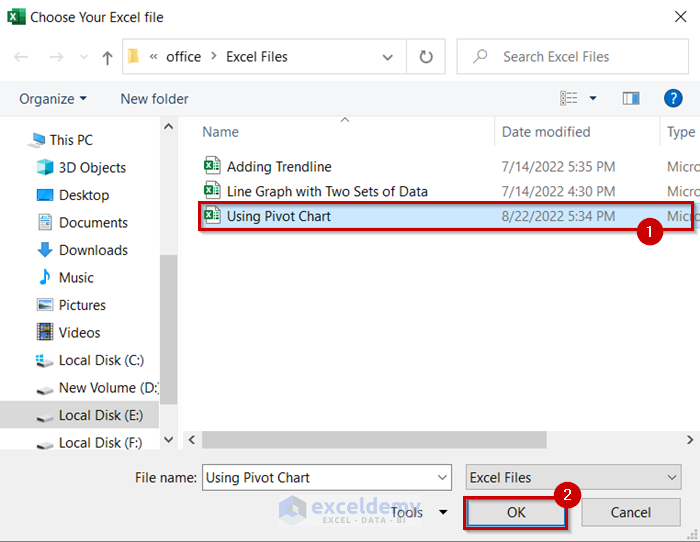
You will see the folder in your selected path open.
- Select the file you want.
- Click OK.
Read More: How to Open Workbook from Path Using Excel VBA
Example 4 – Using Excel VBA to Open the Folder that Contains the Active Workbook
Steps:
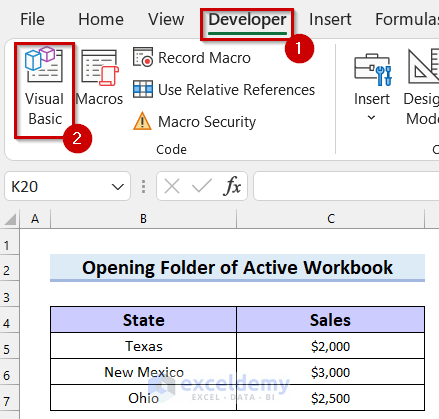
- Go to the Developer tab.
- Select Visual Basic.
The Visual Basic window has opened.
- Select the Insert tab.
- Select Module.

Module will open.
- Insert the following code in Module.
Sub Open_act_Wb_folder()

Dim file_dialog_box As Office.FileDialog
Dim select_file As String

Set file_dialog_box = Application.FileDialog(msoFileDialogFilePicker)

With file_dialog_box
.Filters.Clear
.Filters.Add "All Excel Files", "*.xlsx?", 1
.Title = "Choose Your Excel file"
.AllowMultiSelect = False
.InitialFileName = Application.ActiveWorkbook.Path

If .Show = True Then
select_file = .SelectedItems(1)
End If

If select_file <> "" Then
Workbooks.Open select_file
End If

End With

End Sub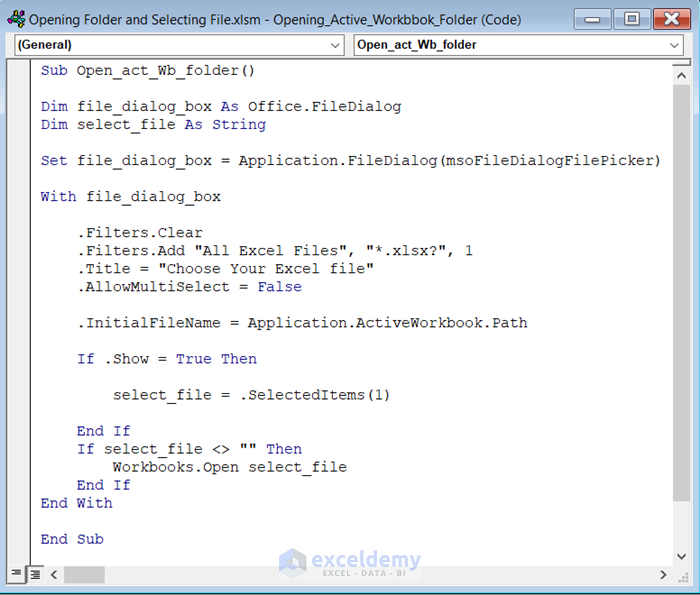
Code Breakdown
- Creates a Sub Procedure named Open_act_Wb_folder.
- Chooses a variable named file_dialog_box as Office.FileDialog, and another variable named select_file as String
- Uses the Set statement to assign Application.FileDialog to file_dialog_box.
- Next, in FileDialog, selects msoFileDialogFilePicker as fileDialogType.
- Uses With statement to avoid repetition of the same object name. Clear the applied filters on the dialog box using Filters.Clear.
- Uses Filters.Add to add filters.
- Uses Tiltle property to add a title to the dialog box.
- Uses AllowMultiSelect if you want to select one or more files. Set the value as “False” but, and “True” if you want to select multiple files.
- Uses the InitialFilename property to select the initial folder location. Use Application.ActiveWorkbbok.Path to set the path of the active workbook as initial folder location.
- Uses IF statement to show the file.
- Uses another IF statement to open the file. It will check if there is any select_file and open it using Workbooks.Open.
- End the IF statement.
- End With statement.
- End Sub Procedure.
- Save the code.
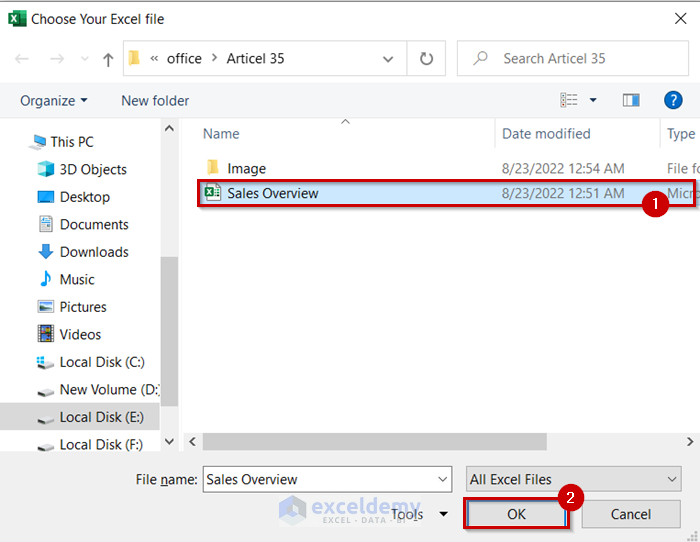
- Run the code.

You will see the folder of your current active workbook has opened.
- Select the file you want to open.
- Click OK.
Read More: Excel VBA to Open Workbook from Path in Cell
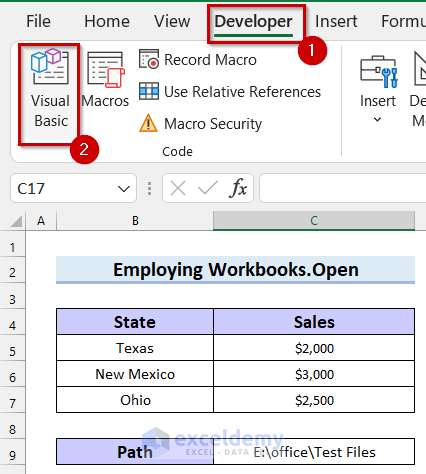
Opening the Selected File from a Folder Path
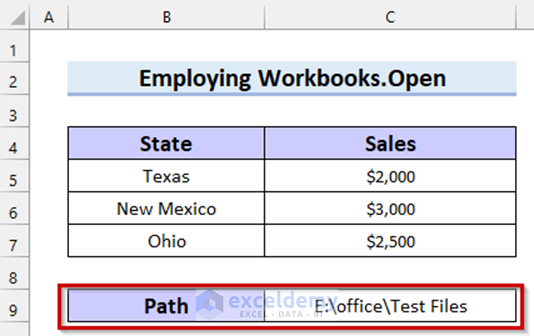
We have written the file path in my Excel sheet as shown below. We will use this cell reference to select the file location.
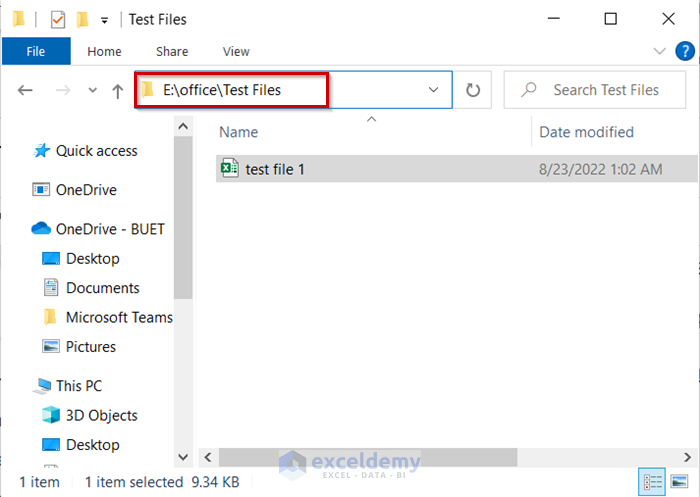
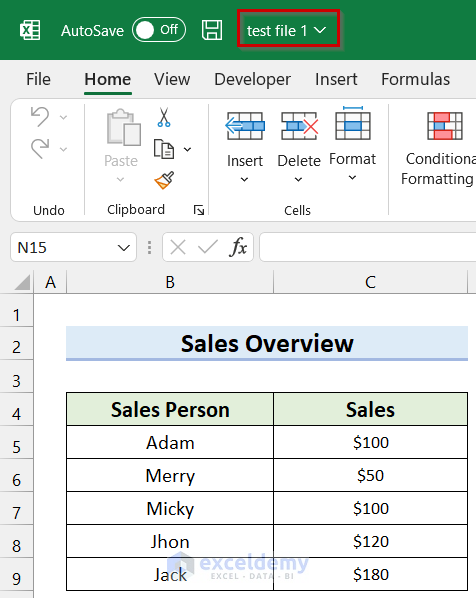
In this example we will open test file 1 using Excel VBA.
Steps:
- Go to the Developer tab.
- Select Visual Basic.
Now, you will see the Visual Basic window has opened.
- Insert tab.
- Select Module.
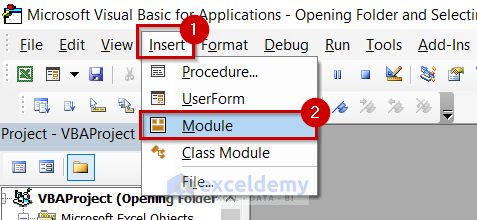
Module will open.
- Insert the following code in the Module.
Sub Open_selected_file()

Dim my_workbook As Workbook
Dim my_worksheet As Worksheet
Dim folder_path As String
Dim my_file As String
Dim selected_file As Workbook

Set my_workbook = ThisWorkbook
Set my_worksheet = my_workbook.Worksheets("Employing Workbooks.Open")

folder_path = my_worksheet.Range("C9").Value
my_file = Dir(folder_path & "\*.xlsx")

Set selected_file = Workbooks.Open(folder_path & "\" & my_file)

End Sub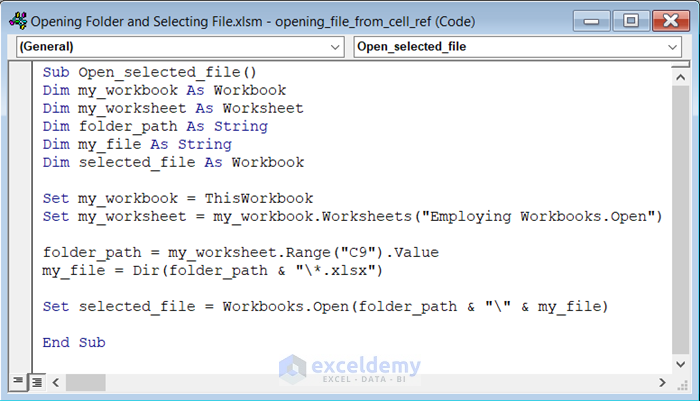
Code Breakdown
- Creates a Sub Procedure named Open_selected_file.
- Chooses a variable named my_workbook as Workbook, a 2nd variable named my_worksheet as Worksheet, and another variable named folder_path as String.
- After that, we declared a variable named my_file as String and another variable named selected_file as Workbook.
- Uses a Set statement to assign ThisWorkbook as my_workbook, and another Set statement to assign a worksheet named “Employing Workbooks.Open” as my_worksheet.
- Defines the folder_path using cell reference from my_worksheet.
- Uses the Dir function to select my_file. The Dir() function will return the first file that matches the path.
- Uses Workbooks.Open, open my_file as the selected_file.
- Save the code.
- Run the code.
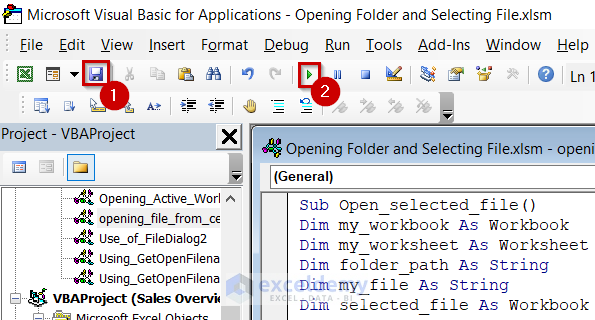
The selected Workbook is open from the created path.
Read More : How to Browse for File Path Using Excel VBA
Things to Remember
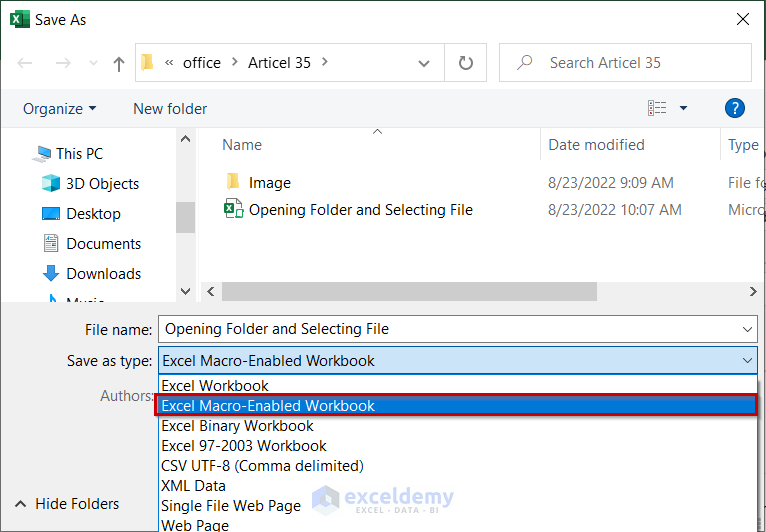
- When working with Excel VBA, you must save the file as Excel Macro-Enabled Workbook.
Download the Practice Workbook
Related Articles
- Excel VBA to Open Workbook in Background
- How to Open Workbook as Read-Only with Excel VBA
- How to Open Workbook with Variable Name with Excel VBA
- How to Open Workbook and Run Macro Using VBA


Je suis resté perplexe, vous êtes magnifique,j’ai trouvé ce que je cherche.Bravo
Je vous souhaite la réussite dans cette vie et un paradis à l’avenir.merci bcp
Hello AMGHAR,
Thanks for your feedback.
If you face any further problems, please share your Excel file with us in the comment section.
Regards
Arin Islam,
Exceldemy.