Method 1 – Using Workbook.Open Property
1.1 Open Workbook Mentioning File Path
Steps
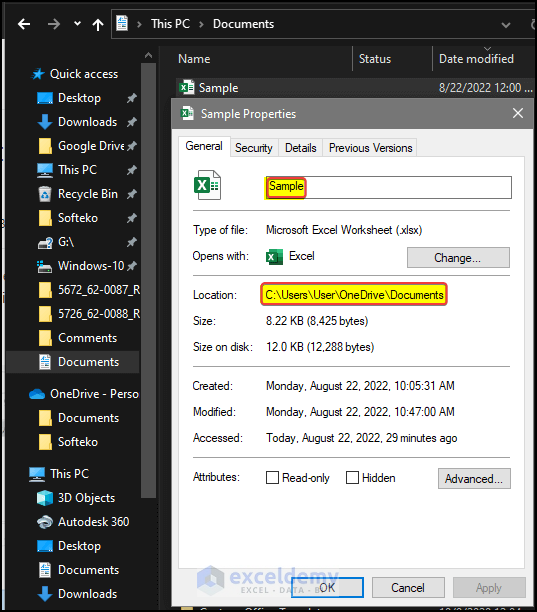
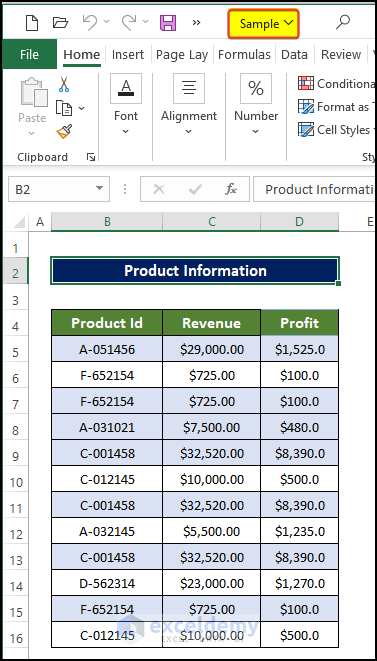
- We have a file stored in the documents folder to open.
- Use the file name as a variable and then open the file using a small VBA macro.
- The Exact file directory of the file is shown below in the properties window.

- Go to the Developer tab and click on Visual Basic. If you don’t have that, you have to enable the Developer tab. Press ‘Alt+F11’ for opening the Visual Basic Editor.

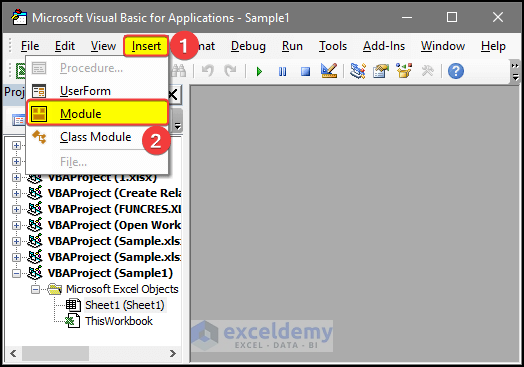
- A new dialog box will appear. In that dialog box, click on Insert > Module.
- In the Module editor window, type the following code:
Sub Open_with_File_Path()
Dim Open_File As String: File_path = "C:\Users\User\OneDrive\Documents\Sample"
Dim wrkbk As Workbook
Set wrkbk = Workbooks.Open(Filename:=File_path)
End Sub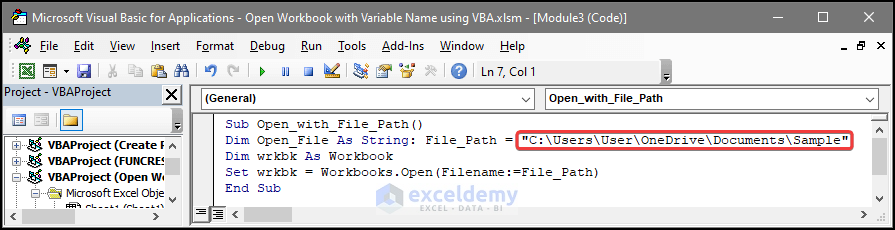
- Close the Module window.
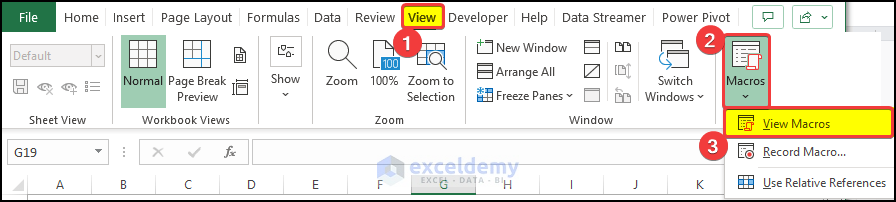
- Go to View tab > Macros.
- Cick on View Macros.
- After clicking View Macros, select the macros that you created just now. The name here is Open_with_File_Path. Then click Run.

- The Sample file is going to open.

Breakdown of the Code
Sub Open_with_File_Path()⮚ Provide a name for the sub-procedure, which is Open_with_File_Path.
Dim Open_File As String: File_path = "C:\Users\User\OneDrive\Documents\Sample"⮚ TPut the location of the file in the File_Path variable
Dim wrkbk As Workbook⮚ Declare our variable wrkbk, whose type is a workbook.
Set wrkbk = Workbooks.Open(Filename:=File_path)⮚ Open the file named in the File_Path directory variable and set the file as wrkbk variable.
End Sub⮚ End the sub-procedure of this code.
1.2 Open Workbook Without Mentioning File Path
Steps
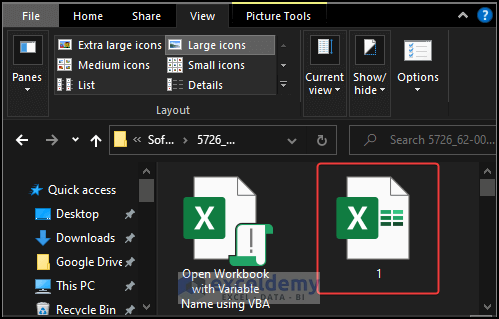
- We have a different file saved in the same directory where the parent Excel file is now saved.
- The file name is 1.
- Go to the Developer tab and click on Visual Basic. If you don’t have that, you must enable the Developer tab. Or You can also press ‘Alt+F11’ to open the Visual Basic Editor.
- A new dialog box; in that dialog box, click on Insert > Module.
- In the Module editor window, type the following code:
Sub Open_without_File_Path()
Dim wrkbk As Workbook
Set wrkbk = Workbooks.Open(Filename:="1.xlsx")
End Sub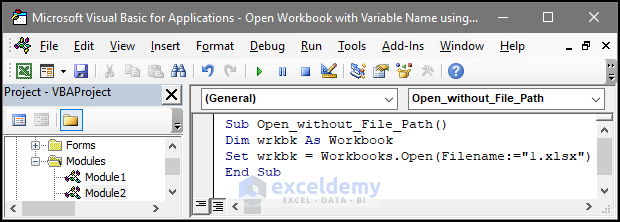
- Close the Module window.
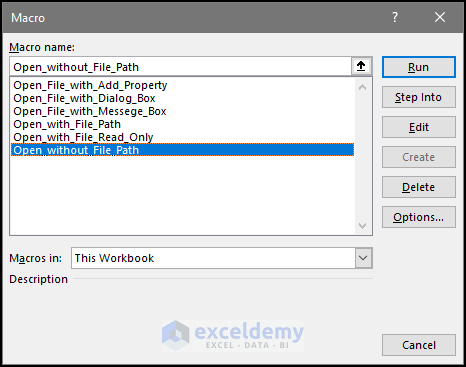
- Go to View tab > Macros.
- Click on View Macros.
- After clicking View Macros, select the macros that you created just now. The name here is Open_without_File_Path. Then click Run.
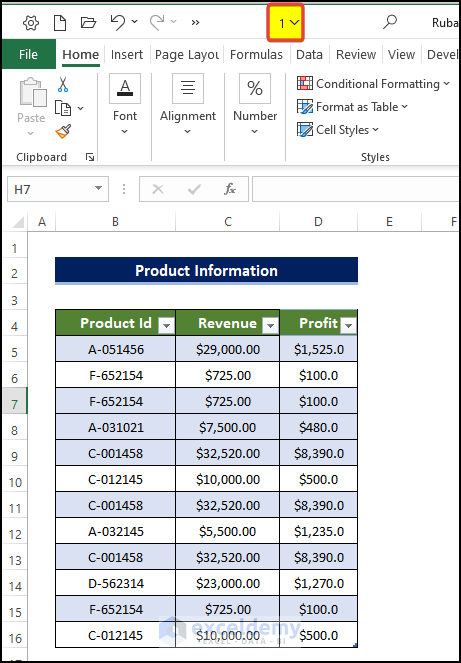
- After pressing Run, you will notice that the file named 1 is now open.
- And this is how we open the workbook with variable names using VBA in Excel.
Breakdown of the Code
Sub Open_without_File_Path()⮚ Provide a name for the sub-procedure which is Sub Open_without_File_Path()
Dim wrkbk As Workbook⮚ Declare wrkbk as a variable in Workbook type
Set wrkbk = Workbooks.Open(Filename:="1.xlsx")⮚ Open file from the parent directory named 1.xlsx.
End Sub⮚ End the sub-procedure of this code.
1.3 Open Workbook as Read Only
Steps
- The file we want to open is saved in the document folder.
- And this is the file we want to open as read-only.
- Go to the Developer tab and click on Visual Basic. If you don’t have that, you must enable the Developer tab. You can also press ‘Alt+F11’ to open the Visual Basic Editor.
- A new dialog box; in that dialog box, click on Insert > Module.
- In the Module editor window, type the following code:
Sub Open_with_File_Read_Only()
Dim wrkbk As Workbook
Set wrkbk = Workbooks.Open("C:\Users\User\OneDrive\Documents\Sample", ReadOnly:=True)
End Sub- Close the Module window.
- Go to View tab > Macros.
- Click on View Macros.
- After clicking View Macros, select the macros that you created just now. The name here is Open_with_File_Read_Only. Then click Run.
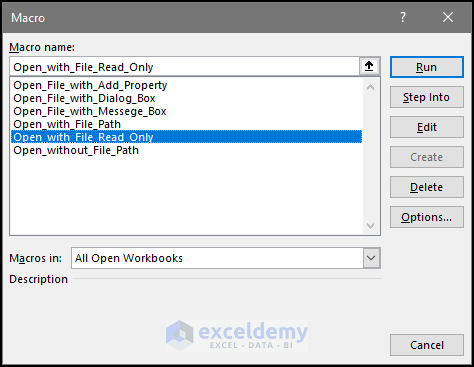
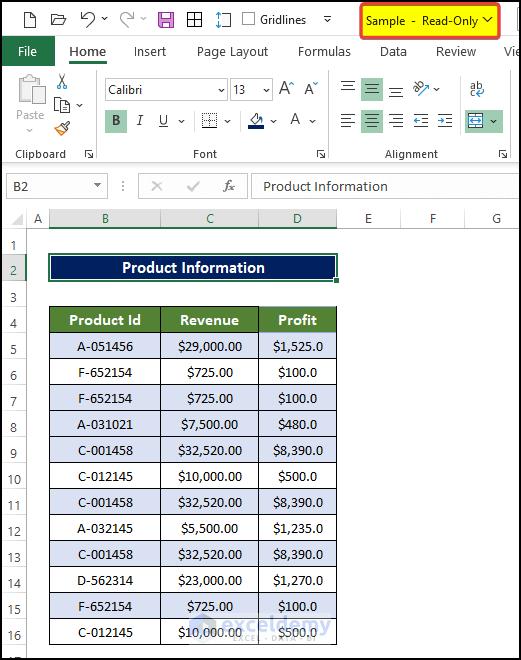
- After clicking Run, the file is now opened as read-only, as shown in the title bar.
Breakdown of the Code
Sub Open_with_File_Read_Only()⮚ Provide a name for the sub-procedure which is Open_with_File_Read_Only()
Dim wrkbk As Workbook⮚ Declare wrkbk as variable in Workbook type
Set wrkbk = Workbooks.Open("C:\Users\User\OneDrive\Documents\Sample", ReadOnly:=True)⮚ The file will then open from the designated directory, and the last argument will set it read-only.
End Sub⮚ End the sub-procedure of this code.
Method 2 – Using Message Box
Steps
- Go to the Developer tab and click on Visual Basic. If you don’t have that, you must enable the Developer tab. You can also press ‘Alt+F11’ to open the Visual Basic Editor.

- A new dialog box will appear. In that dialog box, click on Insert > Module.
- In the Module editor window, type the following code:
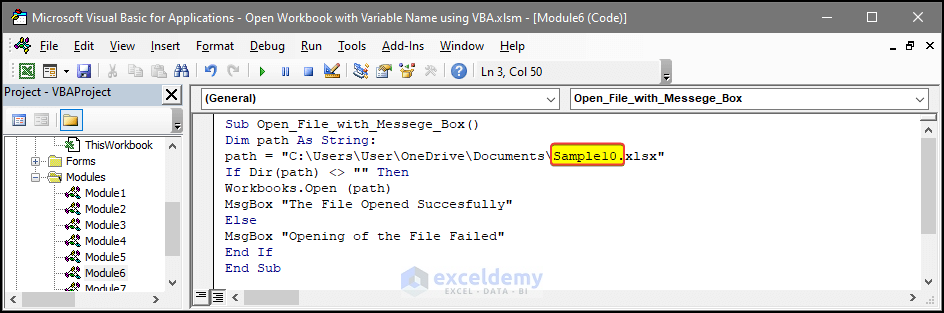
Sub Open_File_with_Messege_Box()
Dim path As String:
path = "C:\Users\User\OneDrive\Documents\Sample.xlsx"
If Dir(path) <> "" Then
Workbooks.Open (path)
MsgBox "The File Opened Successfully"
Else
MsgBox "Opening of the File Failed"
End If
End Sub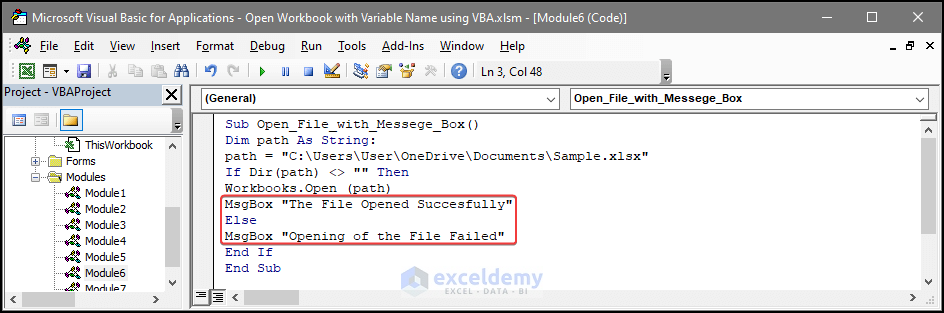
- Close the Module window.
- Go to View tab > Macros.
- Click on View Macros.
- After clicking View Macros, select the macros that you created just now. The name here is Open_File_with_Messege_Box. Then click Run.
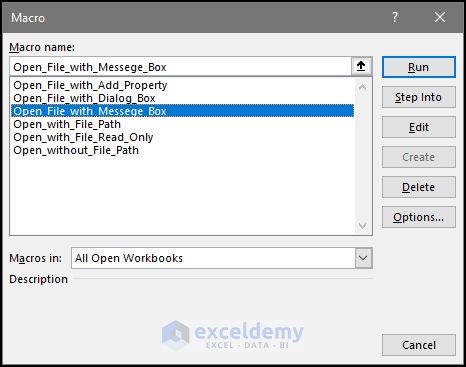
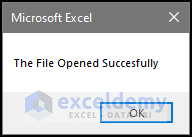
- We got the warning box, which is showing that The File Opened Successfully.
- Click OK.
- We will see that the file is now open.
- Try to alter the code a little bit.
- We changed the file name to Sample10, and there is no file named Sample10 in the documents folder.
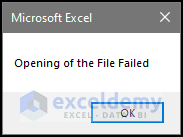
- Rerun the code, and there is a message box saying Opening of the File Failed.
- Click OK after this.
Breakdown of the Code
Sub Open_File_with_Messege_Box()⮚Provide a name for the sub-procedure which is Open_with_File_Read_Only()
Dim path As String:⮚ Declare wrkbk as a variable in the Workbook type
If Dir(path) <> "" Then
Workbooks.Open (path)
MsgBox "The File Opened Successfully"
Else
⮚ This line will check whether the file Sample is available in the directory. If it is, it will open the file and show the message.
MsgBox "Opening of the File Failed"⮚ If there is no file named Sample in the directory, then this message will be delivered.
End If⮚End the sub-procedure of this code.
End Sub⮚ End the sub-procedure of this code.
Method 3 – Use of Dialog Box to Open File
Steps
- Open the file using the file explorer dialog box.
- Go to the Developer tab and click on Visual Basic. If you don’t have that, you must enable the Developer tab. You can also press ‘Alt+F11’ to open the Visual Basic Editor.

- A new dialog box; in that dialog box, click on Insert > Module.
- In the Module editor window, type the following code:
Sub Open_File_with_Dialog_Box()
Dim Dbox As FileDialog
Dim File_Path As String
Dim wrkbk As Workbook
Set Dbox = Application.FileDialog(msoFileDialogFilePicker)
Dbox.Title = "Choose and Open " & FileType
Dbox.Filters.Clear
Dbox.Show
If Dbox.SelectedItems.Count = 1 Then
    File_Path = Dbox.SelectedItems(1)
End If
Set wrkbk = Workbooks.Open(Filename:=File_Path)
End Sub- Close the Module window.
- Go to View tab > Macros.
- Click on View Macros.
- After clicking View Macros, select the macros that you created just now. The name here is Open_File_with_Dialog_Box. Then click Run.
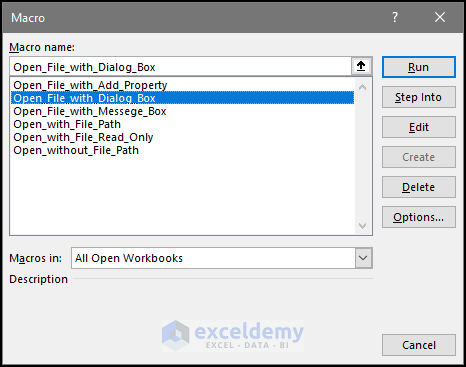
- And then a new window opens. In the file explorer dialog box select Sample and click OK.
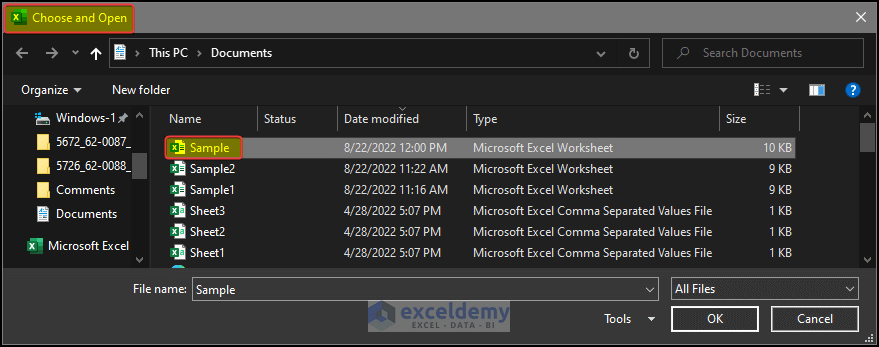
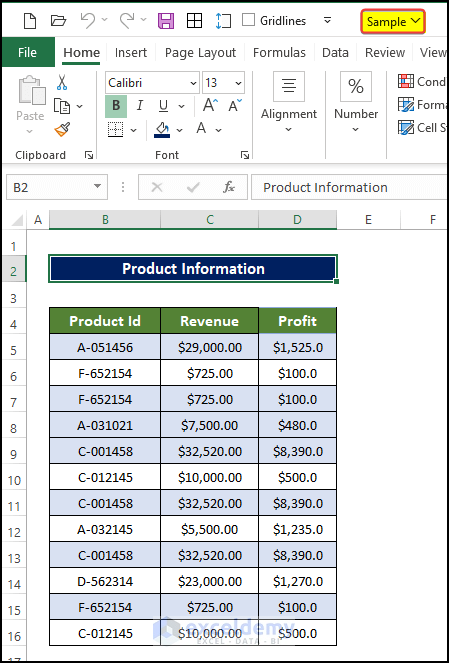
- The file named Sample opened.
- Open the workbook with variable names using VBA in Excel.
Breakdown of the Code
Sub Open_File_with_Dialog_Box()⮚ Provide a name for the sub-procedure which is Sub Open_File_with_Dialog_Box()
Dim Dbox As FileDialog⮚ Declare Dbox as a variable in FileDialog type
Dim File_Path As String⮚ Declare File_Path as a variable in the File_Path As String type
Set Dbox = Application.FileDialog(msoFileDialogFilePicker)
Dbox.Title = "Choose and Open " & FileType
⮚ The first line will contain a dialog box. The next line denotes the dialog box name and the file type.
⮚ Dbox.Title will set the title of the dialog box. and FileType set the file type.
Dbox.Filters.Clear⮚ The Dbox.Filters.Clear will clear any previous filter applied in the diaog box
Dbox.Show⮚ The Dbox.Show will make the dialog box appear on the file.
⮚ This line will determine whether the user selected more than one file. If the user selects more than one file, the whole procedure will stop.
End Sub⮚ End the sub-procedure of this code.
Method 4 – Using Workbook.Add Property
Steps
- Go to the Developer tab and click on Visual Basic. If you don’t have that, you must enable the Developer tab. Or You can also press ‘Alt+F11’ to open the Visual Basic Editor.
- A new dialog box, in that dialog box, click on the Insert > Module.
In the Module editor window, type the following code:
Sub Open_File_with_Add_Property()
Dim File_Path As String: File_Path = "C:\Users\User\OneDrive\Documents\Sample.xlsx"
Dim wb As Workbook
Set wb = Workbooks.Add(File_Path)
End Sub- Close the Module window.
- Go to View tab > Macros.
- Click on View Macros.
- After clicking View Macros, select the macros that you created just now. The name here is Open_File_with_Add_Property. Then click Run.
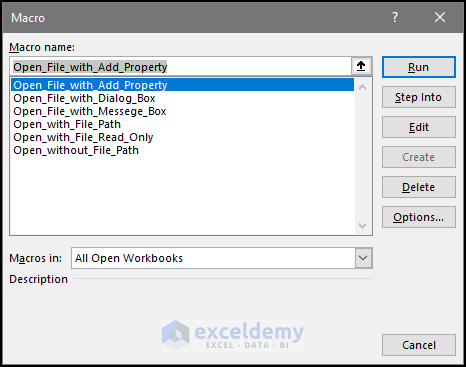
- After clicking Run, you will notice that a new file is created and opened.

Breakdown of the Code
⮚ Provide a name for the sub-procedure which is Sub Open_File_with_Add_Property()
⮚Declare the File_Path variable as String type.
Dim File_Path As String: File_Path = "C:\Users\User\OneDrive\Documents\Sample.xlsx"⮚ Set the File_Path variable to the location of the file.
Dim wb As Workbook⮚Declare wb as a variable in the Workbook type.
Set wb = Workbooks.Add(File_Path)⮚ The workbook is then added from the directory stored in the File_Path location using the Workbook.Add property.
End Sub⮚ End the sub-procedure of this code.
Download Practice Workbook
Download this practice workbook below.
Related Articles
- Excel VBA to Open Workbook in Background
- How to Open Workbook and Run Macro Using VBA
- How to Browse for File Path Using Excel VBA
- How to Open Folder and Select File Using Excel VBA

