Method 1 – Using the VBA FileDialog Property to Open the File Dialog Default Folder
Steps:
- Press ALT+F11 to open the VBA Module window. You can also go to the Developer tab → select Visual Basic.
- In the Insert tab → select Module.

- Enter the following code in the Module window.
Option Explicit
Sub Open_Default_File_Dialog_1()
Application.FileDialog(msoFileDialogOpen).Show
End Sub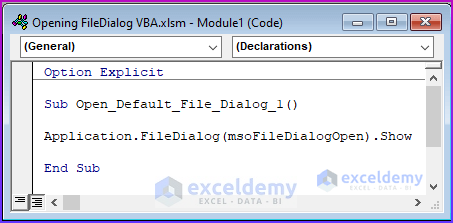
VBA Code Breakdown
- “Open_Default_File_Dialog_1” is the Sub procedure.
- The msoFileDialogOpen data type is used inside the FileDialog property.
- The Show method opens the default file dialog folder.
- Save the Module, place the cursor inside the code and click Run.
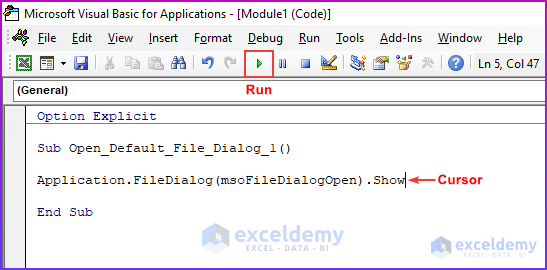
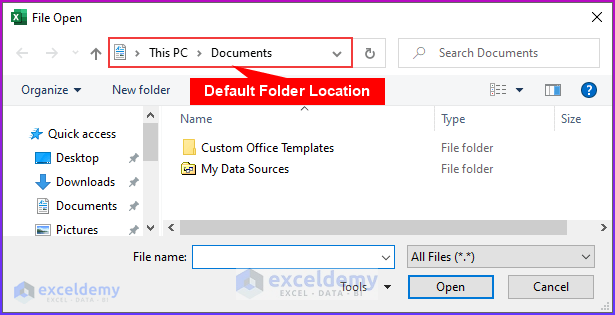
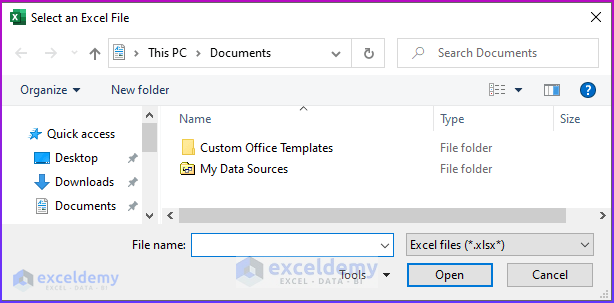
- The File Open dialog box will be displayed.
Read More: How to Browse for File Path Using Excel VBA
Method 2 – Applying the VBA GetOpenFilename Method
Steps:
- Open the Module window.
- Enter the following code.
Option Explicit
Sub Open_Default_File_Dialog_2()
Dim Show_File_Dialog As String
Show_File_Dialog = Application.GetOpenFilename(FileFilter:= _
"Excel files (*.xlsx*), *.xlsx*", _
Title:="Select an Excel File", MultiSelect:=True)
End Sub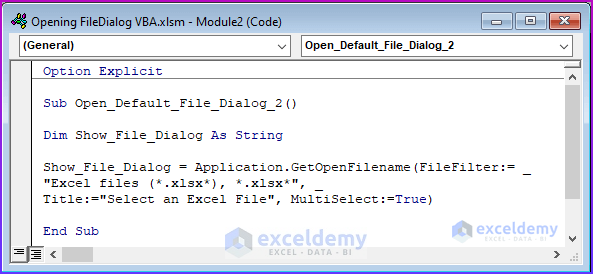
VBA Code Breakdown
- “Open_Default_File_Dialog_2” is the Sub procedure.
- The variable type is defined.
- The GetOpenFilename method is used to show the default folder window.
- It has several parameters: sets the file type as xlsx; sets the title of the window, and allows multiple files to be selected.
- Run the code.
The file dialog default folder will be displayed.
Read More: How to Open Workbook with Variable Name with Excel VBA
Method 3 – Setting and Opening the Default File Dialog Folder with Excel VBA
Steps:
- Open the Module window.
- Enter the following code.
Option Explicit
Sub Set_Default_File_Dialog_Folder()
Dim File_Dialog_Box As Office.FileDialog
Set File_Dialog_Box = Application.FileDialog(msoFileDialogFilePicker)
    With File_Dialog_Box
        .Filters.Clear
        .Filters.Add "Excel Files", "*.xlsx?", 1
        .Title = "Select an Excel File"
        .AllowMultiSelect = False
        .InitialFileName = "C:\Users\Rafiul Haq\Desktop\Exceldemy\16\"
        .Show
    End With
End Sub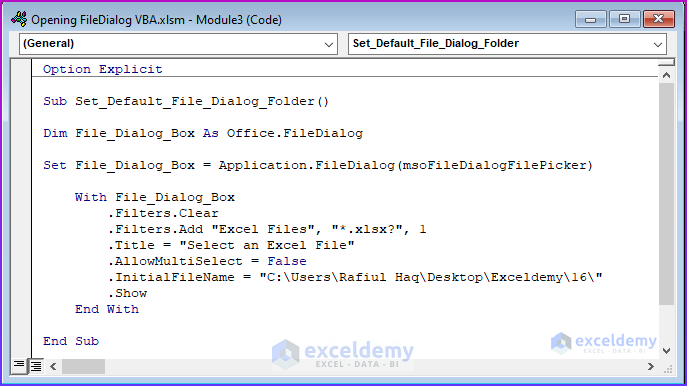
VBA Code Breakdown
- “Set_Default_File_Dialog_Folder” is the Sub procedure .
- The variable type is defined.
- The variable is set as the “Application.FileDialog” property and the data type as “msoFileDialogFilePicker”. It will ask the user to select a file.
- In the With statement the default file dialog folder is set inside the InitialFileName property.
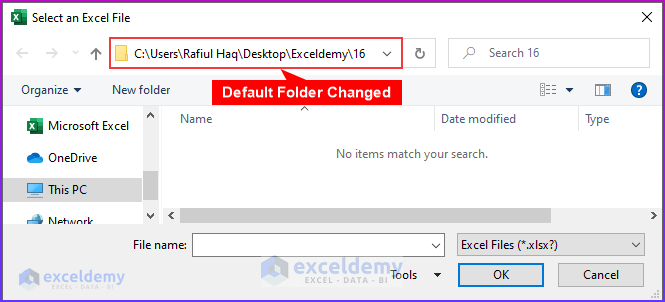
- Using the Show method, it will open the changed default folder.
- Run the code.
- The default folder location changed.
Read More: How to Open Folder and Select File Using Excel VBA
Download Practice Workbook
Related Articles
- Excel VBA to Open Workbook in Background
- How to Open Workbook as Read-Only with Excel VBA
- How to Open Workbook and Run Macro Using VBA
- How to Open Workbook from Path Using Excel VBA
- Excel VBA to Open Workbook from Path in Cell

