Book Bill contains information regarding the purchased products and shows the overall bill. Likewise, businessmen need to create bill books for their companies more or less every day. So, If you are looking for something to track down your billing or create a bill book in Excel, then you have come to the right place.
2 Easy Ways to Create a Bill Book in Excel
Excel has some functionalities to create and customize a bill book easily. In this article, I will show you how to create a bill book in 2 methods. Moreover, I used the Microsoft Excel 365 version in this tutorial.
Method-1: Create a Bill Book Manually
In this method, I will show you how to create a bill book manually with some easy steps.
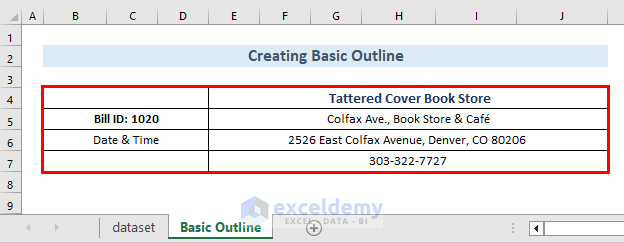
Step 1: Creation of a Basic Outline
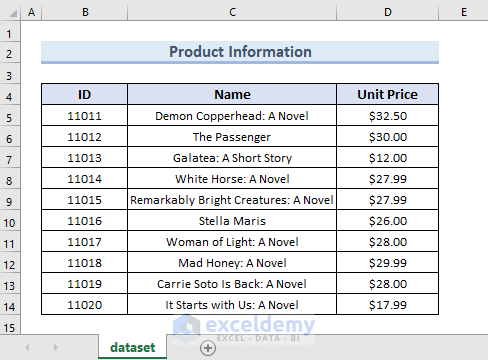
The “Tattered Cover Book Store” dataset contains all the information necessary for the bill book. In my dataset, I have used bookstore information such as ID, Name, and Unit Price.
First, I will create a section for the outline using basic company info which contains the name of the company, address, and phone number. On the left side, I have also included Bill ID and Date & Time for bill book specifications.
After that, we will insert all the information regarding the buyer in another section. Similar to the company information, I have included Name, Street Address, City, State, Zip, and Phone number.
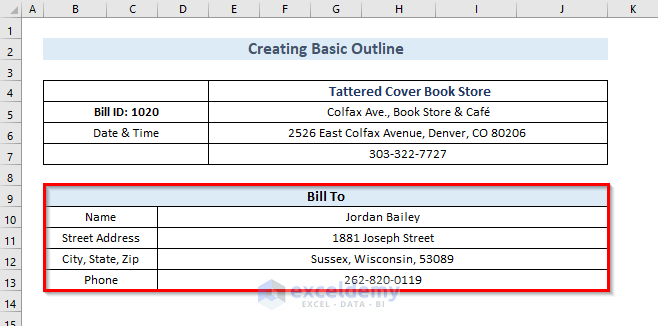
After inserting the buyer information we will need to add the product information for any specific purchase.

With that, I have finished creating the basic outline of the bill book.
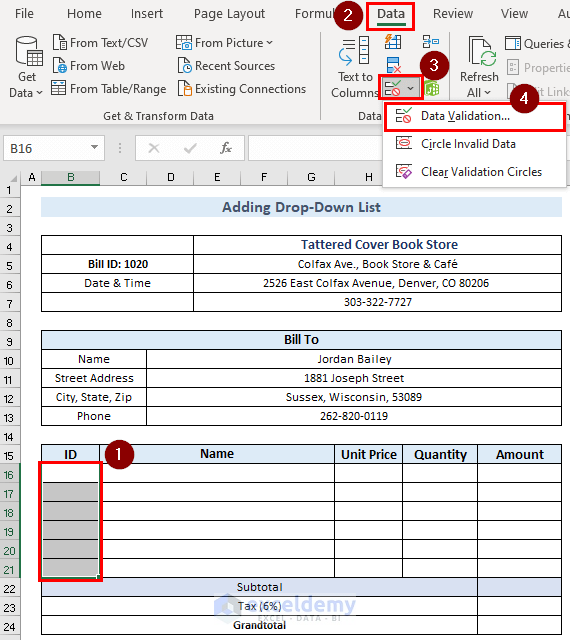
Step 2: Adding Drop-Down List
To imply the dataset information in my template, I will now create a drop-down list in the ID column.
By creating a drop-down list, we can easily select the IDs of the products.
- I have selected all the rows in the ID column to create drop-down lists all at once. After that, go to the Data tab >> Data Validation group >> Data Validation.
Afterward, the Data Validation dialog box will open up.
- Now, I have selected List in the Allow section and selected the ID column from the dataset sheet in the Source.
=dataset!$B$5:$B$14
- I have clicked on the drop-down arrow to view ID options and select one accordingly.
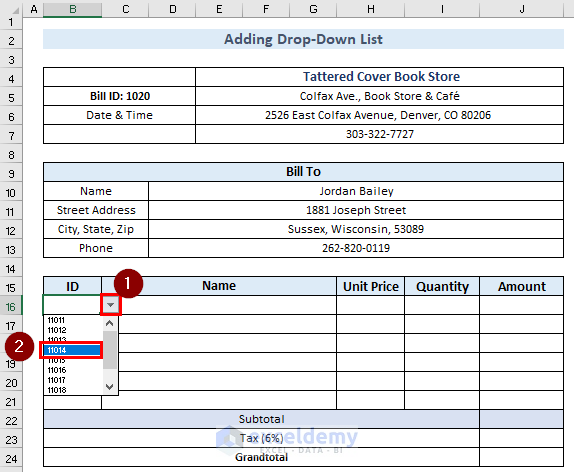
- Similarly, I have selected all ID information to complete this column with data.

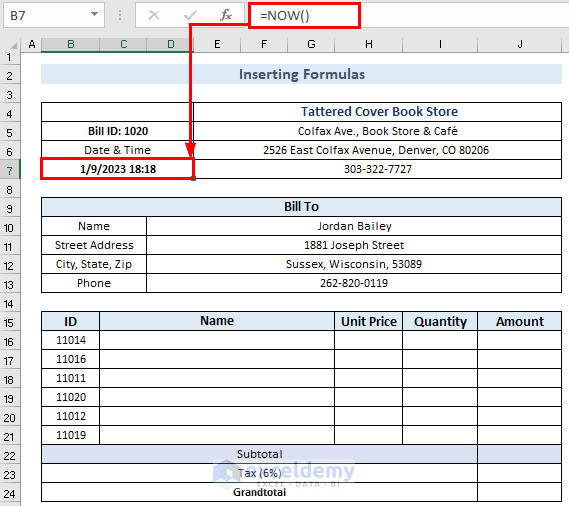
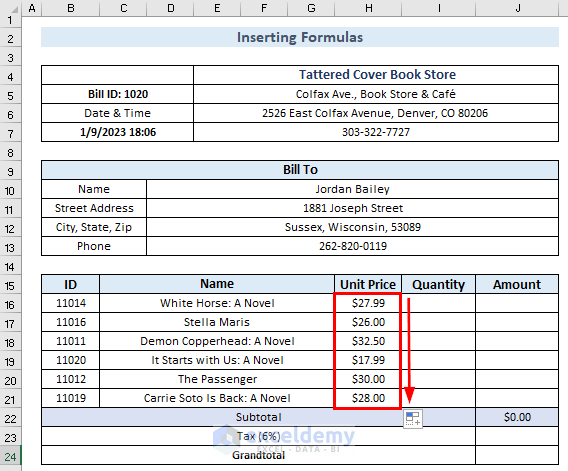
Step 3: Inserting Formulas
In this step, I will insert all other information to fill up the other sections in this outline using formulas.
- I am using the NOW function to get the current date and time without the need to manually update it every time.
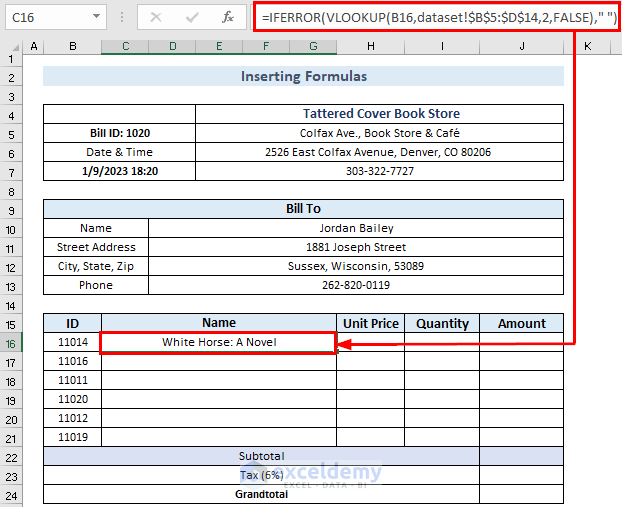
- This time I will use the VLOOKUP function to fill in the Name section of the bill book to get the information directly from the dataset alongside the ID column.
=IFERROR(VLOOKUP(B16,dataset!$B$5:$D$14,2,FALSE)," ")Formula Breakdown
VLOOKUP(B16,dataset!$B$5:$D$14,2,F ALSE) → The VLOOKUP functionwill search for the name of the book based on theIDfrom thedatasetB16 →it is theIDnumber of the product on the basis of which we will search for value.dataset!$B$5:$D$14 →is the whole dataset selected to work as source data.2is thecolumn numberof our dataset, andFALSEis for anexactOutput → White Horse: A Novel
IFERROR(VLOOKUP(B16,dataset!$B$5:$D$14,2,FALSE)," ") →becomesIFERROR(White Horse: A Novel," ") →The IFERROR functionwill return ablankif there is an error otherwise the resultant value.Output → White Horse: A Novel
- Similarly, I filled up the whole Name section by dragging and filling in the formula using the AutoFill feature.
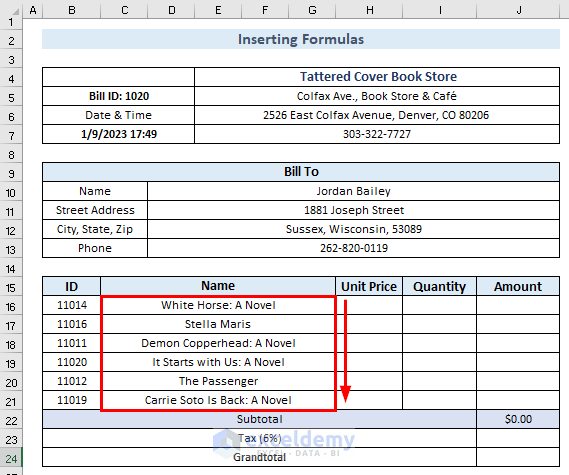
- I have used a very similar kind of technique to fill in the information on Unit Price.
=IFERROR(VLOOKUP(B16,dataset!$B$5:$D$14,3,FALSE)," ")Here, I have used 3 as the column number, as Unit Price is in column 3.

- Right after, I filled the other cells of the Unit Price section by Dragging and Filling.
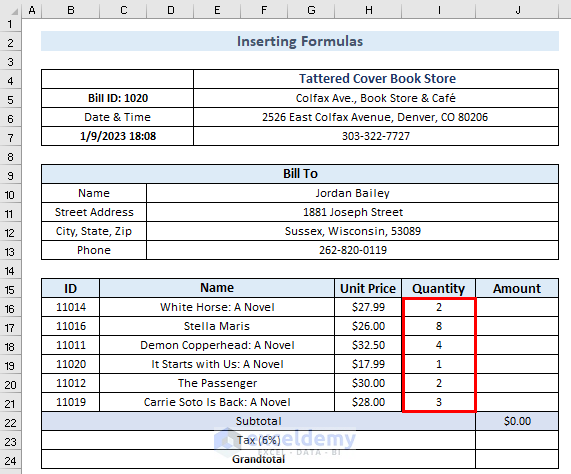
- I have inserted the information regarding Quantity as needed.
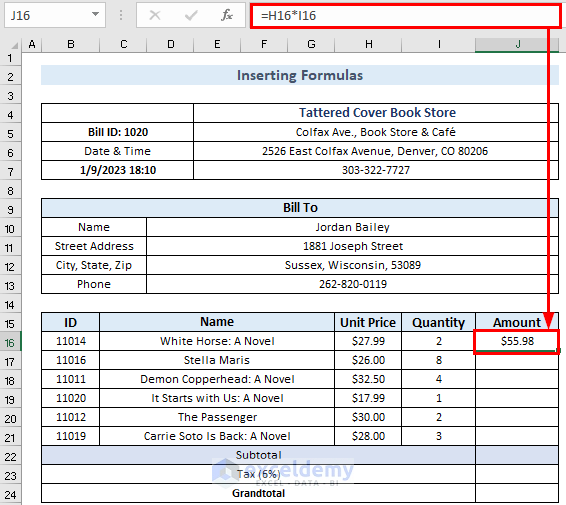
- In this part, I will calculate the Amount by multiplying the Unit Price by the Quantity.
=H16*I16Here, H16 is the Unit Price and I16 is the Quantity. I used the cell reference method so that I can easily fill the other cells as well.
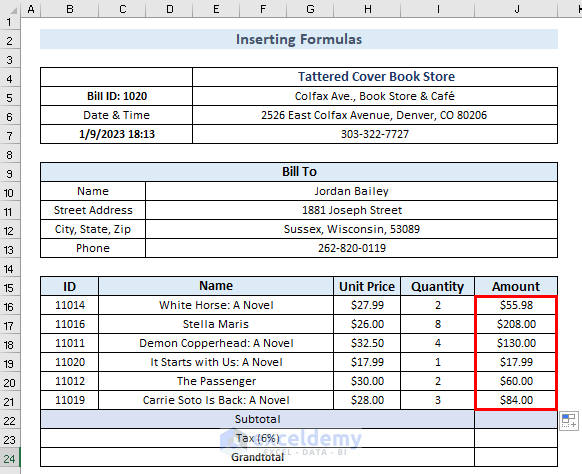
- Next, I filled the other cells of the Amount.
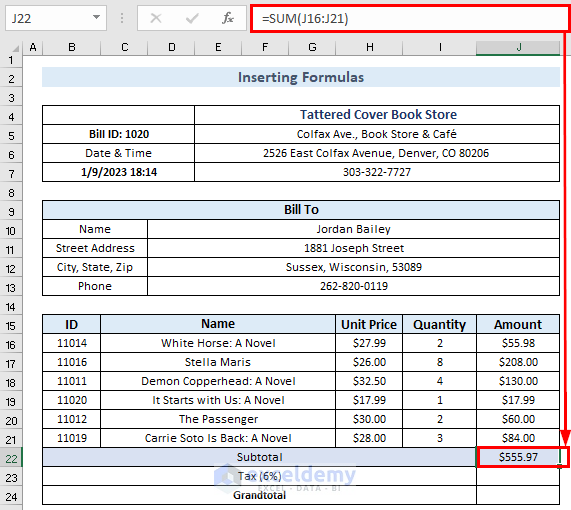
- I used the SUM function, to sum up, the amount of the purchase.
=SUM(J16:J21)Here, J16 to J21 is the selected cell range. This is also a cell reference method to calculate the total.
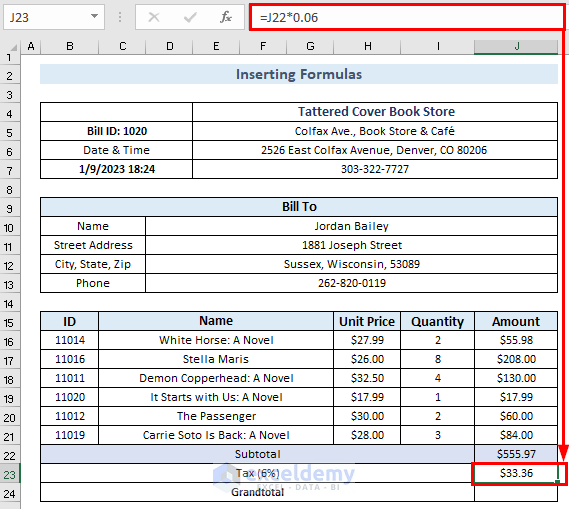
- To calculate the tax amount, I need to multiply the Subtotal by the percentage of the Tax.
=J22*0.06Here, I used 0.06 to multiply the Subtotal value cell, as the Tax is 6%. You can change the formula by using the tax percentage you would apply.
- I used another SUM function to calculate the Grandtotal by adding Subtotal and Tax.
=SUM(J22:J23)Here, J22 and J23 are the cells to make a total.

Now, I am done with manually creating the bill book.
Read More: How to Create Bill Payment Checklist in Excel
Method-2: Utilizing Excel Template to Create a Bill Book
You can customize your bill book however you want using available templates on Excel. In this method, I will show you how to make use of the available templates to create your own bill book.
- Open the Excel file and you will find the templates list under the Home.

- Now, Click on More templates.
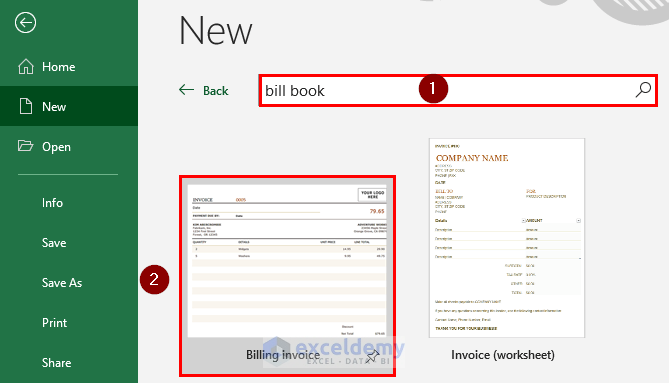
- You can search bill book in the search bar to find out all the available templates in Excel.
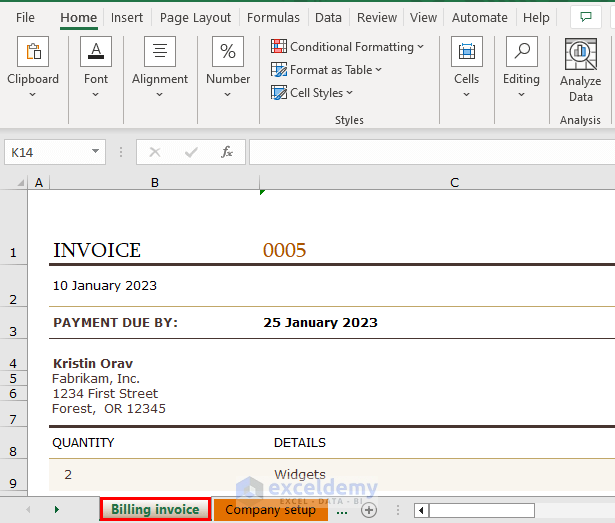
- Click on the Billing invoice.
A box will show up to tell you to create the template on your Excel file.
- Click on Create.
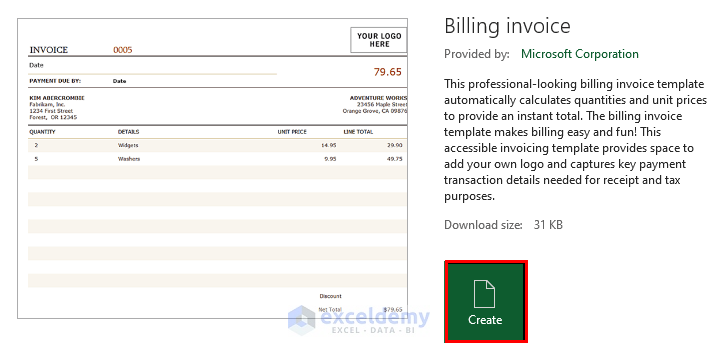
The template is open and ready to use. You can see that, you are on the Billing invoice worksheet by default.
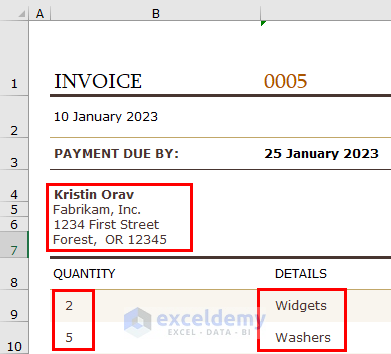
Now, there will be some changes needed to make your customized bill book.
- Click on the customer’s information, QUANTITY, and DETAILS to make changes.
- On the right side, there is a YOUR LOGO HERE section to add your company logo and the is a button for COMPANY SETUP. Click on COMPANY SETUP.
- Click on the COMPANY SETUP.
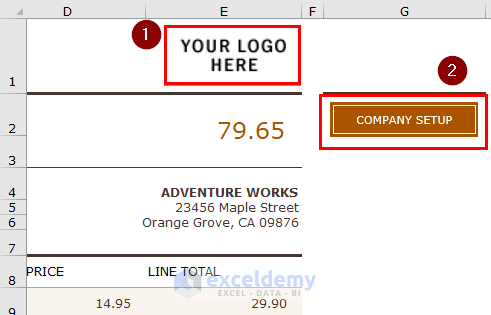
The COMPANY SETUP button will take you to the other worksheet Company setup where all the company information needs to add.
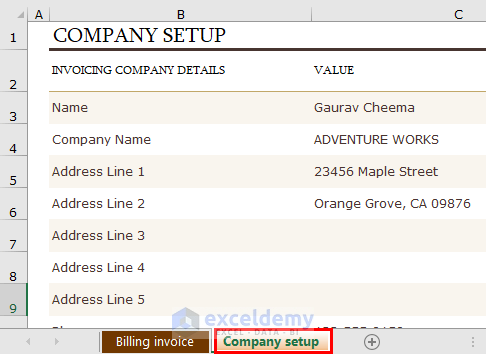
You can change all the company information to your company information and all the changes will be effected in the invoice directly. You won’t need to change the company information in the Billing Invoice worksheet at all.
Read More: How to Create Proforma Invoice in Excel
Download Practice Workbook
You can download the practice workbook here.
Conclusion
In this article, you will be able to learn How to Create Bill Book in Excel. You can suggest your thoughts about this article in the comment section below.
Related Articles
- How to Create Fully Automatic Invoice in Excel
- Use Electricity Bill Calculation Formula in Excel
- How to Create Invoice in Word from Excel Data
- Labour Contractor Bill Format in Excel
- Hotel Bill Format in Excel
- Tally Bill Format in Excel
- Tax Invoice Format in Excel

