How to Add Data Validation to Cell in Excel
Steps:
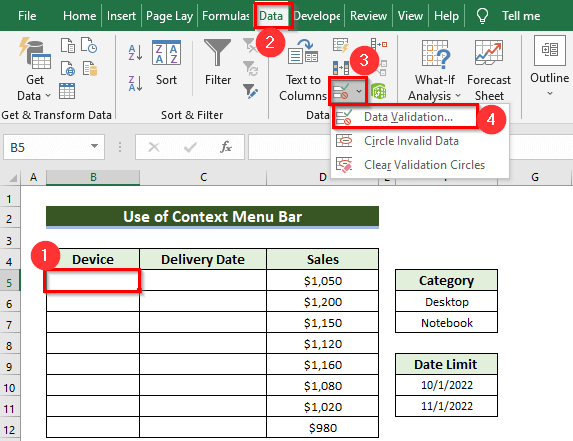
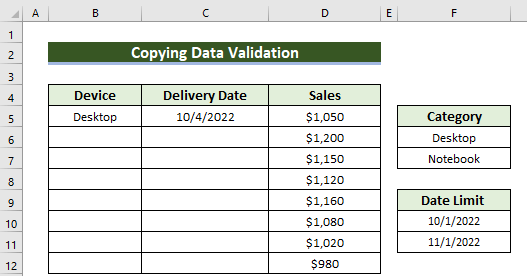
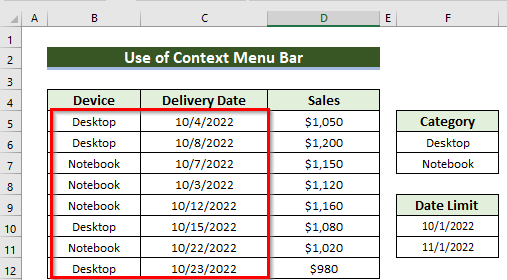
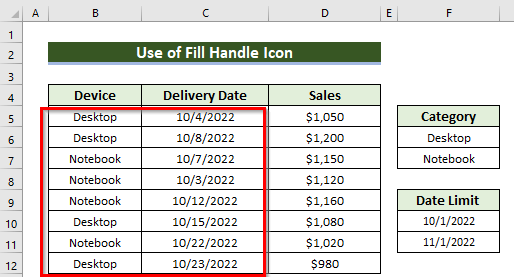
- Select cell B5 where you want to insert only two kinds of cell values (either Desktop or Notebook). We have written those in the range F6:F7 named Category.
- From the Data tab, go to the Data Tools option.
- From the Data Validation feature, choose Data Validation.
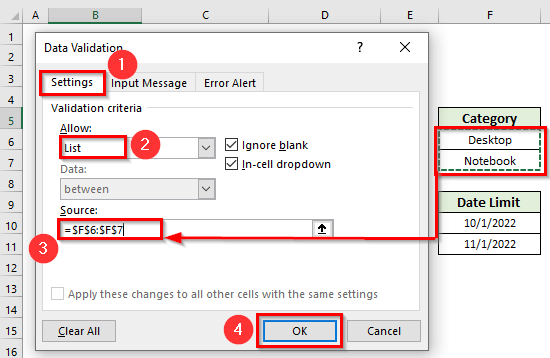
A dialog box named Data Validation will appear.
- From the Settings menu, choose List in the Allow: box.
- Select the references in the Source: box. Here, you must freeze your source using the Dollar sign ($) to copy Data validation. Otherwise, in every cell, the source may change to the next cell of that.
- Press OK to make the changes.
- You will see the drop-down arrow beside cell B5. You can select any of the values.

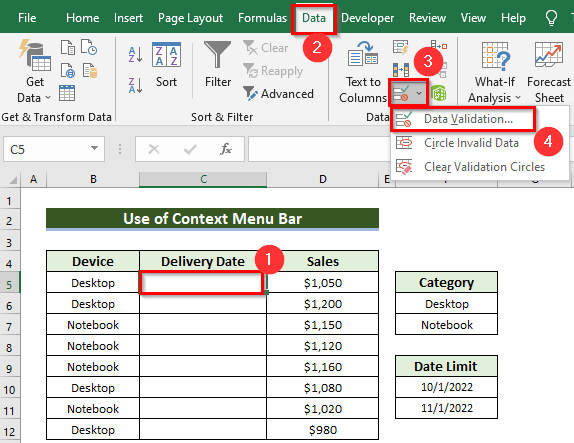
We will apply another type of Data validation in cell C5.
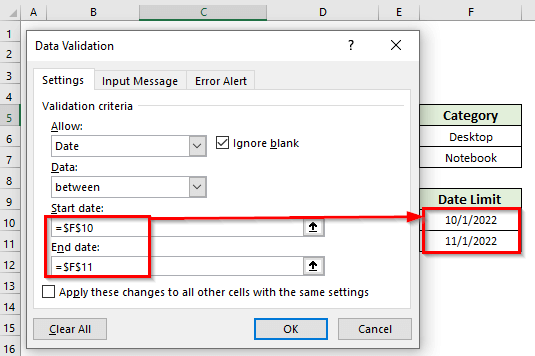
- Select cell C5 to insert only dates as cell values. The date limit is from 1st October to 1st November 2022. We have written those in the range F10:F11 named Date Limit.
- From the Data tab, go to the Data Tools option.
- From the Data Validation feature, choose Data Validation.
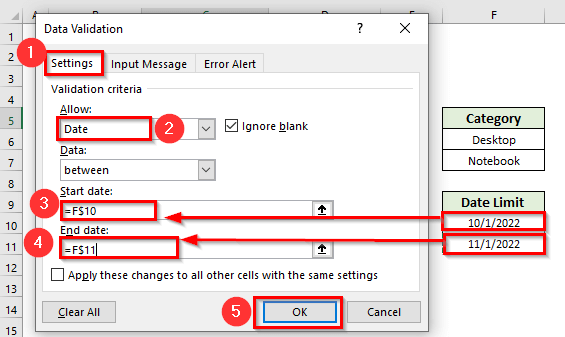
A dialog box named Data Validation will appear.
- From the Settings menu, choose Date in the Allow: box.
- Select the start date and end date. Here, you must freeze your source using the Dollar sign ($) to copy Data validation. Otherwise, in every cell, the source may change to the next cell of that. You may also manually write the start and end date instead of using cell references.
- Press OK to make the changes.
The dataset is ready now.
Method 1 – Using the Context Menu to Copy Data Validation in Excel
Steps:
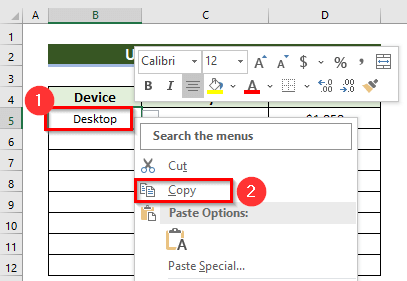
- Select cell B5 and right-click on it.
- From the Context menu, choose the Copy option.
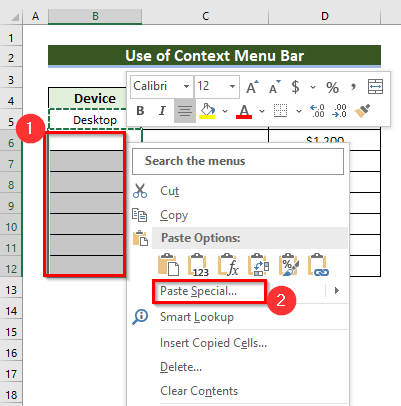
- Select the cell range where you want to copy the Data validation and right-click. We selected the range B6:B12.
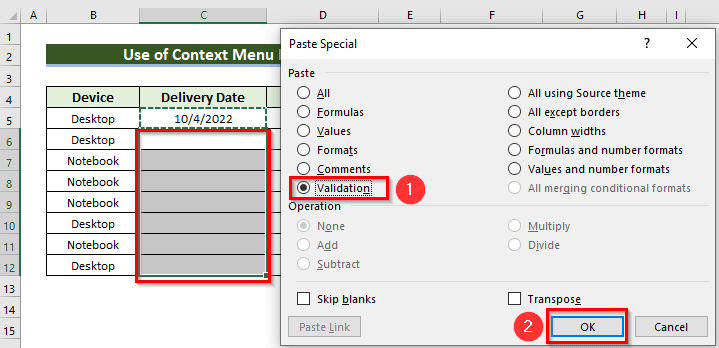
- From the Context menu, choose Paste Special.
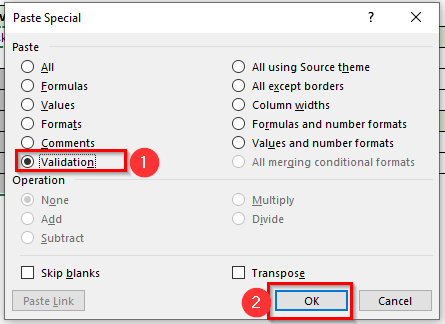
A new dialog box named Paste Special will appear.
- Choose the Validation option.
- Press OK.
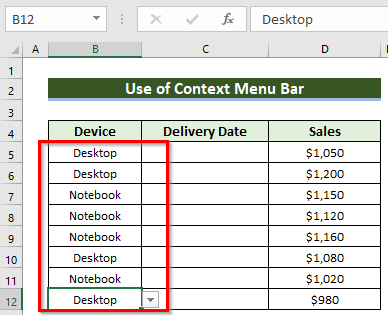
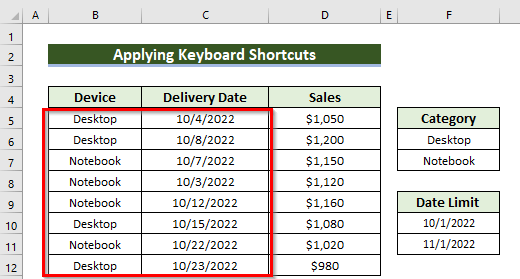
You will see the same Data Validation is working for the cells B6:B12.
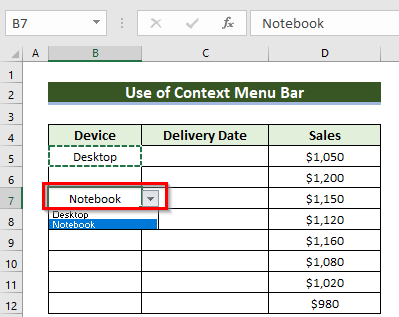
- We have inserted the following cell values using the Data Validation.
- Do the same for the Delivery Date column.
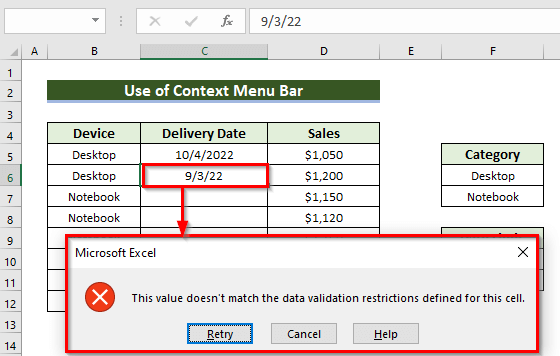
- We inserted a date older than the starting date and got the Microsoft Excel notice.
Using Data Validation, we have made this dataset.
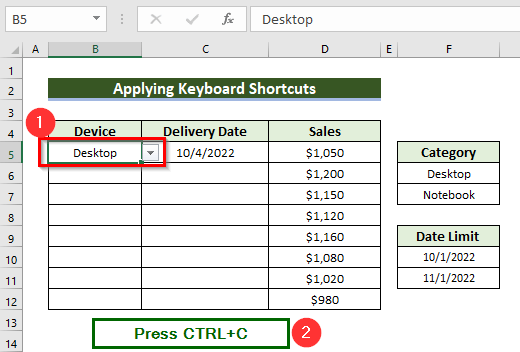
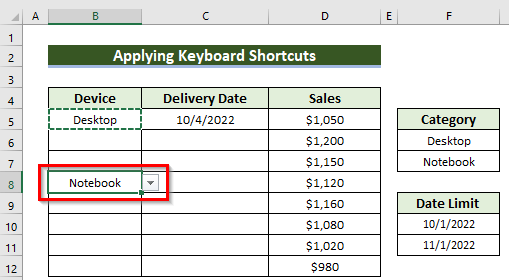
Method 2 – Applying Keyboard Shortcuts
Steps:
- Select cell B5.
- Press the CTRL+C keys.
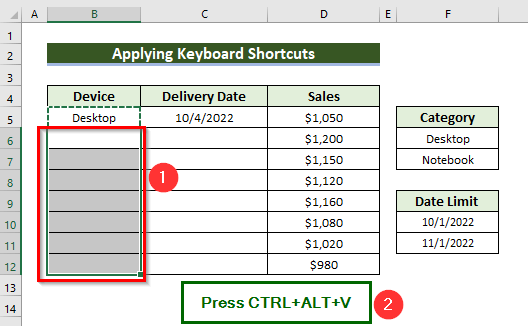
- Select the cell range B6:B12.
- Press the CTRL+ALT+V keys.
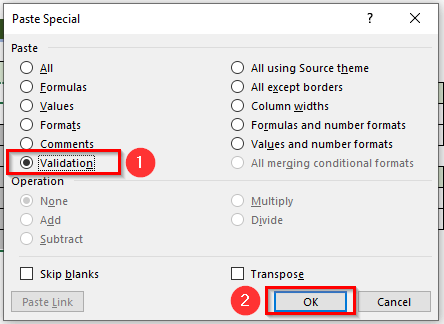
A new dialog box named Paste Special will appear.
- Choose the Validation option.
- Press OK.
You will see the same Data Validation is working for the cells B6:B12.
- Do the same for the Delivery Date column. You must freeze the cell references.
Using Data Validation, we made this dataset.
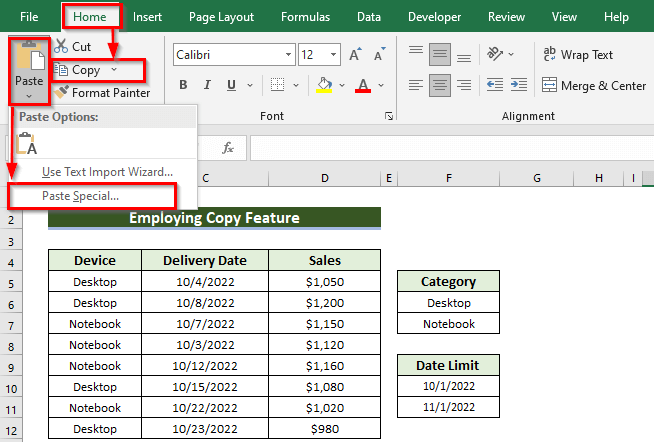
Method 3 – Using the Copy Feature in Excel
You can use the Copy and Paste Special feature under the Home tab.
Method 4 – Using the Fill Handle Icon to Copy Data Validation in Excel
Steps:
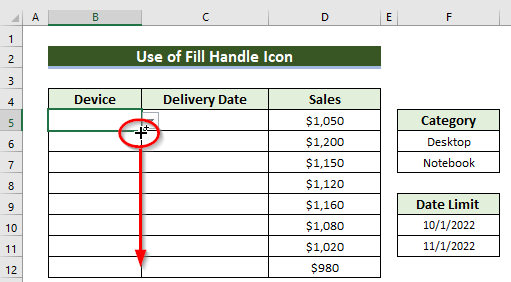
- Select cell B5 where Data Validation is applied. A square box will be shown in the bottom-right corner of cell B5, it is called the Fill Handle icon.
- Click the Fill Handle icon.
- Hold and drag it until you reach cell B12.
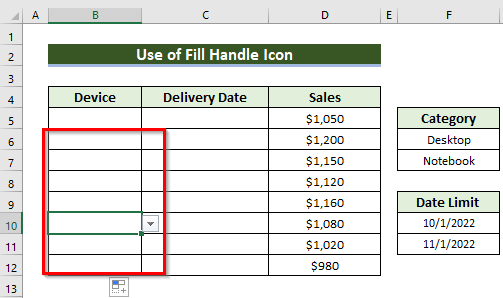
You will see the listed Data Validation is working for all the cells.
Using Data Validation we made this dataset.
Method 5 – Re-Applying the Data Validation Tool in Excel
Steps:
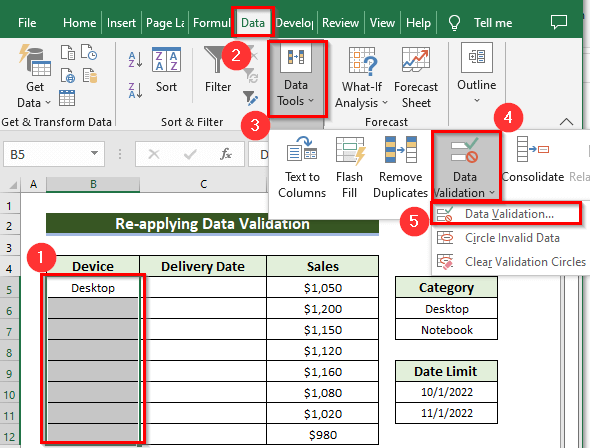
- Select the cell range up to which you want to keep the same Data Validation. We selected the range including the first cell with an applied Data Validation.
- From the Data tab, go to the Data Tools option.
- From the Data Validation feature, choose Data Validation.
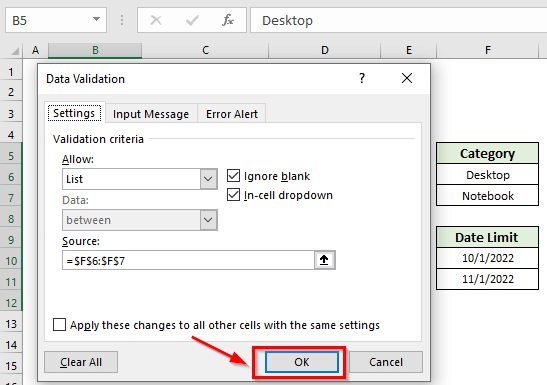
You will see the message from Microsoft Excel.
- Press Yes.

You will see the same Data Validation window, and all the boxes are filled out as the validation for cell B5.
- Press OK.
You will see the same Data Validation working for the cells B6:B12.
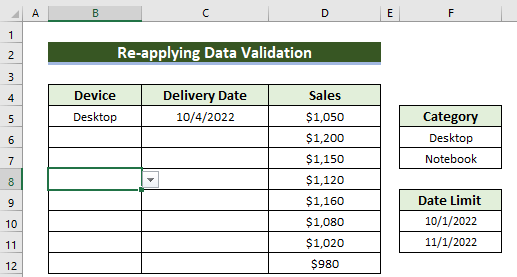
- Do the same for column C.
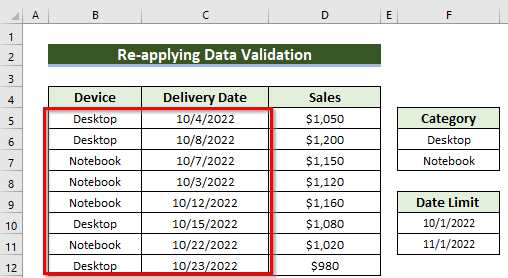
Using Data Validation you made this dataset.
Things to Remember
- If you use the cell references for Data Validation, you must freeze them. Otherwise, you may write the cell values individually.
Download the Excel Workbook
Related Articles
- How to Remove Blanks from Data Validation List in Excel
- How to Use Custom VLOOKUP Formula in Excel Data Validation
- How to Use IF Statement in Data Validation Formula in Excel
- How to Remove Data Validation Restrictions in Excel
- Apply Custom Data Validation for Multiple Criteria in Excel
- How to Apply Multiple Data Validation in One Cell in Excel
<< Go Back to Data Validation in Excel | Learn Excel
Get FREE Advanced Excel Exercises with Solutions!
