This is an overview.
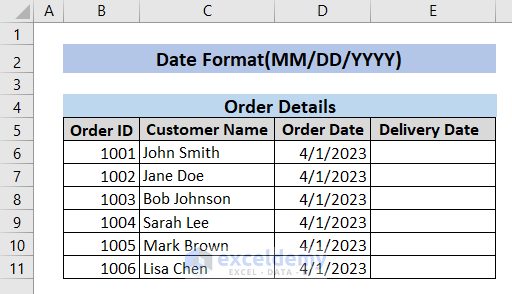
This is the sample dataset.
Example 1 – Creating a Dynamic Drop Down List of Dates
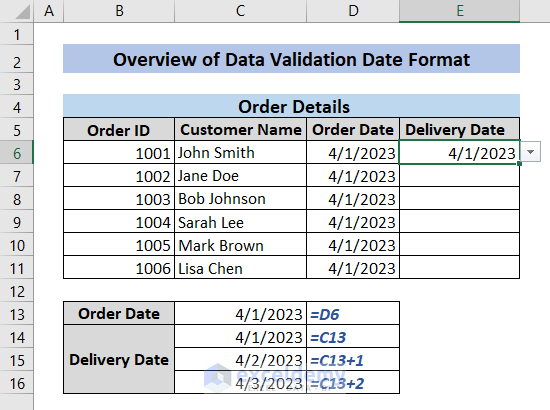
In the sample dataset, the Delivery Date depends on the Order Date. The Delivery Date should be within 3 days from the Order Date. As the Order Date is 4/1/2023 which means April 1st, 2023, the possible Delivery Date can be any day within a 3-day time frame including the Order Date.
Steps:
To see the possible delivery date options when entering the Delivery Date:
- Enter the following formula in C13 to see the Order Date in D6 and press ENTER.
- The formula in D13 uses the FORMULATEXT function.
=D6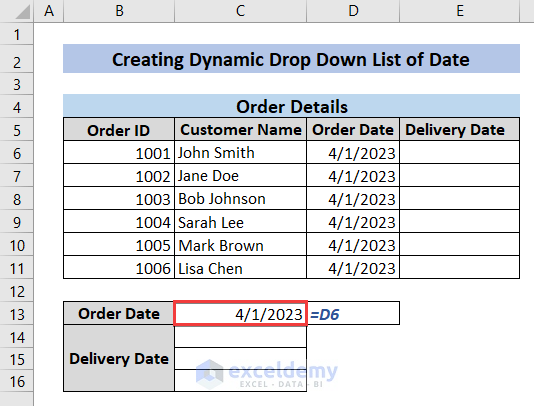
- Enter the following formula in C14 to see the first possible Delivery Date and press ENTER.
=C13 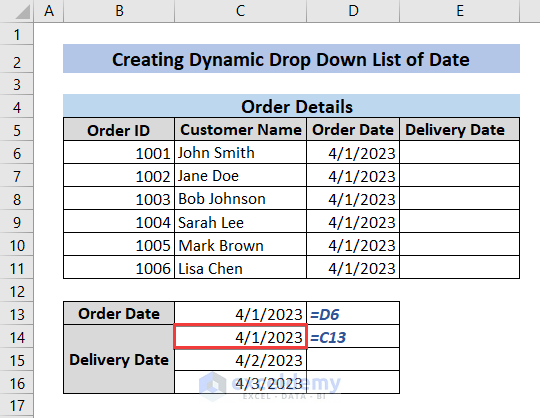
- To see the next two possible Delivery Dates, use =C13+1 formula in C14 and =C13+2 formula in C15.
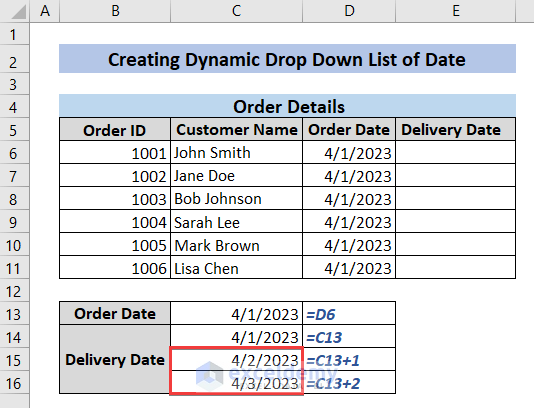
All possible Delivery Dates within 3 days from the Order Date including the Order Date are displayed.
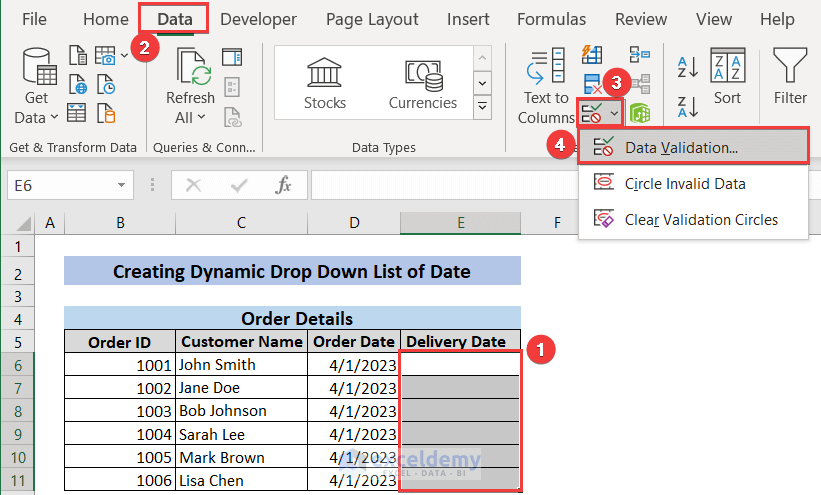
- Select C14:C16 and enter DeliveryDate in the Name Box.

- Select E6:E11 to add Data Validation.
- Go to Data>>Data Validation.
- Select List in Validation Criteria.
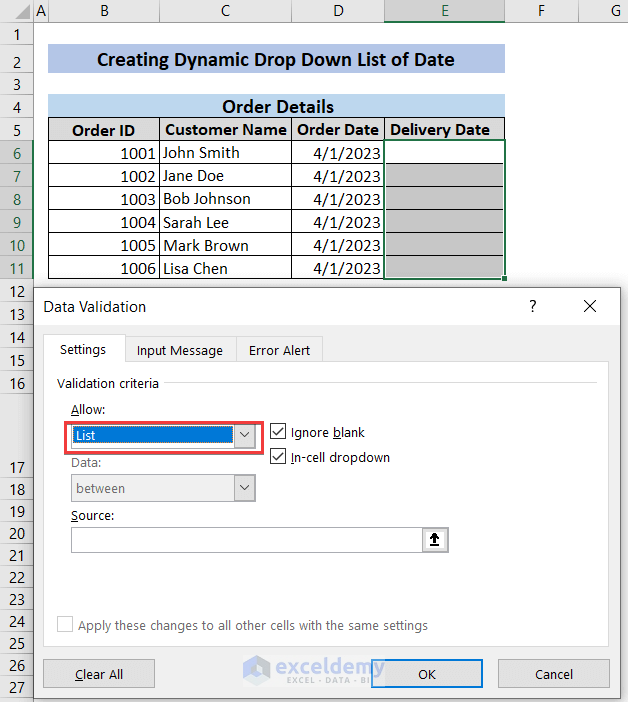
- Place the cursor on Source and press F3 to see the Paste Name option.
- Select the DeliveryDate name and click OK. This will set DeliveryDate as the Source.
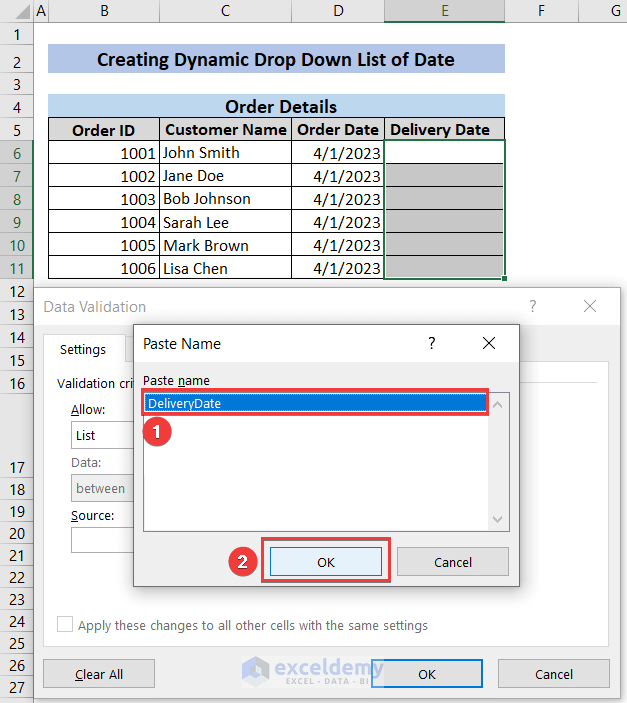
- Click OK to select DeliveryDate as the source and set the Data Validation.

Example 2 – Using the Date Option to Validate Data Within an Interval
Steps:
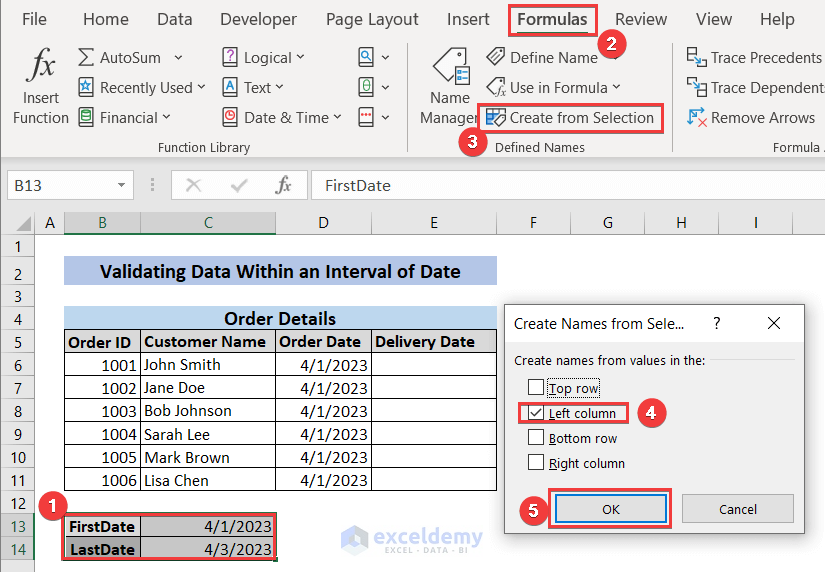
- Select B13:C14 and go to Formulas>>Create from Selection>>Left Column
- Click OK.
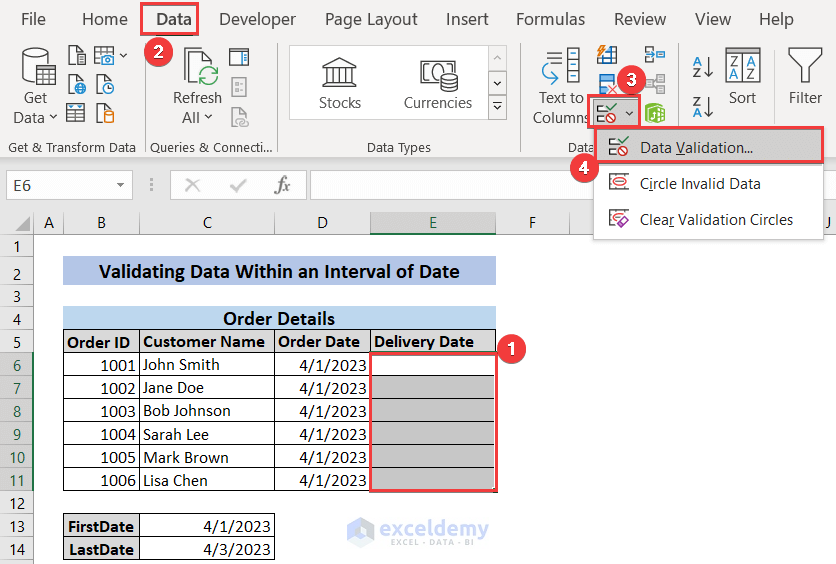
- Select E6:E11 for data validation.
- Go to Data>>Data Validation.
- Enter =FirstDate as Start date: and =LastDate as End date: ,exactly as it appears in B13 and B14.
- Click OK.
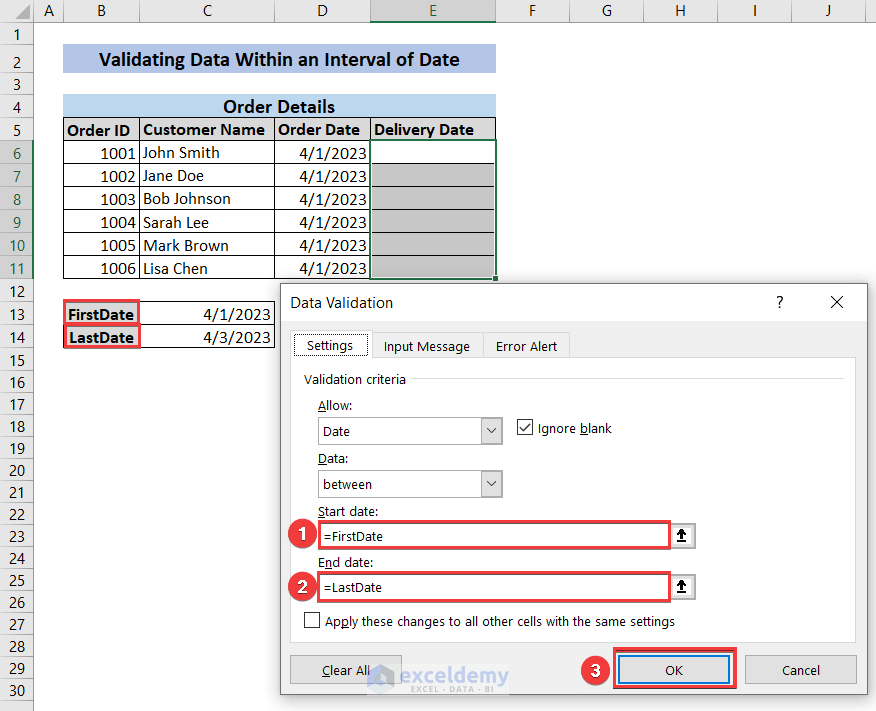
The Data Validation is set. E6:E11 will only allow a date between 4/1/2023 and 4/3/2023.
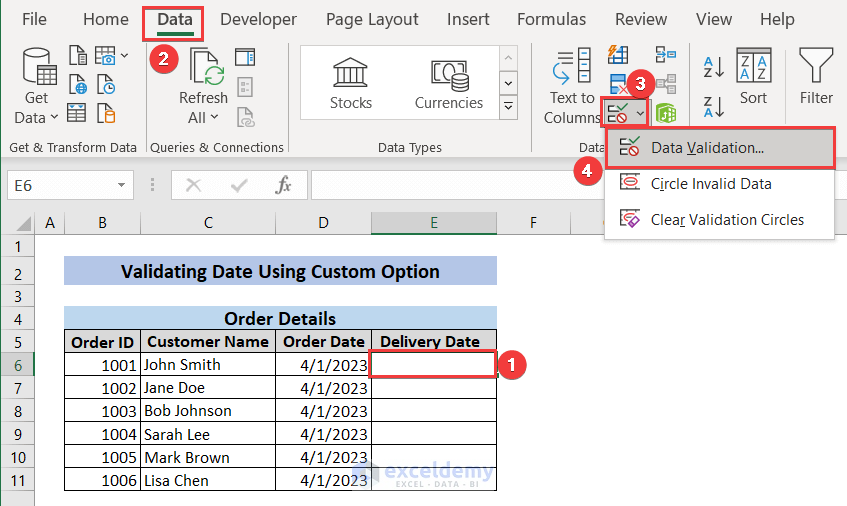
Example 3 – Validating the Date Type Using the Custom Option/(Restrict Date to Current Year)
Restrict the Delivery Date to within 3 days from the Order Date.
Steps:
- Select E6 and go to Data>>Data Validation.
- Select Custom in Allow.
- Enter =AND(E6>=D6,E6<=D6+2) as the Formula and click OK.
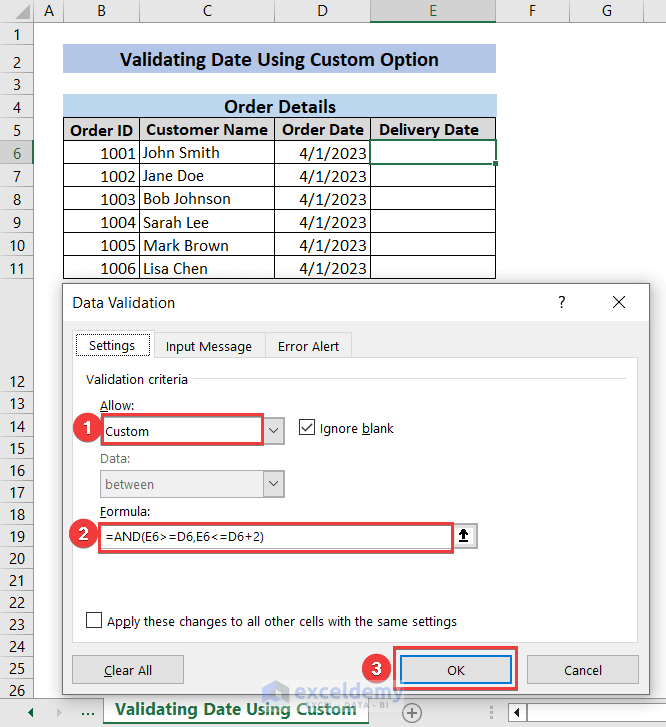
- The data validation formula is now active in E6.
- To apply it to E6:E11, Drag the Fill Handle to E11.
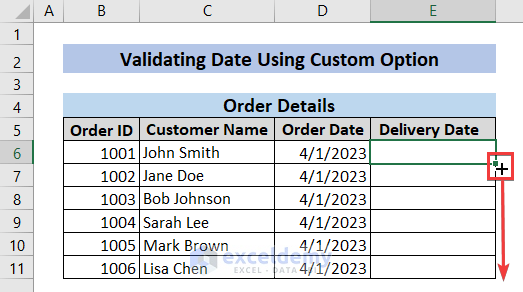
Data validation is set to all cells in E6:E11.
Example 4 – Using VBA to Validate Date Type Data in Cells
Steps:
- Right-click the worksheet named Using VBA to Validate Date.
- Click View Code.
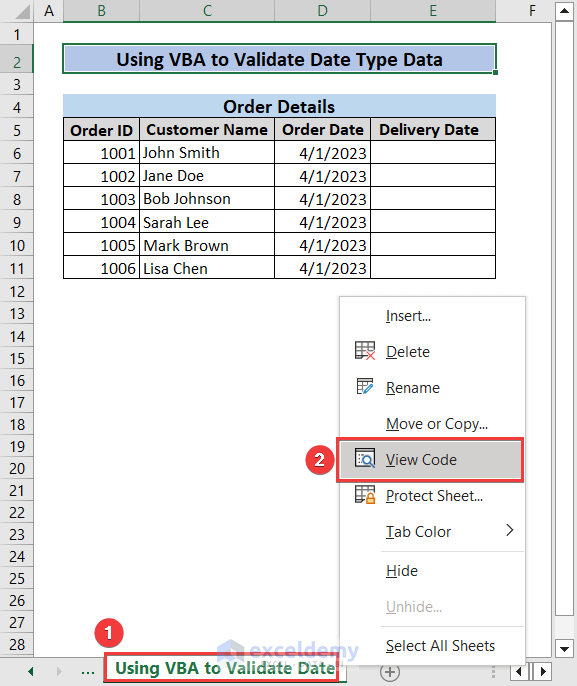
A code window will open.
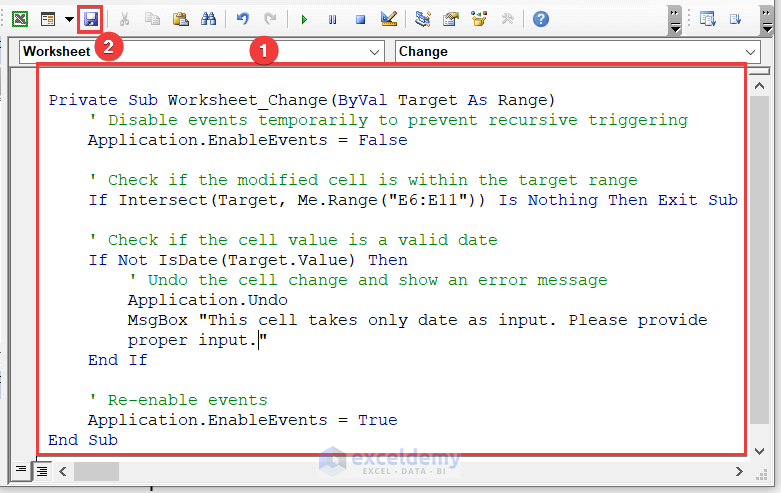
- Enter the following code.
- Click Save.
- Close the code window.
Code:
Private Sub Worksheet_Change(ByVal Target As Range)
' Disable events temporarily to prevent recursive triggering
Application.EnableEvents = False
' Check if the modified cell is within the target range
If Intersect(Target, Me.Range("E6:E11")) Is Nothing Then Exit Sub
' Check if the cell value is a valid date
If Not IsDate(Target.Value) Then
' Undo the cell change and show an error message
Application.Undo
MsgBox "This cell takes only date as input. Please provide proper input."
End If
' Re-enable events
Application.EnableEvents = True
End Sub
Code Breakdown:
Private Sub Worksheet_Change(ByVal Target As Range)
                        Application.EnableEvents = False
indicates that the rest of the code should be executed whenever a change is made to the worksheet and temporarily disables events to prevent recursive triggering.
If Intersect(Target, Me.Range("E6:E11")) Is Nothing Then Exit Subchecks if the modified cell is within the target range ( E6:E11). If it isn’t, the code exits.
If Not IsDate(Target.Value) Then
                        Application.Undo
MsgBox "This cell takes only date as input. Please provide proper input."
End If
checks whether the cell is a valid date. If it isn’t, the last cell change is undone to keep the active cell in the original cell where the error occurred. An error message is displayed.
Application.EnableEvents = Truereenables events so that future events can be triggered.
End SubThe sub-procedure ends.
You can only input Date type data in E6:E11. Otherwise, an error message will be displayed.
How to Use the Time Option to Validate Data Within an Interval of Time in Excel
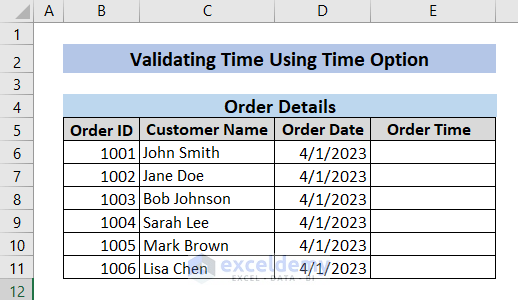
- Enter the Order Time in E6:E11. The valid Order Time is between 9:00 AM and 5:00 PM.
- Select E6:E11 and go to Data>>Data Validation.
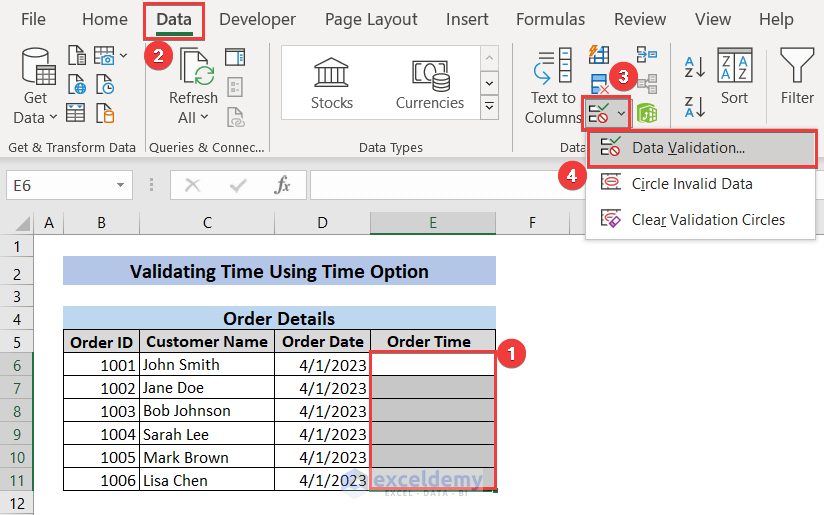
- Select Time in Allow, between in Data, 9:00:00 AM as Start time, and 5:00:00 PM as End time.
- Click OK.
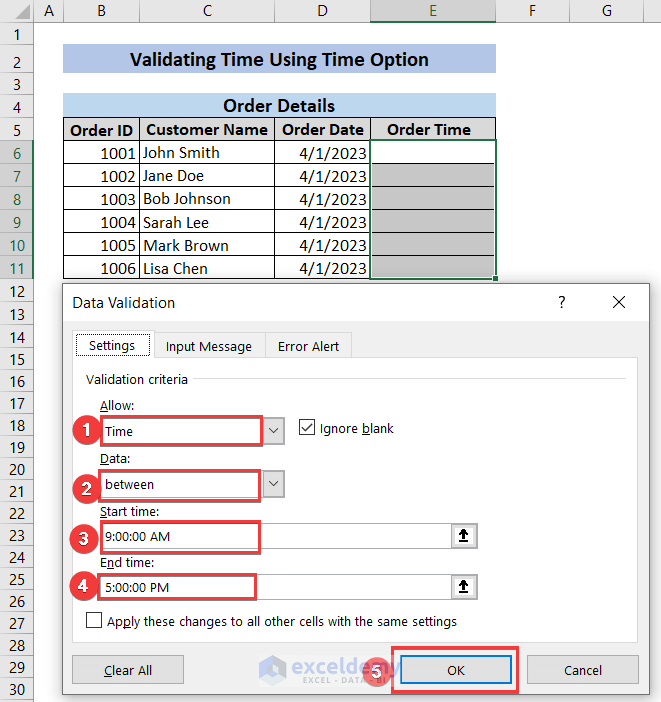
Time is set and you can only input time between the specified interval. Otherwise, an error message will be displayed.
Things to Remember
- Keep a one-word name if you need to refer to it further.
- Date accepts / and – as separator. In general, it doesn’t accept “.” as a separator.
Download Practice Workbook
Download the practice workbook here for free.
Related Articles
- How to Perform Data Validation for Alphanumeric Only in Excel
- How to Use Data Validation in Excel with Color
- How to Circle Invalid Data in Excel
- How to Create Data Validation with Checkbox Control in Excel
- [Fixed] Data Validation Not Working for Copy Paste in Excel
- Excel Data Validation Greyed Out
<< Go Back to Data Validation in Excel | Learn Excel
Get FREE Advanced Excel Exercises with Solutions!
